Ingredients
Equipment
Method
- Preheat the oven to 350°F. Lightly grease an 8×11 baking dish or a 9-inch square baking dish, and set aside.
- For the topping, add all of the topping ingredients to a large bowl, except for the melted butter. Stir until combined.
- Pour in the melted butter and mix with a spatula, then use your hands as needed to fully combine the mixture into a crumbly texture.
- Transfer the topping to the refrigerator while you prepare the filling.
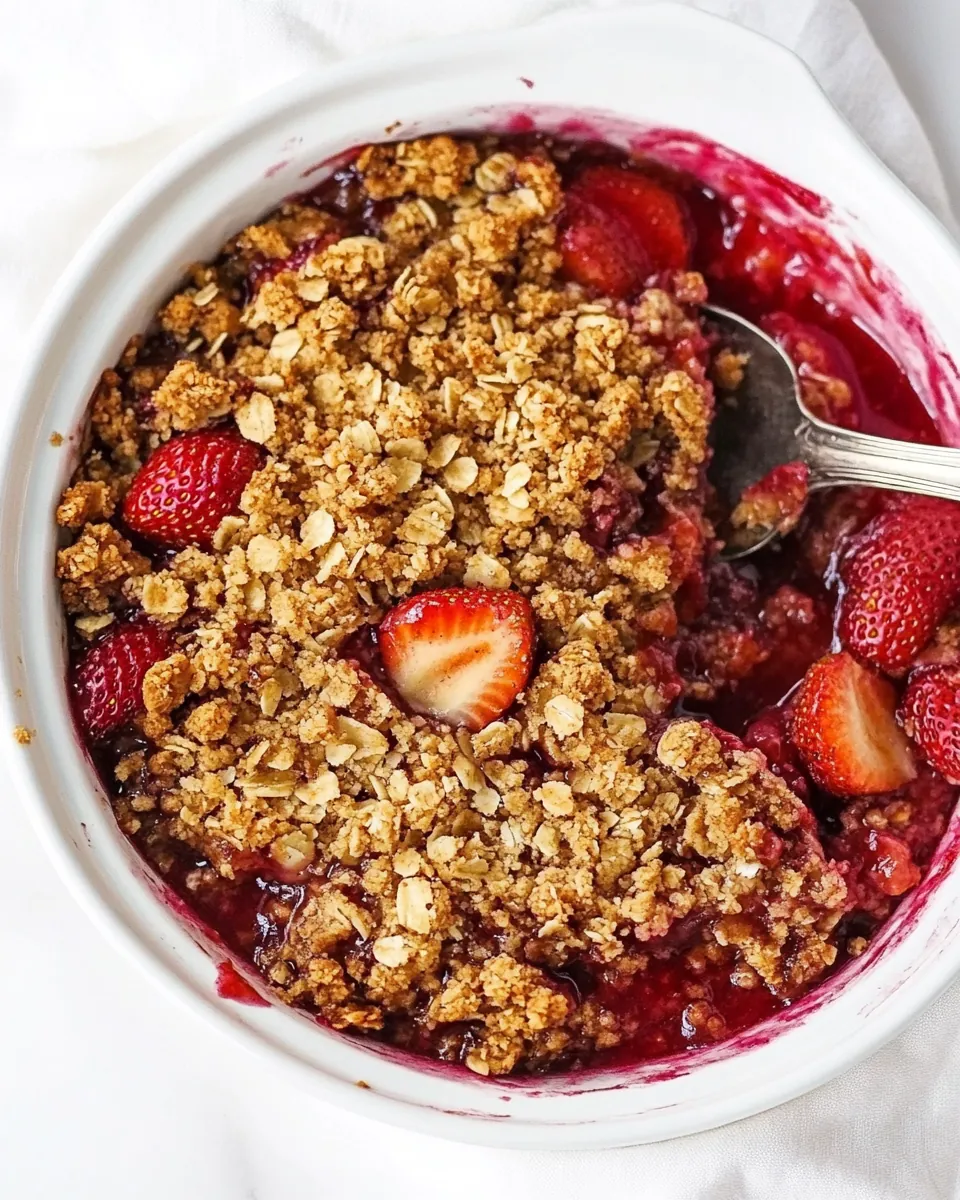
- Cut the strawberries into appropriate sizes: leave the tiniest ones whole, halve small ones, and quarter the larger ones. Aim for pieces about 3/4 to 1 inch wide. Place the prepared strawberries into a large bowl.
- Add the remaining filling ingredients—cornstarch, lemon juice, and vanilla—to the strawberries. Stir gently until everything is evenly coated.
- Transfer the strawberry filling to the prepared baking dish, spreading it out into an even layer.
- Sprinkle the topping over the filling, making sure to break up any large chunks, but still keeping some smaller chunks for texture.
- Bake uncovered at 350°F for 35 to 45 minutes. You want the topping to turn golden brown, and the strawberry juices to bubble vigorously around the edges.
- Once baked, remove the dish from the oven and let it cool on a wire rack for about 10 minutes. This short wait helps the filling set a bit before serving.
- Serve warm with a scoop of vanilla ice cream or a sprinkle of extra cinnamon if desired.
Notes
To use frozen strawberries: thaw the strawberries in the refrigerator overnight or at room temperature for about 2 hours. Slice and pat dry before using. Add 1 extra tablespoon of cornstarch. To make gluten-free Strawberry Crisp: swap the flour in the topping with gluten free flour 1 to 1 baking flour like Bob Red’s Mill. All the rest of the ingredients are gluten free. Use a large enough baking pan. I used an 8×11 baking dish, but you may use anything of a similar size, whether oval, square or rectangle that holds roughly 8 cups or has 80-90 square inches of surface area. A 9×9 square dish works well, but an 8×8 is too small. Use ripe yet firm strawberries. It is best to use firm strawberries for a soft and tender filling. Still, some strawberries will hold their shape while others will break down. If you use softer strawberries, however, you can expect all of the strawberries to break down into more of a jammy consistency. If you go this route, add one extra tablespoon cornstarch. Don’t let the strawberries sit in sugar. You also want to make the topping first so there isn’t any lag time between mixing the strawberries with the sugar and popping the dessert into the oven. The strawberries will start to macerate once they’re combined with sugar, which we want to avoid. Combine the sliced strawberries, cornstarch, lemon juice, and vanilla. Transfer to your lightly greased baking dish, cover tightly with plastic wrap and refrigerate for up to one day. Prepare topping according to directions. Cover and refrigerate. When ready to bake, stir the sugar into the strawberry filling and crumble the topping over top. Bake per recipe directions. To store: Strawberry Crisp is the best fresh from the oven because the crisp is the crunchiest. You can certainly enjoy leftovers, but the topping will start to soften. Refrigerated fruit crisp is good for 3-4 days. How to freeze: Baked Strawberry Crisp may be frozen for up to 3 months but do freeze the unbaked dessert or it will bake up soggy. To freeze, let the crisp cool completely then wrap with a layer of plastic wrap followed by a layer of foil. Freeze for up to 3 months. When ready to use, thaw overnight in the refrigerator. Warm per below instructions.