Ingredients
Equipment
Method
- 1. Preheat your oven to 350° F. Line a 9×13 inch baking dish with parchment paper, ensuring the sides are covered for easy removal later. This will help your bars come out easily and maintain their shape.
- 2. In a large mixing bowl, stir together melted coconut oil and creamy peanut butter until smooth. The mixture should blend seamlessly, creating a rich and creamy consistency. Next, add in the maple syrup, eggs, and vanilla extract. Mix until well combined, ensuring each ingredient is fully incorporated.
- 3. Now it's time to add the dry ingredients. Gradually mix in almond flour, baking powder, and kosher salt. Stir gently until a dough forms. This dough should be thick and slightly sticky.
- 4. Spread the dough evenly into the prepared baking dish. You can use a spatula to smooth the top, making sure it’s evenly distributed across the dish. Bake in the preheated oven for 20 to 22 minutes, or until the center is just set. The edges will look slightly golden, but the center should remain fudgy.
- 5. Once done, remove the bars from the oven and let them cool completely in the baking dish. This will enhance the flavor and texture, ensuring they slice perfectly later.
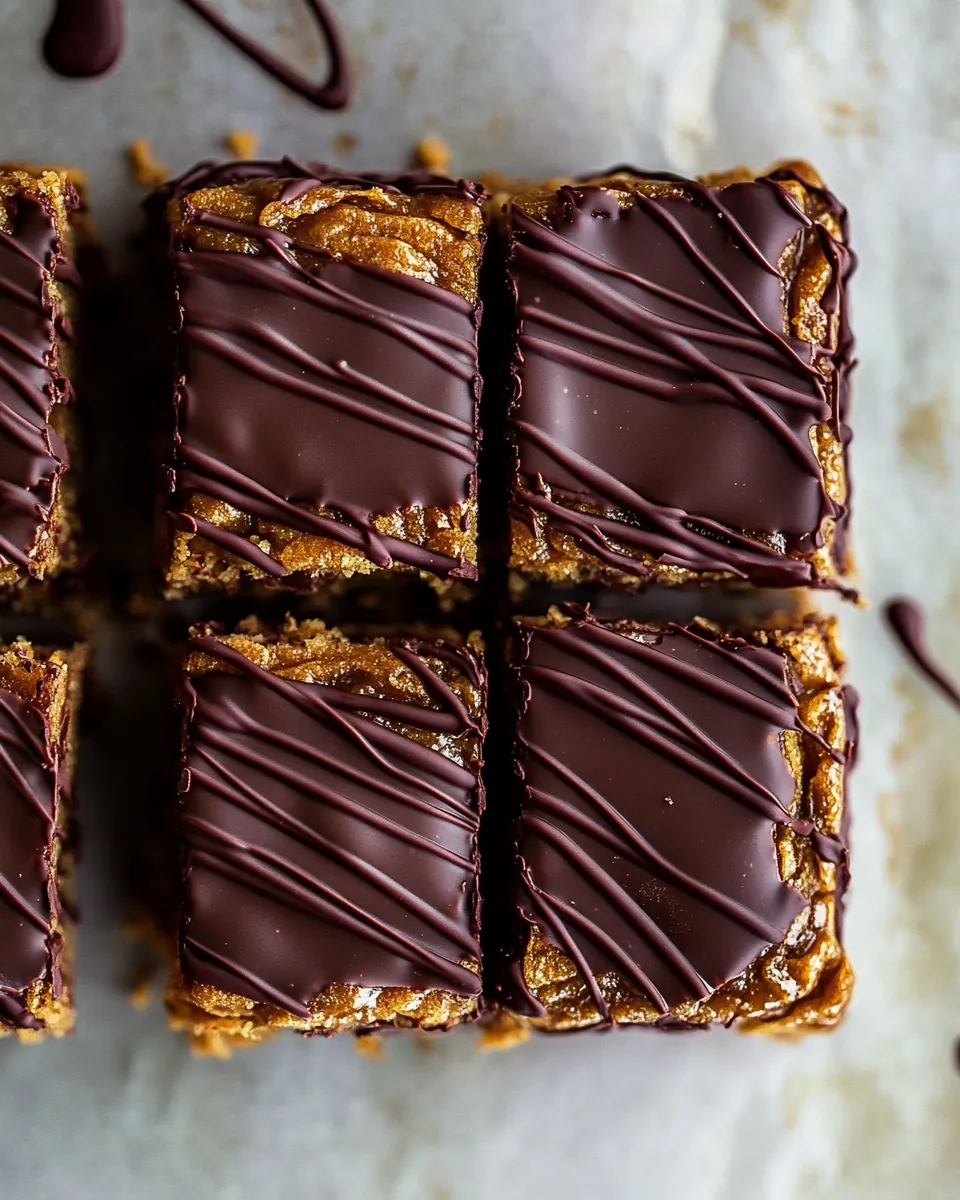
- 6. While the bars are cooling, prepare the glaze. For Glaze 1, microwave 1 cup of chocolate chips and avocado oil together in a bowl, heating in 30-second intervals. Stir after each interval until the mixture is melted and smooth. This should result in a glossy glaze that drizzles beautifully.
- 7. For Glaze 2, repeat the process with another cup of chocolate chips and whole milk. This glaze will add a creamy layer on top of the bars, enriching their flavor.
- 8. Once the bars are cool, spread Glaze 2 evenly over the surface. Allow it to sit for about 15 to 20 minutes to set slightly before drizzling Glaze 1 on top. Use a butter knife to swirl the two glazes together for an artistic finish.
- 9. Chill the prepared bars in the fridge for 30 minutes to an hour, until the glazes are fully set. The colder they get, the easier they will be to cut into neat squares.
- 10. Slice the bars into squares or rectangles, depending on your preferred serving size. Enjoy them chilled for the best flavor and texture. Store any leftovers in a cool place or in the fridge to maintain freshness.
Notes
Storage: Store leftover bars in an airtight container in the fridge to maintain freshness for up to one week.
Freezing: You can freeze the bars for longer storage. Wrap them individually in plastic wrap and place them in an airtight container.
Pairing: These bars pair beautifully with a scoop of vanilla ice cream for a decadent dessert.
Serving suggestion: They are perfect for potlucks and gatherings, as they can easily be sliced into bite-sized pieces.
Experiment with toppings: Consider adding crushed nuts or a sprinkle of sea salt on top of the glazes for added flavor and texture.