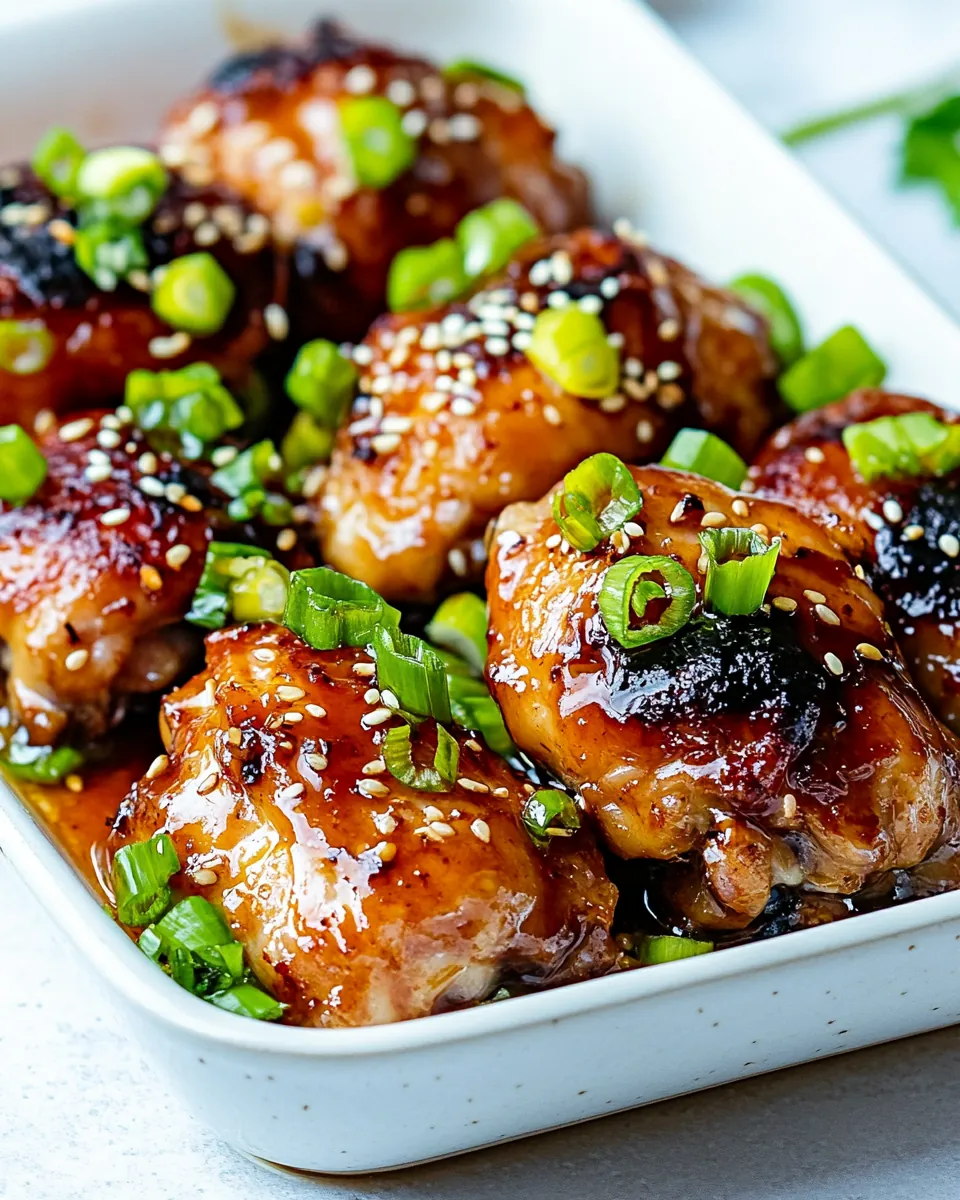
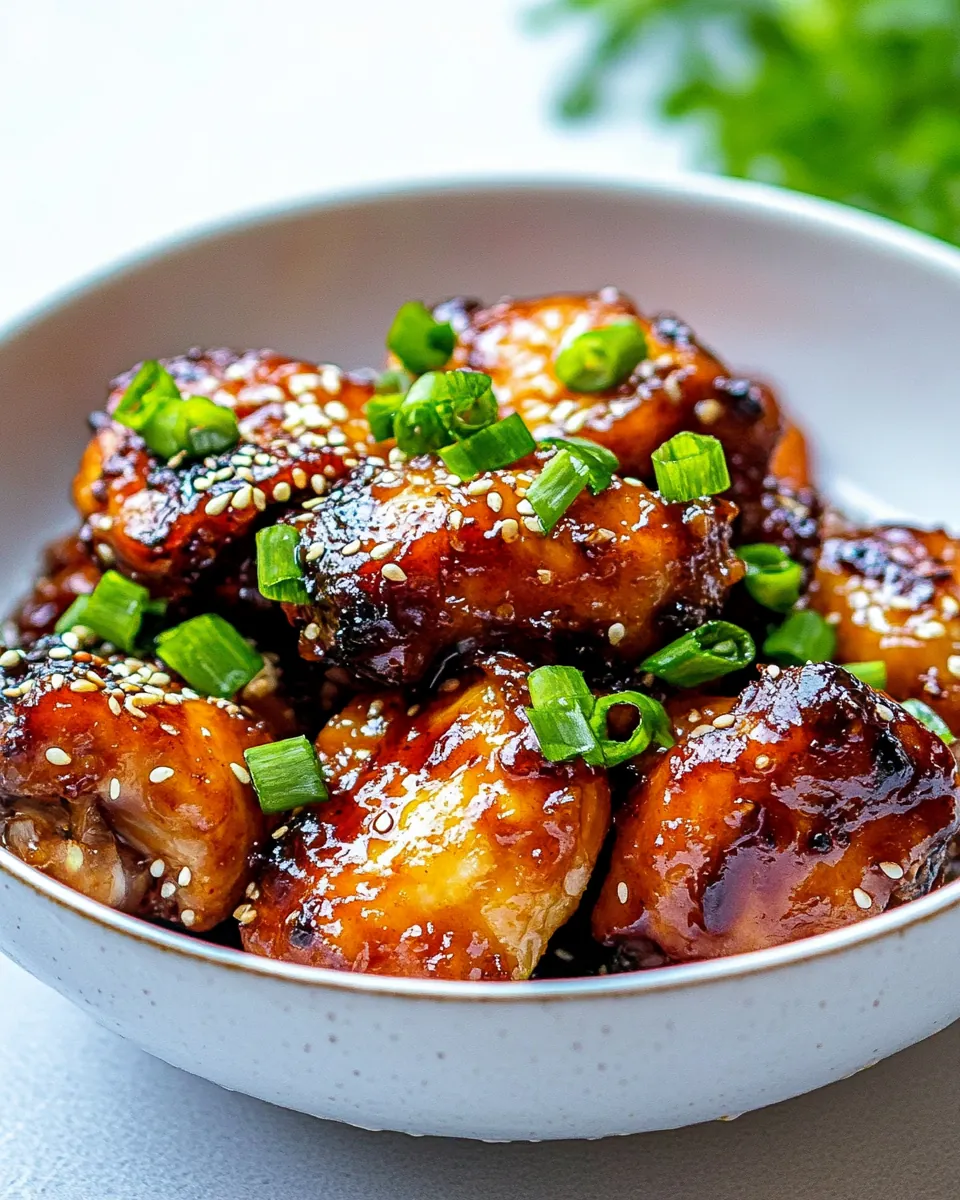
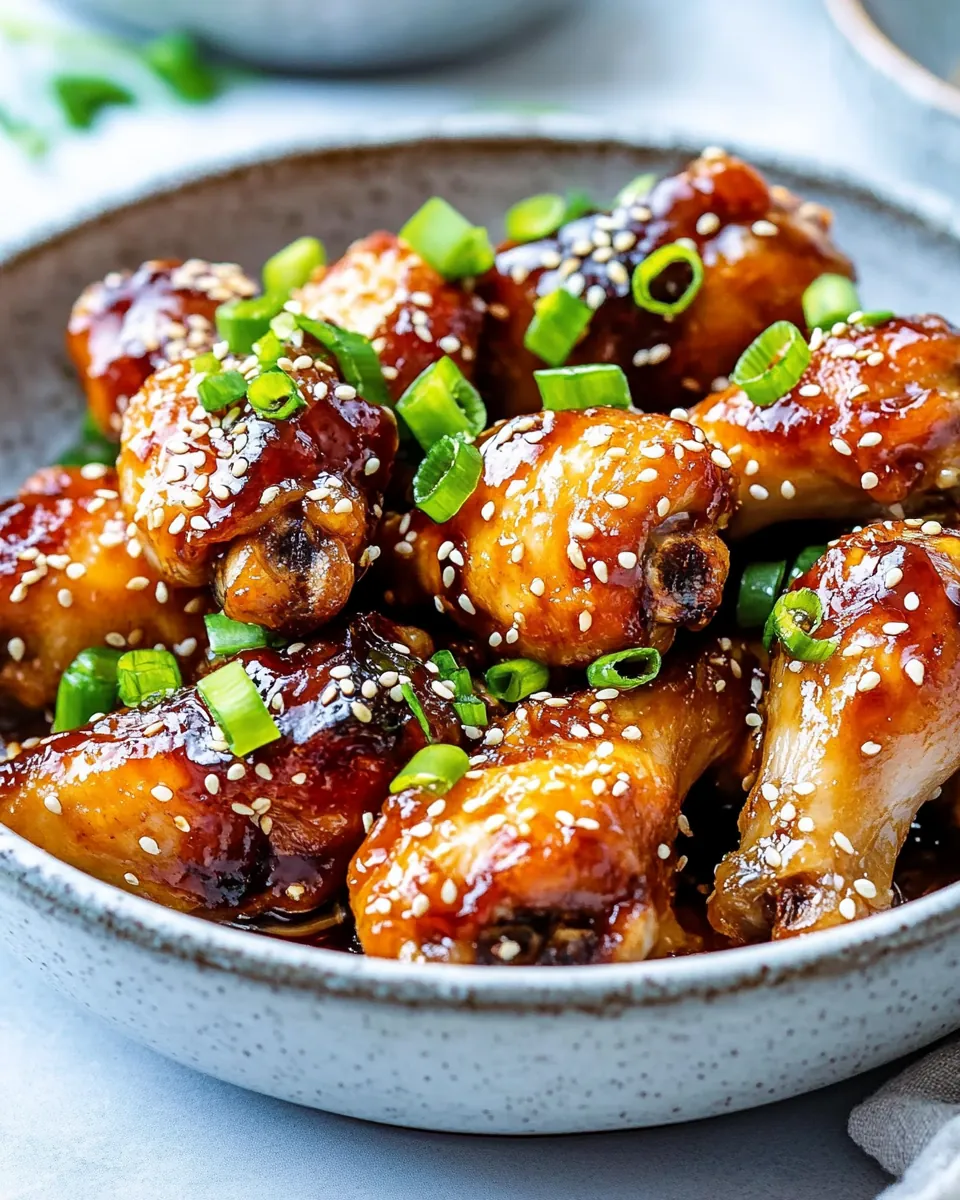
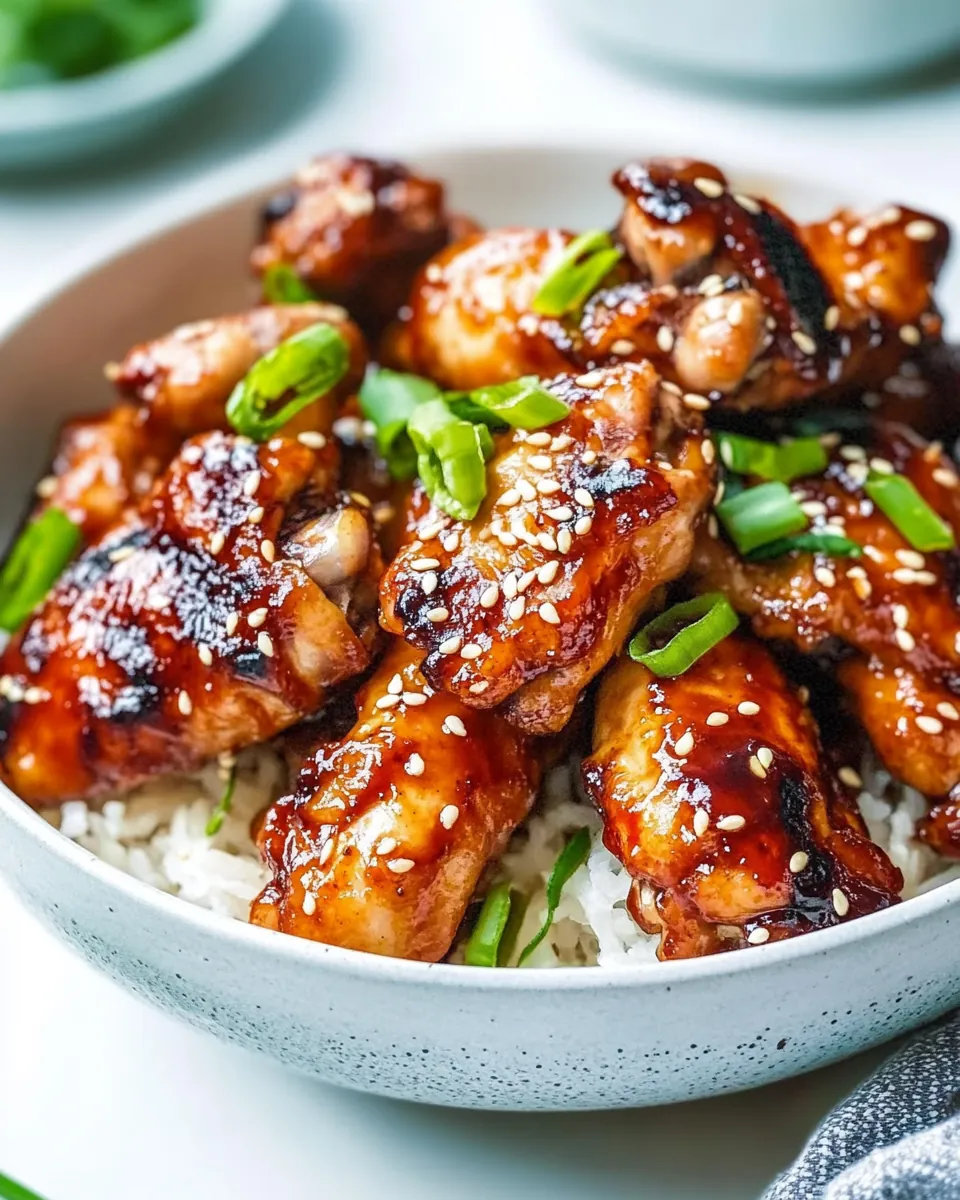
Sticky Korean Chicken
There’s something incredibly satisfying about making Sticky Korean Chicken at home. I still remember the first time I tried it at a friend’s gathering — the way the sweet and savory notes danced together was unforgettable. The thought of recreating that same taste filled me with excitement and a bit of nostalgia. Fast forward to today, and this recipe has become a go-to in my kitchen. Whether it’s for a cozy family dinner or a weekend get-together with friends, this dish never fails to impress.
Recipe Snapshot
50 mins
10 mins
40 mins
Medium
370 kcal
38 g
Keto, Paleo, Whole30
14 g
Frying Pan, Grater, Chef’s Knife, Oven
Why This Sticky Korean Chicken Hits Different
Irresistible Flavors
The combination of honey, soy sauce, and aromatic ginger creates a sticky glaze that keeps you coming back for more. Each bite is a burst of flavor that tantalizes the taste buds, making it a hit among family and friends.
Easy to Make
One of the best things about Sticky Korean Chicken is how straightforward it is to prepare. With just a few ingredients and simple steps, you’ll have a restaurant-quality dish in no time. The marinating process allows the flavors to meld beautifully, making it practically fool-proof.
Customizable Options
This recipe is versatile and can be tweaked to suit your preferences. Want it spicier? Feel free to add more red chili flakes. Prefer a sweeter glaze? A little extra honey goes a long way. You can easily adapt it to fit your taste.
Perfect for Any Occasion
Whether it’s a casual weeknight meal or a special gathering, Sticky Korean Chicken fits perfectly. It’s great for meal prep, and leftovers (if there are any) make a fantastic addition to your lunch the next day.
A Crowd-Pleaser
This dish is sure to impress your guests. The combination of flavors, presentation, and aroma will have everyone asking for seconds. It’s a wonderful way to introduce new flavors to your dining table.
A Touch of the Exotic
Finally, enjoying Sticky Korean Chicken is like taking a mini-vacation to Korea without leaving your home. It brings a taste of Korean cuisine to your kitchen, letting you explore its richness and depth right at your dining table.
What Goes Into Sticky Korean Chicken
The ingredients for Sticky Korean Chicken work together in perfect harmony. Each component plays a crucial role in layering flavors and creating that signature sticky glaze. The balance of sweet, savory, and spicy makes this dish a standout on any table.
- 1/2 cup honey: This natural sweetener adds a rich sweetness that helps create a sticky glaze.
- 1/4 cup soy sauce: The salty umami flavor of soy sauce enhances the overall taste, giving depth to the marinade.
- 4 cloves garlic: Fresh garlic adds a pungent aroma and flavor that balances the sweetness of the honey.
- 1 tbsp grated fresh ginger: Ginger brings a warm, spicy note that brightens the dish.
- 1 tbsp vegetable oil: This is essential for cooking and adds a subtle richness to the chicken.
- 1/2-1 tsp red chili flakes: Add these for a spicy kick that complements the sweetness.
- 3 lbs chicken legs and/or thighs (bone-in, skin-on): The main ingredient. The skin helps keep the chicken juicy and flavorful.
- 4 green onions: Sliced for garnish, they add a fresh crunch and brightness.
- 1 tbsp sesame seeds: These are sprinkled on top for crunch and a nutty flavor.
Putting Together Sticky Korean Chicken
Making Sticky Korean Chicken is as easy as it is delicious. Let’s dive into the steps, ensuring you enjoy every moment of the cooking process. Trust me, the end result is well worth the effort!
- Begin by gathering your ingredients. In a large bowl, combine honey, soy sauce, grated ginger, minced garlic, vegetable oil, and red chili flakes. Mix well until everything is smoothly incorporated. The aroma will start to fill your kitchen, hinting at the delicious dish to come.
- Next, add the chicken pieces into the marinade, ensuring each piece is fully submerged. This step is crucial for flavor infusion. Cover the bowl with plastic wrap or a lid, and place it in the refrigerator. Let it marinate for at least two hours or, for the best results, overnight. The longer it marinates, the more flavor it absorbs.
- When ready to cook, preheat your oven to 375 degrees Fahrenheit (190 degrees Celsius). This temperature is perfect for roasting, allowing the chicken to cook evenly while developing that crispy skin.
- After marinating, remove the chicken from the refrigerator. Take each piece out of the marinade and place it onto a parchment-lined shallow baking pan. Remember to reserve the marinade! The parchment ensures easy cleanup and prevents sticking.
- It’s time to roast! Place the chicken in the oven and cook for 35 to 40 minutes. Look for the skin to turn dark and slightly blistered, and ensure the juices run clear when pierced. The internal temperature should reach 180 degrees Fahrenheit (82 degrees Celsius) to ensure it’s cooked through.
- Halfway through cooking, baste the chicken with the reserved marinade. This step is essential for enhancing the flavor and achieving that sticky glaze we love. You’ll notice how the marinade caramelizes beautifully on the skin.
- Once cooked, take the chicken out of the oven and transfer it to a serving plate. This is where the magic happens — the aroma will have everyone gathering around the kitchen.
- For the final touch, sprinkle the sliced green onions and sesame seeds over the top. These not only add flavor but also make for a beautiful presentation.
- Finally, serve your Sticky Korean Chicken warm, alongside your favorite sides. Enjoy the fruits of your labor and watch as everyone savors each bite!
Things Worth Knowing
- Soaking Chicken: If you have the time, soak your chicken in the marinade overnight for maximum flavor absorption.
- Checking Doneness: Always use a meat thermometer to ensure your chicken is cooked safely and perfectly.
- Adjusting Spice: You can control the heat by adjusting the amount of red chili flakes you use.
- Skin-On vs. Skinless: Using skin-on chicken thighs or legs will give you juicier results due to the fat and moisture from the skin.
Recipe Notes about Sticky Korean Chicken
Here are some additional notes to help you get the most out of your Sticky Korean Chicken experience.
- Storage: Leftovers can be stored in an airtight container in the fridge for up to three days.
- Freezing: You can freeze the marinated chicken before cooking. Just thaw in the fridge before baking.
- Pairing: This dish pairs beautifully with steamed rice or a fresh green salad.
- Garnishing: Consider adding sliced cucumbers or radishes for a fresh crunch.
- Meal Prep: This recipe is fantastic for meal prepping; just divide into portions before storing.
Perfect Matches for Sticky Korean Chicken
When it comes to serving Sticky Korean Chicken, the possibilities are endless! Here are some of my favorite pairings to elevate your meal:
- Steamed Rice: A staple that perfectly complements the rich flavors of the chicken, allowing the sticky glaze to shine.
- Asian Slaw: A refreshing side salad made with cabbage, carrots, and a sesame dressing adds a nice crunch.
- Roasted Vegetables: Broccoli, bell peppers, or snap peas roasted with a little salt and olive oil are a colorful, nutritious addition.
- Kimchi: For an authentic Korean flair, serve some kimchi on the side; it adds tang and spice.
- Family Gatherings: This dish is perfect for casual family dinners or larger gatherings, sure to impress everyone.
- Meal Prep: Prepare the chicken on a Sunday for easy lunches throughout the week. Store in individual containers.
- Outdoor Barbecues: This dish works great grilled too, making it a fantastic choice for summer cookouts.
FAQ
Conclusion
In conclusion, Sticky Korean Chicken is a delicious and easy way to bring a taste of Korean cuisine to your kitchen. Its perfect balance of sweet, savory, and spicy flavors makes it a crowd-pleaser for any occasion. I encourage you to try making it soon — it’s a dish that’s bound to impress your family and friends!
Sticky Korean Chicken
Ingredients
Equipment
Method
- Begin by gathering your ingredients. In a large bowl, combine honey, soy sauce, grated ginger, minced garlic, vegetable oil, and red chili flakes. Mix well until everything is smoothly incorporated. The aroma will start to fill your kitchen, hinting at the delicious dish to come.
- Next, add the chicken pieces into the marinade, ensuring each piece is fully submerged. This step is crucial for flavor infusion. Cover the bowl with plastic wrap or a lid, and place it in the refrigerator. Let it marinate for at least two hours or, for the best results, overnight. The longer it marinates, the more flavor it absorbs.
- When ready to cook, preheat your oven to 375 degrees Fahrenheit (190 degrees Celsius). This temperature is perfect for roasting, allowing the chicken to cook evenly while developing that crispy skin.
- After marinating, remove the chicken from the refrigerator. Take each piece out of the marinade and place it onto a parchment-lined shallow baking pan. Remember to reserve the marinade! The parchment ensures easy cleanup and prevents sticking.
- It’s time to roast! Place the chicken in the oven and cook for 35 to 40 minutes. Look for the skin to turn dark and slightly blistered, and ensure the juices run clear when pierced. The internal temperature should reach 180 degrees Fahrenheit (82 degrees Celsius) to ensure it’s cooked through.
- Halfway through cooking, baste the chicken with the reserved marinade. This step is essential for enhancing the flavor and achieving that sticky glaze we love. You’ll notice how the marinade caramelizes beautifully on the skin.
- Once cooked, take the chicken out of the oven and transfer it to a serving plate. This is where the magic happens — the aroma will have everyone gathering around the kitchen.
- For the final touch, sprinkle the sliced green onions and sesame seeds over the top. These not only add flavor but also make for a beautiful presentation.
- Finally, serve your Sticky Korean Chicken warm, alongside your favorite sides. Enjoy the fruits of your labor and watch as everyone savors each bite!
Notes
- Tip 1: Leftovers can be stored in an airtight container in the fridge for up to three days.
- Tip 2: You can freeze the marinated chicken before cooking. Just thaw in the fridge before baking.
- Tip 3: This dish pairs beautifully with steamed rice or a fresh green salad.
- Tip 4: Consider adding sliced cucumbers or radishes for a fresh crunch.
- Tip 5: Prepare the chicken on a Sunday for easy lunches throughout the week. Store in individual containers.