Spatchcock Turkey
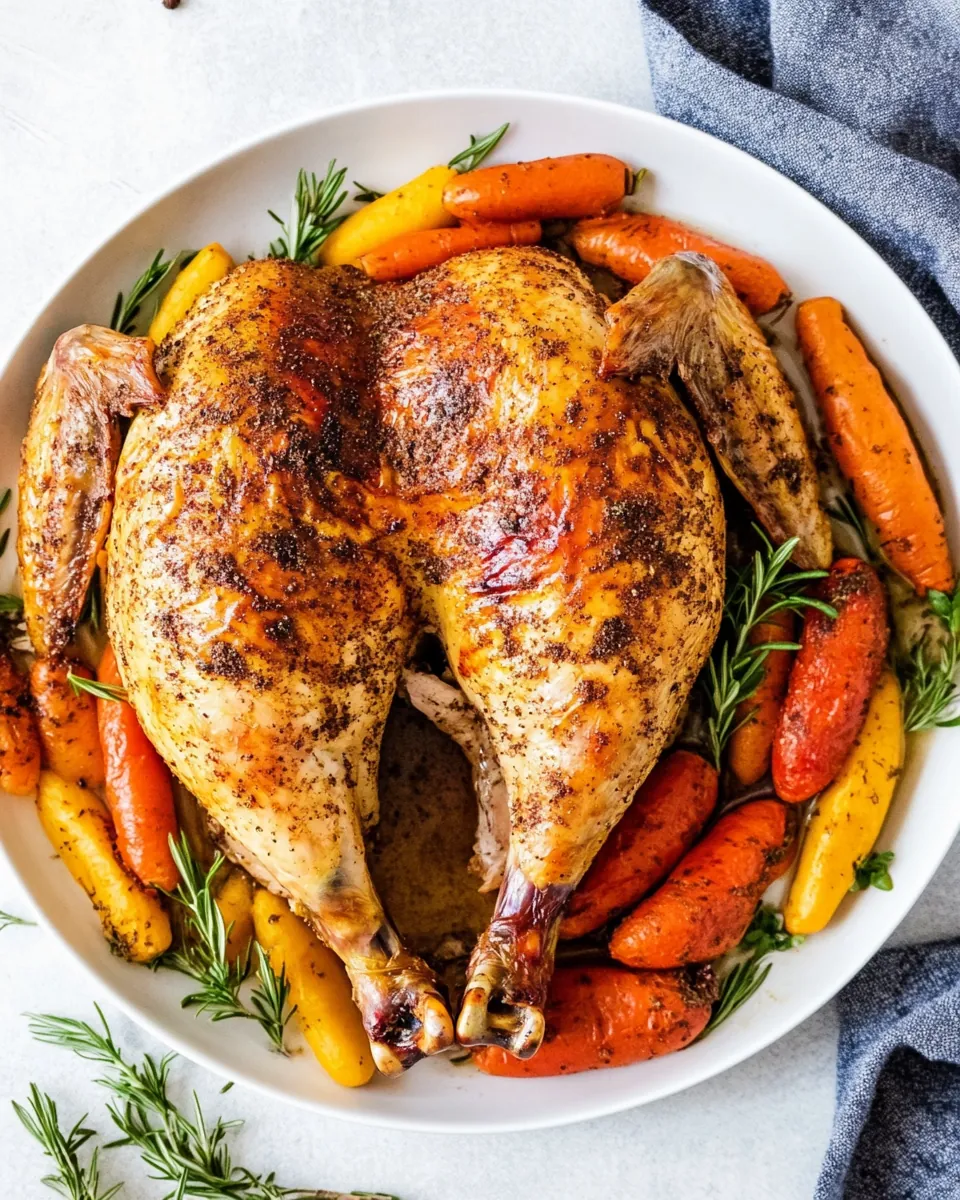
The first time I made Spatchcock Turkey, I felt like I had discovered the key to a whole new way of enjoying Thanksgiving. It was a chilly fall afternoon, and my kitchen was filled with the comforting aroma of spices and herbs. My family was gathered around, excited to see what I had planned. As I unveiled the beautifully roasted turkey, flattened perfectly and glistening with a golden-brown sheen, their eyes widened in anticipation. The method of spatchcocking not only reduced cooking time but also resulted in a turkey that was unbelievably juicy and tender, with crispy skin all around. Everyone around the table was in awe, and I knew this would become a cherished family tradition for years to come.
Recipe Snapshot
1 hr 35 mins
5 mins
90 mins
Medium
320 kcal
50 g
Vegan, Gluten-Free, Low FODMAP
15 g
Baking Sheet, Frying Pan, Mixing Bowl, Oven
Why You’ll Love This Spatchcock Turkey
Why It Stands Out
There are so many reasons to love Spatchcock Turkey. Here are a few that resonate with me:
Juiciness Like No Other
The spatchcocking technique allows for even cooking, ensuring every part of the turkey is moist and flavorful. No more dry turkey breast!
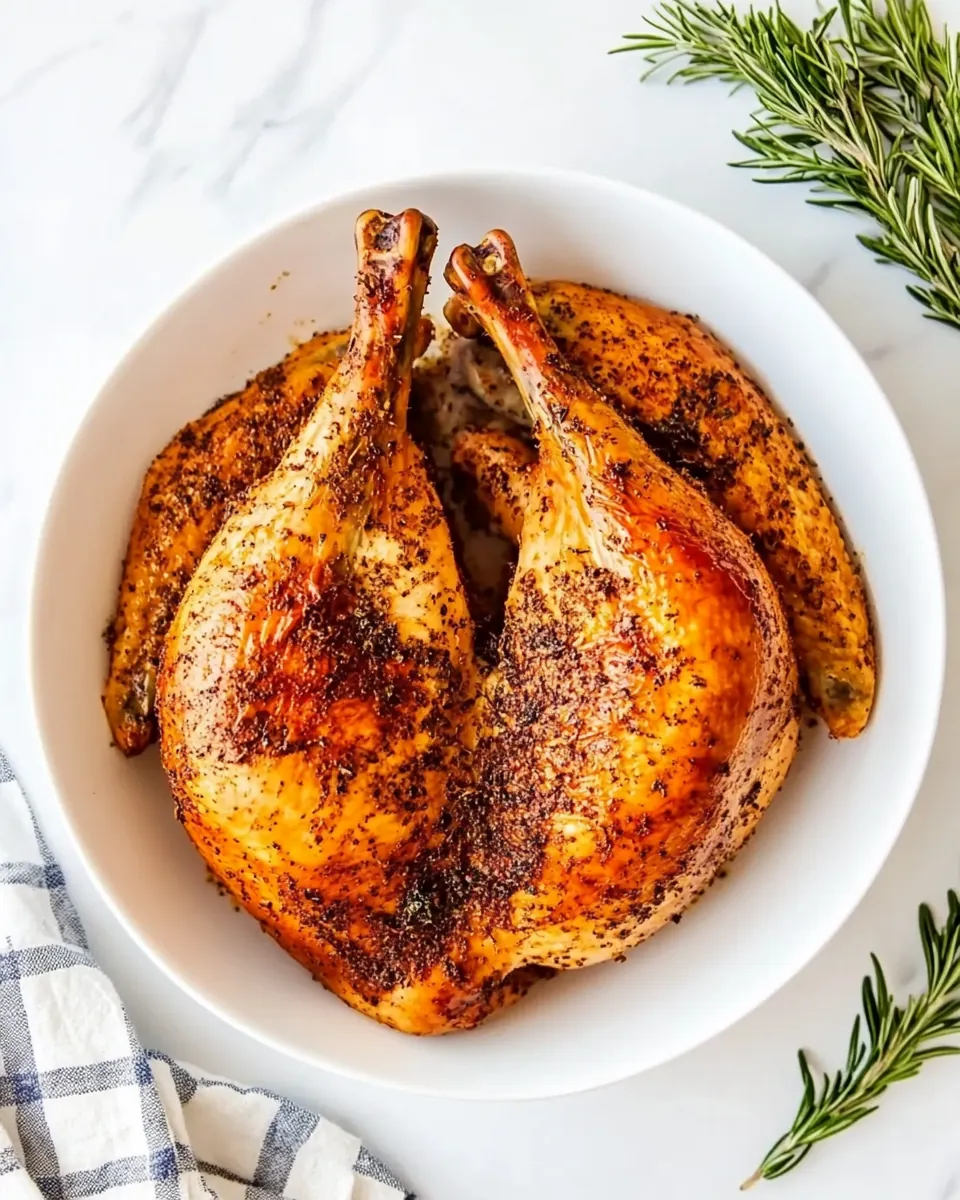
Crispy Skin All Around
With the turkey flattened, you get that coveted crispy skin on both sides. It’s a game-changer for your holiday feast.
Faster Cooking Time
Spatchcocking reduces cooking time significantly, making it easier to get dinner on the table without the stress of a long wait.
Flavorful Seasoning
Rubbing the seasoning under the skin means the flavors infuse deeply into the meat, enhancing every bite with savory goodness.
Stylish Presentation
A spatchcocked turkey looks impressive on the table, showcasing your culinary skills and making guests feel special.
Ingredient List for Spatchcock Turkey
Using the right ingredients is essential for a delicious Spatchcock Turkey. Each component plays a vital role in bringing out the best flavors. The star of the show, of course, is the turkey itself, and the accompanying spices enhance its natural taste beautifully.
- 11-13 pound turkey: A larger turkey ensures there’s enough meat for everyone, and the spatchcock method works best with a bird of this size.
- 2 1/2 tablespoons salt: Salt is crucial for flavoring the meat and ensuring it stays juicy during cooking.
- 1/4 cup brown sugar: This adds a hint of sweetness that balances the spices beautifully.
- 1 tablespoon poultry seasoning: A classic blend that complements the turkey perfectly, enhancing its natural flavors.
- 1 tablespoon smoked paprika: This gives a lovely smoky depth and color to the skin.
How to Make Spatchcock Turkey
Cooking a Spatchcock Turkey might seem intimidating at first, but it’s quite straightforward once you get the hang of it! Let’s walk through the steps together, and I’ll share some tips along the way to ensure you achieve the perfect turkey.
Start by preparing the turkey. Remove the giblets from the turkey, which you can save for making stock if you like. Next, place the turkey breast-side down on a cutting board. Use sharp kitchen shears to cut along both sides of the backbone, removing it completely. This step is essential for flattening the turkey.
After cutting out the backbone, open up the turkey like a book. Flip it over so the breast side is facing up. Gently press down on the breastbone to flatten it further. You should hear a satisfying crack as the bones give way. Make sure to pat the turkey dry with paper towels. A dry surface will help in achieving crispy skin.
Now, let’s prepare the seasoning mix. In a small bowl, combine salt, brown sugar, poultry seasoning, and smoked paprika. This mix will not only add flavor but also help to create that beautiful crust.
Rub the seasoning all over the turkey, making sure to get some underneath the skin. This ensures the flavors penetrate the meat, resulting in a deliciously seasoned bird.
Once seasoned, cover the turkey loosely with plastic wrap and refrigerate for at least 8 hours or overnight. This step is crucial as it allows the flavors to meld and the meat to absorb the salt.
On the day of roasting, preheat your oven to 225C/450F. The high temperature will help to render out the fat in the skin, resulting in a beautifully crispy exterior.
Prepare a roasting pan by placing a rack inside and adding one cup of water beneath the rack. This water will help create steam in the oven, keeping the turkey moist.
Carefully place the turkey on the rack, breast side up, and place it in the oven. Roast the turkey for about 70 to 90 minutes, or until the thickest part of the breast reaches an internal temperature of 165°F. Keep an eye on it, and if the skin starts to brown too quickly, tent it with foil.
Once cooked, remove the turkey from the oven and tent it with foil again. Let it rest for 5 to 10 minutes before carving. This resting time is essential, as it allows the juices to redistribute throughout the meat.
Finally, carve your Spatchcock Turkey and serve it with your favorite sides. Enjoy the compliments as your family and friends dig into this delicious meal!
Things Worth Knowing
- Resting Time: Allowing the turkey to rest after cooking is crucial for juicy meat.
- Using a Thermometer: Always use a meat thermometer to ensure the turkey is fully cooked.
- Spacing in the Oven: Make sure to give enough space around the turkey in the oven for even cooking.
- Flavoring Variations: Feel free to experiment with different herbs and spices based on your family’s preferences.
Making Adjustments

Whether you want to tweak the process or enhance the flavors, here are some helpful tips to consider while making your Spatchcock Turkey.
- Storage: Wrap the leftover carved turkey in plastic wrap or place it in an airtight container, then refrigerate for 3 to 4 days.
- Freezing: Leftover cooked turkey freezes well for 2 to 3 months without losing its flavor or texture.
- Reheating: To reheat, place the leftover spatchcock turkey on a baking sheet, covered, at 325°F. You can also zap it in the microwave, but be cautious not to dry it out.
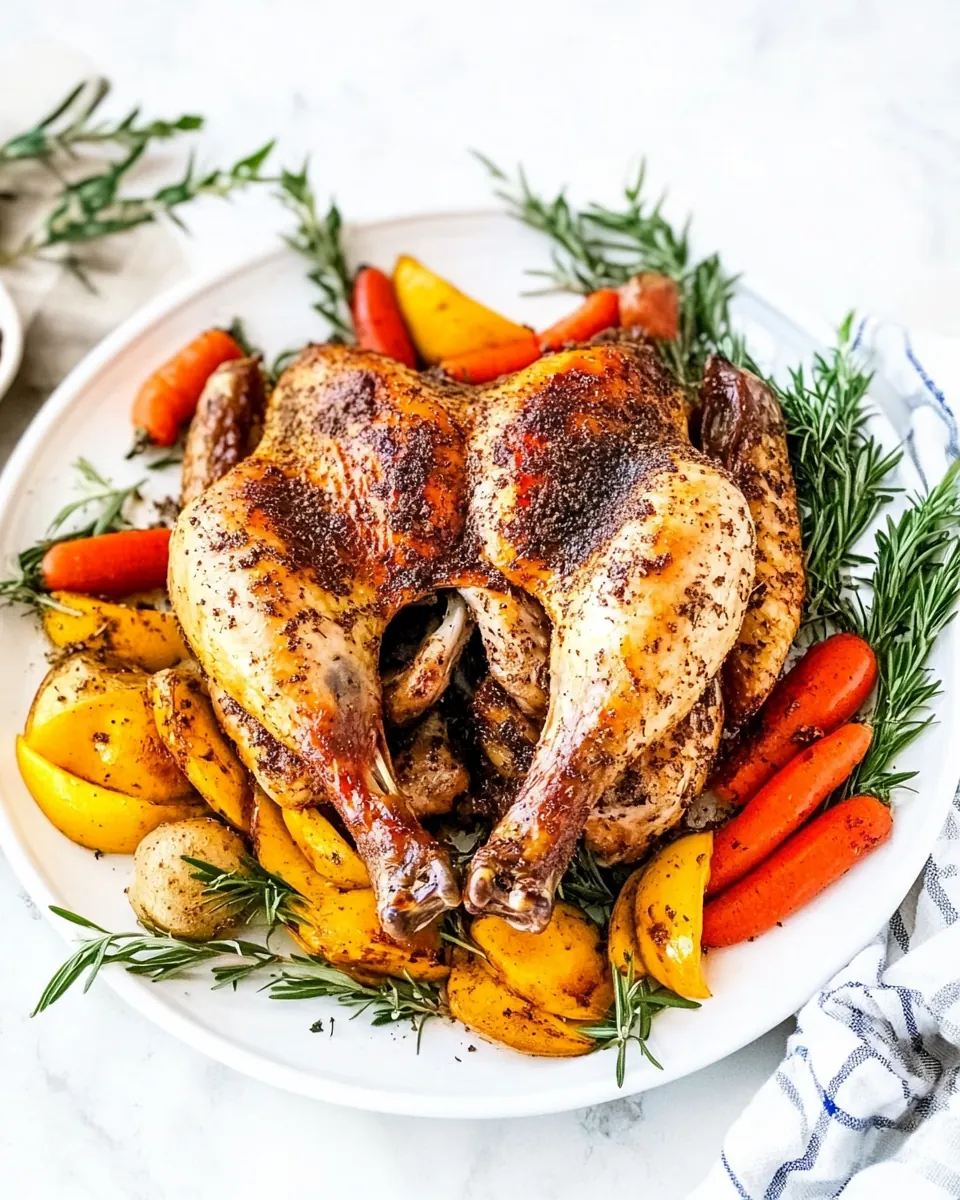
- Flavor Enhancements: Consider adding herbs like rosemary or thyme to the seasoning for a delightful twist.
- Side Pairings: Pair your turkey with roasted vegetables or a fresh salad to complement the rich flavors.
How to Enjoy Spatchcock Turkey
One of the joys of making a Spatchcock Turkey is how versatile it can be when it comes to serving! Here are some ideas to elevate your meal.
- Side Dishes: Serve it alongside creamy mashed potatoes, green bean casserole, or honey-glazed carrots for a classic Thanksgiving feel.
- Sandwiches: Use leftover turkey for delicious sandwiches the next day, layering it with cranberry sauce and stuffing.
- Occasions: This dish is perfect for Thanksgiving, family gatherings, or any celebration that calls for a special meal.
- Seasonal Pairings: Combine it with seasonal dishes like pumpkin soup or apple pie for that autumn vibe.
- Storage Tips: After carving, store the remaining turkey in an airtight container, making it easy to enjoy later!
FAQ
Conclusion
The Spatchcock Turkey method transforms the way we think about cooking turkey. With its juicy meat and crispy skin, it’s become a favorite in our home. I encourage you to try this technique for your next family gathering or holiday dinner. It’s simpler than it looks and will impress everyone at the table!
Spatchcock Turkey
Ingredients
Equipment
Method
- Start by preparing the turkey. Remove the giblets from the turkey, which you can save for making stock if you like. Next, place the turkey breast-side down on a cutting board. Use sharp kitchen shears to cut along both sides of the backbone, removing it completely. This step is essential for flattening the turkey.
- After cutting out the backbone, open up the turkey like a book. Flip it over so the breast side is facing up. Gently press down on the breastbone to flatten it further. You should hear a satisfying crack as the bones give way. Make sure to pat the turkey dry with paper towels. A dry surface will help in achieving crispy skin.
- Now, let’s prepare the seasoning mix. In a small bowl, combine salt, brown sugar, poultry seasoning, and smoked paprika. This mix will not only add flavor but also help to create that beautiful crust.
- Rub the seasoning all over the turkey, making sure to get some underneath the skin. This ensures the flavors penetrate the meat, resulting in a deliciously seasoned bird.
- Once seasoned, cover the turkey loosely with plastic wrap and refrigerate for at least 8 hours or overnight. This step is crucial as it allows the flavors to meld and the meat to absorb the salt.
- On the day of roasting, preheat your oven to 225C/450F. The high temperature will help to render out the fat in the skin, resulting in a beautifully crispy exterior.
- Prepare a roasting pan by placing a rack inside and adding one cup of water beneath the rack. This water will help create steam in the oven, keeping the turkey moist.
- Carefully place the turkey on the rack, breast side up, and place it in the oven. Roast the turkey for about 70 to 90 minutes, or until the thickest part of the breast reaches an internal temperature of 165°F. Keep an eye on it, and if the skin starts to brown too quickly, tent it with foil.
- Once cooked, remove the turkey from the oven and tent it with foil again. Let it rest for 5 to 10 minutes before carving. This resting time is essential, as it allows the juices to redistribute throughout the meat.
- Finally, carve your Spatchcock Turkey and serve it with your favorite sides. Enjoy the compliments as your family and friends dig into this delicious meal!
Notes
- Storage: Wrap the leftover carved turkey in plastic wrap or place it in an airtight container, then refrigerate for 3 to 4 days.
- Freezing: Leftover cooked turkey freezes well for 2 to 3 months without losing its flavor or texture.
- Reheating: To reheat, place the leftover spatchcock turkey on a baking sheet, covered, at 325°F. You can also zap it in the microwave, but be cautious not to dry it out.
- Flavor Enhancements: Consider adding herbs like rosemary or thyme to the seasoning for a delightful twist.
- Side Pairings: Pair your turkey with roasted vegetables or a fresh salad to complement the rich flavors.