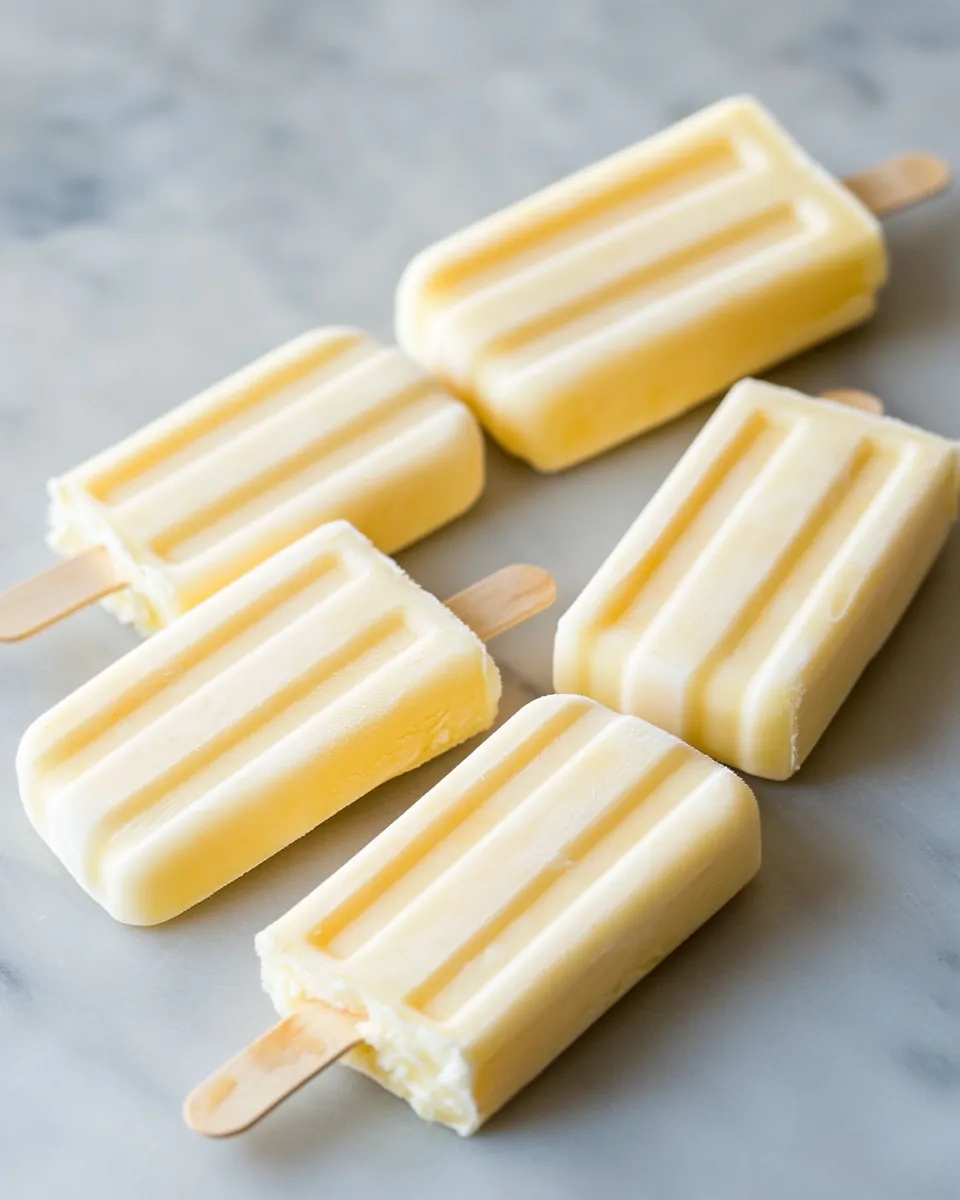
Pineapple Orange Creamsicle
When the summer sun blazes down, there’s nothing quite like a refreshing treat to cool you off. That’s where my love for Pineapple Orange Creamsicle comes in. I remember the first time I made these popsicles; it was a hot afternoon, and I wanted something sweet yet tangy to beat the heat. The vibrant colors of the pineapple and orange juice just screamed summer! As I mixed the ingredients, I could already envision my family gathered around, eagerly waiting for the first bite. This recipe brings back memories of laughter, sunshine, and the joy of simple pleasures.
Recipe Snapshot
12 mins
10 mins
2 mins
Medium
120 kcal
1 g
Gluten-Free, Low FODMAP
7 g
Wooden Spoon, Mixing Bowl
What’s Great About This Pineapple Orange Creamsicle
Delightfully Refreshing
One of the best things about the Pineapple Orange Creamsicle is its refreshing taste. The combination of orange and pineapple juice creates a tropical flavor explosion that transports you straight to the beach. Every bite is like a mini vacation for your taste buds!
Easy to Make
You don’t need to be a culinary expert to whip up these popsicles. With just a few ingredients and some simple steps, anyone can create these delicious frozen treats. It’s the perfect project for kids, making it a fun family activity on a warm day.
Perfectly Creamy
The addition of heavy cream gives the Pineapple Orange Creamsicle its luscious, creamy texture. It’s not just a fruity ice pop; it feels indulgent like a dessert, making it satisfying for both kids and adults. You’ll find yourself wanting to savor every creamy bite.
Customizable Flavors
If you’re feeling adventurous, this recipe is a great canvas for experimentation. You can mix in other fruits or sweeteners to personalize your Pineapple Orange Creamsicle. Want a hint of coconut? Toss in some coconut milk! The opportunities to customize are endless.
Healthier Option
Unlike store-bought popsicles that often contain artificial flavors and preservatives, you know exactly what goes into your homemade Pineapple Orange Creamsicle. You can control the sweetness and use fresh ingredients, making it a healthier option for satisfying your sweet tooth without the guilt.
Great for Any Occasion
Whether it’s a backyard BBQ, a summer birthday party, or just a hot afternoon at home, Pineapple Orange Creamsicle is the perfect treat. It’s sure to impress guests, and everyone will love the refreshing taste. Plus, they’re a fantastic way to cool down during those scorching summer months!
Ingredient List for Pineapple Orange Creamsicle
Creating the Pineapple Orange Creamsicle is all about using fresh, vibrant ingredients that complement each other beautifully. The main stars are the orange and pineapple juices, which pack a punch of flavor and are full of vitamin C. The heavy cream adds a creamy texture, while the granulated sugar balances the acidity of the fruits. Let’s dive into the details of each ingredient!
- 2 cups orange-pineapple juice: This blend provides a tropical flair, combining the sweetness of orange with the tartness of pineapple.
- 1 cup heavy cream: Adds a rich and creamy texture, making the popsicles indulgent.
- 1/2 cup granulated sugar: Sweetens the mixture to perfection, enhancing the fruit flavors.
- 2 teaspoons vanilla extract: The subtle vanilla flavor complements the fruitiness, adding a lovely depth.
The Process for Making Pineapple Orange Creamsicle
Making Pineapple Orange Creamsicle is an enjoyable process that’s as simple as it is rewarding. You’ll be amazed at how quickly you can whip up these delightful treats. Just follow these steps to create your own batch of refreshing popsicles!
- Start by pouring 1/2 cup of the orange-pineapple juice and 1/2 cup of the granulated sugar into a microwave-safe bowl. Heat it in the microwave for about 1 to 2 minutes. Make sure to stir it occasionally until the sugar is fully dissolved, resulting in a sweetened juice mix.
- Once the sugar is dissolved, pour in the remaining orange-pineapple juice and give it a good stir. This is your base mixture, which is going to be the heart of your popsicles, brimming with fruity goodness.
- In a separate bowl (or measuring pitcher), combine the heavy cream, vanilla extract, and 1 and 1/4 cups of the sweetened juice. Whisk them together thoroughly until everything is well combined and the mixture is smooth.
- Now, it’s time to fill your popsicle molds! Pour the creamy mixture into the molds, leaving a little space at the top. Aim for an even distribution to ensure each popsicle is equally creamy and delicious.
- After pouring the mixture, place the molds in the freezer for about 1 hour. This initial freeze will help the popsicles hold their shape when you add the remaining juice later.
- Once the first hour has passed, take the molds out of the freezer. Slowly pour the remaining sweetened juice over the top of each popsicle, filling them to the brim.
- Insert wooden popsicle sticks into each mold. Make sure they’re centered and standing upright; this will help you grab your popsicles with ease later on.
- Put the molds back into the freezer, allowing them to freeze for at least 3 hours. This longer freezing time is essential to achieve that perfect, firm popsicle texture.
- To remove the popsicles from the molds, run warm water over the outside of the mold for a few seconds. The popsicles should slide out effortlessly!
- Enjoy your homemade Pineapple Orange Creamsicle straight away, or store them in a freezer bag for later. Either way, you’re in for a treat!
Things Worth Knowing
- Consistent Freezing: Ensure your freezer is set to a consistent temperature to avoid icy pops. A fluctuating temperature can lead to unevenly frozen popsicles.
- Even Mixing: Stir the mixtures thoroughly to achieve an even distribution of flavors between the cream and the juice.
- Mold Selection: Use silicone molds for easier removal; they allow for a smooth release without needing to run warm water over them.
- Flavor Variations: Don’t hesitate to mix in other fruits like strawberries or mangoes for a twist on the classic flavor.
Tips and Tricks about Pineapple Orange Creamsicle
When it comes to making the perfect Pineapple Orange Creamsicle, there are a few tips and tricks that can enhance your experience. Here are some insights to take your popsicle-making to the next level!
- Storage: Keep leftover popsicles in an airtight container or freezer bag to maintain freshness and prevent freezer burn.
- Freezing: For best results, allow the popsicles to freeze for at least 3 hours. This ensures they are solid and won’t melt too quickly when enjoyed.
- Pairing: These popsicles pair beautifully with fresh fruit salads or can be served alongside a light summer cake for a delightful dessert spread.
- Portion Control: If you want smaller treats, consider using mini molds. They’re perfect for little hands and snacks!
- Creative Add-Ins: Feel free to add chunks of fruit, shredded coconut, or even a hint of mint for an extra layer of flavor.
Accompaniments for Pineapple Orange Creamsicle
When serving the delightful Pineapple Orange Creamsicle, consider these options to elevate your summer treat experience:
- Fresh Fruit Salad: Serve alongside a bowl of mixed fresh fruits for a refreshing side. The bright colors will complement the popsicles beautifully.
- Picnics and BBQs: These popsicles are perfect for summer gatherings. They’re easy to transport and a hit with both kids and adults alike.
- Light Afternoon Snacks: Enjoy these popsicles as a mid-afternoon snack on a hot day. They’ll keep you cool and satisfied.
- Celebration Desserts: Incorporate them into a dessert table for birthdays or summer parties. They can be a fun, interactive treat!
- Seasonal Occasions: Whether it’s a summer barbecue or a holiday gathering, these popsicles fit right in on any occasion.
FAQ
Conclusion
The Pineapple Orange Creamsicle is not just a popsicle; it’s a refreshing escape from the summer heat. With its creamy texture and vibrant flavors, this treat encapsulates the essence of summer in every bite. I encourage you to try making these at home; they’re fun, easy, and sure to bring joy to your family and friends. Trust me, once you taste them, you’ll be making them all summer long!
Pineapple Orange Creamsicle
Ingredients
Equipment
Method
- Pour 1/2 cup of the orange-pineapple juice and 1/2 cup of the granulated sugar into a microwave-safe bowl. Heat it in the microwave for about 1 to 2 minutes. Make sure to stir it occasionally until the sugar is fully dissolved, resulting in a sweetened juice mix.
- Once the sugar is dissolved, pour in the remaining orange-pineapple juice and give it a good stir. This is your base mixture, which is going to be the heart of your popsicles, brimming with fruity goodness.
- In a separate bowl (or measuring pitcher), combine the heavy cream, vanilla extract, and 1 and 1/4 cups of the sweetened juice. Whisk them together thoroughly until everything is well combined and the mixture is smooth.
- Now, it’s time to fill your popsicle molds! Pour the creamy mixture into the molds, leaving a little space at the top. Aim for an even distribution to ensure each popsicle is equally creamy and delicious.
- After pouring the mixture, place the molds in the freezer for about 1 hour. This initial freeze will help the popsicles hold their shape when you add the remaining juice later.
- Once the first hour has passed, take the molds out of the freezer. Slowly pour the remaining sweetened juice over the top of each popsicle, filling them to the brim.
- Insert wooden popsicle sticks into each mold. Make sure they're centered and standing upright; this will help you grab your popsicles with ease later on.
- Put the molds back into the freezer, allowing them to freeze for at least 3 hours. This longer freezing time is essential to achieve that perfect, firm popsicle texture.
- To remove the popsicles from the molds, run warm water over the outside of the mold for a few seconds. The popsicles should slide out effortlessly!
- Enjoy your homemade Pineapple Orange Creamsicle straight away, or store them in a freezer bag for later. Either way, you’re in for a treat!
Notes
- Storage: Keep leftover popsicles in an airtight container or freezer bag to maintain freshness and prevent freezer burn.
- Freezing: For best results, allow the popsicles to freeze for at least 3 hours. This ensures they are solid and won’t melt too quickly when enjoyed.
- Pairing: These popsicles pair beautifully with fresh fruit salads or can be served alongside a light summer cake for a delightful dessert spread.
- Portion Control: If you want smaller treats, consider using mini molds. They’re perfect for little hands and snacks!
- Creative Add-Ins: Feel free to add chunks of fruit, shredded coconut, or even a hint of mint for an extra layer of flavor.