Oreo Peanut Butter
Whenever I think about indulgence, the first thing that pops into my mind is Oreo Peanut Butter. This delightful concoction takes the classic flavors of everyone’s favorite cookie and transforms them into a creamy, dreamy spread that you won’t be able to resist. I remember the first time I made it; I was searching for a unique snack for movie night. Little did I know that I was about to create a treat that would become a staple in my kitchen! With just two simple ingredients, the process is incredibly easy, and the results are absolutely delicious. Whether you’re spreading it on toast, dipping apples, or just eating it straight from the jar, this rich and sweet Oreo Peanut Butter is sure to satisfy your cravings. It’s a hit with kids and adults alike, making it perfect for any occasion.
Recipe Snapshot
5 mins
5 mins
0 mins
Easy
150 kcal
4 g
Paleo, Gluten-Free, AIP
11 g
Baking Sheet, Food Processor
Why Try This Oreo Peanut Butter
Irresistible Flavor Combination
One of the main reasons I absolutely adore Oreo Peanut Butter is the perfect marriage of flavors. The sweet, creamy Oreo cookies blend beautifully with the rich, nutty notes of honey roasted peanuts. It’s a match made in heaven!
Easy to Make
With just two ingredients and a food processor, this recipe is as simple as it gets. No intricate steps or hard-to-find items. Just toss the ingredients in and let the machine do the work. You’ll be enjoying your creation in no time!
Versatile Use
Whether you’re spreading it on breakfast toast, dolloping it onto pancakes, or using it as a dip for fruits, Oreo Peanut Butter can elevate any dish. It’s delightful in a sandwich or even as a topping on ice cream!
Great for Sharing
This treat is perfect for gatherings. I often whip up a batch to share with friends and family during movie nights or casual get-togethers. Everyone loves it, and it always garners compliments.
Perfect for All Ages
Kids love the sweet flavor, while adults appreciate the nostalgic nod to a beloved cookie. It’s a delightful treat that transcends age barriers, making it a family favorite!
Healthy Indulgence
While it’s a treat, using honey roasted peanuts as the base adds a bit of nutritional value compared to traditional spreads. It’s still indulgent, but with a healthier spin!
Main Ingredients for Oreo Peanut Butter
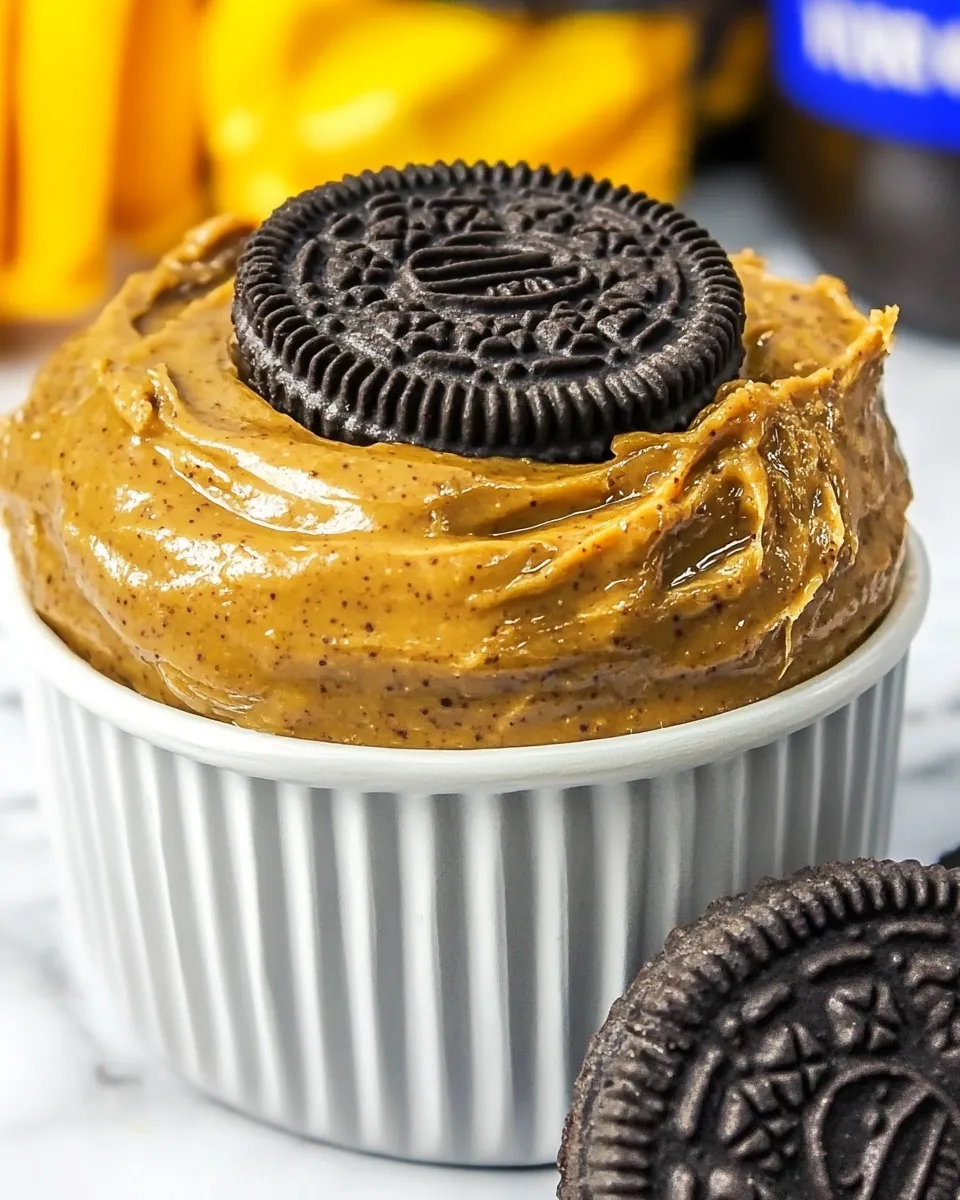
The ingredients for Oreo Peanut Butter are simple yet impactful. Honey roasted peanuts provide the creamy base, while Oreos add a sweet, chocolatey twist. Together, they create a luscious spread that’s incredibly versatile.
- 1 ½ cups (202g) honey roasted peanuts: These peanuts are sweet, crunchy, and lend a lovely creaminess when processed. They are the star of the show, forming the base of our spread.
- 10 (116g) Oreos: The beloved cookie brings in sweetness and chocolate flavor, perfectly complementing the peanuts. You’ll love how they transform this simple mixture into an utterly delicious spread!
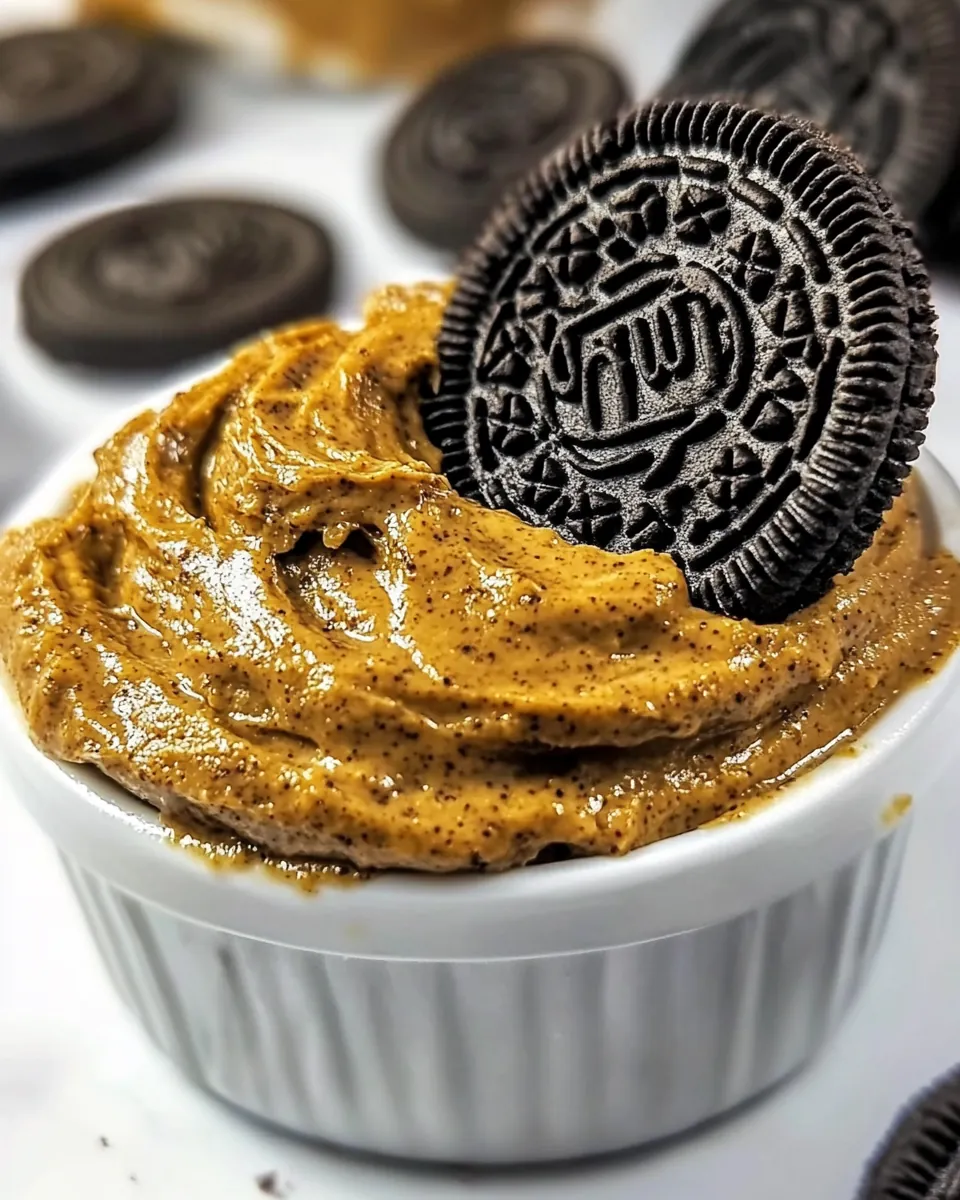
The Method for Oreo Peanut Butter

Making Oreo Peanut Butter is a straightforward process that anyone can master. With just a food processor, you’ll create a creamy, dreamy spread in minutes. Let’s dive into the steps!
- Start by gathering all of your ingredients: honey roasted peanuts and Oreos. Make sure you have your food processor ready, as that’s the magic machine that will turn this simple mix into a creamy delight.
- Place the honey roasted peanuts in the food processor. I like to give them a quick pulse first to break them down a bit before adding anything else.
- Next, add the Oreos to the processor. Keep in mind that the more finely you chop the cookies beforehand, the smoother your peanut butter will become.
- Turn on the food processor and run it continuously. You’ll want to keep an eye on the mixture as it starts to blend together. Initially, it may look crumbly, but don’t worry! Just give it time and let the processor work its magic.
- After about four minutes, check the consistency. You’re looking for a creamy, buttery texture. If it seems a bit dry, you can stop the machine and scrape down the sides to ensure everything gets blended evenly.
- If your food processor feels warm or starts to struggle, it’s wise to pause for a minute or two. Allowing the machine to rest can prevent it from overheating.
- Once you’ve reached your desired consistency, taste your Oreo Peanut Butter. You might want to add a touch more peanuts or Oreos, depending on your preference!
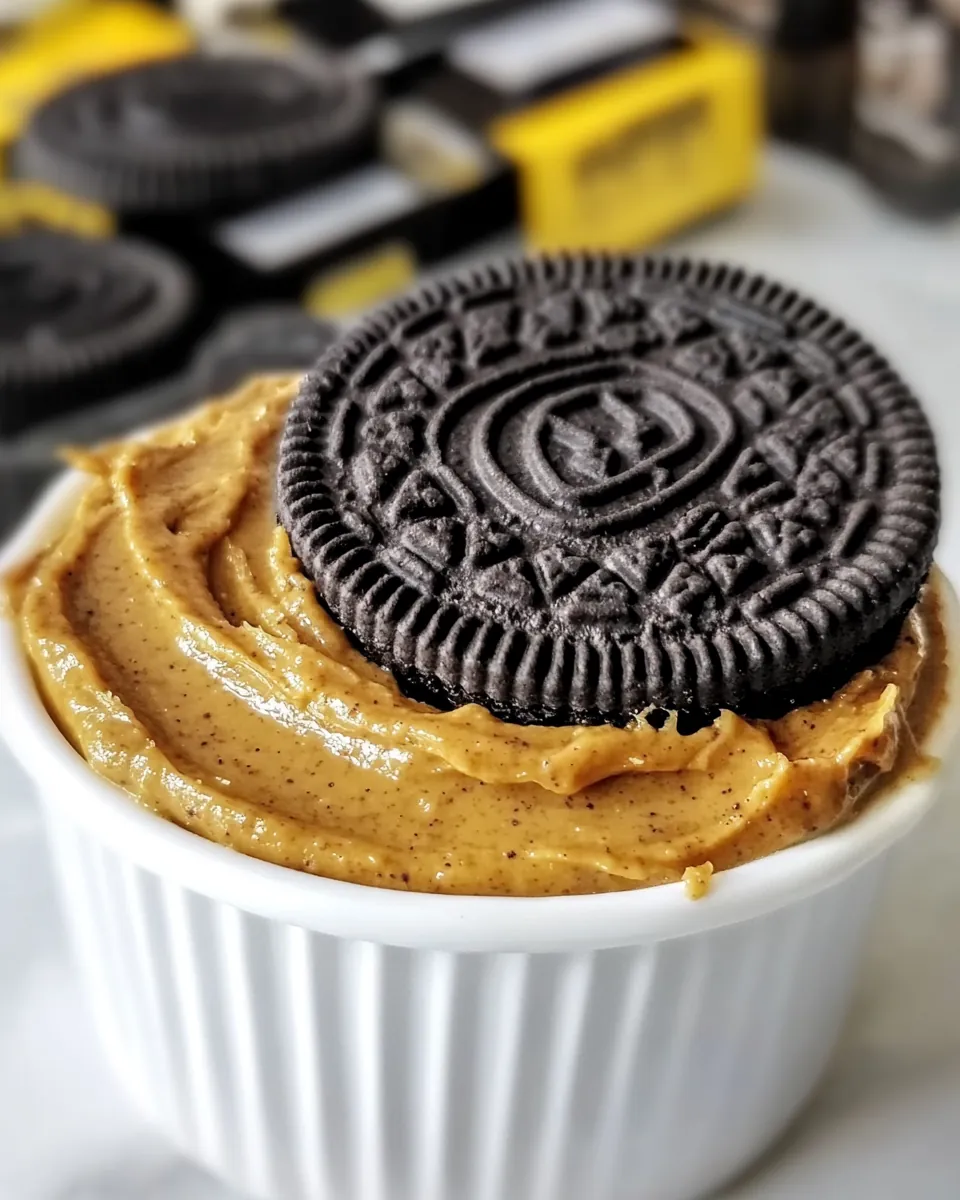
- When everything is blended beautifully, transfer the mixture to a jar or an airtight container. I love to use glass jars for storage.
- Serve your Oreo Peanut Butter immediately or store it in the fridge for later. It’s delicious on toast, fruits, or even enjoyed on its own!
Things Worth Knowing
- Keep it Creamy: If your mixture is too thick, consider adding a bit of vegetable oil to achieve the desired consistency.
- Choosing Ingredients: Using fresh honey roasted peanuts will give your spread the best flavor; check the expiry date on your nuts.
- Storage Tips: Store your Oreo Peanut Butter in the fridge to keep it fresh, and it can last up to two weeks.
- Make it a Gift: This spread makes for a fun homemade gift! Just jar it up and add a cute label.
Ways to Customize
Customizing Oreo Peanut Butter is part of the fun! Here are some creative ways to make it your own.
- Add More Flavor: Consider mixing in some cocoa powder or a dash of cinnamon to spice things up.
- Try Different Nuts: If you’re not a fan of peanuts, you can substitute with cashews or almonds for a different flavor profile.
- Make it Crunchy: For added texture, throw in some chopped nuts or additional crushed Oreos.
- Develop a Swirl: Create layers by mixing in a bit of chocolate or caramel sauce for a fun twist.
- Healthier Version: If you’re looking for a healthier spread, you might try using less sugar by opting for a sugar-free Oreo brand.
- Spread it on Everything: Use this peanut butter in smoothies, as a topping for pancakes, or even in baking recipes for an extra chocolatey kick!
- Personalize the Jar: Decorate your jar with ribbons or stickers for a more personalized touch, making it perfect for gifting.
What Goes Well With This Oreo Peanut Butter
Finding the perfect pairings for Oreo Peanut Butter can elevate your snacking experience. Here are some suggestions:
- Fruit Slices: Serve with apple or banana slices for a delicious and nutritious snack.
- Toast: Spread on warm toast or bagels for a sweet breakfast treat.
- Ice Cream: Drizzle over vanilla ice cream for a decadent dessert.
- Pancakes: Use as a topping for pancakes or waffles to add a unique twist.
- Sandwiches: Make a dessert sandwich with Oreo Peanut Butter and banana slices for a fun lunch option.
- Seasonal Parties: This spread works great for celebrations – serve it at birthday parties or holiday gatherings!
- Storage Tips: Keep it refrigerated and enjoy within two weeks for the freshest taste.
FAQ
Conclusion
In summary, Oreo Peanut Butter brings a unique and delightful twist to your snacking routine. It’s a delicious blend of sweet and nutty flavors that will satisfy your cravings. I encourage you to give it a try and experience the joy of making this easy, tasty spread yourself!
Oreo Peanut Butter
Ingredients
Equipment
Method
- Place the honey roasted peanuts in a food processor and pulse to break down. Add the Oreos and process until creamy.
- Process continuously until the mixture turns buttery, about four minutes. Stop to scrape down the sides if needed.
- If the mixture is too thick, add a tablespoon of vegetable oil to thin it out.
- Once creamy, transfer to a jar and store in the fridge for up to two weeks.
Notes
- Tip: If your mixture is too thick, you can add vegetable oil (about 1 tablespoon) to thin it.