Halloween Pretzels
There’s something magical about creating festive treats during Halloween, and my go-to is always the Halloween Pretzels. Every year, as the leaves start to turn and the air gets a bit crisper, I feel that familiar excitement bubbling up. I remember the first time I made these delightful snacks for a neighborhood Halloween party. The kids’ eyes lit up with joy, and I couldn’t help but smile. It’s not just about the taste; it’s the joy of crafting something special that brings everyone together. From the crunch of the pretzel to the sweetness of the candy coating, these treats are perfect for sharing, making them a favorite for gatherings and celebrations. Plus, they’re incredibly easy to make! So, grab your ingredients and let’s dive into the fun world of baking these spooky Halloween Pretzels.
Recipe Snapshot
20 mins
15 mins
5 mins
Medium
120 kcal
1g g
Keto, Paleo, Whole30
6g g
Wooden Spoon
The Best Thing About This Halloween Pretzels
They’re Perfectly Themed
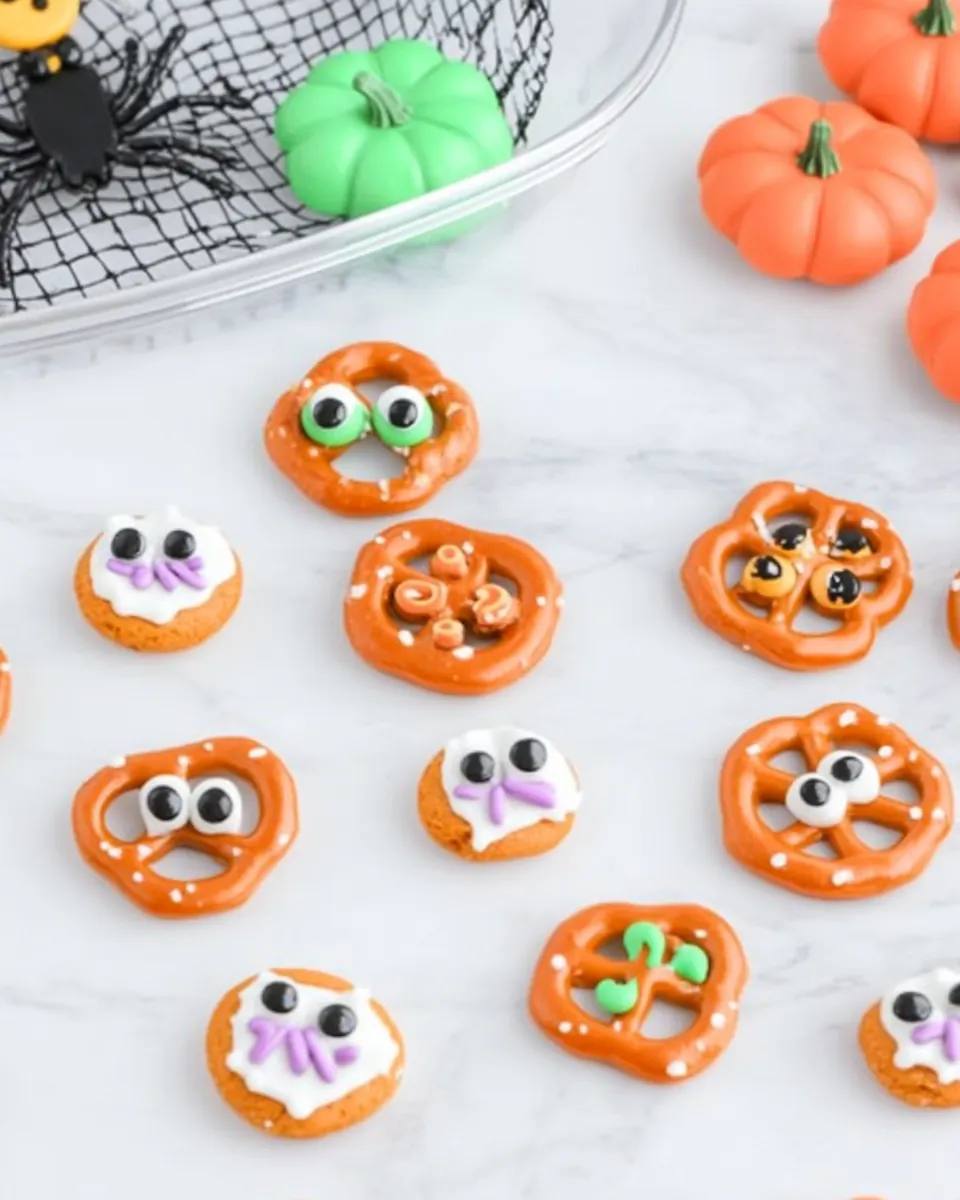
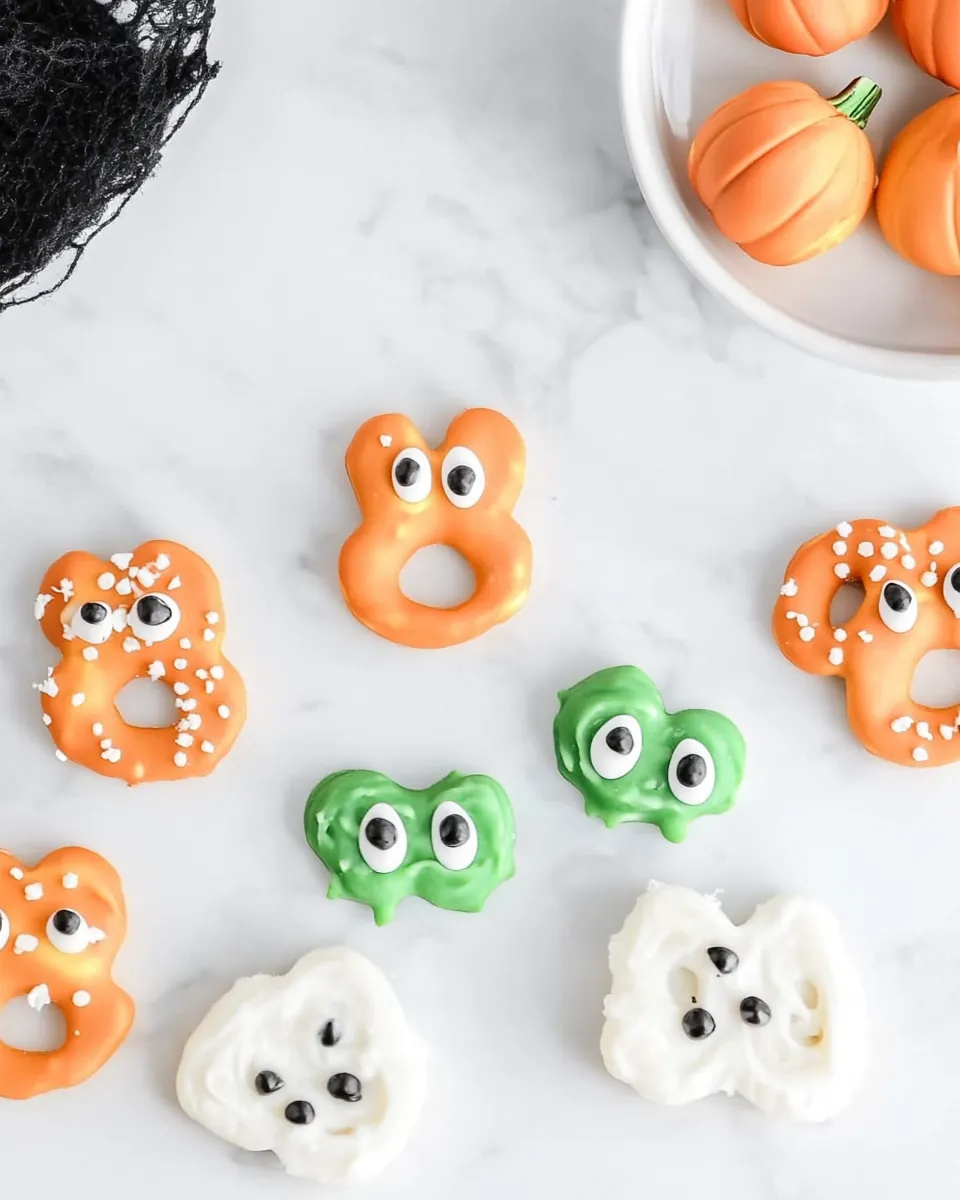
When it comes to Halloween, nothing beats fun food that matches the theme! These Halloween Pretzels are cute and spooky at the same time, making them a great visual treat. Decorated to resemble mummies or Frankenstein, they’re sure to impress your guests!
Easy to Make
Even if you’re not a baking expert, these treats are super simple. With just a few ingredients and minimal steps, you can whip up a batch in no time. The kids can even join in, making it a fun family activity!
Customizable Designs
The beauty of Halloween Pretzels lies in their versatility. You can get creative with toppings and colors! Use different types of candy melts, sprinkles, or even edible glitter to match your party’s theme.
Great for Parties
These treats are perfect for Halloween parties, classroom celebrations, or just a fun family night. They’re bite-sized and easy to grab, making them a hit with both kids and adults. Plus, they add a festive touch to any dessert table!
A Fun Story to Share
Every time I make these Halloween Pretzels, I reminisce about the Halloween when my kids and I spent the afternoon decorating them together. Each pretzel became a little masterpiece and each bite brings back those wonderful memories!
Delicious and Sweet
Don’t forget about flavor! The combination of crunchy pretzels with sweet candy melts creates a delightful contrast that everyone loves. Plus, the added textures make each bite a unique experience!
Everything You Need for Halloween Pretzels
The ingredients for Halloween Pretzels come together to create an enchanting flavor profile. The key players here include pretzel twists for that satisfying crunch and candy melts that provide a sweet coating. Each component complements the others, ensuring a delightful balance of taste and texture.
- 12 mini pretzel twists: These provide the base for our treats, adding that essential crispy texture.
- 3/4 cup white chocolate chips: Melting this creates a sweet, creamy coating that pairs perfectly with the salty pretzels.
- 1 teaspoon coconut oil: Used to help the chocolate melt smoothly and give it a nice sheen.
- 24 mini candy eyes: These little cuties are perfect for adding a fun, spooky touch!
- 3/4 cup orange candy melts: Bright and festive, these are key for making your pretzels stand out.
- 12 green M&M’s: These add a splash of color and are perfect for decorating.
- 12 mini square pretzels: Used in variation, these add a different shape and texture to the mix.
- 3/4 cup green candy melts: Great for creating a creepy color scheme.
- 1/4 cup chocolate sprinkles: The finishing touch for adding some fun texture and a festive look!
The Method for Halloween Pretzels

Making Halloween Pretzels is a straightforward process that anyone can enjoy. Follow these simple steps to create your own spooky treats! The process is divided into clear steps, ensuring that your pretzels turn out perfectly every time.
- First, line a baking sheet with parchment paper. This will prevent the pretzels from sticking and make cleanup a breeze.
- Now, take your white chocolate chips and place them in a microwave-safe bowl. Microwave at half power for one minute. This gentle heat will help melt the chocolate without burning it.
- After the minute is up, remove the bowl and stir in 1 teaspoon of coconut oil. This helps to give the melted chocolate a lovely gloss and makes it easier to work with.
- If the chocolate isn’t fully melted, don’t worry! Microwave it for an additional 15 seconds, stirring every 15 seconds until smooth. You want it to be fully melted and creamy.
- Once melted, transfer the mixture to a squeeze bottle or a pastry bag. This will make it much easier to decorate your pretzels!
- Squeeze a small amount of the melted white chocolate into the top two holes of each pretzel twist, covering them completely. Then, place a candy eye into the chocolate to create a mummy effect.
- Next, using quick back-and-forth motions, pipe more white chocolate onto the pretzel to give it the appearance of mummy cloth. Play with the design to create unique looks!
- After decorating, let the pretzels dry completely on the parchment paper before transferring them to a serving tray.
- In a separate bowl, melt your orange candy melts in the same manner as before. Once melted, dip each pretzel twist into the melted orange chocolate, ensuring it’s fully coated.
- Use a fork to lift the pretzel out of the chocolate and shake off any excess. Place it back on the prepared baking sheet.
- Now for the fun part! For each pretzel, place a green M&M in the top indent so it stands up, creating a cute character.
- Let these pretzels dry thoroughly. As they set, they’ll hold their shape and be ready to enjoy!
- If you have extra melted chocolate, consider dipping your mini square pretzels as well. We can make little Frankenstein heads!
- To finish off, add a candy eye to each decorative pretzel and top with chocolate sprinkles for added flair.
- Finally, break a pretzel into small pieces and place them on either side of the chocolate-covered pretzel to create Frankenstein’s bolts. Let everything dry completely before serving.
Things Worth Knowing
- Temperature Control: Melting chocolate can be tricky. Always use low heat and stir frequently to prevent burning.
- Experiment with Colors: Use different colored candy melts to create a variety of designs for your pretzels.
- Decorating Fun: Let the kids help with decorating! It’s a great way to bond and unleash creativity.
- Storage Tips: Store the pretzels in an airtight container to keep them fresh and crunchy.
Recipe Variations about Halloween Pretzels

There are numerous ways to put your spin on Halloween Pretzels, making it an exciting treat every time! Here are some creative tips that you can experiment with.
- Different Chocolate Types: Try using milk chocolate or dark chocolate instead of white chocolate for a different flavor profile.
- Spooky Sprinkles: Add themed sprinkles like skeletons or ghosts for an extra festive touch.
- Nut Butter Drizzle: For a twist, drizzle some melted peanut butter or almond butter over the pretzels.
- Flavor Variations: Infuse your melted chocolate with flavors like peppermint or cinnamon for a unique taste.
- Alternative Designs: Get creative by using fruit snacks or gummy candies to create additional designs.
- Mix it Up: Use different styles of pretzels, like rods or shapes, for variety.
What to Pair With Halloween Pretzels
When serving Halloween Pretzels, consider a variety of fun accompaniments and drinks to enhance the experience. Here are some ideas to get you started:
- Hot Chocolate: Pair these with a warm cup of hot chocolate for a cozy and festive treat.
- Halloween Punch: Serve with a spooky-themed punch made from fruit juices, soda, and creepy garnishes.
- Spooky Cupcakes: Add a selection of Halloween-themed cupcakes to your spread for additional sweet options.
- Cheese Platter: For a savory balance, consider serving cheese and crackers for a contrast to the sweetness.
- Fruit Skewers: Add some fresh fruit skewers to provide a refreshing element to your dessert table.
- Halloween Cookies: Combine with other Halloween-themed cookies to create a delightful dessert platter.
FAQ
Conclusion
These Halloween Pretzels are a delightful and spooky treat that combines simplicity with festive flair. With their crunchy texture and sweet coating, they’re sure to be a favorite at your Halloween festivities. I encourage you to try making them; it’s a fun way to get into the spirit of the season. Plus, they’re a fantastic treat to share with friends and family. Happy Halloween!
Halloween Pretzels
Ingredients
Equipment
Method
- Line a baking sheet with parchment paper.
- Place the chocolate melts in a microwave-safe bowl and microwave at half power for 1 minute. Remove and stir in the coconut oil. If more time is needed, microwave for 15-seconds, stirring after every 15 seconds.
- Transfer melted white chocolate to a squeeze bottle or pastry bag.
- Squeeze a small amount of white chocolate in the top two holes of the pretzel covering completely. Place candy eyes onto the chocolate.
- Using quick back and forth motions, pipe white chocolate onto the pretzel to look like mummy cloth. Let the pretzels dry completely and then transfer to a serving tray.
- Drop each pretzel in the melted chocolate and submerge it slightly. Use a fork to remove each pretzel and place it on the prepared baking sheet.
- Place 1 green M&M into the top indent of the pretzel on its side, so it’s standing up. Let the pretzels dry completely and then transfer to a serving tray.
- Drop each pretzel square in the melted chocolate and submerge it slightly. Use a fork to remove each pretzel and place it on the prepared baking sheet.
- Place a candy eye in each of the top two holes of the pretzel.
- Sprinkle chocolate sprinkles on the top of the pretzel for hair.
- Break a pretzel into small pieces and place a piece of the pretzel to each side of the chocolate covered pretzel to create Frankenstein’s bolts. Let the pretzels dry completely and then transfer to a serving tray.