Chocolate Eggnog Waffles
The holiday season is truly a magical time, and nothing brings the warmth of that spirit into your kitchen quite like Chocolate Eggnog Waffles. I remember the first time I made these delightful waffles; it was a chilly winter morning, and the smell of warm spices wafted through the air as I poured the rich, creamy batter into the waffle iron. It was a family tradition to gather around the breakfast table, indulging in sweet treats, and these waffles quickly became a favorite. As the waffles cooked to perfection, the anticipation in the room grew, and soon enough, we were all savoring the divine blend of eggnog, chocolate, and spices.
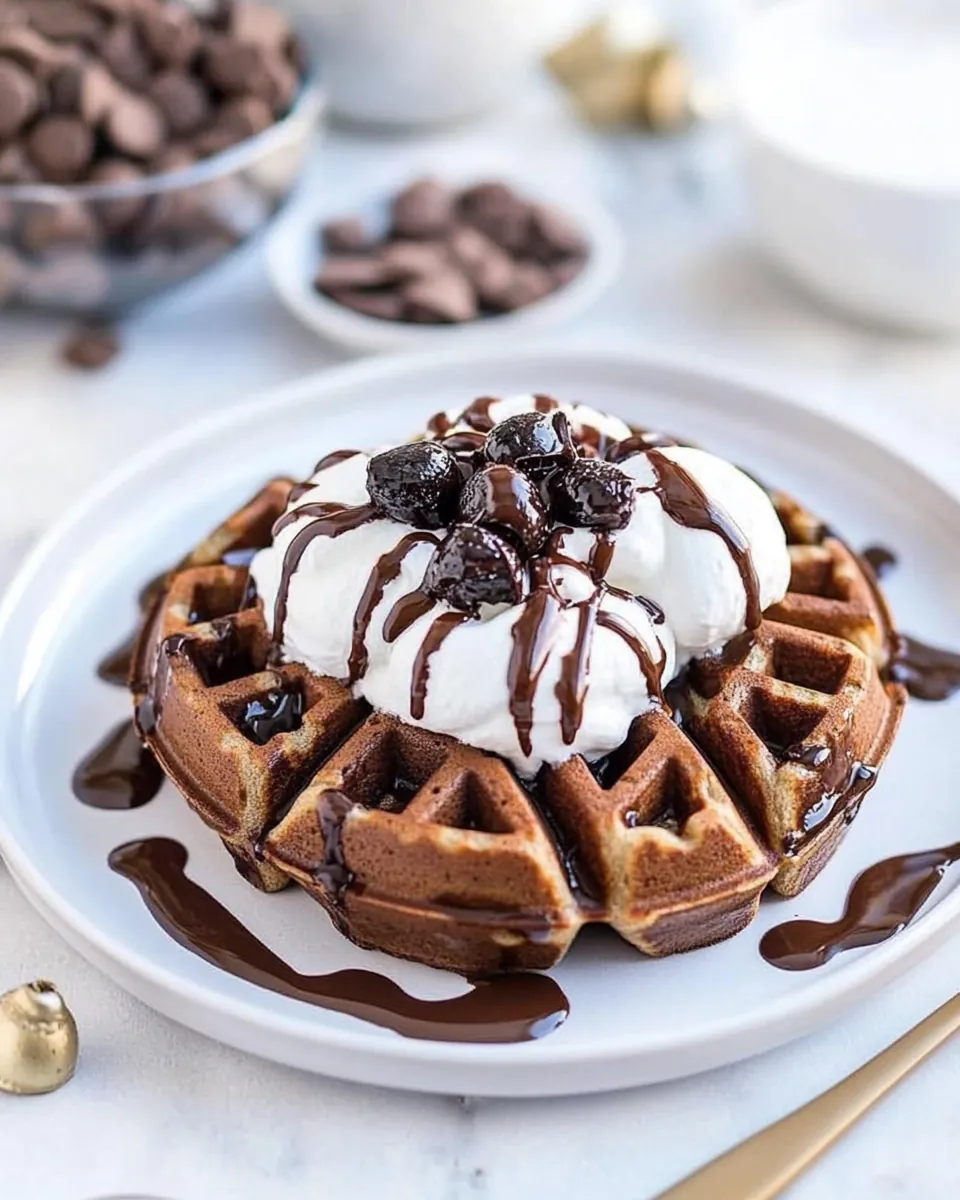
Each bite was a delightful combination of fluffy, chocolatey goodness that felt like a warm hug on a cold winter day. The idea of a festive breakfast that not only fills your belly but also warms your heart is what makes Chocolate Eggnog Waffles so special. They are perfect for holiday gatherings or lazy weekend brunches, making every moment feel like a celebration. Whether topped with a generous swirl of whipped cream or drizzled with chocolate sauce, these waffles are sure to bring smiles all around.
Recipe Snapshot
13 mins
10 mins
3 mins
Medium
320 kcal
6 g
Vegan, Gluten-Free, Low FODMAP
15 g
Wooden Spoon, Whisk, Mixing Bowl
The Beauty of This Chocolate Eggnog Waffles
Comforting Winter Treat
There’s something undeniably comforting about indulging in Chocolate Eggnog Waffles during the winter months. The warm spices combined with the rich chocolate create a cozy atmosphere that is perfect for holiday gatherings or a quiet morning at home. Every bite brings a sense of nostalgia, reminding me of family traditions and joyful celebrations.
Perfect for Family Gatherings
These waffles are not just a treat for yourself; they are a delightful way to bring family and friends together. Imagine serving a stack of these to your loved ones on Christmas morning, accompanied by fresh fruit and hot drinks. They make bonding moments even sweeter and highlight the joy of sharing food with those we care about.
Versatile and Fun
One of the best aspects of Chocolate Eggnog Waffles is their versatility. You can easily customize them to fit your taste. Want a bit more spice? Add an extra pinch of nutmeg or cinnamon. Seeking a more decadent flavor? Top with extra chocolate morsels or a sprinkle of powdered sugar. The possibilities are endless!
Family-Friendly Recipe
This recipe is also family-friendly, making it a great way to engage children in the kitchen. They will love whisking together the eggnog and eggs, and they’ll be thrilled to help stir in the chocolate morsels. Cooking together can create beautiful memories and inspire a love for cooking from a young age.
Quick and Easy to Prepare
With simple ingredients, Chocolate Eggnog Waffles can be whipped up quickly, making them an ideal choice for busy mornings. The combination of flour, baking cocoa, and eggnog can come together in no time, allowing you to enjoy a delicious breakfast without a lot of fuss.
A Wonderful Holiday Surprise
Finally, these waffles serve as a delightful surprise for any holiday brunch. Guests will appreciate the unique flavor combination, and it’s a fun way to switch up the typical breakfast menu. Who wouldn’t want to start their day with a plate of warm, chocolatey waffles?
Shopping List for Chocolate Eggnog Waffles

Creating Chocolate Eggnog Waffles is all about gathering the right ingredients that work harmoniously to create a rich and festive flavor. Each of these ingredients plays a vital role in achieving the perfect texture and taste. The star player here is, of course, the eggnog, which adds a creamy richness and seasonal spice that’s hard to resist. Let’s take a look at what you’ll need to make these delightful waffles.
- 1 ½ cups all-purpose flour: The backbone of the waffle, providing structure and flavor.
- ½ cup NESTLÉ® TOLL HOUSE® Baking Cocoa: Adds a rich chocolate flavor that’s essential for this recipe.
- 4 teaspoons baking powder: Helps the waffles rise, making them fluffy and light.
- ½ teaspoon salt: Enhances the flavors and balances the sweetness.
- 1 teaspoon ground cinnamon: Adds warmth and spice, making these waffles perfect for winter.
- ¼ teaspoon ground nutmeg: A traditional holiday spice that complements the eggnog.
- 2 tablespoons granulated sugar: A touch of sweetness to balance the flavors.
- 1 ⅔ cups eggnog: The star ingredient that gives these waffles their unique flavor.
- 2 large eggs: Essential for binding the ingredients together.
- 4 tablespoons butter, melted: Adds richness and moistness to the waffles.
- 2 teaspoons pure vanilla extract: A hint of vanilla enhances the overall flavor.
- 1 cup NESTLÉ® TOLL HOUSE® Semi-Sweet Chocolate Morsels: For a delightful chocolate surprise in every bite.
- whipped cream (optional): Perfect for topping and adding extra creaminess.
Recipe Steps for Chocolate Eggnog Waffles

Making Chocolate Eggnog Waffles is a fun and enjoyable process. The aroma of spices and chocolate fills the air, creating a cozy atmosphere. Follow these steps carefully to ensure your waffles come out fluffy and delicious. Let’s get started on this delightful recipe!
- PREHEAT your waffle iron according to the manufacturer’s directions. Make sure it’s fully heated to ensure even cooking.
- WHISK together the flour, baking cocoa, baking powder, salt, cinnamon, nutmeg, and sugar in a large bowl. This dry mixture sets the stage for your waffles, so mix thoroughly for even distribution of ingredients.
- IN A MEDIUM BOWL, whisk together the eggnog, eggs, butter, and vanilla. This wet mixture is where the flavors come alive, so make sure everything is well combined.
- COMBINE the wet mixture with the dry mixture. Stir gently until just combined; be careful not to over mix, as this can make your waffles tough. You want a lumpy batter.
- STIR IN the chocolate morsels, ensuring they are evenly distributed throughout the batter.
- SPRAY the preheated waffle iron with non-stick cooking spray. This step is crucial for preventing the waffles from sticking.
- POUR the waffle batter into the waffle iron in batches. Follow the manufacturer’s directions for the right amount to use, typically about ½ to ¾ cup per waffle.
- COOK according to manufacturer’s directions until golden brown. This usually takes about 2 to 3 minutes per waffle, but watch carefully to avoid overcooking.
- SERVE warm. If desired, top with whipped cream and a drizzle of chocolate sauce for an extra indulgent treat.
Things Worth Knowing
- Use Fresh Ingredients: Ensure your eggnog, eggs, and butter are fresh for the best flavor.
- Preheat Your Waffle Iron: Always preheat your waffle iron for perfectly crisp waffles.
- Don’t Overmix: Be gentle when combining the dry and wet ingredients to keep the waffles light and fluffy.
- Customize Your Toppings: Feel free to experiment with toppings like fresh fruit, nuts, or a dusting of powdered sugar.
Ways to Customize

There are plenty of ways to make Chocolate Eggnog Waffles your own. The versatility of this recipe allows for creativity in both preparation and presentation. Let’s explore some fun options!
- Add Different Spices: Experiment with other spices like cardamom or ginger for a unique twist.
- Use Different Types of Chocolate: Swap out the semi-sweet chocolate morsels for dark or white chocolate to change up the flavor profile.
- Try Alternative Milks: If you want a lighter version, consider using almond milk or coconut milk for a different taste and texture.
- Make It Gluten-Free: Substitute the all-purpose flour with a gluten-free flour blend for a gluten-free option.
- Storage: Store leftovers in an airtight container in the fridge for up to 3 days.
- Freezing: You can freeze the waffles for up to 2 months. Just reheat in the toaster or oven when ready to enjoy.
- Pairing: Serve alongside fruit salads or smoothies for a balanced breakfast.
How to Enjoy Chocolate Eggnog Waffles
Enjoying Chocolate Eggnog Waffles can be an experience in itself! There are many ways to serve these delicious waffles that will make your breakfast or brunch more delightful.
- Serve Warm: Always serve your waffles warm for the best taste and texture.
- Add Whipped Cream: For an indulgent touch, top each waffle with a generous dollop of whipped cream.
- Consider Fresh Fruits: Adding slices of fresh strawberries, bananas, or blueberries can elevate the dish.
- Drizzle with Chocolate Sauce: A light drizzle of chocolate sauce makes these waffles even more decadent.
- Perfect for Breakfast or Brunch: These waffles are a fantastic choice for holiday breakfasts or brunch gatherings with family and friends.
- Pair with Hot Beverages: Serve alongside hot cocoa, coffee, or even a warm chai latte for a comforting start to your day.
- Occasions: Ideal for Christmas morning, winter brunch parties, or cozy Sunday breakfasts at home.
FAQ
Conclusion
Chocolate Eggnog Waffles are a delightful addition to your breakfast repertoire, combining the beloved flavors of the holiday season into a fun and comforting dish. They’re perfect for cozy family gatherings or a special treat on chilly mornings. I encourage you to try your hand at making these waffles for your next brunch; the smiles they bring will make it all worthwhile.
Chocolate Eggnog Waffles
Ingredients
Equipment
Method
- PREHEAT your waffle iron according to the manufacturer’s directions.
- WHISK together the flour, baking cocoa, baking powder, salt, cinnamon, nutmeg, and sugar in a large bowl.
- IN A MEDIUM BOWL, whisk together the eggnog, eggs, butter, and vanilla.
- COMBINE the wet mixture with the dry mixture and stir until just combined; do not over mix.
- STIR IN the chocolate morsels.
- SPRAY the preheated waffle iron with non-stick cooking spray.
- POUR the waffle batter into the waffle iron in batches.
- COOK according to manufacturer’s directions until golden brown, about 2 to 3 minutes per waffle.
- SERVE warm and top with whipped cream if desired.
Notes
- Storage: Store leftovers in an airtight container in the fridge for up to 3 days.
- Freezing: You can freeze the waffles for up to 2 months. Just reheat in the toaster or oven when ready to enjoy.
- Pairing: Serve alongside fruit salads or smoothies for a balanced breakfast.