Easter Chocolate Covered Strawberries
There’s something magical about the combination of fresh strawberries and rich chocolate, especially when it comes to making Easter Chocolate Covered Strawberries. Every spring, as the days start to warm up, we find ourselves craving those sweet, juicy strawberries dipped in silky chocolate. It feels like a tradition in our home, a little celebration of springtime and all the joy that comes with it. I remember the first time I made these—how the entire house filled with the rich aroma of melted chocolate, and how my kids’ faces lit up as they dipped their own strawberries. It’s a simple yet delightful way to welcome the season, and it brings everyone together around the kitchen table, sharing laughter and creativity. So, let’s dive into this delicious recipe and discover just how easy it is to make these delightful treats!
Recipe Snapshot
55 mins
45 mins
10 mins
Medium
150 kcal
2 g
Keto, Gluten-Free, Low FODMAP
8 g
Food Processor, Wooden Spoon
The Charm of This Easter Chocolate Covered Strawberries
Perfect for Celebrations
What I love most about Easter Chocolate Covered Strawberries is their versatility. They’re not just for Easter; you can make them for birthdays, graduations, or just because! Each occasion feels a little more special when you can customize them with different chocolate colors and toppings.
Visually Stunning
When you present these strawberries, they look like a work of art. The contrast of the vibrant, fresh strawberries against the glossy chocolate is simply stunning. Whether you’re using white chocolate, dark chocolate, or a mix, the visual appeal is undeniable and will impress your guests.
Interactive Fun
Making these strawberries is an interactive experience that everyone can enjoy. It’s a great way to get kids involved in the kitchen, allowing them to express their creativity by choosing colors and toppings. Plus, there’s nothing quite like seeing their excitement as they dip and decorate their own strawberries!
Decadent Treat
Let’s be real; chocolate makes everything better! The rich flavor of melted chocolate enveloping the fresh strawberry creates a delicious treat that’s hard to resist. It’s a flavor combination that never fails to deliver satisfaction and joy.
Quick and Easy
Despite their impressive appearance, making Easter Chocolate Covered Strawberries is surprisingly easy. With just a few ingredients and simple steps, you can whip these up in no time. They’re perfect for those last-minute gatherings or if you just want a sweet treat without much fuss.
Customizable
You can personalize each strawberry to match your theme or preference. From using colored chocolate to adding sprinkles or nuts, the possibilities are endless. This recipe allows your creativity to shine, making it a unique experience every time you make them.
What Goes Into Easter Chocolate Covered Strawberries
Creating Easter Chocolate Covered Strawberries is all about selecting high-quality ingredients that complement each other beautifully. Each component plays a vital role in bringing this recipe to life.
- 1 pound strawberries – Fresh, ripe strawberries are the star of this treat. Their natural sweetness and bright flavor create a perfect balance with the chocolate.
- White chocolate chips – These add a creamy sweetness that pairs wonderfully with the tartness of the strawberries.
- Gel food coloring – This allows you to customize the chocolate for a festive touch and vibrant color.
- Olive oil – A small amount will help to achieve a smooth consistency in the melted chocolate.
- Sprinkles or other decorations – Optional, but they add that fun, festive flair to your strawberries.
- Milk or dark chocolate chips – These options provide a rich, decadent flavor that complements the strawberries nicely.
The Method for Easter Chocolate Covered Strawberries
Making Easter Chocolate Covered Strawberries is a delightful process that brings joy to both the cook and those who get to enjoy them. Follow these steps to create your own delicious batch.
- Start by lining a baking sheet with tin foil to make clean-up a breeze. This is an essential step that makes it easier to transfer your finished strawberries later.
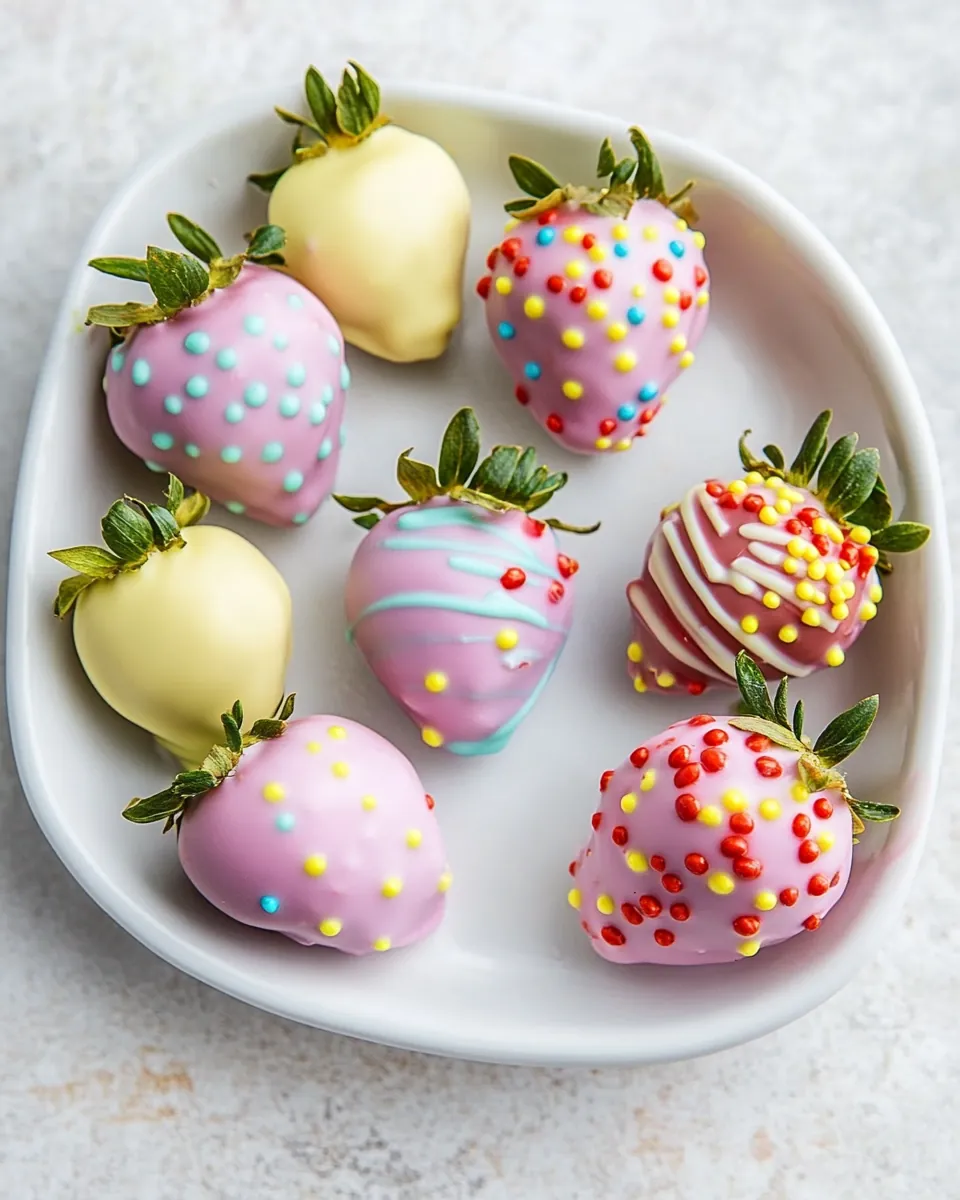
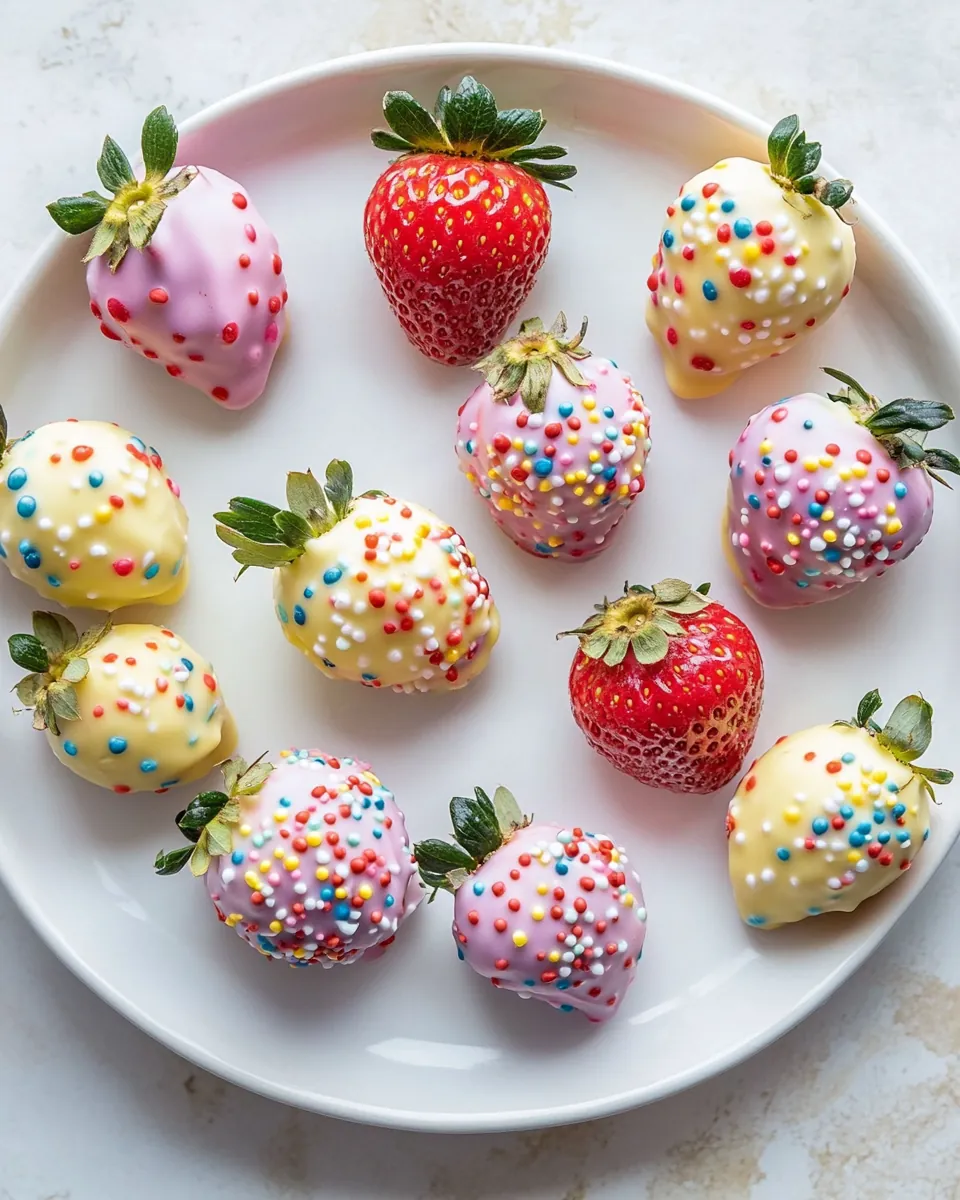
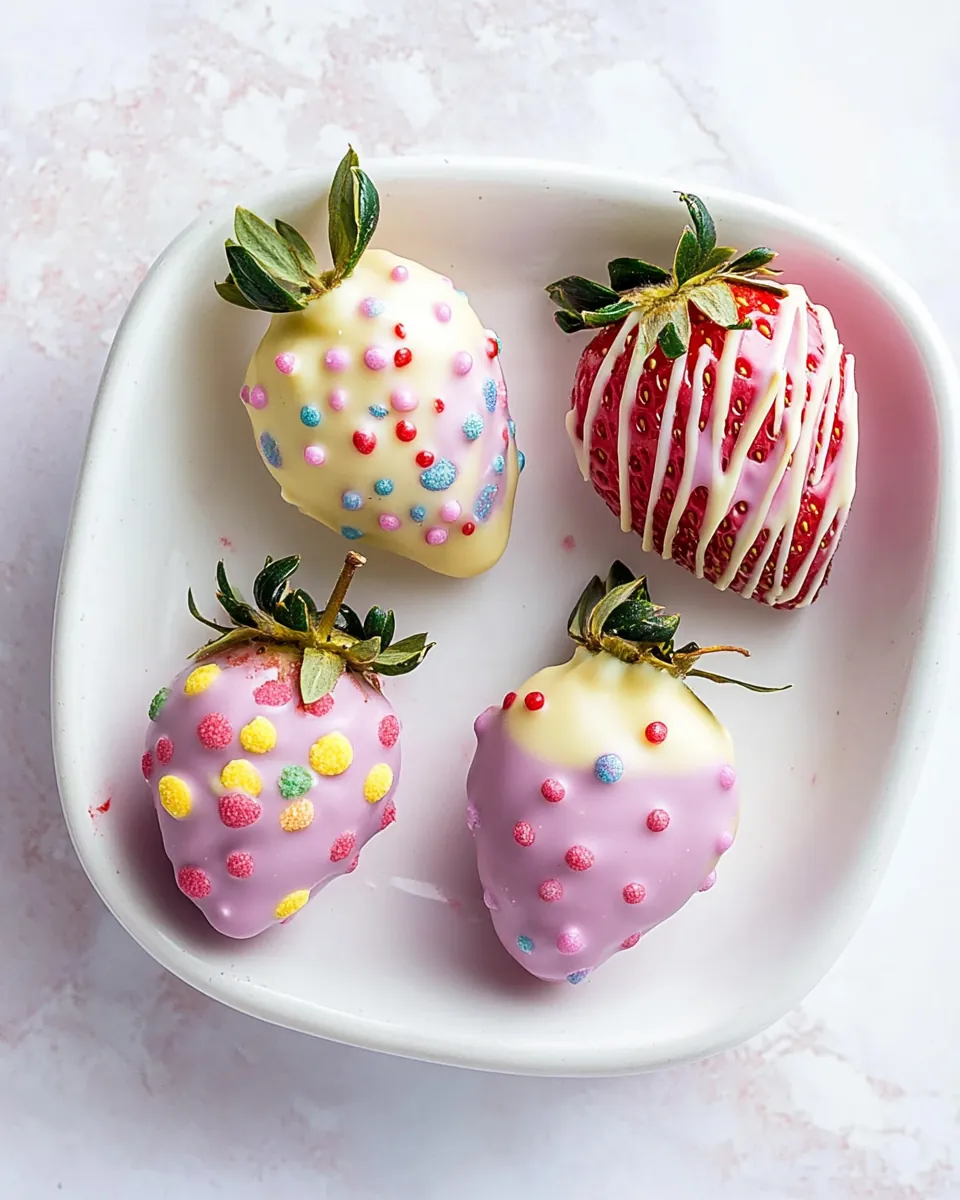
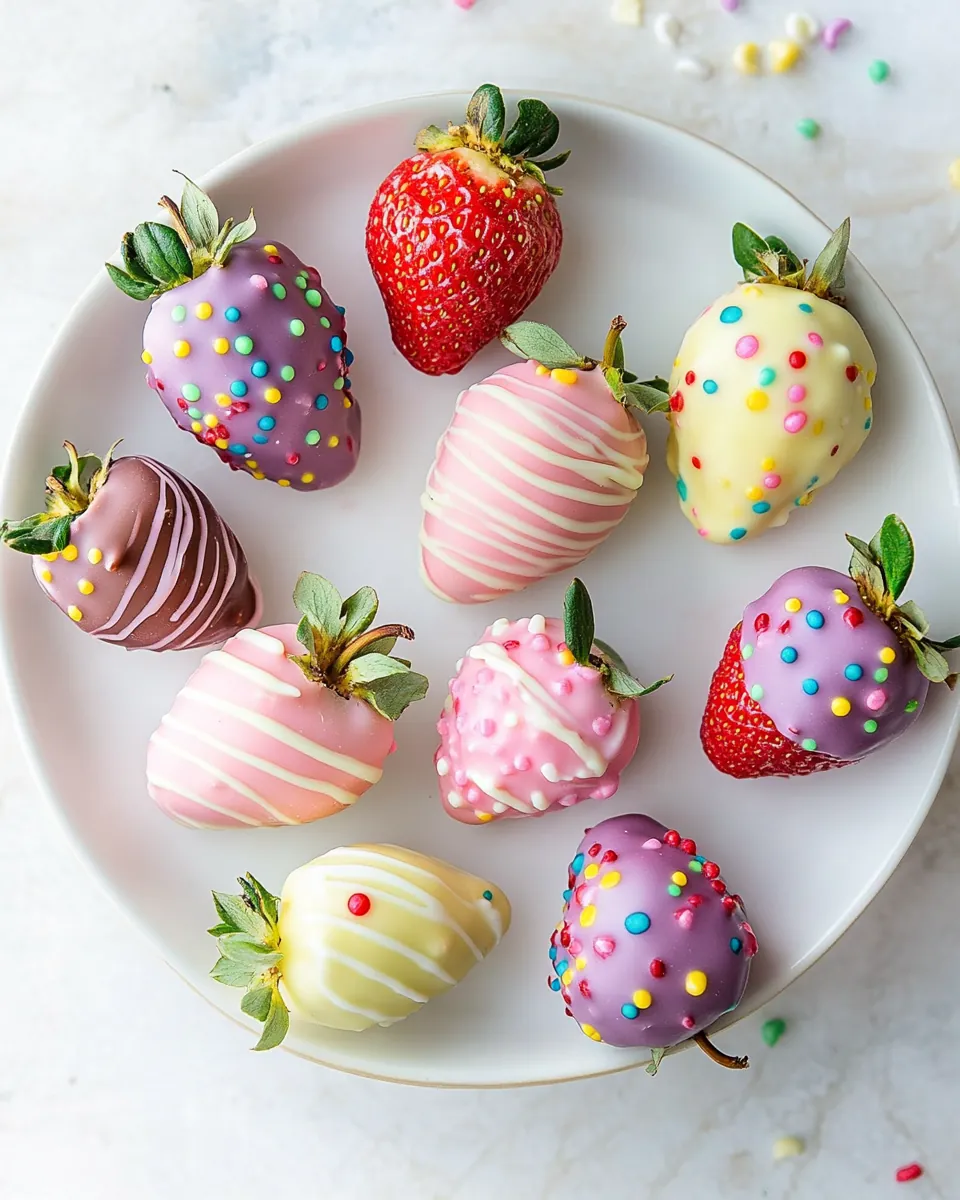
- Get a small bowl for each color of chocolate you plan to use. Here, I typically use five bowls for a variety of colors and flavors.
- Pour about 1/3 cup of white chocolate chips into each bowl. Feel free to adjust the amount based on how many strawberries you plan to dip. The goal is to have enough chocolate to comfortably dip each strawberry.
- Microwave the chocolate in one bowl at a time for about 30 seconds. After each interval, stir the chocolate to ensure it melts evenly. You want it to be completely melted and smooth.
- Add a couple of drops of olive oil to the melted chocolate. This will help achieve a glossy finish. If you want to add color, now’s the time to do so with your gel food coloring.
- Once the chocolate is the right consistency and color, it’s time to dip. Take a strawberry, hold it by the stem, and dip it into the chocolate, turning it to coat evenly. It’s okay if it’s a little messy!
- Place the dipped strawberry on the lined baking sheet carefully. Try not to move it too much as it will start to set. Repeat this process with all the strawberries you want to cover in that color.
- Once you’ve dipped all the strawberries, you can add sprinkles or other decorations while the chocolate is still wet. This adds a fun, festive touch.
- If you’re using milk or dark chocolate chips as well, repeat the melting and dipping process with those. Feel free to drizzle them on top of the white chocolate-dipped strawberries for an added touch.
- After all the strawberries are dipped and decorated, place the baking sheet in the fridge and let them set for at least a couple of hours. This step is crucial; it allows the chocolate to harden and results in a perfect bite.
- Once the strawberries are set, transfer them to an airtight container for storage. They should keep well in the fridge for about two to three days, if they last that long!
Things Worth Knowing
- Quality Matters: Always choose fresh, ripe strawberries. The sweeter and juicier they are, the better your chocolate-covered strawberries will taste.
- Temperature Control: Make sure the chocolate isn’t too hot when dipping the strawberries. If it’s too hot, the strawberries can get mushy.
- Keep it Dry: Ensure your strawberries are completely dry before dipping them. Any moisture can cause the chocolate to seize up or not stick properly.
- Experiment with Flavors: Don’t hesitate to try different types of chocolate or even flavorings in the chocolate to create unique combinations.
Recipe Variations about Easter Chocolate Covered Strawberries
There are endless ways to customize your Easter Chocolate Covered Strawberries! Here are some fun suggestions to try:
- Storage: To keep your strawberries fresh, store them in an airtight container in the fridge. Avoid stacking them to prevent the chocolate from cracking.
- Freezing: You can freeze chocolate-covered strawberries, but be aware that the texture might change once thawed. Keep them in a single layer on a baking sheet before transferring to a container.
- Color Variations: Use different colors of colored chocolate to create a rainbow effect for parties or holidays.
- Gourmet Touch: Drizzle melted chocolate of a different kind over the strawberries for an elegant finish. You can even sprinkle with sea salt for a sweet and savory twist.
- Flavor Infusions: Try adding a bit of citrus zest or almond extract to the melted chocolate for an added flavor dimension.
Serving Ideas for Easter Chocolate Covered Strawberries
- Perfect for Easter Brunch: Serve these as a delightful addition to your Easter brunch spread. They add a touch of elegance and sweetness.
- Gift-giving: These strawberries make a lovely gift. Arrange them in a decorative box, and you have a thoughtful treat for friends and family.
- Party Treat: They’re perfect for parties or gatherings. Make a variety of colors and flavors to cater to everyone’s preferences.
- Pair with Desserts: Serve alongside other desserts like cakes or cupcakes for a sweet table centerpiece.
- Seasonal Decor: Use these chocolate-dipped strawberries as part of your springtime decor. They not only taste good but also look beautiful!
- Storage Tips: If you have leftovers, keep them stored in the fridge in a single layer to maintain their aesthetic appeal.
FAQ
Conclusion
The beauty of Easter Chocolate Covered Strawberries lies in their simplicity and the joy they bring to any gathering. They’re not just a tasty treat; they’re a canvas for creativity and fun, perfect for the spring season. I encourage you to gather your loved ones and try this delightful recipe. You’ll create sweet memories while indulging in these delicious chocolate-dipped strawberries!
Easter Chocolate Covered Strawberries
Ingredients
Equipment
Method
- Line a baking sheet with tin foil for easy clean-up.
- Get a small bowl out for each color of chocolate you plan on using (I used 5 bowls).
- Add about 1/3 cup of white chocolate chips to each bowl.
- Microwave it in 30 second intervals, stirring in between, until the chocolate is fully melted.
- Stir in a couple of drops of olive oil and a drop or two of gel food coloring. Adjust color as needed.
- Dip the strawberry and turn it in the chocolate until it's evenly covered.
- Place the strawberry on the baking sheet and be careful not to move it.
- Repeat for each strawberry that you want to be that color.
- Once your strawberries are covered in chocolate, if desired, add sprinkles, edible glitter, or luster dust.
- Place the baking sheet in the fridge and let the strawberries set for at least a couple of hours.
Notes
- Tip 1: Keep in mind the amount of white chocolate to add per bowl, as you'll want enough for easy dipping.
- Tip 2: Use small bowls to allow comfortable dipping for each color.
- Tip 3: Ensure the chocolate is melted properly for the best coverage.
- Tip 4: Work quickly for better results, as the chocolate can set fast.
- Tip 5: Enjoy your strawberries fresh; they taste best when eaten within a few days.