Salsa Chicken
The first time I made Salsa Chicken, I was simply looking for a quick and easy dinner option after a long day at work. My family was hungry, and I needed something that would not only be simple to prepare but also delicious. As I rummaged through my pantry, I found a jar of salsa, some chicken breasts, and a packet of taco seasoning that had been hiding in the back. A quick look online showed me how this delightful combination could come together to create a flavorful dish. It was a hit! The savory flavors melded perfectly, and the cheese melted wonderfully, creating a mouthwatering meal that my family couldn’t get enough of. Since then, Salsa Chicken has become a staple in our household. It’s versatile, easy to make, and satisfies even the pickiest eaters.
Recipe Snapshot
40 mins
10 mins
30 mins
Easy
350 kcal
30 g
Keto, Gluten-Free, Low FODMAP
20 g
9 x 13 Baking Dish
The Beauty of This Salsa Chicken
It’s Incredibly Easy to Make
One of the biggest reasons I love Salsa Chicken is its simplicity. With just a few ingredients, it comes together in a matter of minutes. There’s no complicated prep or extensive cooking techniques involved, making it perfect for busy weeknights or when you need to whip up something quickly for unexpected guests.
A Crowd-Pleaser
When I serve Salsa Chicken, everyone digs in! The combination of spices, tangy salsa, and melted cheese is always a favorite. It’s comforting yet refreshing and works for a variety of palates. Whether it’s a family dinner or a gathering with friends, this dish steals the show.
So Many Topping Options
Another fantastic aspect of Salsa Chicken is the endless possibilities for toppings. From creamy sour cream to fresh jalapenos, the additions are plentiful. I love to set up a topping bar when I serve this dish, so everyone can customize their meal just the way they like it. There’s something fun about personalizing your plate!
Great for Meal Prep
If you’re like me and enjoy meal prepping, Salsa Chicken is perfect for that too! I can easily make a big batch and store portions for the week ahead. It reheats beautifully, making it a great option for lunch or dinner throughout the week.
Healthy and Delicious
This dish is not just about flavor; it’s also a healthier option compared to many takeout meals. With lean chicken breasts and fresh salsa, it’s packed with protein and flavor without the extra guilt. I love knowing that I’m providing a nutritious meal for my family.
Fun for the Whole Family
Cooking Salsa Chicken is an activity we often do together as a family. My kids enjoy helping out by adding the salsa or sprinkling the cheese. It’s a great way to bond, teach them about cooking, and get them excited about what’s for dinner!
Ingredients Overview for Salsa Chicken
When it comes to making Salsa Chicken, the ingredients are not only simple but also complement each other perfectly. The main players here are the chicken breasts, which provide a solid protein base, and the salsa that adds vibrant flavor and moisture. The taco seasoning brings a delightful spice that elevates the dish, while the cheese gives it that irresistible creamy texture.
- 4 chicken breasts: The foundation of this dish. Use boneless, skinless chicken breasts for a tender and juicy result.
- 1 oz. taco seasoning: A burst of flavor that enhances the chicken. It’s a simple way to add complexity with minimal effort.
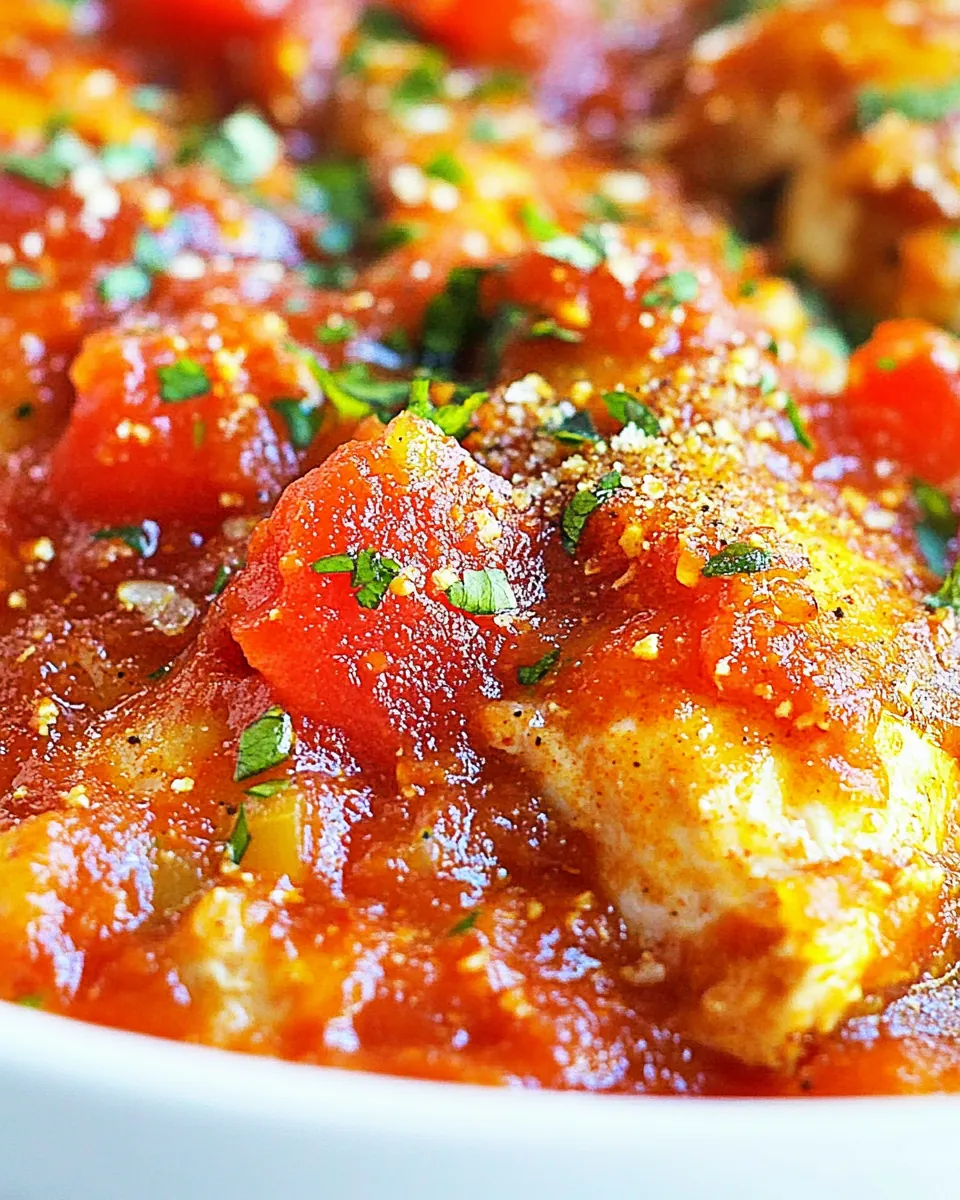
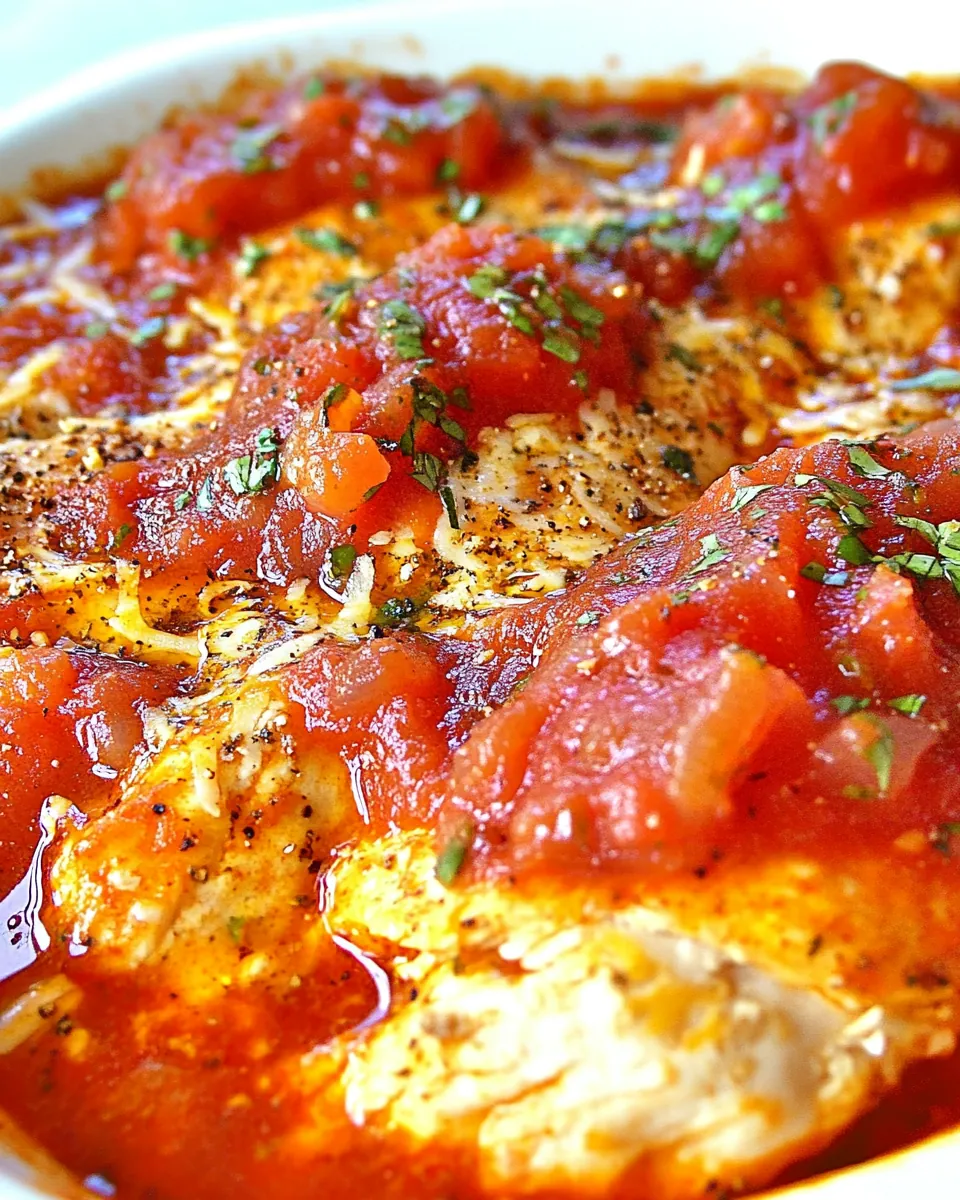
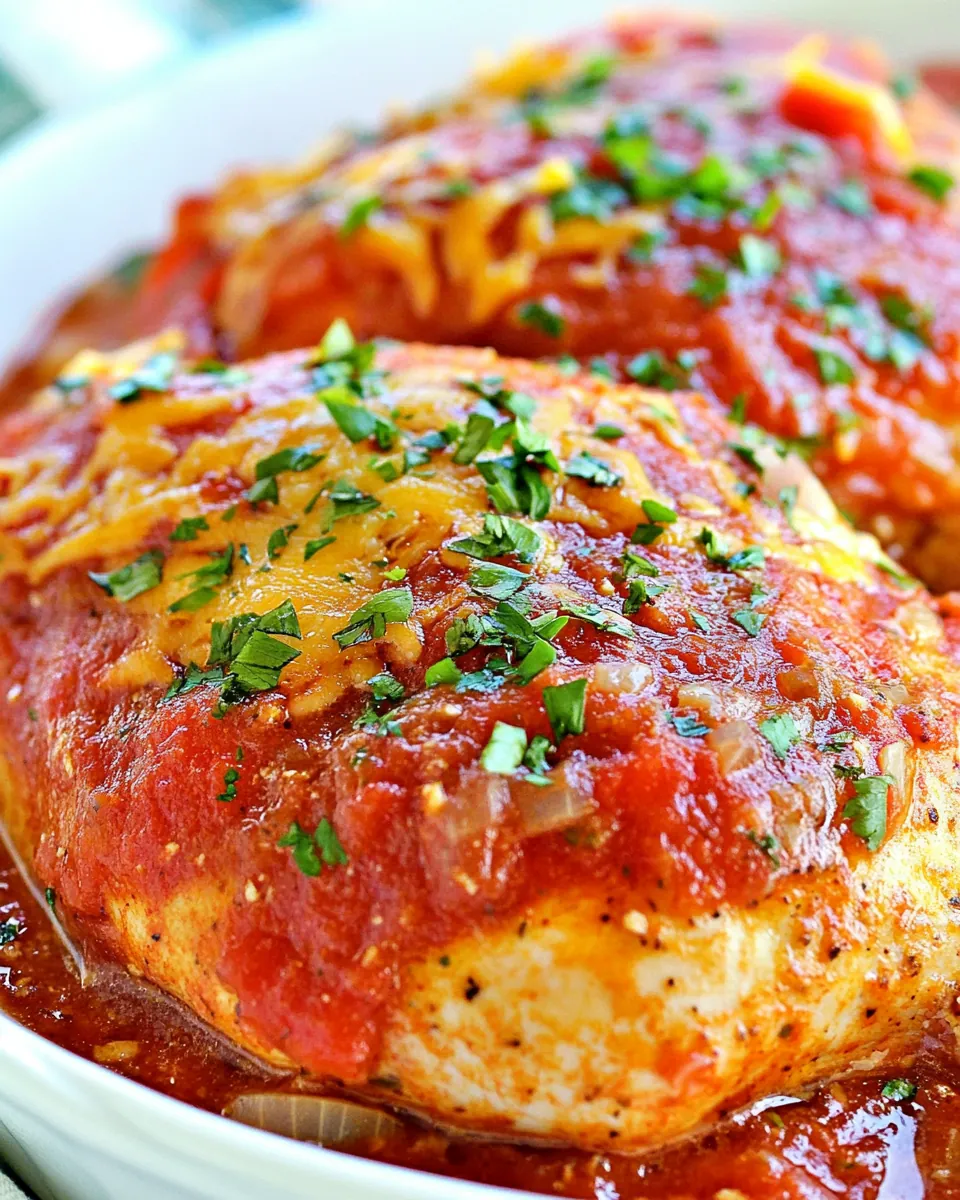
- 1 cup chunky salsa: The star of the dish! Choose your favorite salsa for a personal touch.
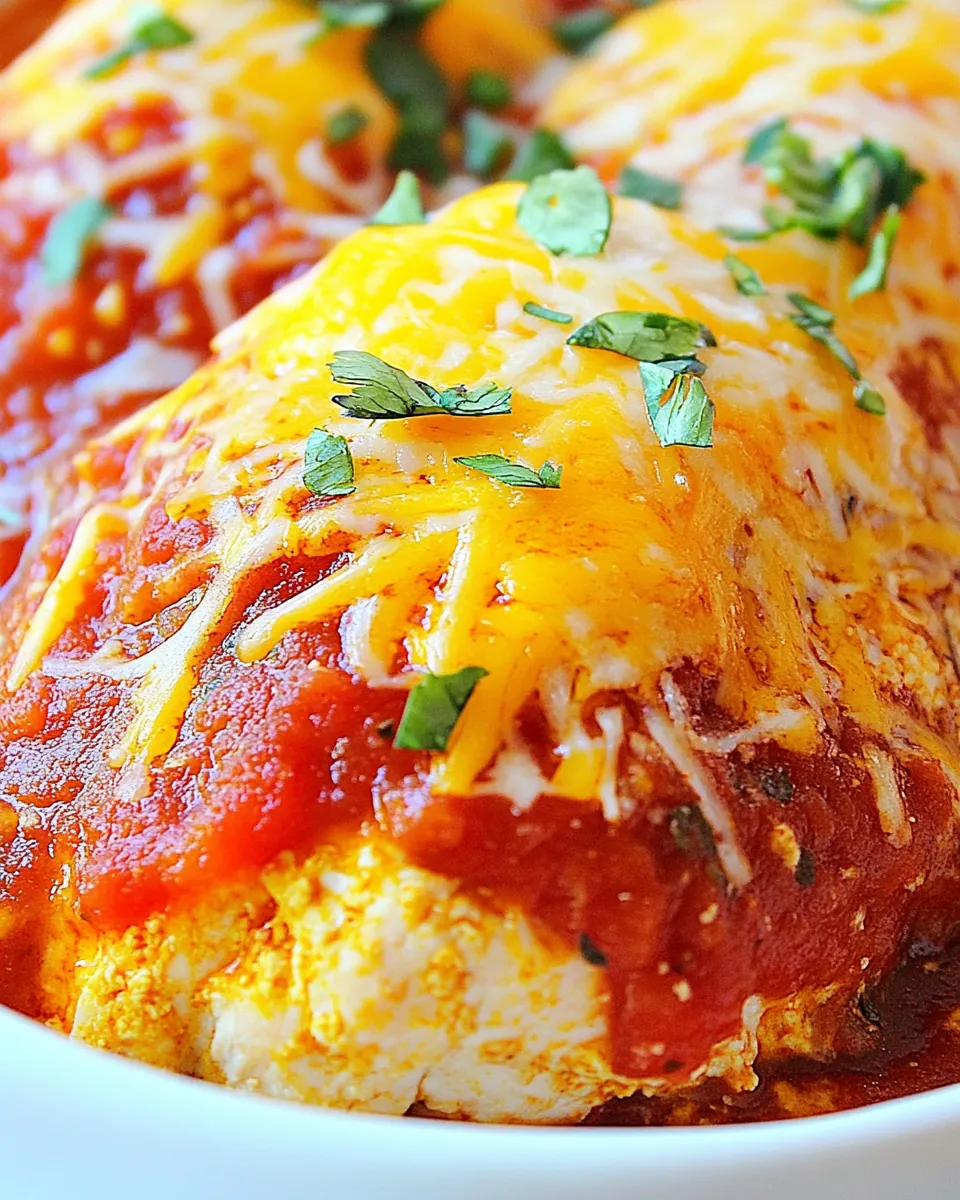
- 1 cup shredded cheese (recommended: Cheddar, Mexican Blend, or Monterey Jack): This adds creaminess and richness. Use a blend for extra flavor.
- Sour cream and minced jalapeno (optional for serving): These toppings can elevate your Salsa Chicken experience!
Recipe Directions for Salsa Chicken
Making Salsa Chicken is a wonderful experience, and I’m excited to share the steps with you. This dish is straightforward, and once you try it, you’ll see how effortless it really is. Let’s dive into the process!
- Preheat your oven to 375°F (190°C) and take out your 9×13 baking dish. Grease it with nonstick cooking spray for easy removal later.
- Carefully lay the chicken breasts in the baking dish. Make sure they’re arranged in a single layer, as this helps them cook evenly.
- Sprinkle the taco seasoning over the chicken. Use your hands to rub the seasoning into the meat, ensuring it’s coated well. This will give the chicken a flavorful crust.
- Next, grab your salsa. Pour it over the seasoned chicken breasts, spreading it evenly across the surface. The salsa will infuse the chicken with moisture and flavor as it cooks.
- Now, take your shredded cheese and sprinkle it generously over the salsa-covered chicken. This is where the magic happens—the cheese will melt beautifully, creating a delicious top layer.
- Place the baking dish in the preheated oven and bake. Depending on the thickness of the chicken, it should take 25 to 35 minutes to cook. If you’re using thin-cut chicken, aim for 10 to 15 minutes.
- Check for doneness by slicing into the thickest part of a chicken breast. If it’s no longer pink and the juices run clear, it’s ready!
- Once cooked, remove the dish from the oven and let it rest for a few minutes. This step is crucial for keeping the chicken juicy.
- When you’re ready to serve, consider adding toppings like sour cream and minced jalapeno. They enhance the flavor and add a fresh twist.
- Enjoy your Salsa Chicken with a side of rice, tortillas, or a fresh salad!
Things Worth Knowing
- The longer you let the chicken marinate with the taco seasoning, the more flavorful it will be.
- Always ensure your chicken is cooked to an internal temperature of 165°F (74°C) for safe consumption.
- Feel free to experiment with different types of salsa to find your favorite flavor profile.
- Letting the Salsa Chicken rest before serving helps retain its juices and flavor.
Substitutions and Tips
While Salsa Chicken is delicious as is, there are plenty of tips to enhance your experience. Here are some suggestions to make this recipe even better!
- Storage: Leftover Salsa Chicken can be stored in an airtight container in the refrigerator for up to three days.
- Freezing: You can freeze Salsa Chicken before baking. Just assemble the dish and wrap it tightly. Bake from frozen when ready, adding extra time to the cooking process.
- Pairing: Serve with warm tortillas, rice, or a fresh salad to complement the flavors.
- Variations: Try using different proteins, such as turkey or tofu, for a twist on the original.
- Serving: This dish is perfect for gatherings. Set up a taco bar with toppings for a fun dining experience!
Serving Suggestions
When it comes to serving Salsa Chicken, the possibilities are endless! Here’s how I love to bring this dish to the table:
- With Tortillas: I like to serve it with warm tortillas, allowing everyone to make their own tacos.
- Over Rice: Serve the Salsa Chicken over a bed of fluffy rice, soaking up all the delicious juices.
- With Side Salads: A fresh garden salad can balance the richness of the dish beautifully.
- Casual Gatherings: This recipe is perfect for potlucks or casual gatherings, where everyone can help themselves.
- For Special Occasions: Consider using this dish for family celebrations or gatherings, as it’s sure to impress!
- Storage Tips: If you have leftovers, store them in an airtight container in the refrigerator to enjoy later.
FAQ
Conclusion
Salsa Chicken is not just a meal; it’s a comforting experience that brings family and friends together around the table. With its simple ingredients and delicious flavors, it’s sure to become a favorite in your home. I encourage you to try making it for dinner tonight!
Salsa Chicken
Ingredients
Equipment
Method
- Preheat your oven to 375°F (190°C) and grease a 9×13 baking dish with nonstick cooking spray.
- Lay the chicken breasts in the baking dish and sprinkle with taco seasoning.
- Pour chunky salsa over the chicken and spread it evenly.
- Sprinkle shredded cheese on top and bake for 25 to 35 minutes.
- Check for doneness, let rest for a few minutes, then serve with toppings.
Notes
- Tip 1: Leftover Salsa Chicken can be stored in an airtight container in the refrigerator for up to three days.
- Tip 2: You can freeze Salsa Chicken before baking, just assemble, wrap tightly, and bake from frozen.
- Tip 3: Serve with warm tortillas, rice, or a fresh salad to complement the flavors.
- Tip 4: Try using different proteins, such as turkey or tofu, for a twist on the original.
- Tip 5: Set up a taco bar with toppings for a fun dining experience!