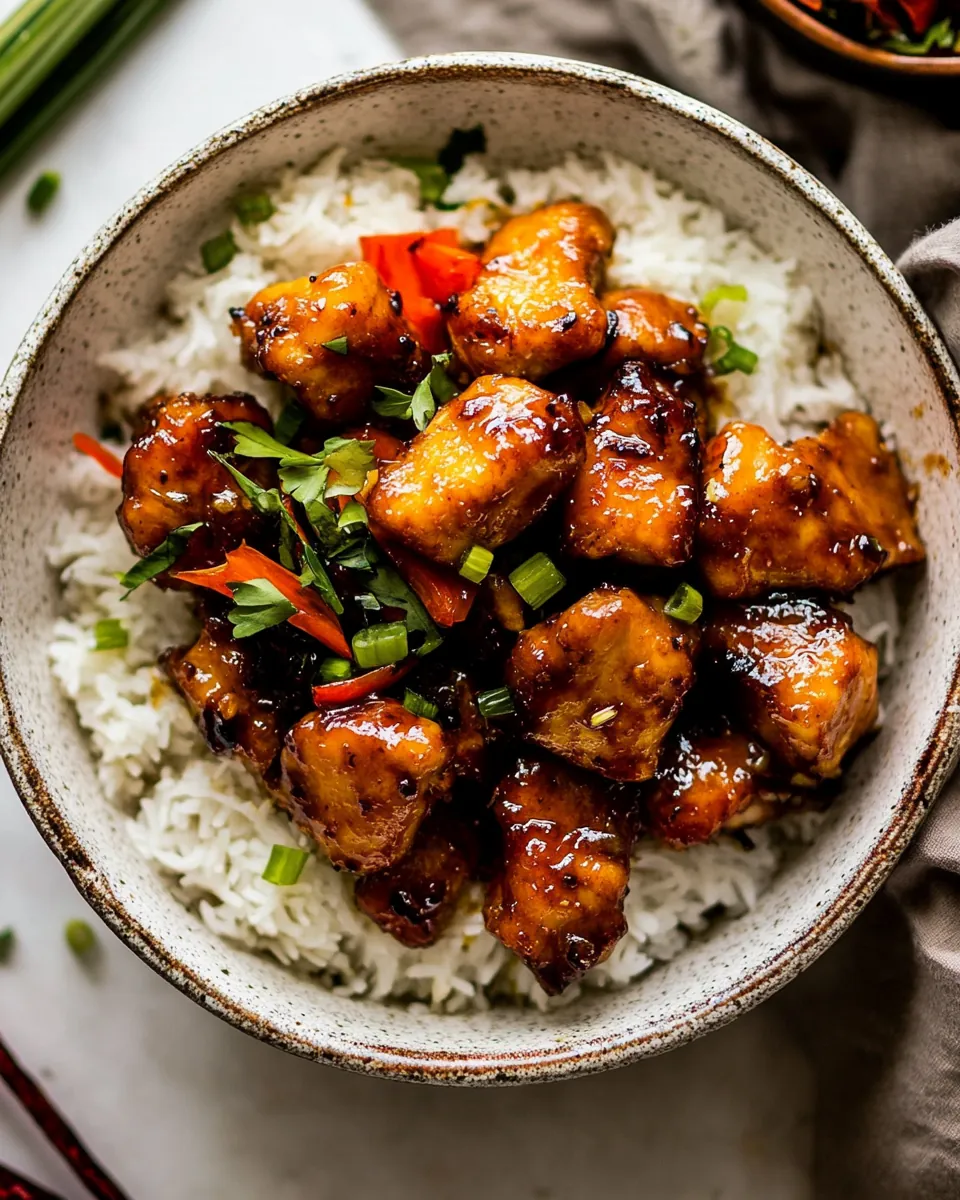
Sheet Pan Sticky Sweet and Sour Chicken
Whenever I’m in need of a quick and satisfying meal, the Sheet Pan Sticky Sweet and Sour Chicken always comes to mind. This dish never fails to impress with its vibrant flavors and ease of preparation. I remember the first time I made it; I was juggling a busy week, and this recipe saved the day. The combination of tender chicken, crisp vegetables, and a glossy sauce created a symphony of flavors that had everyone asking for seconds. It’s one of those meals that brings the family together around the table, filling the house with a delightful aroma that beckons everyone to come and get a plate. If you’re looking for something that’s not only delicious but also visually appealing, the Sheet Pan Sticky Sweet and Sour Chicken is your answer. You’ll love how the vibrant colors of the broccoli, bell peppers, and shallots contrast with the sticky sauce, making it a feast for the eyes as well.
Recipe Snapshot
35 mins
15 mins
20 mins
Medium
450 kcal
30 g
Whole30, Low FODMAP
18 g
Chef’s Knife, Grater, Large Pot, Frying Pan, Baking Sheet, Oven
What’s Great About This Sheet Pan Sticky Sweet and Sour Chicken
Simple Preparation
The beauty of the Sheet Pan Sticky Sweet and Sour Chicken lies in its simplicity. With just one pan to clean, you can enjoy a flavorful meal without spending hours cooking and cleaning. I often find myself making this dish on busy weeknights because it’s incredibly straightforward. Just toss everything onto the sheet pan and let the oven do the work. You can spend that saved time catching up with family or unwinding after a long day.
Flavor Explosion
This dish is a flavor powerhouse! The sticky sauce, made with sweet Thai chili sauce and soy sauce, coats the chicken and veggies beautifully, creating an irresistible glaze. Every bite offers a delightful balance of sweetness and tanginess that’s sure to please. I love the way the sauce caramelizes during cooking, giving the chicken that coveted crispy exterior while keeping the inside juicy and tender.
Healthful Ingredients
What’s not to love about a dish that is both delicious and nutritious? The Sheet Pan Sticky Sweet and Sour Chicken is packed with vibrant vegetables like broccoli and bell peppers, which provide essential vitamins and minerals. The addition of jalapeño adds a touch of heat, making it all the more exciting. Each ingredient not only enhances the flavor but also contributes to a balanced meal.
Customizable Options
One of the best features of the Sheet Pan Sticky Sweet and Sour Chicken is how customizable it is. Whether you prefer extra heat from the jalapeño or want to sneak in more veggies, this recipe is flexible. I often change up the vegetables based on what I have on hand or what’s in season. You can also substitute the chicken for tofu or another protein, making it suitable for various dietary preferences.
Perfect for Meal Prep
If you’re into meal prepping, this dish is a winner! The Sheet Pan Sticky Sweet and Sour Chicken keeps well in the fridge, and the flavors only get better the next day. You can easily make a big batch and portion it out for lunches throughout the week. It’s a great way to ensure you have a wholesome meal ready to go, no matter how busy your day gets.
Family-Friendly
This dish is a crowd-pleaser, making it perfect for families. Kids love the sweet sauce and colorful vegetables, while adults appreciate the balanced flavors and ease of preparation. It’s a wonderful way to introduce children to new flavors and textures without overwhelming them. Plus, serving it over rice makes it even more appealing!
Everything You Need for Sheet Pan Sticky Sweet and Sour Chicken
The ingredients for the Sheet Pan Sticky Sweet and Sour Chicken are simple yet impactful. Each component plays a role in creating a dish that’s not only delicious but also visually stunning. The combination of proteins, vegetables, and a flavorful sauce meld together to create a meal that is wholesome and satisfying.
- 1 1/2 pounds boneless chicken breasts, cut into 2 inch cubes: This is the star of the show, providing protein and richness. The chicken absorbs the flavors of the sauce beautifully.
- 1 egg, beaten: Helps to bind the flour to the chicken, ensuring a crispy coating.
- 1/4 cup all-purpose flour, or gluten-free all-purpose flour: Gives the chicken a lovely texture when baked.
- 1 teaspoon ground ginger: Adds a warm spice that complements the sweetness of the sauce.
- 1 pinch each kosher salt and black pepper: Essential for seasoning the chicken, enhancing its flavor.
- 1 cup broccoli florets: Adds nutrition and vibrant color to the dish.
- 2 bell peppers, sliced: Contributes sweetness and crunch.
- 2 shallots, quartered: Offers a mild onion flavor that elevates the dish.
- 4 tablespoons extra virgin olive oil or sesame oil: Helps to roast the vegetables and chicken perfectly.
- 1 cup sweet Thai chili sauce: The sweet and tangy sauce that ties everything together.
- 1/3 cup low sodium soy sauce: Adds depth and umami flavor.
- 1/2 cup apple juice: Provides natural sweetness and acidity.
- 1/4 cup rice vinegar: Adds brightness and tang to the sauce.
- 1 tablespoon ketchup: Enhances the sauce’s sweetness and depth of flavor.
- 1 tablespoon creamy peanut butter: Introduces a nutty flavor that complements the sauce perfectly.
- 1 jalapeño, sliced, and seeded if desired: Adds a kick of heat that balances the sweetness.
- 2 cloves garlic, grated: Infuses the dish with aromatic goodness.
- Rice and cilantro, for serving: Perfect accompaniments that complement the dish beautifully.
How to Prepare Sheet Pan Sticky Sweet and Sour Chicken
Cooking the Sheet Pan Sticky Sweet and Sour Chicken is a joyous experience, filled with vibrant colors and enticing aromas. Follow these steps carefully, and you’ll have a delicious meal on the table in no time.
- Preheat your oven to 475° F. Line a baking sheet with parchment paper or lightly grease it with oil. This step ensures that your chicken and veggies won’t stick, making cleanup a breeze.
- In a mixing bowl, add the cubed chicken, beaten egg, and a pinch of pepper. Toss everything together until the chicken is well-coated. In another bowl, mix the flour and ginger. Dredge the chicken pieces in the flour mixture, ensuring an even coating. This will give the chicken a crispy texture when baked.
- Place the coated chicken on one side of the prepared baking sheet. Drizzle 2 tablespoons of oil over it. On the other side, add the broccoli, peppers, and shallots, tossing them with the remaining oil to coat.
- Bake everything in the preheated oven for 15 minutes, allowing the chicken to start cooking and the veggies to soften slightly.
- While the chicken and veggies are roasting, prepare the sauce. In a medium saucepan over medium-high heat, combine the sweet Thai chili sauce, soy sauce, apple juice, rice vinegar, ketchup, peanut butter, jalapeño, and grated garlic. Bring the mixture to a boil, stirring frequently.
- Allow the sauce to boil for 5 to 8 minutes until it thickens and reduces by about one-third. Remove it from the heat once it reaches your desired consistency.
- Once the 15 minutes are up, take the baking sheet out of the oven. Pour half of the thickened sauce over the chicken, tossing it gently to ensure even coverage. Toss the veggies as well, making sure they are nicely coated.
- Return the baking sheet to the oven and lower the temperature to 400° F. Bake for an additional 3 minutes, just until the sauce caramelizes and clings beautifully to the chicken. Keep a close eye on it, as the sauce can burn easily.
- When done, remove the baking sheet from the oven. Serve the chicken over bowls of fluffy rice, drizzling with the remaining sauce. Top with fresh cilantro, and serve the roasted veggies on the side.
Things Worth Knowing
- Watch the sauce: When baking with the sauce, make sure to watch it closely during the final minutes. It can easily burn if left unattended.
- Prep your ingredients: Have all your vegetables chopped and ready to go before you start cooking. This keeps the process smooth and enjoyable.
- Experiment with vegetables: Feel free to switch up the vegetables based on what you have at home. Carrots, snap peas, or even zucchini would work well!
- Adjust spice levels: If you prefer a milder dish, you can reduce or omit the jalapeño. For those who like it spicy, add more!
Variations to Try
If you’re looking to change things up, the Sheet Pan Sticky Sweet and Sour Chicken can easily be customized to fit your taste or dietary needs. Here are some ideas:
- Storage: Leftover Sheet Pan Sticky Sweet and Sour Chicken can be stored in an airtight container in the fridge for up to 3 days. Reheat in the oven for the best texture.
- Freezing: You can freeze the cooked chicken and veggies in a freezer-safe container for up to 3 months. Thaw in the fridge overnight before reheating.
- Pairing: Serve with a side of steamed rice, quinoa, or even cauliflower rice for a lower-carb option.
- Colorful Veggies: Add more colors to your dish by incorporating assorted bell peppers or even some snap peas for crunch.
- Protein Alternatives: Swap the chicken for tofu or shrimp for different flavor profiles. Adjust cooking times accordingly.
- Seasonal Ingredients: Utilize seasonal vegetables to keep the dish fresh and exciting. Asparagus in spring or roasted root vegetables in fall can add variety.
How to Enjoy Sheet Pan Sticky Sweet and Sour Chicken
Enjoying the Sheet Pan Sticky Sweet and Sour Chicken is all about presentation and pairing it with the right accompaniments. Here are some ideas to make your meal even more delightful:
- Serve over rice: A generous serving of fluffy white or brown rice is perfect for soaking up the delicious sauce.
- Garnish with cilantro: Fresh cilantro adds a burst of flavor and freshness, enhancing the overall dish.
- Pair with a salad: A light cucumber or Asian slaw will complement the rich flavors of the chicken.
- Meal prep friendly: This dish is fantastic for meal prep; make a large batch and portion it out for easy lunches throughout the week.
- Perfect for gatherings: The Sheet Pan Sticky Sweet and Sour Chicken is great for family dinners or casual gatherings, allowing everyone to serve themselves.
- Enjoy with a drink: Pair this meal with a refreshing lemon iced tea or coconut water for a tropical twist.
FAQ
Conclusion
The Sheet Pan Sticky Sweet and Sour Chicken is a delightful meal that brings together bold flavors, vibrant colors, and simple preparation. It’s perfect for busy nights or special family gatherings, making it a true staple in any kitchen. I encourage you to try this recipe tonight—your family will thank you, and you might just find it becoming a favorite as well.
Sheet Pan Sticky Sweet and Sour Chicken
Ingredients
Equipment
Method
- Preheat your oven to 475° F. Line a baking sheet with parchment paper or lightly grease it with oil. This step ensures that your chicken and veggies won’t stick, making cleanup a breeze.
- In a mixing bowl, add the cubed chicken, beaten egg, and a pinch of pepper. Toss everything together until the chicken is well-coated. In another bowl, mix the flour and ginger. Dredge the chicken pieces in the flour mixture, ensuring an even coating. This will give the chicken a crispy texture when baked.
- Place the coated chicken on one side of the prepared baking sheet. Drizzle 2 tablespoons of oil over it. On the other side, add the broccoli, peppers, and shallots, tossing them with the remaining oil to coat.
- Bake everything in the preheated oven for 15 minutes, allowing the chicken to start cooking and the veggies to soften slightly.
- While the chicken and veggies are roasting, prepare the sauce. In a medium saucepan over medium-high heat, combine the sweet Thai chili sauce, soy sauce, apple juice, rice vinegar, ketchup, peanut butter, jalapeño, and grated garlic. Bring the mixture to a boil, stirring frequently.
- Allow the sauce to boil for 5 to 8 minutes until it thickens and reduces by about one-third. Remove it from the heat once it reaches your desired consistency.
- Once the 15 minutes are up, take the baking sheet out of the oven. Pour half of the thickened sauce over the chicken, tossing it gently to ensure even coverage. Toss the veggies as well, making sure they are nicely coated.
- Return the baking sheet to the oven and lower the temperature to 400° F. Bake for an additional 3 minutes, just until the sauce caramelizes and clings beautifully to the chicken. Keep a close eye on it, as the sauce can burn easily.
- When done, remove the baking sheet from the oven. Serve the chicken over bowls of fluffy rice, drizzling with the remaining sauce. Top with fresh cilantro, and serve the roasted veggies on the side.
Notes
- Tip 1: Leftover Sheet Pan Sticky Sweet and Sour Chicken can be stored in an airtight container in the fridge for up to 3 days. Reheat in the oven for the best texture.
- Tip 2: You can freeze the cooked chicken and veggies in a freezer-safe container for up to 3 months. Thaw in the fridge overnight before reheating.
- Tip 3: Serve with a side of steamed rice, quinoa, or even cauliflower rice for a lower-carb option.
- Tip 4: Add more colors to your dish by incorporating assorted bell peppers or even some snap peas for crunch.
- Tip 5: Swap the chicken for tofu or shrimp for different flavor profiles. Adjust cooking times accordingly.
- Tip 6: Utilize seasonal vegetables to keep the dish fresh and exciting. Asparagus in spring or roasted root vegetables in fall can add variety.