Pressure Cooker Korean Beef Bulgogi
The Pressure Cooker Korean Beef Bulgogi is one of those meals that can instantly transport you to the streets of Seoul, where the aroma of grilled beef fills the air. I remember the first time I tried bulgogi—it was at a bustling food market, where every bite was infused with flavors that danced across my palate. Fast forward to today, and I’ve made it my mission to recreate that experience in my own kitchen. This recipe allows me to whip up tender, marinated beef in a fraction of the time, thanks to the magic of a pressure cooker. It’s become a go-to for busy weeknights or when I want to impress guests without spending hours in the kitchen.
Using the pressure cooker not only speeds up the cooking process but also locks in all the delicious flavors of the marinade. I love how the combination of creamy sesame oil, sweet coconut sugar, and spicy gochugang sauce melds together to create a mouthwatering glaze that clings to each piece of beef. Whether you’re serving it over a bed of steamed rice or alongside some fresh vegetables, this dish is sure to satisfy any craving. And let’s be honest, who doesn’t love a meal that can be made so quickly yet tastes like it simmered all day?
So, if you’re looking to spice up your dinner routine or impress your family with a taste of Korean cuisine, give this Pressure Cooker Korean Beef Bulgogi a try. You won’t be disappointed!
Recipe Snapshot
30 mins
10 mins
20 mins
Easy
350 kcal
32 g
Whole30, Vegan, Gluten-Free
15 g
Instant Pot, Baking Sheet, Grater, Peeler, Chef’s Knife, Wooden Spoon
Why This Pressure Cooker Korean Beef Bulgogi Stands Out
It’s Incredibly Flavorful
The first reason I adore this Pressure Cooker Korean Beef Bulgogi is its rich and layered flavor profile. The marinade combines beef broth, garlic, and ginger to create a depth that is simply irresistible. Each bite bursts with sweet, savory, and spicy notes that keep you coming back for more.
Quick and Easy
In today’s fast-paced world, time is precious. This recipe allows you to enjoy a homemade meal without spending hours in the kitchen. With just a few simple steps, you’ll have a delicious dinner ready in under an hour, making it perfect for busy weeknights.
Versatile Serving Options
Another thing I love about this recipe is its versatility. You can serve the bulgogi with steamed rice, fried rice, or even cauliflower rice for a low-carb option. Add some fresh vegetables on the side, and you’ve got a well-rounded meal that everyone will enjoy.
Perfect for Meal Prep
If you’re like me and enjoy meal prepping, this Pressure Cooker Korean Beef Bulgogi is a fantastic choice. It reheats beautifully, making it a great option for lunches throughout the week. Just portion it out after cooking, and you’ll have satisfying meals ready to go.
A Taste of Korean Cuisine
This dish is not just a meal; it’s an experience that introduces you to the vibrant flavors of Korean culture. It’s a great way to explore new cuisines and impress friends with your cooking skills!
What Goes Into Pressure Cooker Korean Beef Bulgogi
The ingredients for Pressure Cooker Korean Beef Bulgogi are a harmonious blend that creates an unforgettable dish. Each component plays a vital role in bringing out the savory and sweet flavors that are characteristic of Korean cuisine. The star of the show, of course, is the beef, which becomes incredibly tender in the pressure cooker. The use of ginger and garlic adds warmth, while the coconut sugar and gochugang sauce provide that signature Korean kick. Together, they come together for a meal that’s both comforting and exciting.
- 1/2 cup beef broth – This adds moisture and depth to the dish.
- 1/3 cup liquid aminos – A soy sauce alternative that delivers a rich umami flavor.
- 1/4 cup coconut sugar – A natural sweetener that balances the savory notes.
- 2 tbsp pure maple syrup – Adds a hint of sweetness and enhances the overall flavor.
- 4 cloves garlic minced – Essential for that aromatic base.
- 1 tbsp sesame oil – Provides a nutty flavor and richness.
- 1 tbsp rice vinegar – Adds acidity to balance the sweetness.
- 1 tbsp fresh ginger peeled and grated – Offers a warm spice that complements the beef.
- 1 tbsp gochugang sauce – This Korean chili paste brings heat and depth.
- 3 lbs beef chuck roast chopped into 1-inch cubes – The main ingredient that soaks up all the flavors.
- 3 tbsp tapioca flour – Helps thicken the sauce for a perfect consistency.
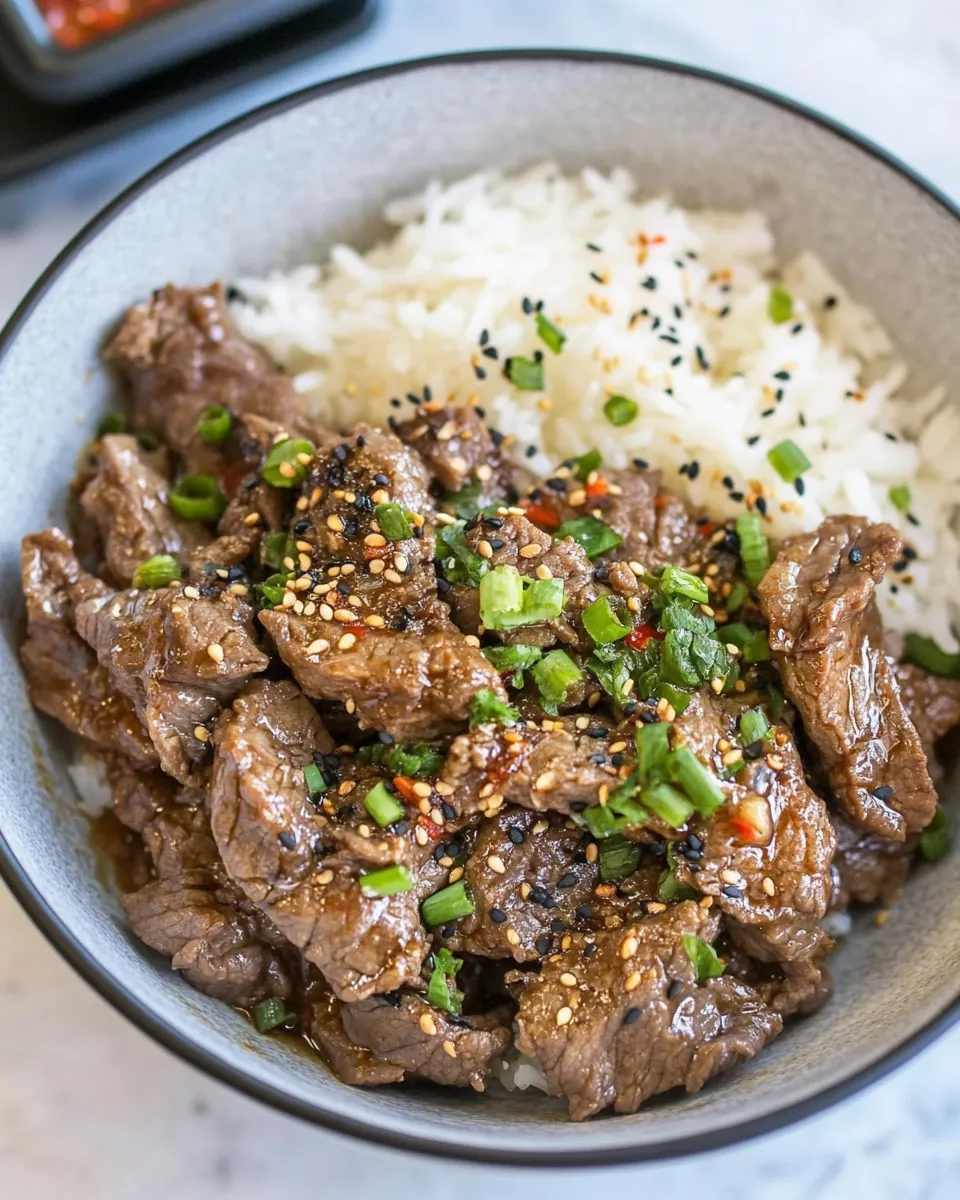
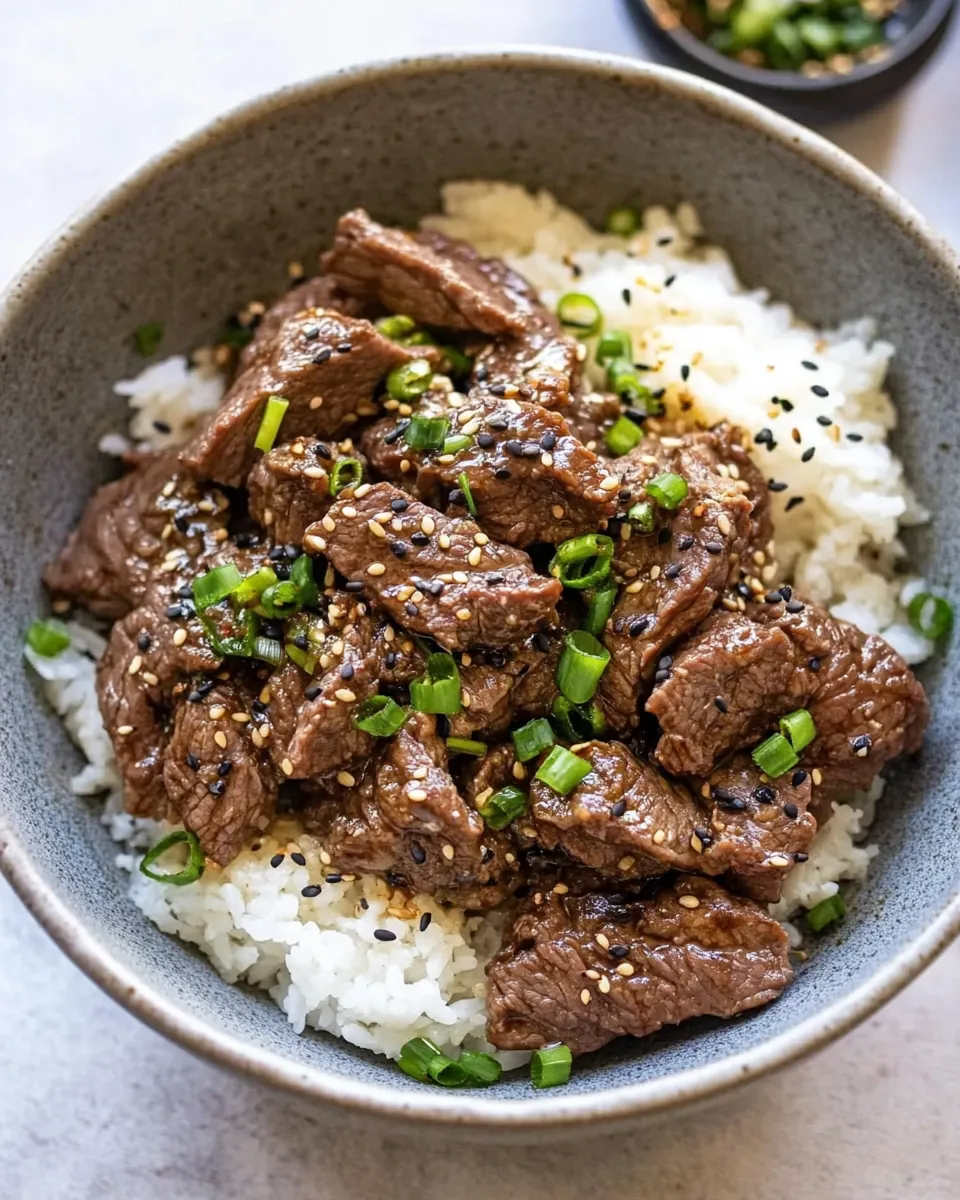
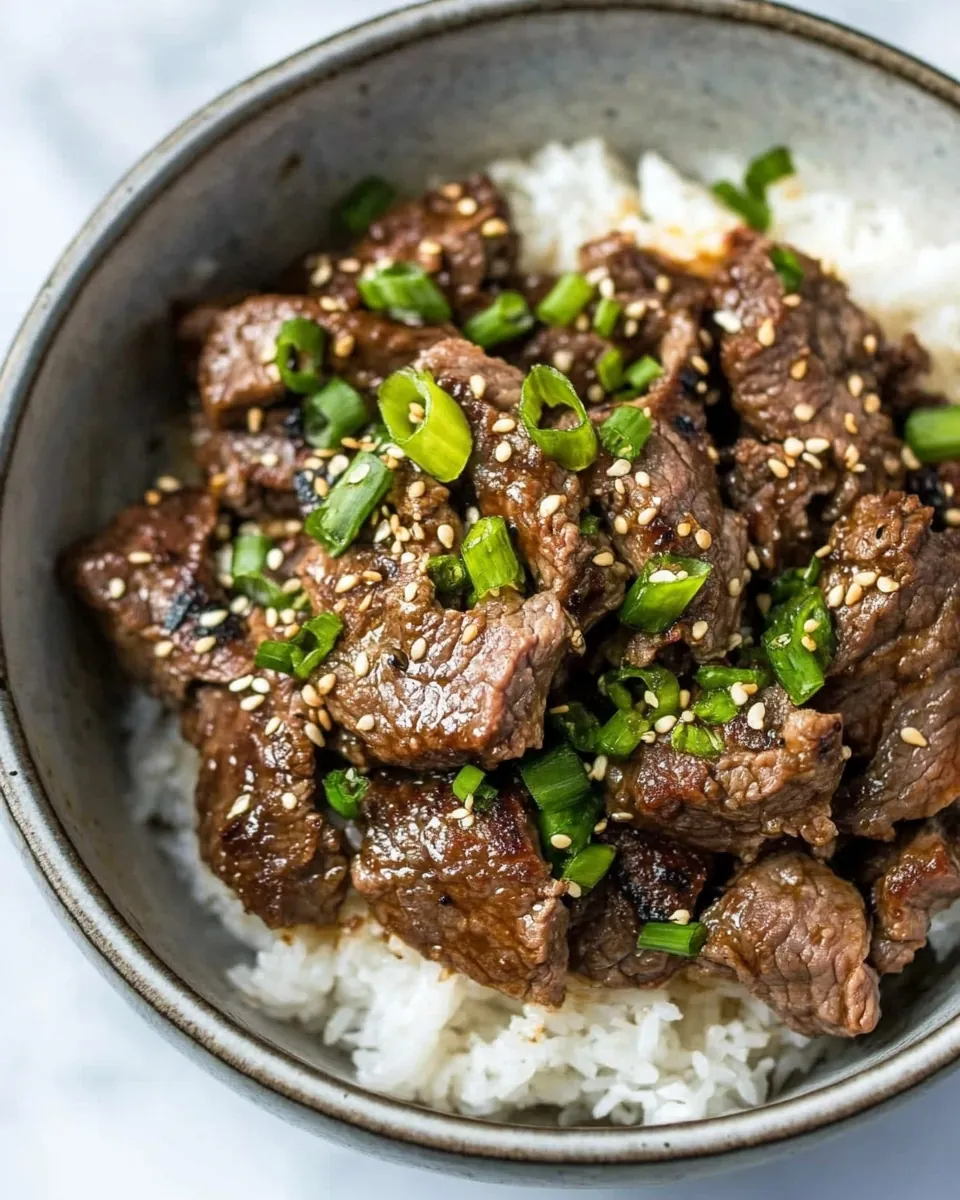
- 1 tsp sesame seeds – Used as a garnish for added texture.
- 2 green onions chopped – Freshness and color to elevate the dish.
- Cooked white rice for serving – A perfect base for the bulgogi.
Directions for Pressure Cooker Korean Beef Bulgogi
Making this Pressure Cooker Korean Beef Bulgogi is a breeze! The pressure cooker does all the heavy lifting, so you can focus on enjoying the process. Follow these steps, and soon you’ll have a delicious meal ready to serve.
- Start by stirring together the beef broth, liquid aminos, coconut sugar, pure maple syrup, garlic, sesame oil, rice vinegar, ginger, and gochugang sauce in a bowl. Make sure everything is well combined to create a flavorful marinade for the beef.
- Next, plug in your pressure cooker and add the chopped beef. Pour the marinade over the meat and stir well, ensuring every piece is coated in that delicious sauce.
- Secure the lid of the pressure cooker, press the Manual Pressure button, and set the timer to fifteen minutes. Don’t forget to leave the steam release valve sealed during this time!
- Once the pressure cooker has completed its cycle, carefully open the lid. You should see beautifully cooked beef that’s absorbed all those wonderful flavors.
- Add the tapioca flour and sesame seeds to the pot. This will help thicken the sauce. Press the Saute button and cook, stirring occasionally for about three to five minutes, or until the sauce has thickened to your liking.
- Finally, serve the bulgogi with a side of steamed rice, fried rice, or even cauliflower rice if you’re looking for a low-carb option. Garnish with extra green onions for a fresh touch!
Things Worth Knowing
- Cooking Time: The pressure cooker significantly reduces the cooking time compared to traditional methods, making it a great option for quick dinners.
- Marination: Letting the beef marinate for a few hours or overnight will enhance the flavors even more, though it’s not mandatory.
- Texture: Look for the beef to be fork-tender once cooked. It should not be chewy.
- Sauce Consistency: Adjust the amount of tapioca flour based on your preference for a thicker or thinner sauce.
Recipe Variations about Pressure Cooker Korean Beef Bulgogi
If you’re excited to try different versions of the Pressure Cooker Korean Beef Bulgogi, you’re in for a treat! There are plenty of ways to switch it up and keep things interesting.
- Vegetable Additions: Feel free to add in some bell peppers, carrots, or broccoli during the cooking process for a well-rounded meal.
- Different Cuts of Beef: You can experiment with other cuts, like sirloin or flank steak, for different textures and flavors.
- Spicy Variation: For those who like it hot, increase the amount of gochugang sauce or add some chili flakes to kick up the heat.
- Sweetness Level: Adjust the coconut sugar to suit your taste. You can make it sweeter or less sweet depending on your preferences.
- Low-FODMAP Option: If you’re sensitive to garlic or onion, simply omit them and add a splash of lime juice for acidity.
- Serving Alternatives: Serve the bulgogi with lettuce wraps or in a bowl with quinoa for a different twist.
Perfect Matches for Pressure Cooker Korean Beef Bulgogi
When it comes to serving this Pressure Cooker Korean Beef Bulgogi, the options are plentiful! Here are some great pairings that will elevate your meal.
- Steamed Rice: This is a classic pairing, as the rice soaks up the delicious sauce perfectly.
- Fried Rice: For a more filling option, serve the bulgogi atop a bed of savory fried rice.
- Cauliflower Rice: A fantastic low-carb alternative that still delivers great flavor.
- Grilled Vegetables: Add some grilled zucchini, peppers, or asparagus on the side to complement the dish.
- Korean Side Dishes: Include kimchi or pickled vegetables for a traditional touch.
- Salad: A fresh cucumber salad adds crunch and balances the richness of the beef.
- Occasions: This dish is perfect for casual dinners, family gatherings, or special occasions!
FAQ
Conclusion
The Pressure Cooker Korean Beef Bulgogi is a remarkable dish that brings together rich flavors and tender meat in a quick and easy format. It’s perfect for busy nights or special gatherings, allowing you to savor authentic Korean cuisine from the comfort of your home. I encourage you to give this recipe a try and experience the delightful taste of bulgogi for yourself. You won’t regret it!

Pressure Cooker Korean Beef Bulgogi
Ingredients
Equipment
Method
- Stir together the beef broth, coconut aminos, coconut sugar, pure maple syrup, garlic, sesame oil, rice vinegar, ginger, and gochugang to a bowl.
- Plug in your Crock-Pot Pressure Cooker and add the chopped beef. Pour the sauce over the beef and stir. Secure the lid, press Manual Pressure, and set the time to 15 minutes. Leave the steam release valve sealed.
- Once the pressure cooker has finished its cycle, open the lid and add in the tapioca flour and sesame seeds. Press the Saute button and cook, stirring occasionally, until sauce has thickened, about 3 to 5 minutes.
- Serve Korean bulgogi beef with choice of steamed rice, fried rice, or cauliflower rice.
Notes
- Tip: If you're very sensitive to garlic and onion, make the recipe Low-FODMAP by omitting the onion and garlic.
- Tip: You can add 1 to 2 tablespoons of lime juice to round out the flavor and bring some tang to the dish.
- Tip: Serve with choice of rice or cauliflower rice.