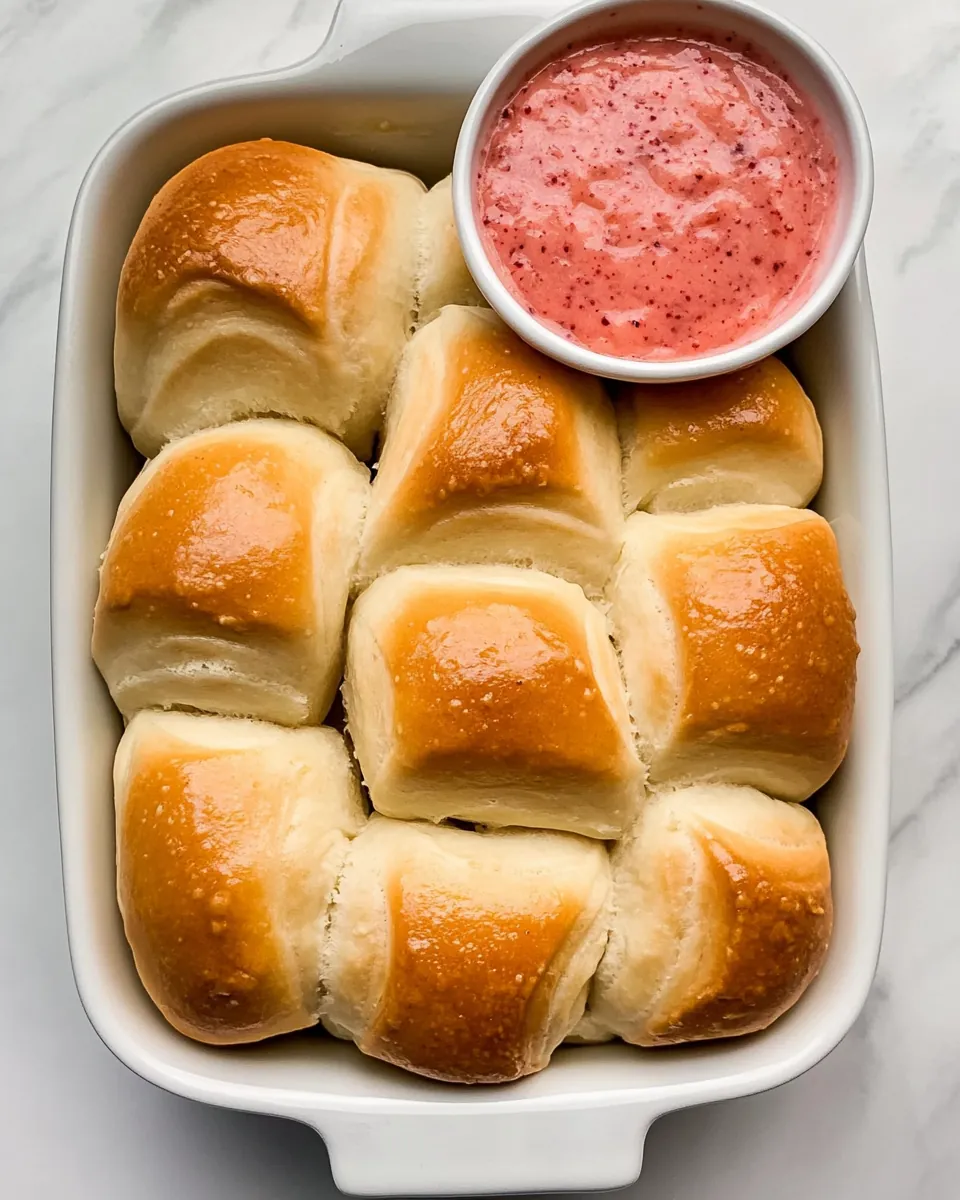
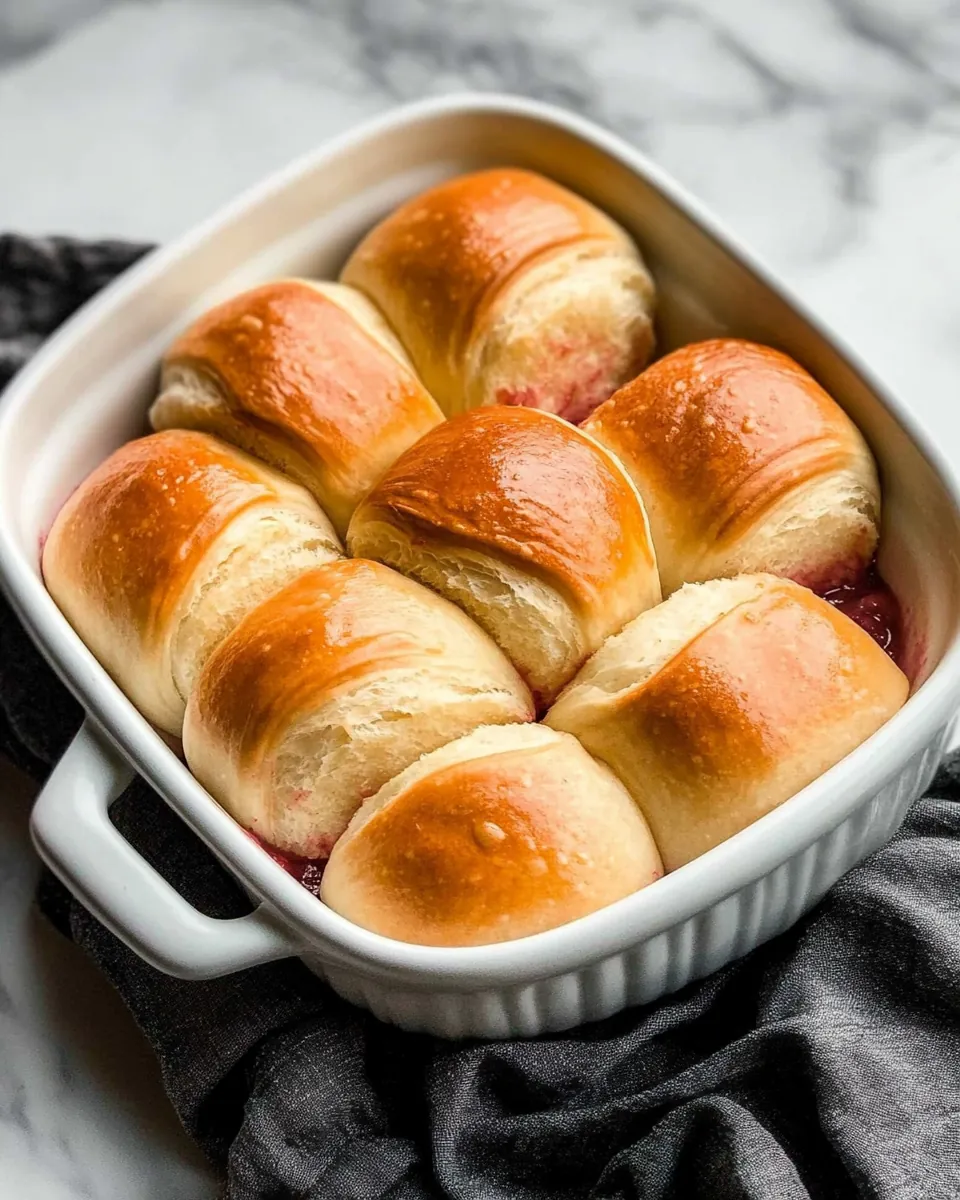
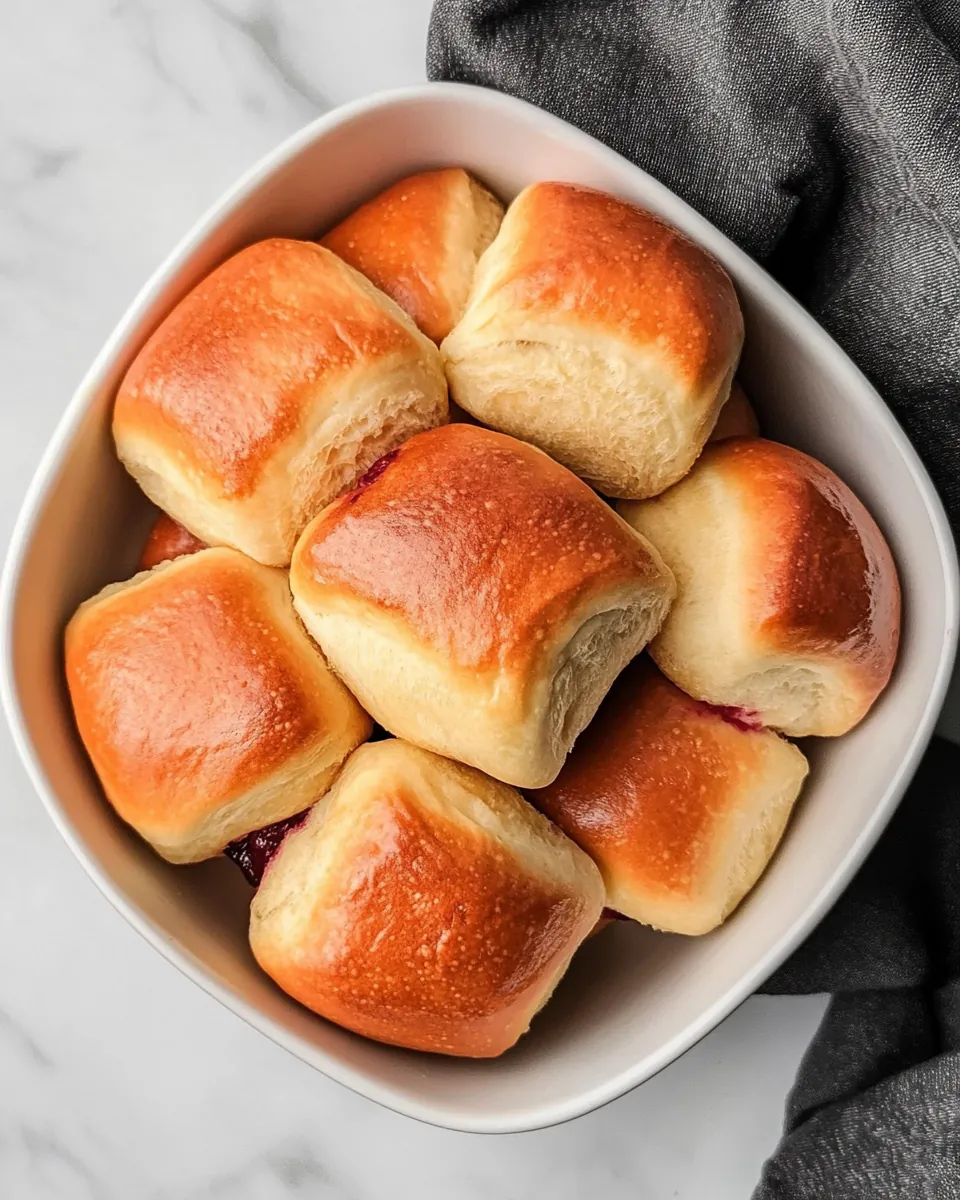
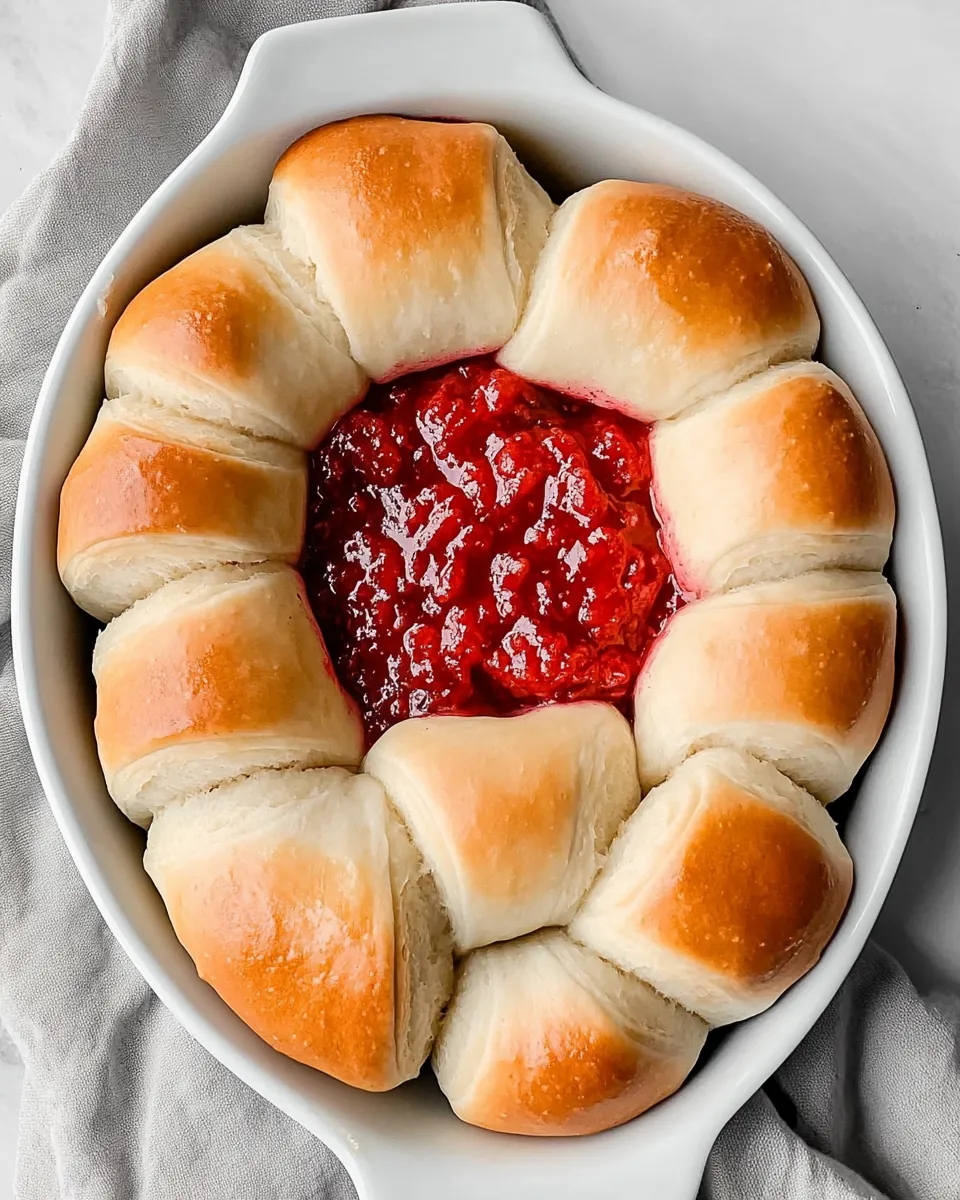
Parker House Rolls
The Parker House Rolls hold a special place in my heart, often reminding me of family gatherings and holiday feasts. Growing up, my grandmother always had these soft, buttery rolls ready on the table, their golden tops glistening and a faint warmth radiating from them. The moment you broke one apart, the aroma of freshly baked bread would fill the room, beckoning everyone to come and enjoy. I can still hear the laughter and chatter, the clinking of silverware, and the delightful anticipation of that first bite. There’s something so comforting about the Parker House Rolls; they embody warmth, love, and shared moments. Even as an adult, I whip up a batch when I want to bring a little nostalgia into my kitchen. You can be sure that these rolls will elevate any meal, whether it’s a casual Sunday dinner or a fancy holiday feast. Let me take you on a journey through my version of this cherished recipe.
Recipe Snapshot
60 mins
45 mins
15 mins
Hard
120 kcal
3 g
Paleo, Whole30, Vegan
5 g
Baking Sheet, Wooden Spoon, Mixing Bowl, Oven
What Sets This Parker House Rolls Apart
Perfect for Any Occasion
One of the best attributes of Parker House Rolls is their versatility. They fit seamlessly into any meal, whether it’s an elegant dinner party or a cozy family gathering. They can serve as a delightful appetizer, a side dish, or even a light snack on their own.
Unforgettable Texture
The texture of these rolls is simply unmatched. They’re soft, pillowy, and slightly chewy, making each bite a pleasure. The rich, buttery flavor perfectly complements their tender crumb, creating a balance that’s hard to resist.
Easy to Customize
While the classic Parker House Rolls are fantastic on their own, they also offer a blank canvas for creativity. You can easily incorporate herbs or cheeses to give them a unique twist or serve them warm with flavored butters for an added touch of indulgence.
Make Ahead Convenience
One of the things I love about this recipe is that it allows for some prep flexibility. You can prepare the dough ahead of time and let it rise overnight in the fridge. This makes it perfect for busy days, as you can simply shape and bake them when you’re ready. Fresh rolls, with minimal stress!
Ideal for Sharing
There’s a sense of joy in sharing Parker House Rolls with friends and family. The act of pulling apart the rolls and passing them around the table fosters a sense of togetherness that enhances any meal. It’s a simple way to create cherished memories.
Main Ingredients for Parker House Rolls
When it comes to baking, the right ingredients make all the difference. For Parker House Rolls, the foundational components work in harmony to create that perfect texture and flavor. Each ingredient plays a significant role in the overall taste and quality of the rolls, from the flour that provides structure to the yeast that gives them that delightful rise. Let’s dive into the key players!
- All-Purpose Flour: The backbone of the rolls, it provides the necessary structure. A good flour will yield a light and fluffy texture, crucial for these soft delights.
- Sugar: Just a touch of sweetness enhances the flavor and helps activate the yeast, contributing to that golden crust.
- Yeast: Essential for that lovely rise, yeast introduces air pockets, making the rolls light and airy. RapidRise yeast is a convenient choice for quicker preparation.
- Salt: A key ingredient that enhances flavor, salt also regulates yeast activity, ensuring the rolls don’t rise too quickly.
- Milk: Adds richness and moisture, contributing to the soft texture. It also helps in browning the rolls as they bake.
- Water: Vital for activating the yeast and hydrating the dough, water is the unsung hero of this recipe.
- Butter: The fat in these rolls brings a rich flavor and tender crumb, making each bite a little piece of heaven.
- Egg: Acts as a binding agent and contributes to the golden color of the crust.
- Buttermilk: Used for brushing the rolls, it adds a touch of tanginess and enhances the overall flavor.
Putting Together Parker House Rolls
Baking Parker House Rolls is a delightful process that brings the warmth of home into your kitchen. Let’s walk through the steps together to ensure your rolls come out perfectly every time. Follow these easy instructions, and you’ll be enjoying warm, fluffy rolls in no time!
- Start by combining 2 cups of flour, sugar, undissolved yeast, and salt in a large mixer bowl. This mixture is the foundation for your rolls and will give them the beautiful rise we’re aiming for. Make sure to mix these dry ingredients well so that the yeast activates properly.
- In a saucepan, heat milk, water, and butter until it reaches a temperature between 120 to 130 degrees F. This warm mixture will help activate the yeast, making your rolls fluffy and light. You can use a kitchen thermometer to check the temperature, ensuring it’s warm but not too hot to kill the yeast.
- Once the liquid ingredients are warmed, stir them into the flour mixture. Beat this mixture at medium speed for about 2 minutes, scraping down the bowl occasionally. This step is crucial in developing the gluten needed for a great structure.
- Add egg and 1/2 cup more flour to the mixture. Beat again at high speed for another 2 minutes. The batter will start to come together, creating a soft dough that’s slightly sticky.
- Next, gradually stir in enough remaining flour to create a soft dough. You want it to be pliable but not overly sticky. Take your time with this step, and remember that the exact amount of flour can vary based on humidity and other factors.
- Now it’s time to knead the dough! Turn it out onto a lightly floured surface and knead for about 8 to 10 minutes. You’re looking for the dough to become smooth and elastic, which indicates that the gluten is well developed.
- Once kneaded, cover the dough and let it rest for about 10 minutes. This resting period allows the gluten to relax, making it easier to roll out.
- (Optional) If you prefer, you can place the dough in a greased bowl, cover it with plastic wrap, and let it rise in the refrigerator for 12 to 24 hours. This slow rise develops flavor and texture.
- After resting, divide the dough in half. Roll each half into a 12-inch square, about 1/4 inch thick. Use a rolling pin and ensure your surface is lightly floured to prevent sticking.
- With a pizza cutter, cut each square into 6 strips, then cut each strip into 3 rectangles. Now you have the classic roll shapes ready to form!
- Brush each rectangle with melted butter, creasing each one slightly off-center with the dull edge of a knife and folding at the crease. This step is what gives Parker House Rolls their lovely folded shape.
- Arrange the folded rolls in rows on greased baking sheets, overlapping them slightly, and allow about 1/4 inch of space between each. Cover them and let them rise in a warm, draft-free place until they double in size, which should take about 30 minutes.
- Preheat your oven to 400 degrees F. Once the rolls have risen, bake them for about 13 to 15 minutes or until they are golden brown and cooked through. They should smell incredible!
- Once baked, remove them from the sheets and cool them on a wire rack. Brush the tops with 1/4 cup of melted butter for that irresistible finish. Serve warm and enjoy!
Things Worth Knowing
- Check the Yeast: Always ensure your yeast is fresh and active. If it’s expired, your rolls may not rise properly.
- Proper Folding: When folding the rolls, make sure to create a nice crease, as it helps them hold their shape during baking.
- Warm Environment: Let the rolls rise in a warm, draft-free space. This helps the yeast work effectively, resulting in a good rise.
- Testing Doneness: The rolls are done when they are golden brown on top. You can tap the bottom for a hollow sound indicating they are baked through.
Tips for Success
To help you achieve perfect Parker House Rolls, here are some essential tips that can make all the difference in your baking experience:
- Storage: Keep leftover rolls in an airtight container at room temperature for up to 2 days. If they become a bit stale, you can reheat them in the oven for a few minutes.
- Freezing: If you want to make a large batch, these rolls freeze beautifully! Just wrap them tightly in plastic wrap and foil, and they can last for up to 3 months in the freezer.
- Pairing: These rolls are fantastic with soups, salads, or roasted meats. They make a great accompaniment to any meal.
- Herbed Variations: Consider adding herbs like rosemary or thyme to the dough for an aromatic twist on the classic flavor.
- Butter Brushing: Brushing the rolls with melted butter right after baking gives them a gorgeous shine and extra flavor.
Side Dish Ideas for Parker House Rolls
When it comes to serving Parker House Rolls, the possibilities are endless. Here are some delicious side dish ideas that pair beautifully:
- Butternut Squash Soup: The creamy texture and sweet flavors of butternut squash soup complement the buttery rolls perfectly.
- Garlic Mashed Potatoes: Rich and creamy mashed potatoes served alongside these fluffy rolls create a comforting plate.
- Caesar Salad: A fresh Caesar salad adds a nice crunch and balances the richness of the rolls.
- Roasted Vegetables: Seasonal roasted vegetables provide a colorful and healthful accompaniment.
- Holiday Dinners: Serve these rolls with turkey or ham during special occasions like Thanksgiving or Christmas, adding warmth to your festive table.
- Brunch Buffets: Perfect for brunch, pair them with eggs and fresh fruit for a delightful start to the day.
- Storage Tips: Always keep your rolls covered to maintain their softness, and consider freezing extras for future meals.
FAQ
Conclusion
The Parker House Rolls are truly a delightful addition to any meal, bringing warmth and comfort to the table. Their soft, buttery goodness is hard to resist and makes them a favorite for family gatherings and special occasions. I encourage you to try making these rolls; they’re easier than they might seem and the joy they bring is absolutely worth it. You’ll find yourself reaching for these delightful rolls time and again!
Parker House Rolls
Ingredients
Equipment
Method
- Combine 2 cups flour, sugar, undissolved yeast and salt in a large mixer bowl.
- Heat milk, water, and 1/4 cup butter until very warm (120 to 130 degrees F).
- Stir into flour mixture.
- Beat 2 minutes at medium speed of electric mixer, scraping bowl occasionally.
- Add egg and 1/2 cup flour; beat 2 minutes at high speed.
- Stir in enough remaining flour to make a soft dough.
- Knead on lightly floured surface until smooth and elastic, about 8 to 10 minutes.
- Cover; let rest 10 minutes.
- Divide dough in half; roll each half to a 12-inch square, about 1/4-inch thick.
- Cut each into 6 (12 x 2-inch) strips.
- Cut each strip into 3 (4 x 2-inch) rectangles.
- Brush each rectangle with melted butter.
- Crease rectangles slightly off center with dull edge of knife and fold at crease.
- Arrange in rows, slightly overlapping, on greased baking sheets.
- Cover; let rise in warm, draft-free place until doubled in size, about 30 minutes.
- Bake in preheated 400 degrees F oven for 13 to 15 minutes or until done.
- Remove from sheets; cool on wire rack.
- Brush with 1/4 cup melted butter.
Notes
- Makes about 1 1/2 cups: This recipe yields a generous amount of rolls, perfect for sharing or freezing for later.