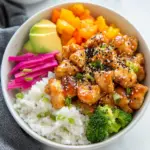
Panko Chicken
There’s something undeniably satisfying about a crispy, golden piece of chicken, and Panko Chicken delivers just that! I remember the first time I made this dish; it was a busy weeknight, and I was craving something delicious yet simple. The thought of juicy chicken coated in crunchy panko breadcrumbs was enough to make my mouth water. As the aroma filled my kitchen, I couldn’t help but feel excited about the meal ahead. What I love most about Panko Chicken is not only its incredible texture but also its versatility. It’s perfect for a family dinner or a cozy night in, leaving everyone asking for seconds. Whether served with a side of vegetables or on a bed of fresh salad, this dish never disappoints.
Recipe Snapshot
45 mins
15 mins
30 mins
Medium
350 kcal
24 g
Gluten-Free, Low FODMAP
18 g
Chef’s Knife, Whisk, Grater, Wooden Spoon, Baking Sheet, Mixing Bowl, Frying Pan, Skillet, Oven
What’s Great About This Panko Chicken
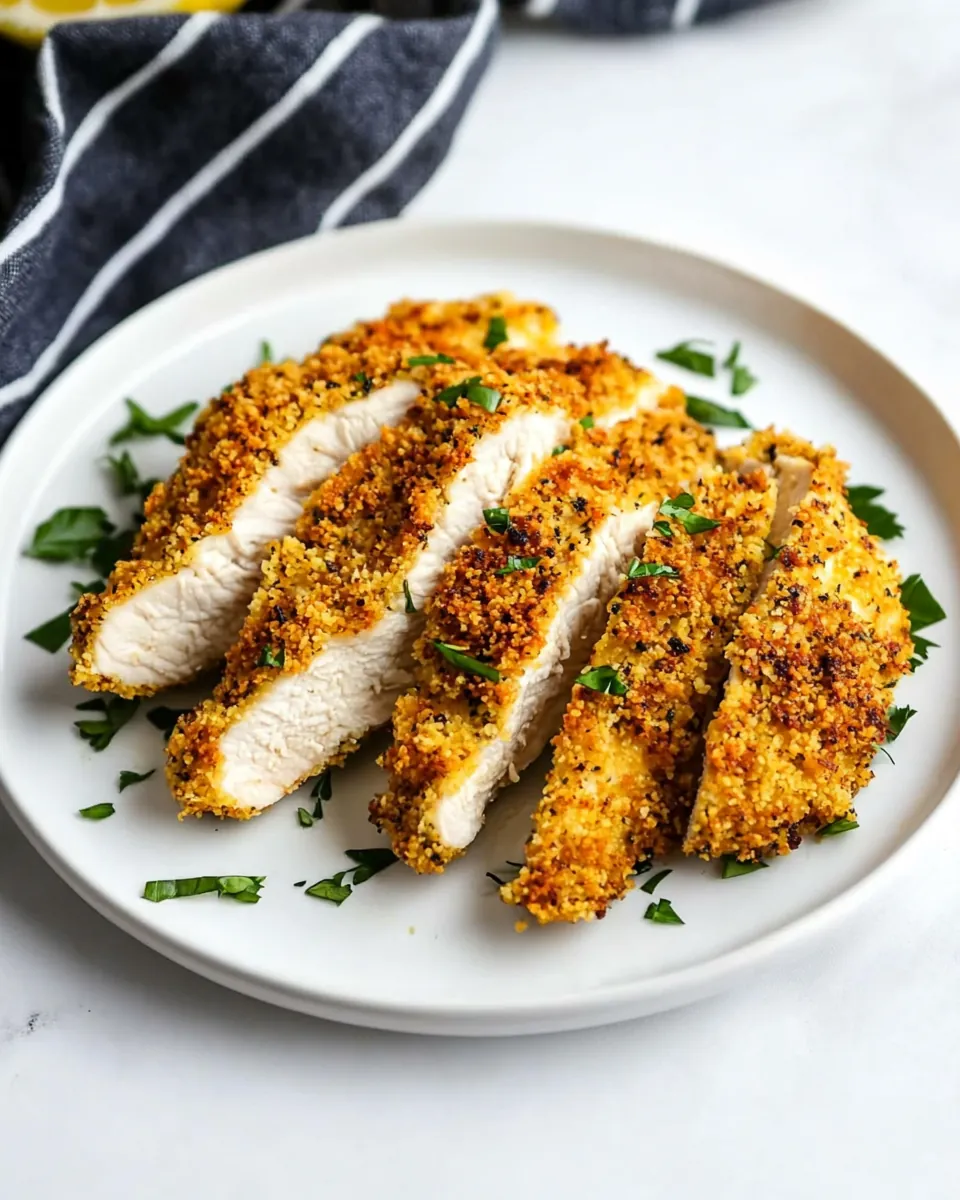
Crispy Texture
One of the standout features of Panko Chicken is its superb crunch. The panko breadcrumbs create a light, airy crust that’s simply irresistible. Unlike regular breadcrumbs, panko is coarser and gives a delightful crunch that elevates the dish.
Simple Ingredients
Another reason to love this recipe is how simple the ingredients are. You likely already have everything you need in your pantry. With just a few staple items, you can whip up a meal that feels gourmet without the fuss.
Quick Prep and Cook Time
This dish is incredibly quick to prepare and cook. In about thirty minutes, you can have a delicious dinner on the table, making it perfect for busy weeknights when time is of the essence.
Family-Friendly
Panko Chicken is a hit with both kids and adults alike. The crispy coating and tender chicken are sure to please even the pickiest eaters, making it a fantastic option for family meals.
Endless Serving Options
This recipe is exceptionally versatile. Serve it alongside some roasted vegetables, a fresh salad, or even in a sandwich. It’s perfect for any occasion, whether it’s a casual meal at home or a more festive gathering.
Customizable
With Panko Chicken, the fun doesn’t stop at just chicken! You can easily customize it with different seasonings or even try it with different proteins, like fish or tofu, making it an adaptable recipe for everyone.
Ingredients Overview for Panko Chicken

Every ingredient in Panko Chicken plays a crucial role in creating that perfect flavor and texture. The rich, buttery taste of the unsalted butter complements the crispy panko breadcrumbs, while the chicken serves as the heart of the dish. Each element works harmoniously to deliver a delightful meal that’s satisfying and tasty.
- 3 tablespoons unsalted butter – This adds richness and helps create a golden, crispy coating.
- 1½ cups Panko breadcrumbs – The star of the dish, these coarser breadcrumbs provide the signature crunch.
- 2 boneless, skinless chicken breasts – The protein base of the recipe, tender and juicy when cooked properly.
- ½ cup all-purpose flour – Used for dredging, it helps the egg mixture adhere to the chicken.
- Kosher salt and freshly ground black pepper – Essential for seasoning and enhancing the overall flavor.
- 2 large eggs – This helps bind the breadcrumbs to the chicken, creating that delicious coating.
- 2 teaspoons Dijon mustard – Adds a subtle tanginess to the dish.
- 1-2 dashes hot sauce (optional) – For those who like a bit of heat.
- ¼ cup freshly grated Parmesan cheese – A flavor enhancer that adds a nice depth to the breadcrumbs.
- 1 tablespoon Italian seasoning – This brings aromatic flavors to the dish.
- ½ teaspoon garlic powder – A subtle garlic flavor that complements the chicken.
- ½ teaspoon ground paprika – Adds a smoky note and a lovely color.
How to Make Panko Chicken
Making Panko Chicken is a breeze and a fun process. Follow my detailed steps to achieve perfectly crispy chicken every time. Trust me, once you get the hang of it, this will become a go-to recipe in your kitchen!
- Preheat your oven to 400°F. Prepare a baking sheet by placing a wire rack over it. This allows air to circulate around the chicken, ensuring a crisp coating.
- In a medium nonstick skillet, melt 3 tablespoons of unsalted butter over medium heat. Once melted, add in 1½ cups of Panko breadcrumbs to the skillet. Toast the breadcrumbs, stirring often, until they turn a beautiful golden brown. This step is essential for achieving that perfect crunch!
- Once toasted, transfer the Panko to a large shallow bowl and set aside to cool. This cooling step prevents the breadcrumbs from cooking the chicken prematurely.
- While the Panko cools, pat the 2 boneless, skinless chicken breasts dry using paper towels. Then slice each breast in half horizontally to create thinner cutlets. Thinner cutlets cook faster and stay juicier.
- In another shallow bowl, combine ½ cup of all-purpose flour with a generous pinch of Kosher salt and freshly ground black pepper. Whisk to combine. This will be your first dredging station.
- In a third shallow bowl, whisk together 2 large eggs, 2 teaspoons of Dijon mustard, and a few dashes of hot sauce (if using). This egg mixture acts as the glue for the breadcrumbs.
- Now, it’s time to dredge! Take one chicken cutlet and first coat it in the flour mixture, shaking off any excess. Next, dip it in the egg mixture, ensuring it’s fully coated.
- Finally, transfer the chicken to the bowl with the toasted Panko. Press the crumbs onto the chicken to help them adhere well. Be generous with the breadcrumbs!
- Place the coated chicken on the wire rack over the baking sheet. Repeat the dredging process with the remaining chicken cutlets.
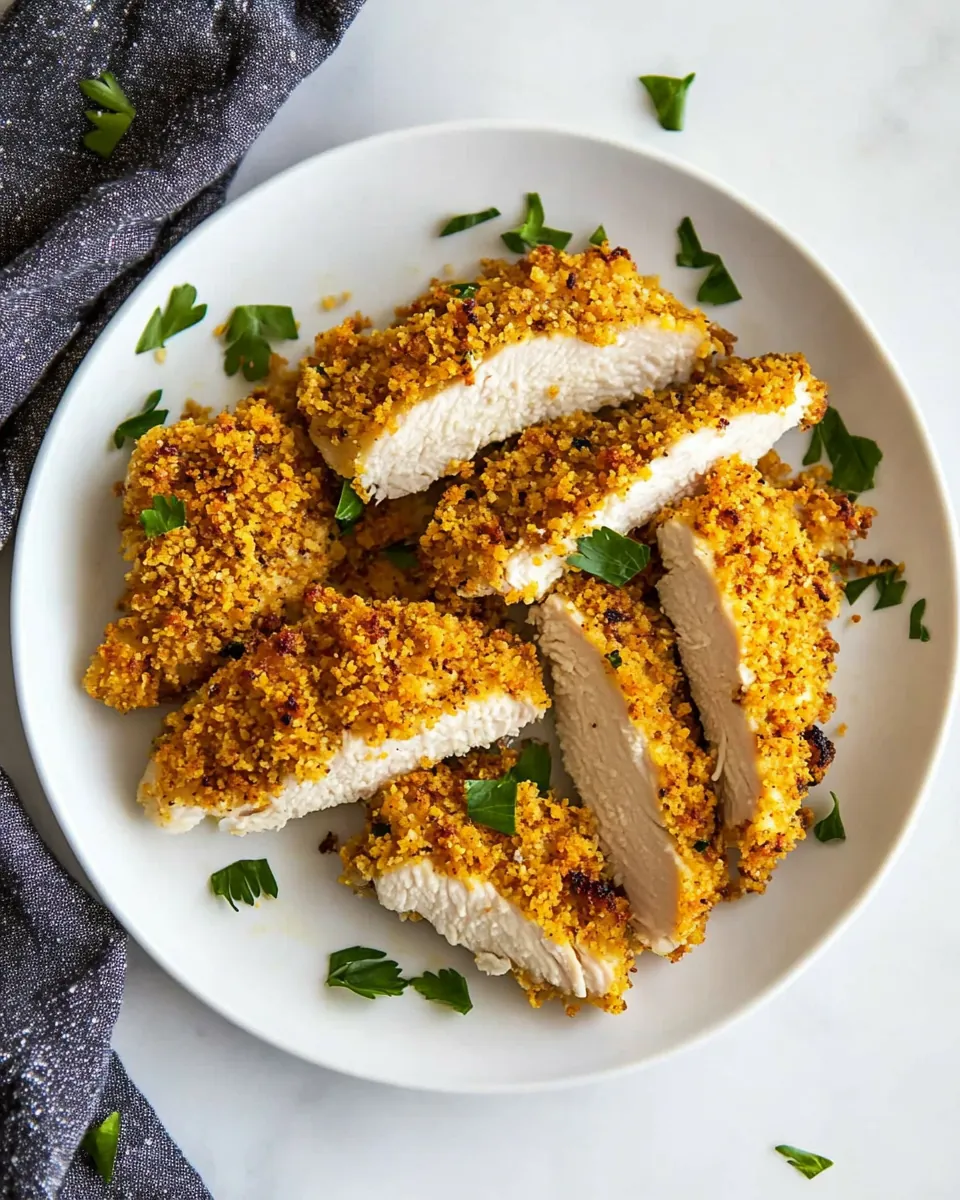
- Bake the chicken in the preheated oven for 15 to 20 minutes or until the chicken is cooked through. The internal temperature should reach 165°F. You’ll know it’s ready when the coating is crispy and golden brown!
- Once done, remove the chicken from the oven and let it rest for a few minutes. Then serve it hot and enjoy your delicious Panko Chicken!
Things Worth Knowing
- Toasting the Panko: Toasting the Panko breadcrumbs not only enhances their flavor but also helps in achieving that perfect crunch. It’s a simple step that makes a world of difference!
- Cooking on a Wire Rack: Using a wire rack allows hot air to circulate around the chicken, preventing it from steaming and keeping it crispy on all sides.
- Chicken Cutlets: Slicing the chicken breasts into cutlets reduces cooking time and ensures a juicier, more tender result. You can also use chicken tenders if you prefer.
- Gluten-Free Adaptation: For a gluten-free version, substitute the all-purpose flour with gluten-free flour and use gluten-free Panko breadcrumbs. This way, you can still enjoy the crispy goodness!
- Flavor Variations: Feel free to experiment with different seasonings in your Panko mix. Adding herbs or spices can elevate the flavor profile of your Panko Chicken.
Tips and Variations
There are so many ways to enjoy Panko Chicken! Here are some tips and variations to help you get creative with this dish:
- Storage: Store any leftover Panko Chicken in an airtight container in the refrigerator for up to three days. To reheat, place it in an oven to maintain its crispiness.
- Freezing: If you want to freeze the cooked chicken, wrap it tightly in plastic wrap and then in aluminum foil. It can last in the freezer for up to three months. Just reheat in the oven when ready to enjoy!
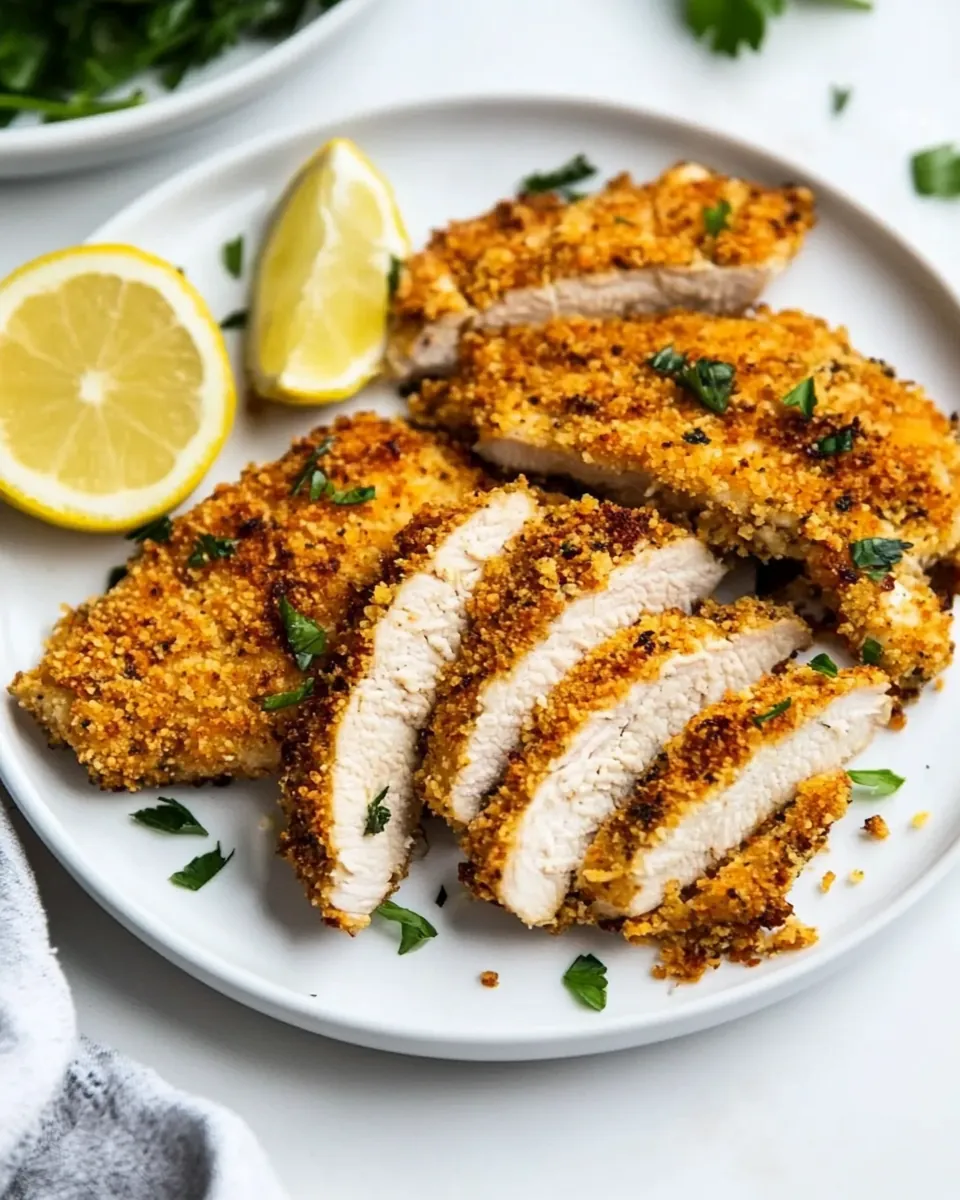
- Pairing: Panko Chicken pairs wonderfully with a variety of sides like mashed potatoes, roasted vegetables, or a fresh garden salad. You can also serve it in a sandwich with your favorite toppings.
- Herb Additions: For a fresh twist, try adding chopped herbs like parsley or basil to the Panko before coating the chicken. This adds an aromatic flavor and a pop of color.
- Spice It Up: If you love a kick, add more hot sauce to the egg mixture or sprinkle some cayenne pepper into the Panko for extra heat.
What to Serve Alongside Panko Chicken
When considering what to serve with Panko Chicken, think about creating a balanced meal that complements the crispy chicken beautifully. Here are some delicious ideas:
- Garden Salad: A fresh garden salad with mixed greens, tomatoes, cucumbers, and a tangy vinaigrette pairs perfectly with the crunchy chicken.
- Mashed Potatoes: Creamy mashed potatoes with butter and garlic provide a comforting side that goes hand-in-hand with Panko Chicken.
- Roasted Vegetables: Roasted seasonal vegetables add color and nutrients, making them a great accompaniment to the dish.
- Rice Pilaf: A light and fluffy rice pilaf can serve as a great base for Panko Chicken, absorbing any juices from the chicken.
- Mac and Cheese: For a heartier option, serve with homemade mac and cheese. The creaminess contrasts well with the crunchy chicken.
- Sandwiches: Make a delicious sandwich using Panko Chicken, lettuce, and your favorite sauce for a quick lunch option.
- Dips: Try serving with a side of ranch or honey mustard dip for a fun twist that brings out the flavors of the chicken.
FAQ
Conclusion
The beauty of Panko Chicken lies in its perfect combination of crispy texture and juicy chicken. It’s a dish that feels indulgent yet is surprisingly easy to make. I encourage you to try this recipe and experience the satisfying crunch for yourself. Whether for a special occasion or a casual dinner, this Panko Chicken is sure to impress!
Panko Chicken
Ingredients
Equipment
Method
- Preheat your oven to 400°F. Prepare a baking sheet by placing a wire rack over it. This allows air to circulate around the chicken, ensuring a crisp coating.
- In a medium nonstick skillet, melt 3 tablespoons of unsalted butter over medium heat. Once melted, add in 1½ cups of Panko breadcrumbs to the skillet. Toast the breadcrumbs, stirring often, until they turn a beautiful golden brown. This step is essential for achieving that perfect crunch!
- Once toasted, transfer the Panko to a large shallow bowl and set aside to cool. This cooling step prevents the breadcrumbs from cooking the chicken prematurely.
- While the Panko cools, pat the 2 boneless, skinless chicken breasts dry using paper towels. Then slice each breast in half horizontally to create thinner cutlets. Thinner cutlets cook faster and stay juicier.
- In another shallow bowl, combine ½ cup of all-purpose flour with a generous pinch of Kosher salt and freshly ground black pepper. Whisk to combine. This will be your first dredging station.
- In a third shallow bowl, whisk together 2 large eggs, 2 teaspoons of Dijon mustard, and a few dashes of hot sauce (if using). This egg mixture acts as the glue for the breadcrumbs.
- Now, it’s time to dredge! Take one chicken cutlet and first coat it in the flour mixture, shaking off any excess. Next, dip it in the egg mixture, ensuring it’s fully coated.
- Finally, transfer the chicken to the bowl with the toasted Panko. Press the crumbs onto the chicken to help them adhere well. Be generous with the breadcrumbs!
- Place the coated chicken on the wire rack over the baking sheet. Repeat the dredging process with the remaining chicken cutlets.
- Bake the chicken in the preheated oven for 15 to 20 minutes or until the chicken is cooked through. The internal temperature should reach 165°F. You’ll know it’s ready when the coating is crispy and golden brown!
- Once done, remove the chicken from the oven and let it rest for a few minutes. Then serve it hot and enjoy your delicious Panko Chicken!
Notes
- Tip 1: Toasting the Panko breadcrumbs not only enhances their flavor but also helps in achieving that perfect crunch. It’s a simple step that makes a world of difference!
- Tip 2: Using a wire rack allows hot air to circulate around the chicken, preventing it from steaming and keeping it crispy on all sides.
- Tip 3: Slicing the chicken breasts into cutlets reduces cooking time and ensures a juicier, more tender result. You can also use chicken tenders if you prefer.
- Tip 4: For a gluten-free version, substitute the all-purpose flour with gluten-free flour and use gluten-free Panko breadcrumbs. This way, you can still enjoy the crispy goodness!
- Tip 5: Feel free to experiment with different seasonings in your Panko mix. Adding herbs or spices can elevate the flavor profile of your Panko Chicken.