Overnight Pizza Dough
Making Overnight Pizza Dough has become a cherished tradition in my household. Every Friday evening, as the week winds down, I find joy in preparing this easy yet delightful dough. The anticipation of Saturday pizza night, with family gathered around and toppings galore, fills the air with excitement. I love how simple ingredients can transform into something extraordinary, bringing everyone together for a night of fun and creativity. The best part? The dough needs to rest overnight, allowing the flavors to develop while I get a good night’s sleep. It’s a win-win!
Recipe Snapshot
2 hr
120 mins
0 mins
Hard
220 kcal
6 g
Paleo, Vegan, Gluten-Free
1 g
Oven, Baking Sheet, Whisk, Mixing Bowl, Peeler
Why We Love This Overnight Pizza Dough
There are several reasons why Overnight Pizza Dough captures a special place in our hearts:
1. Effortless Preparation
Mixing the ingredients for Overnight Pizza Dough is a cinch! With just a bowl and a spatula, you can create a scrumptious base for your pizza. The dough requires minimal effort and can be made in advance, freeing you up to enjoy your evening.
2. Enhanced Flavor
Allowing the dough to rest overnight results in a deeper flavor profile. The long fermentation process develops unique yeast characteristics, giving your pizza a distinctive taste that’s far superior to quick dough recipes.
3. Perfect Texture
After resting overnight, the dough becomes wonderfully elastic and easy to work with. This means you can stretch it into perfect circles without tearing, resulting in a beautifully crusty pizza base ready for your favorite toppings.
4. Versatility
Whether you prefer a classic margherita or a loaded veggie pizza, this dough can handle it all. With its robust structure, it supports any toppings you desire, making it a versatile choice for any pizza lover.
5. Family Fun
Making pizza from scratch is a fun family activity. Everyone can get involved in rolling out the dough and selecting their own toppings, creating a memorable experience that brings laughter and creativity into the kitchen.
Overnight Pizza Dough Shopping List
When it comes to crafting an amazing pizza dough, each ingredient plays a vital role in achieving that perfect balance of texture and flavor. The simplicity of these ingredients—like flour, water, and salt—is what makes this recipe so approachable. They work in harmony, creating a beautifully elastic dough that rises to the occasion.
- Flour: A high-protein flour, such as bread or 00 flour, provides the strength needed for a chewy crust. You’ll need about 2 ½ cups of it to create the base.
- Water: The hydration from 1 ⅓ cups of filtered or spring water is essential, helping to form the dough and activate the yeast.
- Instant Yeast: Just a pinch (scant ⅛ teaspoon) helps the dough to rise beautifully overnight.
- Kosher Salt: About 1 tablespoon of salt enhances the flavor of the dough, making it much more delicious.
- Olive Oil: A drizzle of olive oil is used to coat the dough, preventing it from drying out during the fermentation process.
Making This Overnight Pizza Dough

Crafting Overnight Pizza Dough is an exciting journey that starts with a few simple steps. Follow along as we transform basic ingredients into a heavenly dough ready for your favorite toppings!
- In a large bowl or tub, combine flour, water, and instant yeast. Mix well until you form a sticky, shaggy dough.
This initial mixture is crucial as it lays the foundation for your dough. The texture should be rough but starting to come together nicely. - Cover the bowl lightly and set it in a warm location to rest overnight.
During this time, the yeast will activate and begin to work its magic, creating bubbles and expanding the dough. This is what we call a “poolish” and it should double in size after about 10 to 12 hours. - The next morning, whisk together another portion of flour and kosher salt in a large bowl.
This additional mix will be incorporated into your risen poolish to create a full dough structure. - Pour the warm water gently around the edges of your poolish to release it, then add it to the bowl with the flour mixture.
Gently incorporate the dough using a folding motion to ensure all dry ingredients are combined. You want to avoid any pockets of flour! - Once mixed, cover the bowl lightly again and let it sit in a warm spot for about 30 minutes.
This resting phase allows the gluten to relax, making it easier to manage. - After 30 minutes, you’ll need to perform two sets of folds within the first hour.
To fold, cup your hand underneath the dough, lift it, and tuck it under itself. Rotate the bowl and repeat this folding process four times at 12, 3, 6, and 9 o’clock. This technique develops strength in the dough. - After completing the folds, cover the dough and let it rest for another 30 minutes.
You’ll notice the dough becoming smoother and less shaggy with each fold, indicating that it’s developing structure. - Once the second set of folds is complete, drizzle about a tablespoon of olive oil around the edges of the dough. Gently lift and flip the dough a few times to coat it lightly in oil.
This step prevents the dough from drying out and helps it rise beautifully. - Cover again and let the dough rise for about 5 to 6 hours, or until it’s about 2.5 times its original size.
Keep it in a warm room, and watch it grow! It’s an exciting moment. - Lightly flour your work surface and the top of the dough before turning it out onto the floured surface.
Use a bench scraper to divide the dough into four even pieces, approximately 275 grams each. - To shape, stretch the corners of each piece of dough, tucking them into the center. Then flip the dough ball onto a clean, unfloured part of the surface.
Gently pull it towards you while cupping it with your palms, creating surface tension. Rotate and repeat until you have a nice tight ball. - Now, you can either refrigerate the dough for later use or freeze it for future pizzas. For refrigeration, place on a floured cookie sheet and cover with plastic wrap. For freezing, wrap loosely in plastic and seal in a zip-top bag.
This flexibility allows you to make pizza whenever the craving strikes! - When ready to bake, preheat a pizza stone in a 500-degree oven for 45 minutes to an hour.
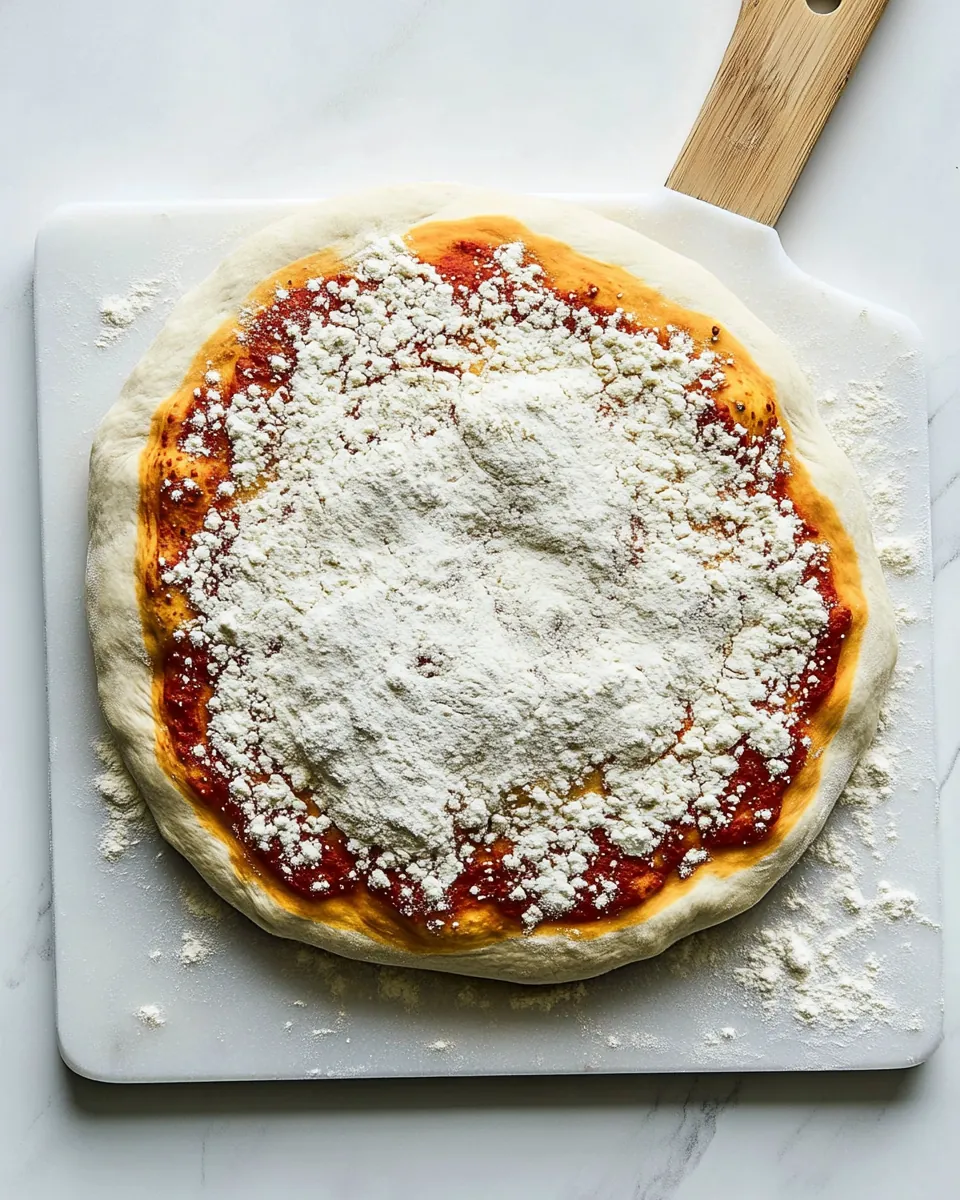
The stone needs to be thoroughly heated to yield a crispy crust when baking. - Stretch your dough into 9-inch rounds, taking care to avoid deflating the dough too much, and place them on a dusted pizza peel.
Add your favorite toppings before transferring to the hot pizza stone. - Bake for around 8 to 12 minutes, until the crust is golden brown and the cheese is bubbly and spotted.
Let the pizzas cool for a few minutes before slicing and serving; this step allows the cheese to set.
Things Worth Knowing
- Hydration Level: The hydration of the dough is crucial. A wetter dough creates that airy, open crumb we love in pizza.
- Resting Time: Longer resting times improve flavor. Allowing the dough to rest overnight enhances yeast development.
- Temperature Checks: Ensure your water temperature is right; it should be about 80ºF/26ºC for the yeast to activate effectively.
- Flour Types: Using a combination of bread and 00 flour can yield an excellent texture for your crust.
Helpful Hints

Here are some tips to ensure your Overnight Pizza Dough turns out perfectly every time:
- Storage: Store leftover dough in an airtight container in the fridge for up to a week. Just remember to let it come to room temperature before using.
- Freezing: You can freeze the shaped dough balls for up to three months. Wrap them well and label with the date!
- Pairing: Serve with fresh salad, garlic bread, or a variety of dips for a complete meal.
- Cooking Surface: A preheated pizza stone is essential for achieving that perfect crispy crust. Make sure it’s hot before placing your pizza on it.
- Toppings: Feel free to experiment with toppings! From classic pepperoni to gourmet veggies, the choice is yours.
- Baking Time: Keep an eye on your pizzas while they bake. Every oven is different, and you want to catch them just as they turn golden.
Accompaniments for Overnight Pizza Dough
- Fresh Salads: A crisp, green salad pairs beautifully with pizza, offering a refreshing contrast to the warm, cheesy slice.
- Garlic Bread: Serve with some garlic bread for a satisfying combination that everyone loves.
- Pizza Parties: This is perfect for gatherings, allowing guests to customize their pizzas with various toppings.
- Seasonal Toppings: Incorporate seasonal vegetables or fruits into your pizzas for a fresh twist. Think pumpkin in the fall or fresh tomatoes in summer!
- Picnics: Cold pizza makes a delicious picnic treat, perfect for enjoying outdoors with friends.
- Weekend Brunch: Pizza isn’t just for dinner—serve it at brunch with a side of scrambled eggs for a fun twist.
FAQ
Conclusion
What makes Overnight Pizza Dough so special is its ability to transform simple ingredients into a flavorful, airy base for your pizzas. Each bite is a delightful experience, perfect for any topping you can dream up. I encourage you to try making this dough for your next pizza night; it might just become a new family tradition. Gather your loved ones and enjoy the fun of creating delicious homemade pizzas!

Overnight Pizza Dough
Ingredients
Equipment
Method
- In a large bowl or tub, combine flour, water, and instant yeast. Mix well to form a sticky, shaggy dough.
- Cover lightly and set in a warm location overnight.
- The next morning, whisk together another portion of flour and kosher salt in a large bowl.
- Pour the warm water gently around the edges of your poolish to release it, then add it to the bowl with the flour mixture.
- Gently incorporate the dough using a folding motion to ensure all dry ingredients are combined.
- Cover the bowl lightly again and let it sit in a warm spot for about 30 minutes.
- After 30 minutes, you’ll need to perform two sets of folds within the first hour.
- After each set of folds, cover the dough and let it rest for another 30 minutes.
- Once the second set of folds is complete, drizzle about a tablespoon of olive oil around the edges of the dough.
- Cover again and let the dough rise for about 5 to 6 hours.
- Lightly flour your work surface and the top of the dough before turning it out onto the floured surface.
- Use a bench scraper to divide the dough into four even pieces.
- To shape, stretch the corners of each piece of dough, tucking them into the center.
- At this point, you can either refrigerate or freeze the dough for later use.
- When ready to bake, preheat a pizza stone in a 500-degree oven.
- Stretch your dough into 9-inch rounds.
- Add your favorite toppings before transferring to the hot pizza stone.
- Bake for around 8 to 12 minutes, until the crust is golden brown and the cheese is bubbly.
- Let the pizzas cool for a few minutes before slicing and serving.
Notes
- Storage: Store leftover dough in an airtight container in the fridge for up to a week.
- Freezing: You can freeze shaped dough balls for up to three months.
- Pairing: Serve with fresh salad, garlic bread, or a variety of dips.
- Cooking Surface: A preheated pizza stone is essential for achieving that perfect crispy crust.
- Toppings: Feel free to experiment with toppings! From classic pepperoni to gourmet veggies, the choice is yours.
- Baking Time: Keep an eye on your pizzas while they bake.