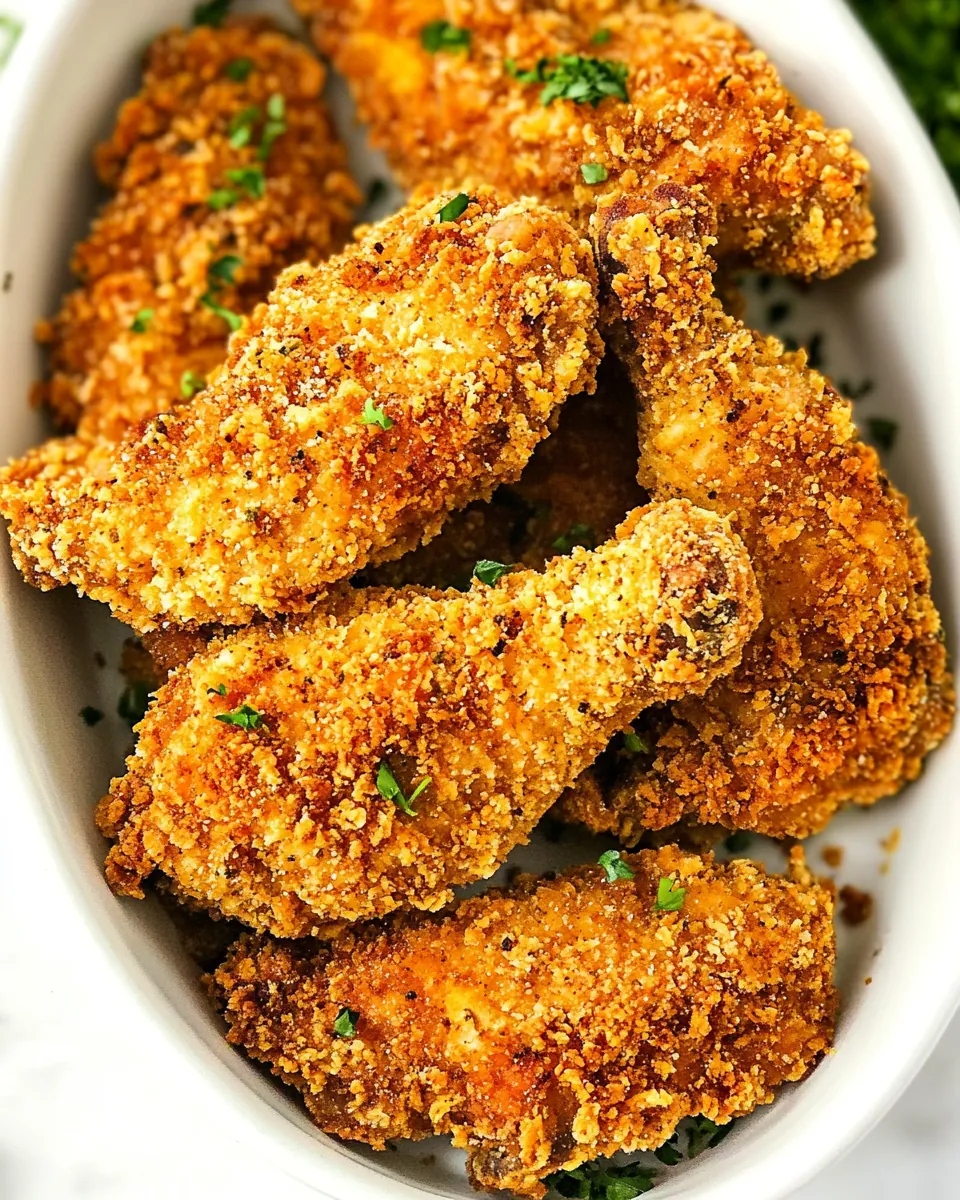
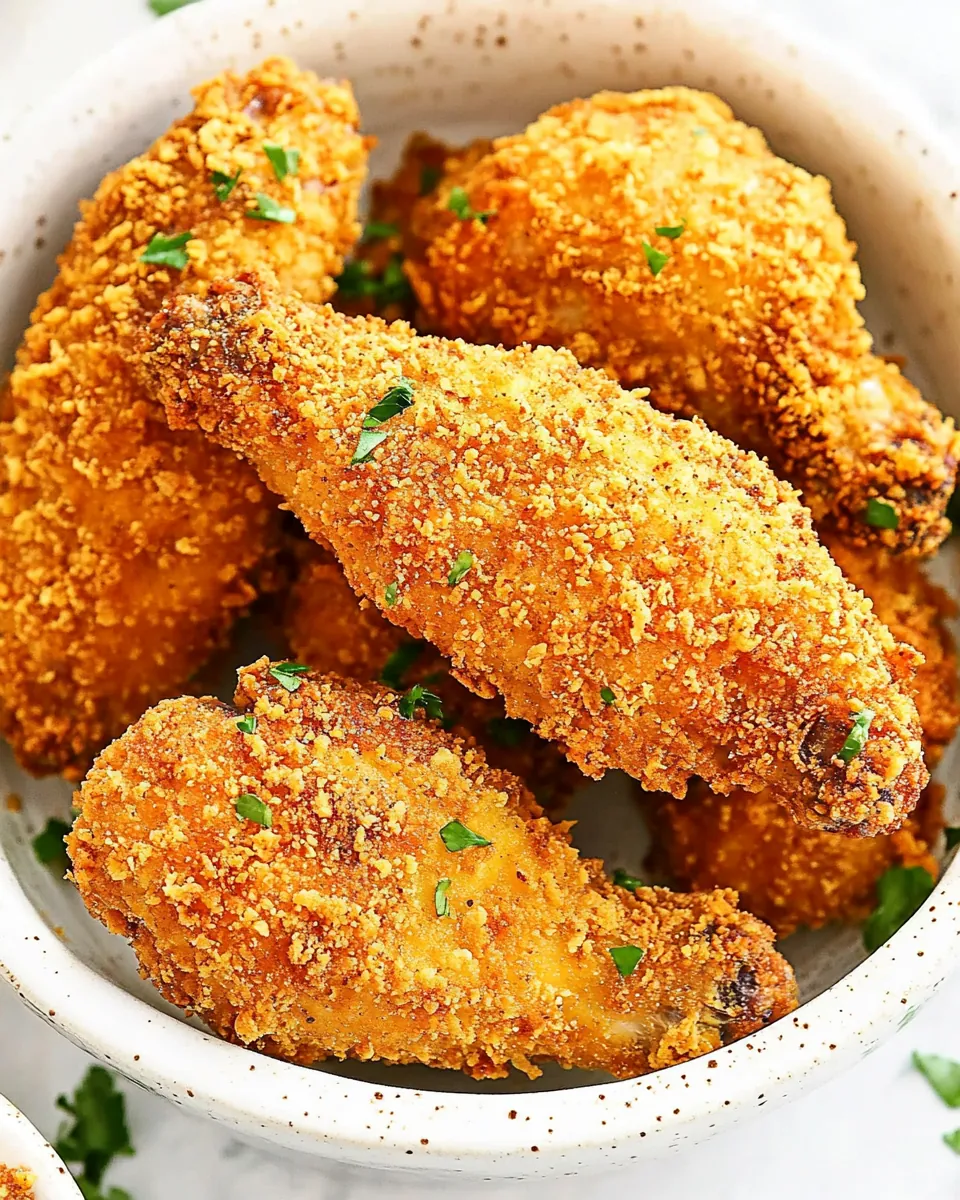
Oven Baked Fried Chicken
There’s something incredibly satisfying about serving up a plate of Oven Baked Fried Chicken. This dish has become a cherished family favorite in my home, especially on weekends when we gather around the table for comfort food. The aroma of the chicken baking in the oven fills the house, making it impossible to resist. I remember the first time I made it; I was nervous but excited. As the chicken baked, I couldn’t help but sneak a piece of the crispy breading. It was love at first bite! There’s just something about the perfect combination of crunchy coating and juicy meat that brings everyone together. Each bite is a reminder of home, family, and the joy of cooking together. This Oven Baked Fried Chicken is not just a meal; it’s an experience. With its easy preparation and delightful crunch, it’s a dish that’s here to stay in our culinary repertoire.
Recipe Snapshot
35 mins
15 mins
20 mins
Medium
330 kcal
30 g
Gluten-Free
10 g
Whisk, Air Fryer, Baking Sheet, Mixing Bowl, Frying Pan, Skillet, Oven
The Appeal of This Oven Baked Fried Chicken
Healthier Alternative
One of the reasons I adore this recipe is that it offers a healthier alternative to traditional fried chicken. By baking instead of frying, I can enjoy that crispy texture I crave without the added guilt. You can savor every bite and still feel good about what you’re eating.
Flavor Explosion
The spice mix really elevates the flavor of the chicken. Each ingredient, from the chili powder to the smoked paprika, brings its own unique touch, creating a harmonious blend that’s just irresistible. It’s a flavor explosion that leaves you wanting more!
Perfect for Meal Prep
This Oven Baked Fried Chicken is fantastic for meal prepping. You can make a large batch and store it in the fridge for easy lunches or quick dinners throughout the week. Trust me, having this chicken ready to go is a lifesaver on busy days.
Easy to Customize
Another thing I love is how customizable this recipe is. You can easily adjust the spices based on your family’s preferences or even add a twist with different marinades or toppings. It’s all about making it your own!
Family-Friendly
This dish is a hit with kids and adults alike. Everyone loves the crispy coating and tender chicken, making it a perfect choice for family gatherings or casual weeknight dinners. It’s a sure way to put smiles on everyone’s faces.
Main Ingredients for Oven Baked Fried Chicken
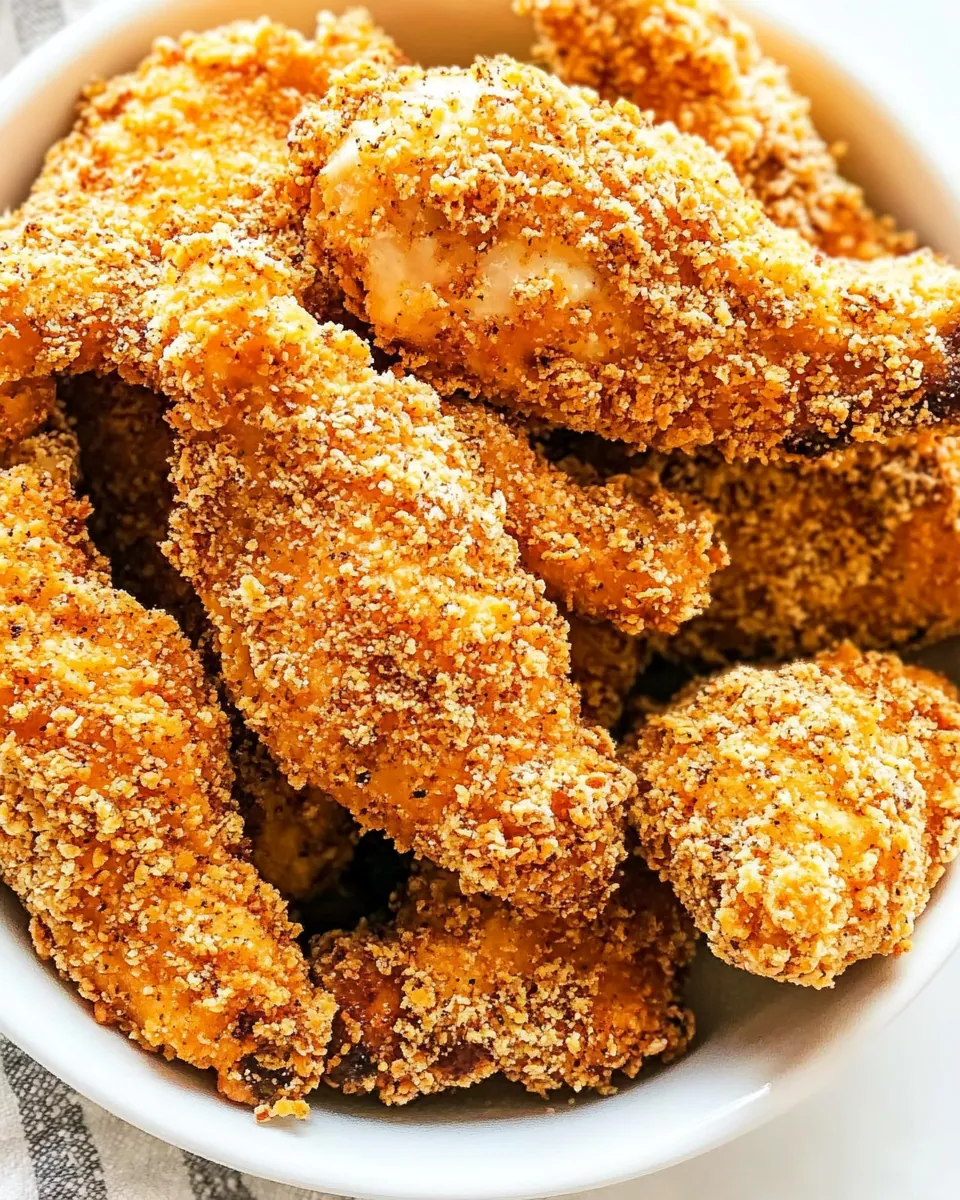
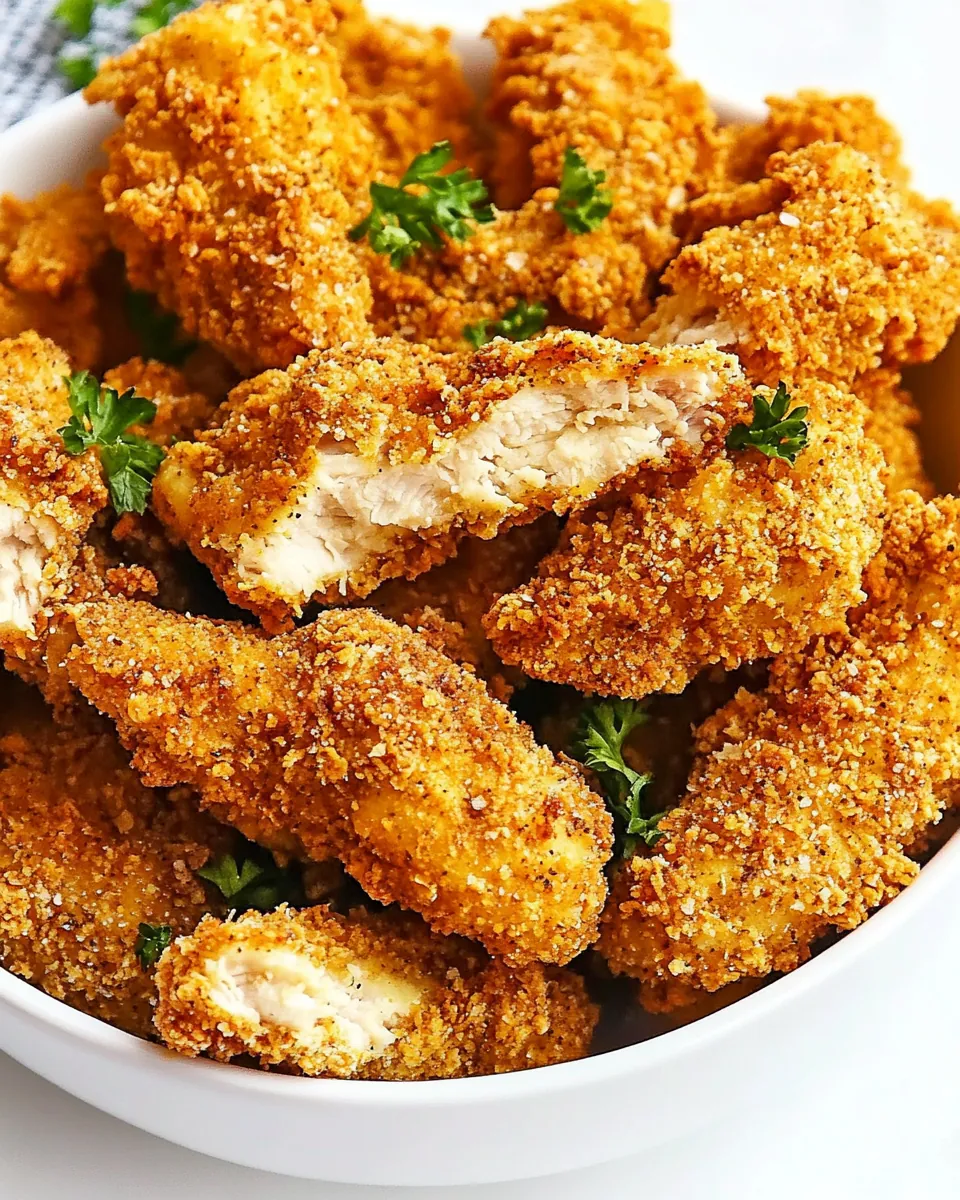
The ingredients for Oven Baked Fried Chicken are simple yet effective. They work together to create a deliciously crispy and golden exterior while keeping the chicken juicy and tender inside. The key players in this dish include buttermilk, which tenderizes the chicken, and a blend of flour and breadcrumbs that forms a crunchy coating. Each ingredient has a purpose, enhancing the overall flavor and texture of this beloved dish.
- 10-12 chicken tenderloins (more or less to fit baking sheet) – The main protein that will be transformed into crispy, tender goodness.
- 1 cup buttermilk – This ingredient is essential for marinating the chicken, keeping it moist and flavorful.
- 3 tablespoons unsalted butter – Adds richness and helps achieve that lovely golden color when baking.
- 1 cup all-purpose flour – Forms the base of the breading, creating a crunchy shell around the chicken.
- 1 cup panko breadcrumbs – Provides an extra crunch that makes each bite satisfying.
- 1/4 cup fine cornmeal – Offers a unique texture and flavor to the coating.
- 1 tablespoon salt (it won’t taste salty) – Enhances all the flavors without overpowering the dish.
- 2 teaspoons each of chili powder and garlic powder – These spices add depth and a bit of heat to the chicken.
- 1 teaspoon each of pepper, smoked paprika, and onion powder – Together, these spices create a robust flavor profile that is hard to resist.
Cooking Method for Oven Baked Fried Chicken
Making Oven Baked Fried Chicken is a straightforward process that yields delicious results. Follow these steps, and you’ll have crispy chicken that rivals any fried version. Let’s get started!
- Marinate the Chicken: Begin by whisking together your spice mix ingredients in a small sealable bag or container. Add 1 tablespoon of the spice mix and 1 cup of buttermilk to a large freezer bag along with the chicken. Seal the bag and massage it to ensure the marinade coats all the pieces. Marinate in the refrigerator for at least 6 to 24 hours for the best flavor, allowing the spices to infuse into the meat. Remember to store any remaining spice mix separately. This step is crucial for tender and flavorful chicken.
- Preheat the Oven: If you’re baking (which I recommend), preheat your oven to 400°F. While it’s heating, line a half-rimmed baking sheet (18×13 inch) with parchment paper. Avoid using foil, as it tends to stick to the chicken. This preparation is vital for ensuring a non-stick surface.
- Melt the Butter: Place the butter in your baking sheet and melt it in the oven while it preheats. Check on it every few minutes until it is fully melted, then remove the baking sheet from the oven. This step not only adds flavor but also helps the breading achieve a lovely golden color.
- Mix the Breading: In a large bowl, combine the flour, panko breadcrumbs, cornmeal, and the remaining spice mix. This breading mixture is key to achieving that crunchy coating. It’s important to mix well so that every piece of chicken gets coated evenly.
- Coat the Chicken: Take the marinated chicken out of the buttermilk and dab off any excess marinade with paper towels. I like to lay the chicken on paper towels to soak up that extra liquid. Then, add half of the chicken to the breadcrumb mixture and shake the bag to coat well. Make sure to press the breadcrumbs into the chicken as you remove each tenderloin from the bag for an even coating.
- Arrange the Chicken: Line the breaded chicken on the buttered baking sheet, ensuring they don’t touch each other. This allows them to crisp up nicely. If you’re air frying, prepare the basket by lining it with parchment paper and repeat the breading process.
- Bake: Bake the chicken at 400°F for 10 minutes. After the time is up, carefully flip the pieces over, and bake for an additional 5 minutes until the chicken reaches an internal temperature of 160°F. If you want extra crispiness, you can broil them for a few minutes at the end. Just keep an eye on them to avoid burning.
- Air Frying Option: If you prefer air frying, preheat your air fryer to 400°F. Working in batches, place the breaded chicken in the basket in a single layer, lightly spraying with cooking spray. Cook for 5 minutes on each side, or until they’re crispy and have an internal temperature of 160°F. This method offers a different texture, but it’s just as delicious.
- Rest the Chicken: Once cooked, let the chicken rest for about 5 minutes before serving. This allows the internal temperature to rise to 165°F and keeps it juicy. Serve with your favorite dipping sauces for an added flavor boost!
Things Worth Knowing
- Use a Meat Thermometer: Ensure your chicken is cooked through by using a meat thermometer to check that it has reached an internal temperature of 165°F.
- Don’t Skip the Marinade: Allowing the chicken to marinate for several hours enhances its flavor and ensures tenderness.
- Experiment with Spices: Feel free to customize your spice blend to suit your tastes. The classic combination can always be adjusted to include your favorites!
- Let it Rest: Resting the chicken post-cooking keeps it juicy and flavorful, so don’t rush to cut into it right away.
Helpful Hints
Cooking is all about learning and adapting, and these hints can help you get the most out of your Oven Baked Fried Chicken experience.
- Storage: Baked breaded chicken should be stored in an airtight container in the refrigerator for 3 to 5 days. For the best results, don’t stack the chicken directly on top of each other; use parchment paper between the layers to maintain crispiness.
- Freezing: You can freeze the breaded chicken before baking. Just place the breaded pieces in a single layer on a baking sheet and freeze until solid. Then transfer them to a freezer bag. When you’re ready to eat, bake from frozen, adding a few minutes to the cooking time.
- Reheating: The chicken will not be nearly as crispy if reheated in the microwave, but it will still be flavorful. To reheat, transfer the chicken to a microwave-safe plate in an even layer. Microwave for 90 seconds, then in additional increments of 15 seconds as needed.
- Air Fryer Reheat: When reheating in an air fryer, place chicken in a single layer in the basket without touching. Air fry using the “snack” setting for 4 to 6 minutes until warmed through.
- Oven Reheat: To reheat in the oven, spread the chicken on a lightly greased baking rack set in a baking sheet. Bake at 400 degrees for 5 to 8 minutes or until heated through.
Perfect Pairings for Oven Baked Fried Chicken
- Coleslaw: A refreshing side of coleslaw complements the rich flavors of the chicken perfectly. It adds a satisfying crunch.
- Mashed Potatoes: Creamy mashed potatoes are a classic pairing that balances the crispy chicken with a smooth texture.
- Green Beans: Serve with sautéed or steamed green beans for a touch of color and a healthy side.
- Macaroni and Cheese: For a comforting choice, macaroni and cheese is always a crowd-pleaser that pairs wonderfully with fried chicken.
- Biscuits: Warm, fluffy biscuits are a must for soaking up any extra juices and adding a touch of Southern flair to your meal.
- BBQ Sauce: Don’t forget to serve with your favorite dipping sauces, like BBQ or ranch, for an extra flavor kick.
- Casual Gatherings: This dish is perfect for family gatherings, BBQs, or casual weeknight dinners. It brings everyone together around the table, making it a heartwarming choice.
FAQ
Conclusion
In summary, the Oven Baked Fried Chicken is a delicious and healthier alternative to traditional fried chicken. It brings together crispy breading and juicy chicken in every bite. I encourage you to try this recipe for your next family dinner or gathering. It’s sure to impress everyone at the table, and you’ll love how easy it is to prepare. Don’t wait—make this mouthwatering dish tonight!
Oven Baked Fried Chicken
Ingredients
Equipment
Method
- Marinate the Chicken: Whisk the Spice Mix ingredients together in a small sealable bag or container. Add 1 TB Spice Mix, 1 cup buttermilk, and chicken to a large freezer bag. Marinate in the refrigerator for 6–24 hours. Store remaining Spice Mix separately.
- If baking (RECOMMENDED): Preheat the oven to 400°F. Line a half-rimmed baking sheet (18×13-inch) with parchment paper (foil will NOT work because the chicken sticks to it). Add the butter and melt it in the oven while it preheats, checking every few minutes. Remove the baking sheet once the butter has melted.
- Meanwhile Mix Breading: Mix the flour, panko, cornmeal, and remaining Spice Mix in a large bowl. Add half of this breading mixture to a freezer bag.
- Bread Chicken: Remove the chicken from the buttermilk and dab off the excess marinade with paper towels (I plop the chicken on paper towels). Add half the chicken to the breadcrumb bag and shake until well coated. Press the breadcrumbs into the chicken as you remove the tenderloins from the bag.
- If baking, line the breaded chicken on the buttered baking sheet. Repeat with the remaining chicken. If air frying, line the breaded chicken on parchment paper. Repeat with the remaining chicken.
- TO BAKE (Recommended): Bake at 400°F for 10 minutes. Flip the chicken over and bake for 5 minutes, until the internal temperature reaches 160°F. Broil to desired crispiness.
- TO AIR FRY: Preheat the air fryer to 400°F. Working in batches, add the chicken to the air fryer basket in a single layer and lightly spray with cooking spray. Cook for 5 minutes on each side or until crispy and the chicken's internal temperature reaches 160°F.
- Rest: Let the chicken rest for 5 minutes to rise to an internal temperature of 165°F. Serve with your favorite dipping sauces.
Notes
- If your breading is white in some places after you flip your chicken: it did not come in contact with the butter. The chicken will still taste great exactly as is, or you can lightly spray it with cooking spray and proceed to broil.
- Storage: Baked breaded chicken should be stored in an airtight container in the refrigerator for 3 to 5 days. For best results, don’t stack your chicken directly on each other, as this will make it soggy. Instead, place a piece of parchment paper between the layers.
- Microwave: The chicken will not be nearly as crispy if reheated in the microwave, but it will still be flavorful. Transfer chicken tenders to a microwave-safe plate in an even layer. Microwave for 90 seconds, then in additional increments of 15 seconds as needed.
- Air fryer: Place chicken in a single layer in the basket without touching. Air fry using the “snack” setting for 4-6 minutes until warmed.
- Oven: Spread chicken on a lightly greased baking rack set in a baking sheet. Bake at 400 degrees for 5-8 minutes or until heated through.