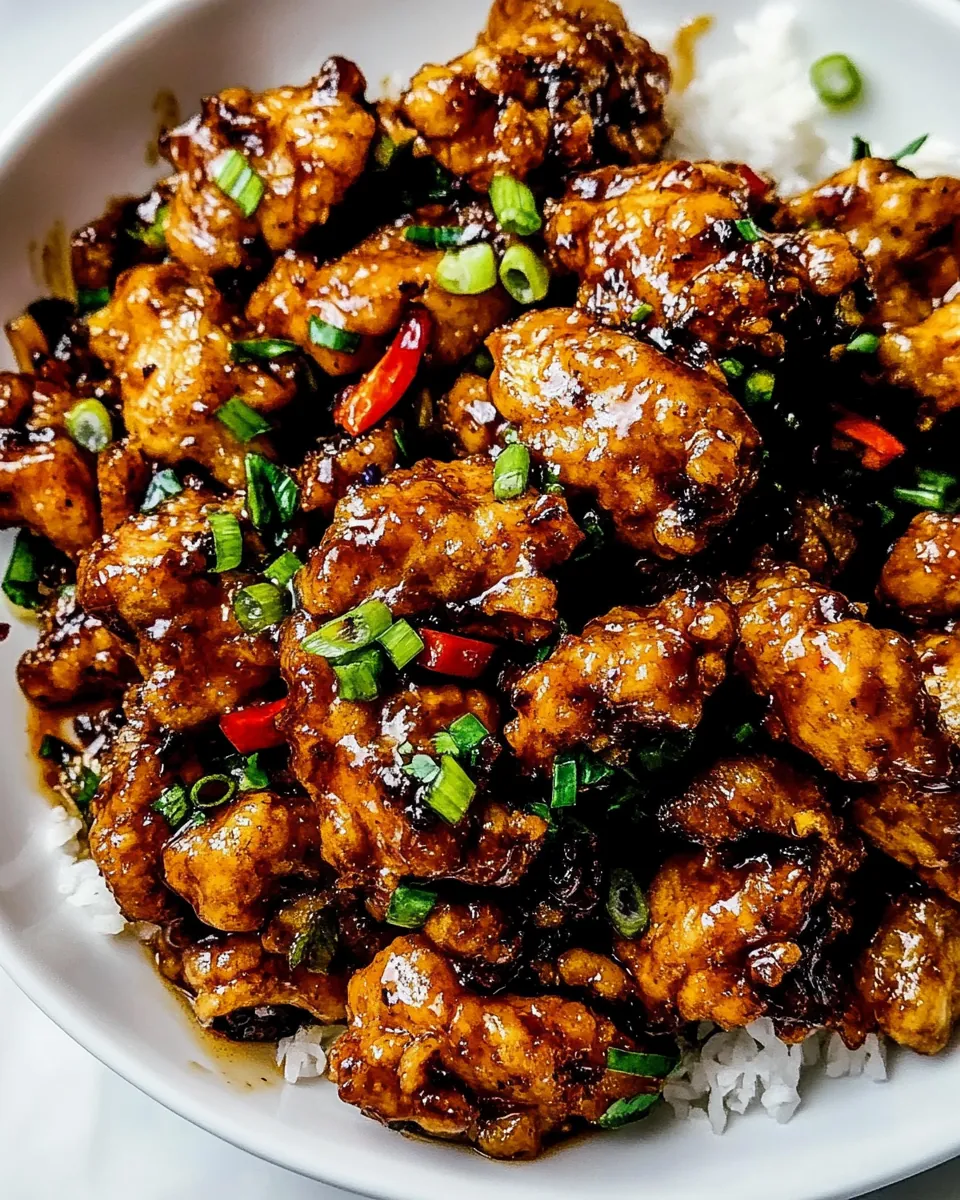
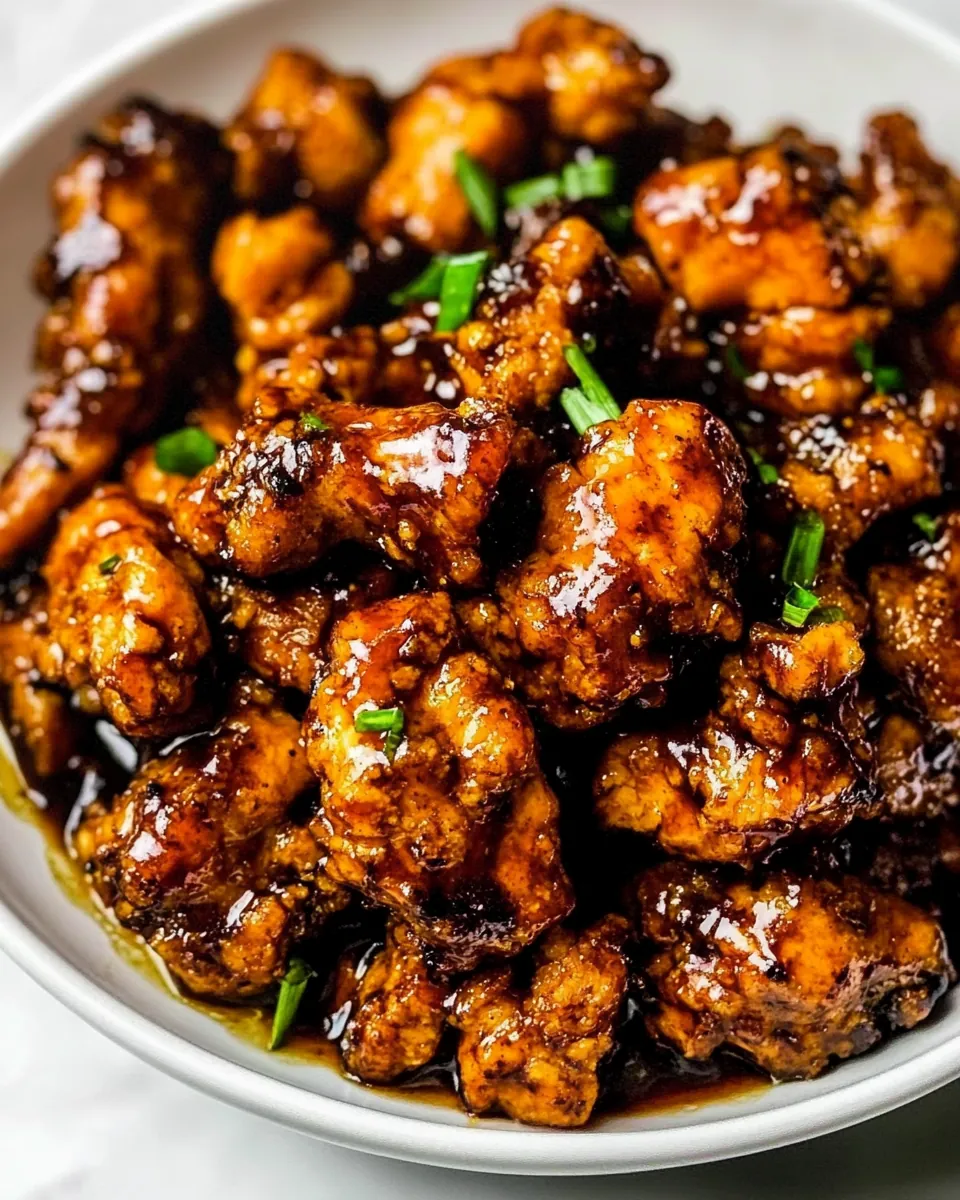
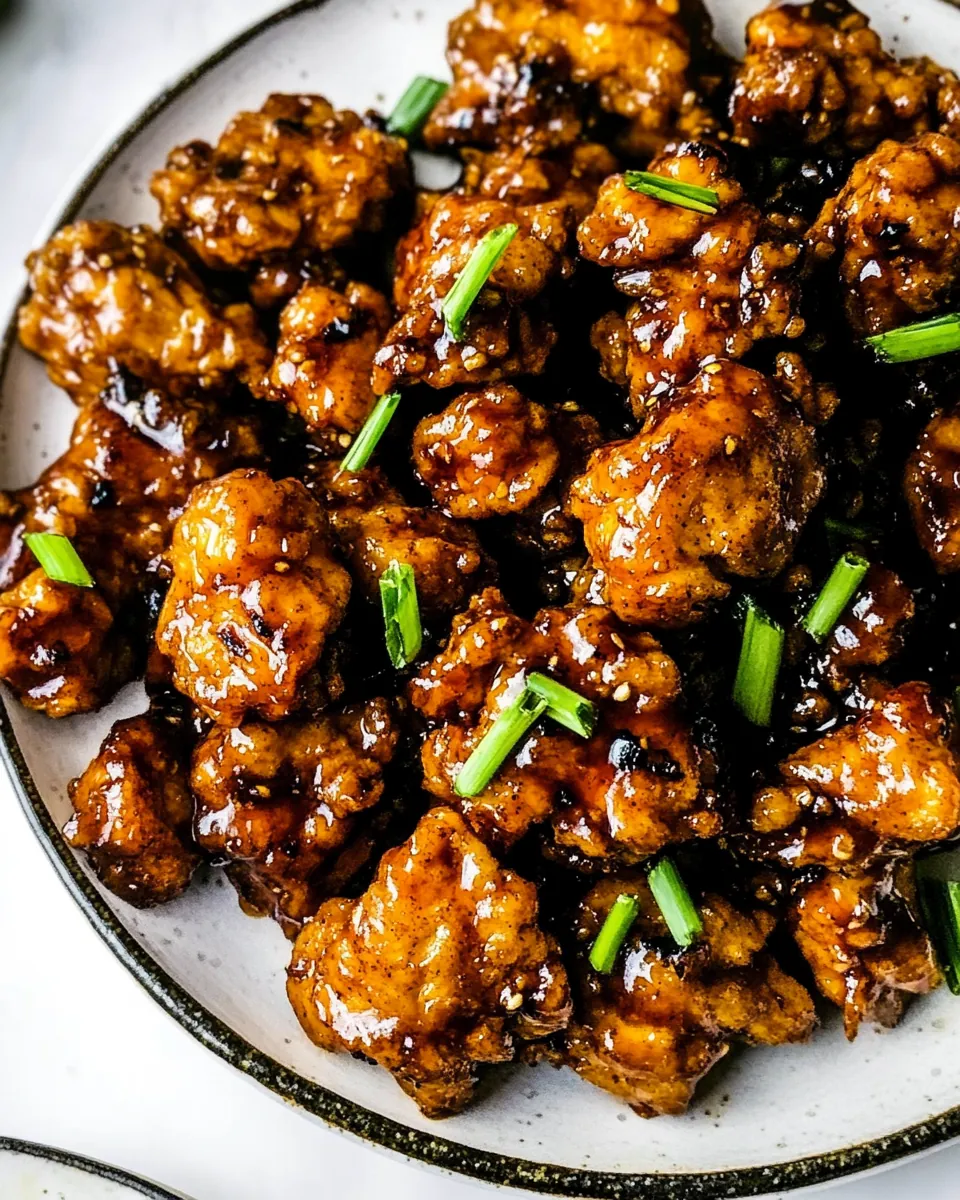
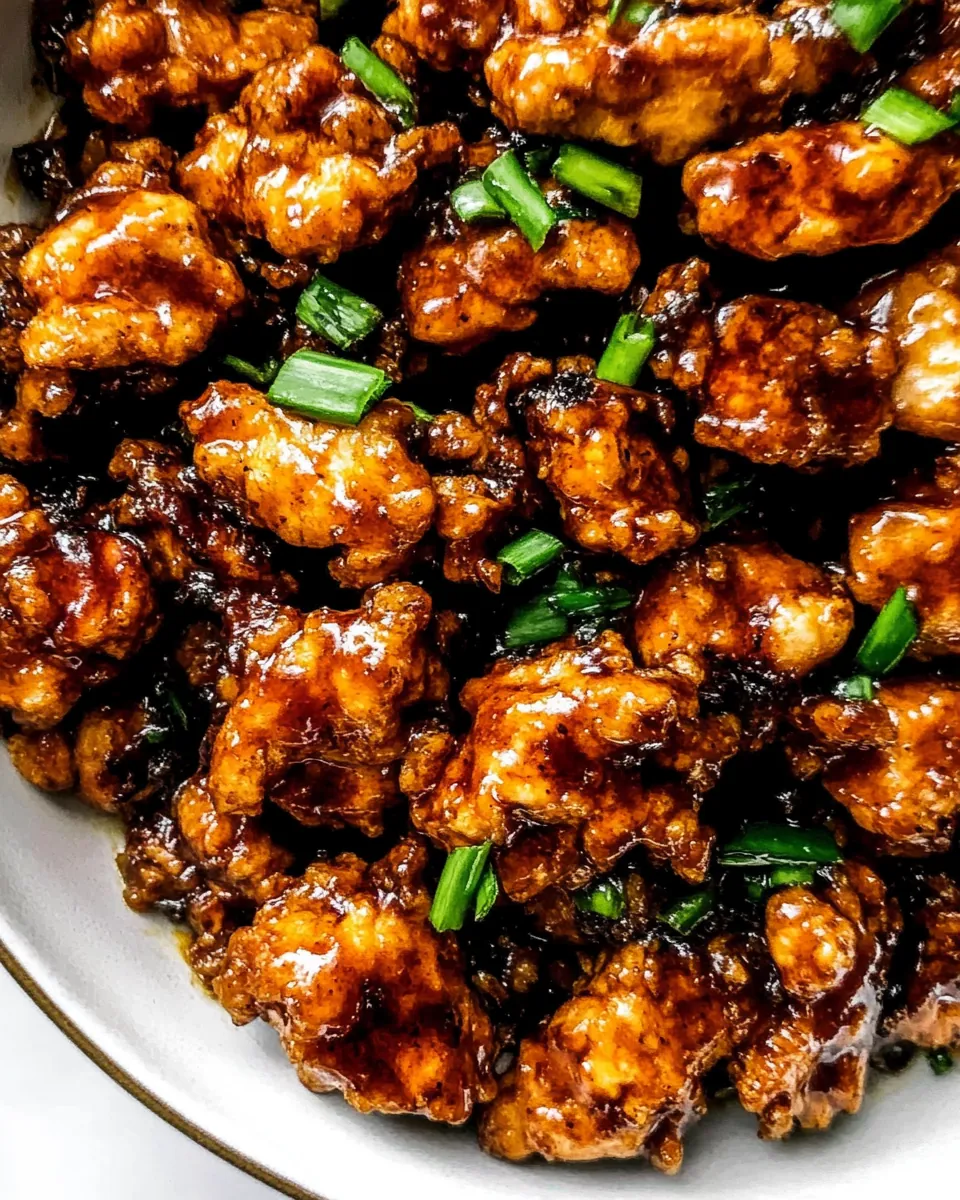
Orange Chicken
Whenever I think of comfort food that brings a smile to my face, Orange Chicken is at the top of the list. My love for this dish began during my college days, when I’d rush to my favorite takeout spot for a quick meal after a long day of classes. The crispy, golden pieces of chicken tossed in a tangy, sweet orange sauce were simply irresistible. Every bite was a delightful explosion of flavors, reminding me of home and the joy of sharing delicious meals with friends. Now, I’ve mastered my own version right in my kitchen, and I can’t wait to share it with you. This recipe is so easy and satisfying that it’s become a staple in my household. Whether it’s for a weeknight dinner or a special occasion, Orange Chicken never disappoints.
Recipe Snapshot
35 mins
15 mins
20 mins
Medium
450 kcal
20 g
Keto, Paleo, Whole30
15 g
Wok or sturdy pot that can handle high heat
The Best Thing About This Orange Chicken
Flavor Explosion
The first reason I absolutely adore this Orange Chicken recipe is the flavor explosion. The combination of sweet and savory is perfectly balanced, thanks to the harmonious blend of hoisin sauce, orange juice, and a touch of soy sauce. Each bite brings a burst of citrusy goodness, making it utterly addictive.
Simple Ingredients
Using simple, everyday ingredients makes this dish stand out. You likely already have most of the items in your pantry. The key actors here, like chicken thighs, ginger, and garlic, come together effortlessly, creating a restaurant-quality meal at home.
Quick Preparation
I love how quickly this recipe comes together. In just a short time, you can transform raw ingredients into a vibrant dish, ideal for those busy weeknights when you need something delicious without slaving over the stove for hours. It’s a great option for when friends drop by unexpectedly!
Crispy Goodness
Let’s not forget about the crispy texture. The method of battering the chicken and frying it creates a delightful crunch that contrasts beautifully with the velvety sauce. This texture is what elevates Orange Chicken from just good to absolutely fantastic!
Versatile Dish
This recipe is also incredibly versatile. You can easily adjust it to suit your tastes or dietary needs. Whether you want to make it spicier with a dash of chili flakes or lighter by using less sugar, the possibilities are endless. Plus, it pairs wonderfully with different sides such as steamed rice or sautéed vegetables, making it a flexible choice for any meal planning.
Family Favorite
Last but not least, this dish has quickly become a family favorite. Everyone, from my kids to my parents, enjoys it, which makes me feel like a culinary hero every time I serve it. There’s something special about seeing smiles around the dinner table, all thanks to the delightful Orange Chicken.
Ingredients You’ll Need for Orange Chicken
As you prepare to embark on this culinary adventure, it’s important to understand the magic behind these ingredients. Each component plays a crucial role in creating the perfect balance of flavors and textures in your Orange Chicken. From the zesty kick of the orange zest to the savory depth from the soy sauce, these ingredients work together to create a deliciously harmonious dish.
- ⅓ cup hoisin sauce: A thick, sweet sauce that adds depth and richness.
- 1 teaspoon orange zest: Provides a fresh, citrusy aroma that enhances the dish.
- 3 tablespoons orange juice: Adds sweetness and acidity to balance flavors.
- 3 tablespoons soy sauce: A savory element that deepens the overall taste.
- ½ cup sugar: Sweetens the sauce and helps create a caramelized exterior.
- 1 teaspoon sesame oil: Adds a nutty flavor that complements the other ingredients.
- 1 tablespoon cornstarch: Helps thicken the sauce and provides a nice coating for the chicken.
- 2 tablespoons water: Used to adjust sauce consistency.
- 2½ cups flour (divided): Used for coating the chicken, creating a crispy batter.
- 1 cup ice cold water: Essential for making a light batter.
- 1 large egg: Adds richness to the batter.
- ¼ cup cornstarch: Helps achieve that crispy texture when frying.
- 1 teaspoon salt: Enhances the flavors of the dish.
- ½ teaspoon black pepper: Adds a mild heat.
- Vegetable oil: Used for frying and then for stir-frying.
- 1 lb chicken thighs (boneless, skinless, cut into bite-sized pieces): The star of the dish.
- 1 tablespoon ginger (fresh, minced): Adds warmth and spice.
- 2 large cloves garlic (minced): Provides aromatic depth.
- 1 tablespoon scallions (chopped, for garnish, optional): Adds a fresh touch on top.
Directions for Orange Chicken
Ready to create something amazing? Let’s dive into the simple steps for making your very own Orange Chicken. Trust me; your kitchen is about to smell incredible! Follow these detailed steps to ensure perfect results.
- In a medium bowl, mix together all of the sauce ingredients: hoisin sauce, orange zest, orange juice, soy sauce, sugar, sesame oil, cornstarch, and water. Whisk until fully combined and set aside. The mixture should be smooth, with a nice thick consistency. This sauce is the heart of your dish, adding that sweet and tangy flavor.
- In another bowl or pan, combine 1½ cups of flour with ice cold water and egg. Stir until you achieve a batter that resembles pancake batter in consistency. This batter is crucial for coating your chicken and achieving that crispy outer layer.
- In a separate bowl or platter, mix together 1 cup of flour, cornstarch, salt, and black pepper. This will be your dredging mixture, essential for the next step.
- Heat about 2 inches of vegetable oil in your wok until it reaches 350°F. Use a cooking thermometer to check the temperature; this ensures that your chicken will fry properly and become crispy.
- Working in batches, coat the chicken thighs in the wet batter, ensuring it’s fully covered, then dredge them in the flour mixture. Set aside on a plate. Repeat until all the chicken is coated. Watch for the batter to cling well; this creates the perfect frying layer.
- Carefully fry the battered chicken in the hot oil until they turn golden brown and crispy. This should take about 4 to 6 minutes per batch, depending on the size of your pieces. Use a spider or metal tongs to remove the chicken from the oil and let it drain on a plate lined with paper towels. The color should be a beautiful golden hue; this indicates they’re cooked through and crispy.
- Once all the chicken is fried, carefully discard the oil from the wok and clean it out with a paper towel. It’s important to keep your cooking area clean to ensure the best flavors in your sauce.
- Heat 2 tablespoons of fresh vegetable oil over high heat in the wok. Wait until it’s shimmering before proceeding. This step is crucial for stir-frying your aromatics.
- Add minced ginger and garlic to the hot oil and stir-fry for about 30 seconds, stirring constantly to avoid burning. The aroma will be heavenly, filling your kitchen with warmth and flavor.
- Pour in the reserved sauce and stir frequently. Bring it to a boil and let it simmer for about 2 to 3 minutes, or until slightly thickened. This is where the magic happens, as the sauce transforms into a sticky glaze.
- Add all of the fried chicken pieces to the wok and stir to fully coat them in the sauce. The key here is to ensure every piece is covered. Serve immediately over rice, garnished with chopped scallions. Enjoy the vibrant colors and enticing smells as you plate your dish!
Things Worth Knowing
- Oil Temperature: Ensuring your oil is at the right temperature is crucial for crispy chicken. Too low, and it will become greasy; too high, and it will burn.
- Resting Time: Let the fried chicken rest on paper towels after frying. This helps absorb excess oil and keeps it crispy.
- Thickening Sauce: If you want a thicker sauce, simply let it simmer longer or add a bit more cornstarch mixed with water.
- Leftover Sauce: Any leftover sauce can be stored in the fridge for up to one week. Use it to stir-fry vegetables for a quick meal.
Substitutions and Tips
When making Orange Chicken, it can be beneficial to have a few tips in mind. Here are some suggestions to enhance your experience:
- Storage: Leftovers can be stored in an airtight container in the fridge for up to 3 days. Reheat in the microwave or on the stovetop.
- Freezing: You can freeze cooked chicken for up to 2 months. Just ensure it’s fully cooled before transferring to a freezer-safe bag.
- Pairing: Serve Orange Chicken over steamed rice, fried rice, or with a side of stir-fried vegetables for a complete meal.
- Flavor Variations: Add a splash of rice vinegar for acidity or chili flakes for some heat in the sauce.
- Cooking Method: This recipe can also be made using an air fryer for a healthier version without sacrificing the crunch!
Serving Suggestions
When it comes to serving your homemade Orange Chicken, there are countless possibilities to explore. Here are some ideas to help you create an unforgettable meal:
- Over Rice: The classic choice is serving this dish over a bed of fluffy steamed rice. The rice absorbs the delicious sauce, enhancing every bite.
- With Stir-Fried Vegetables: Pair your chicken with a colorful array of stir-fried vegetables like bell peppers, broccoli, and snap peas for an added crunch and nutritional boost.
- On Noodles: For a twist, serve your Orange Chicken over cooked noodles, tossing them in the sauce for a delightful combination.
- As a Party Dish: This dish is a fantastic option for parties or gatherings. Set up a buffet and let guests serve themselves with all the sides.
- Seasonal Touch: In fall, consider adding some roasted pumpkin or squash as a side to bring a seasonal flair to your meal.
- Lunch Box: Pack leftover Orange Chicken in lunch boxes with rice and veggies for a delicious midday meal.
FAQ
Conclusion
This delicious Orange Chicken recipe is truly a gem that brings the flavors of takeout right to your home. With its crispy exterior and sweet, tangy sauce, it’s sure to impress family and friends alike. I hope you give it a try and enjoy every bite. Trust me, once you make this dish, it will become a favorite in your kitchen!
Orange Chicken
Ingredients
Equipment
Method
- In a medium bowl, mix together all of the sauce ingredients: hoisin sauce, orange zest, orange juice, soy sauce, sugar, sesame oil, cornstarch, and water. Whisk until fully combined and set aside. The mixture should be smooth, with a nice thick consistency. This sauce is the heart of your dish, adding that sweet and tangy flavor.
- In another bowl or pan, combine 1½ cups of flour with ice cold water and egg. Stir until you achieve a batter that resembles pancake batter in consistency. This batter is crucial for coating your chicken and achieving that crispy outer layer.
- In a separate bowl or platter, mix together 1 cup of flour, cornstarch, salt, and black pepper. This will be your dredging mixture, essential for the next step.
- Heat about 2 inches of vegetable oil in your wok until it reaches 350°F. Use a cooking thermometer to check the temperature; this ensures that your chicken will fry properly and become crispy.
- Working in batches, coat the chicken thighs in the wet batter, ensuring it’s fully covered, then dredge them in the flour mixture. Set aside on a plate. Repeat until all the chicken is coated. Watch for the batter to cling well; this creates the perfect frying layer.
- Carefully fry the battered chicken in the hot oil until they turn golden brown and crispy. This should take about 4 to 6 minutes per batch, depending on the size of your pieces. Use a spider or metal tongs to remove the chicken from the oil and let it drain on a plate lined with paper towels. The color should be a beautiful golden hue; this indicates they're cooked through and crispy.
- Once all the chicken is fried, carefully discard the oil from the wok and clean it out with a paper towel. It’s important to keep your cooking area clean to ensure the best flavors in your sauce.
- Heat 2 tablespoons of fresh vegetable oil over high heat in the wok. Wait until it's shimmering before proceeding. This step is crucial for stir-frying your aromatics.
- Add minced ginger and garlic to the hot oil and stir-fry for about 30 seconds, stirring constantly to avoid burning. The aroma will be heavenly, filling your kitchen with warmth and flavor.
- Pour in the reserved sauce and stir frequently. Bring it to a boil and let it simmer for about 2 to 3 minutes, or until slightly thickened. This is where the magic happens, as the sauce transforms into a sticky glaze.
- Add all of the fried chicken pieces to the wok and stir to fully coat them in the sauce. The key here is to ensure every piece is covered. Serve immediately over rice, garnished with chopped scallions. Enjoy the vibrant colors and enticing smells as you plate your dish!
Notes
- Tip 1: Leftovers can be stored in an airtight container in the fridge for up to 3 days. Reheat in the microwave or on the stovetop.
- Tip 2: You can freeze cooked chicken for up to 2 months. Just ensure it’s fully cooled before transferring to a freezer-safe bag.
- Tip 3: Serve Orange Chicken over steamed rice, fried rice, or with a side of stir-fried vegetables for a complete meal.
- Tip 4: Add a splash of rice vinegar for acidity or chili flakes for some heat in the sauce.
- Tip 5: This recipe can also be made using an air fryer for a healthier version without sacrificing the crunch!