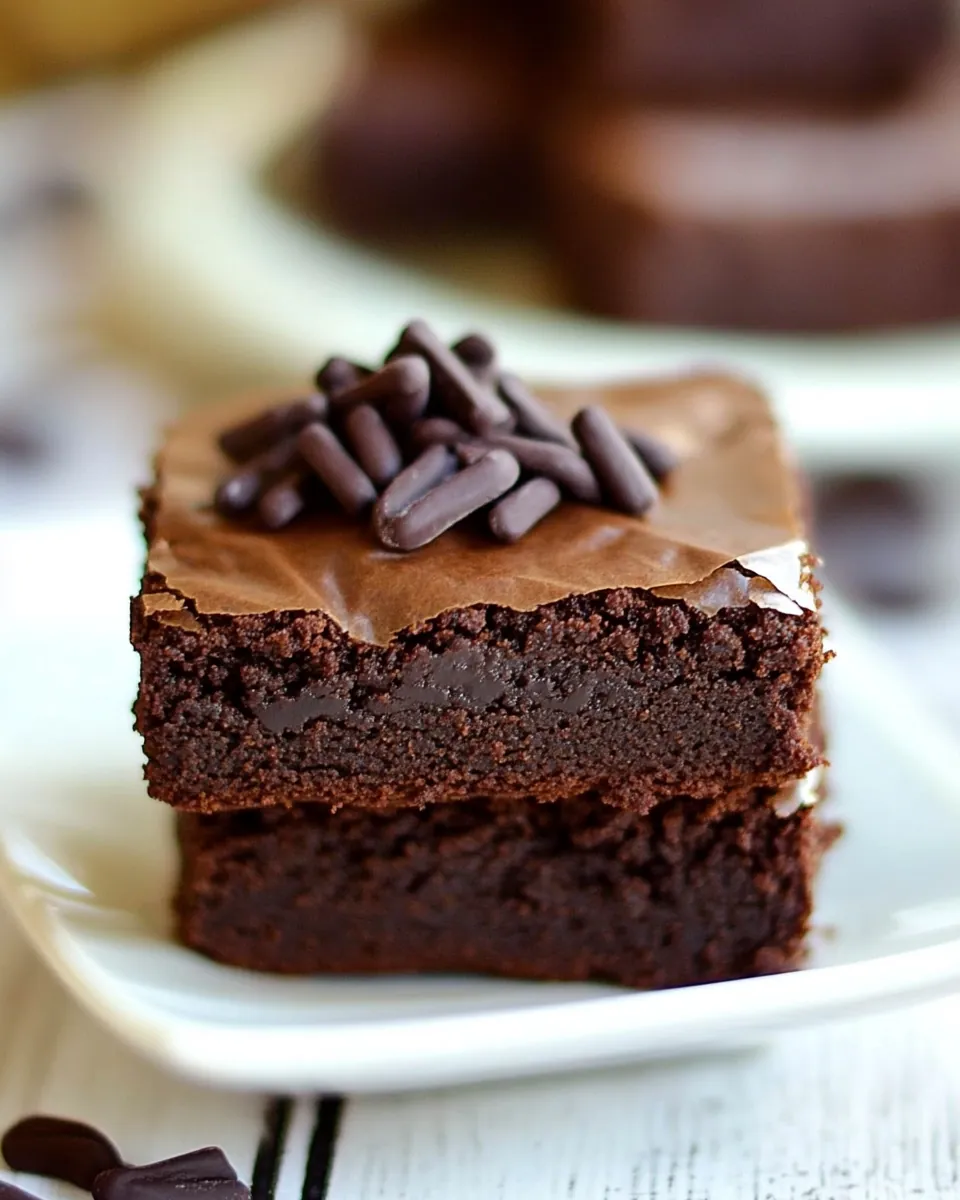
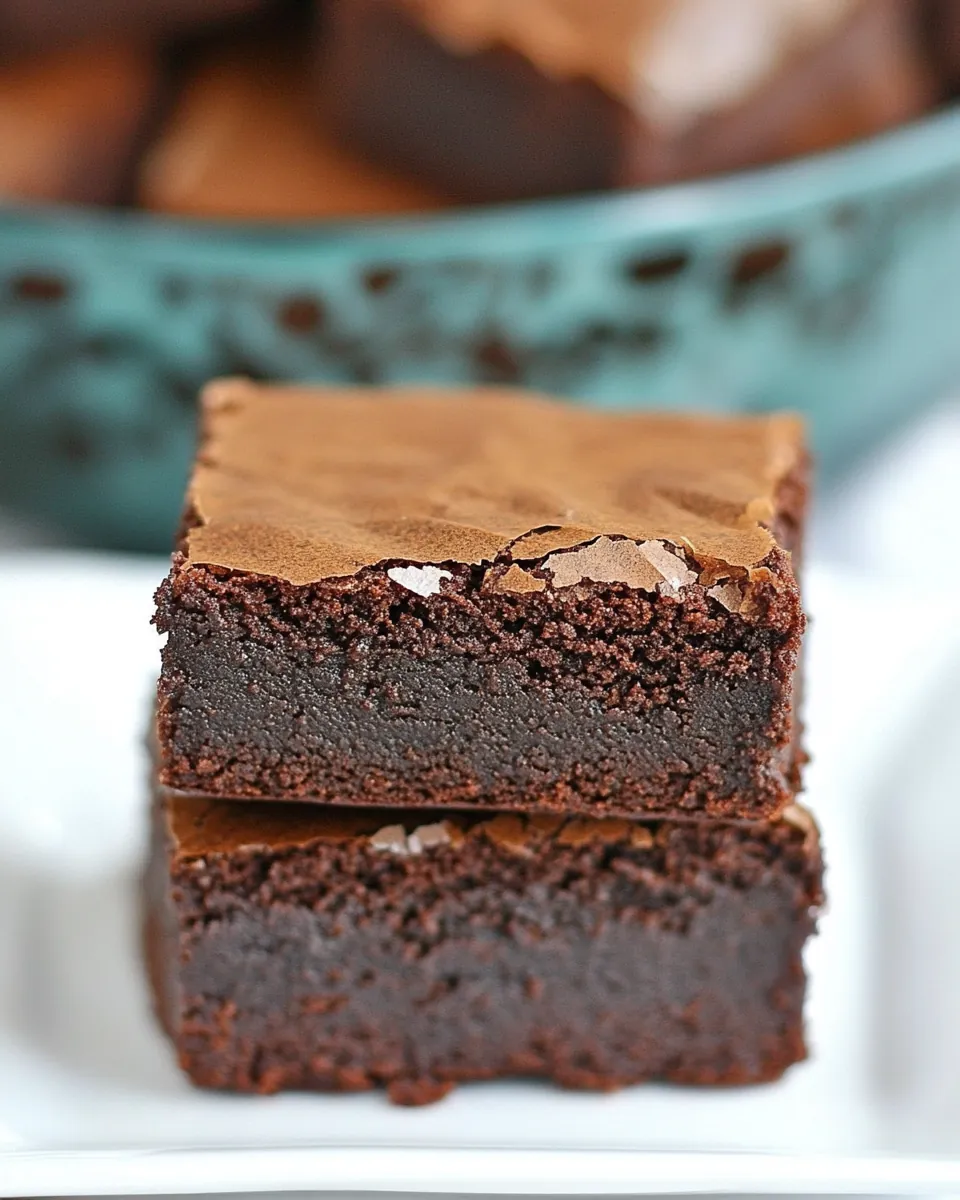
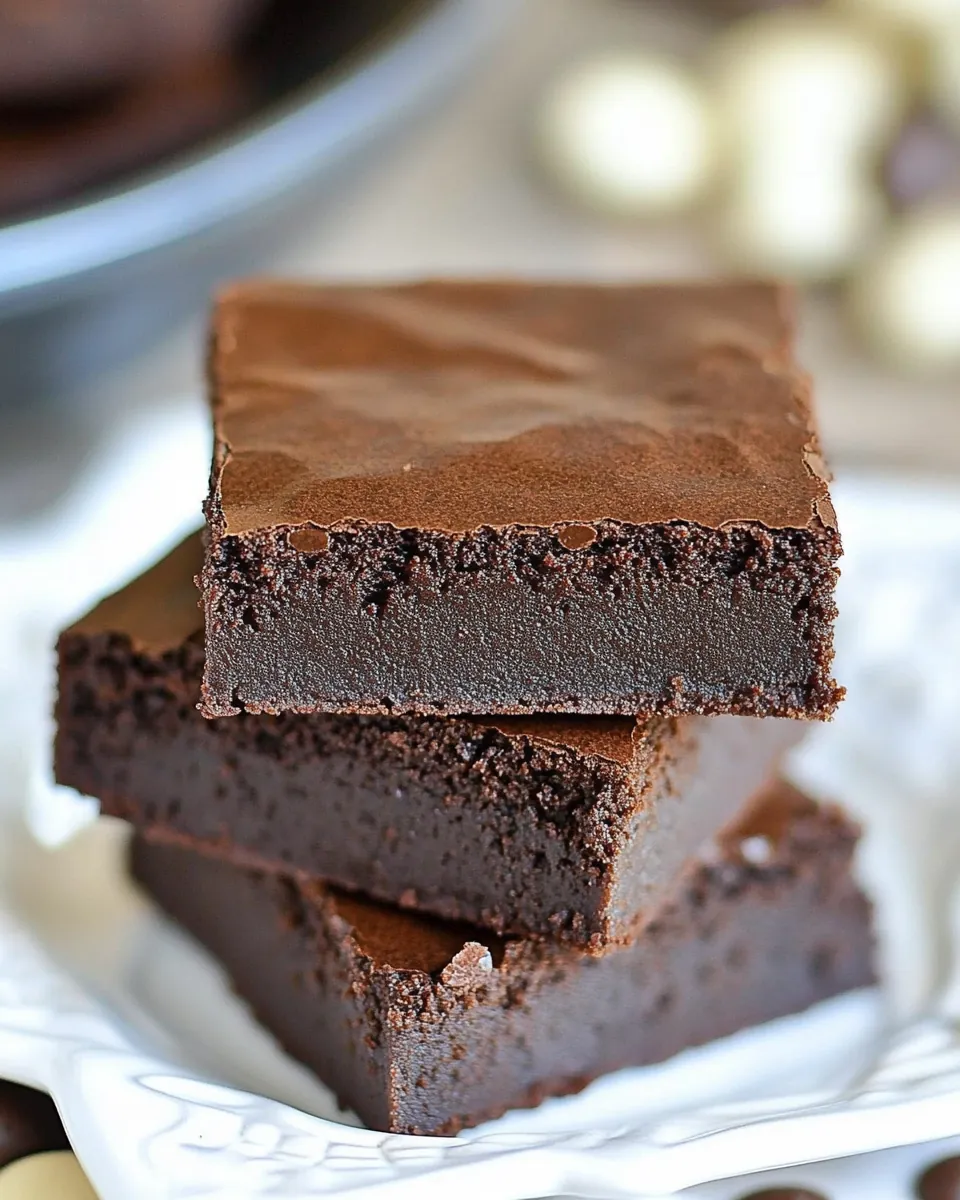
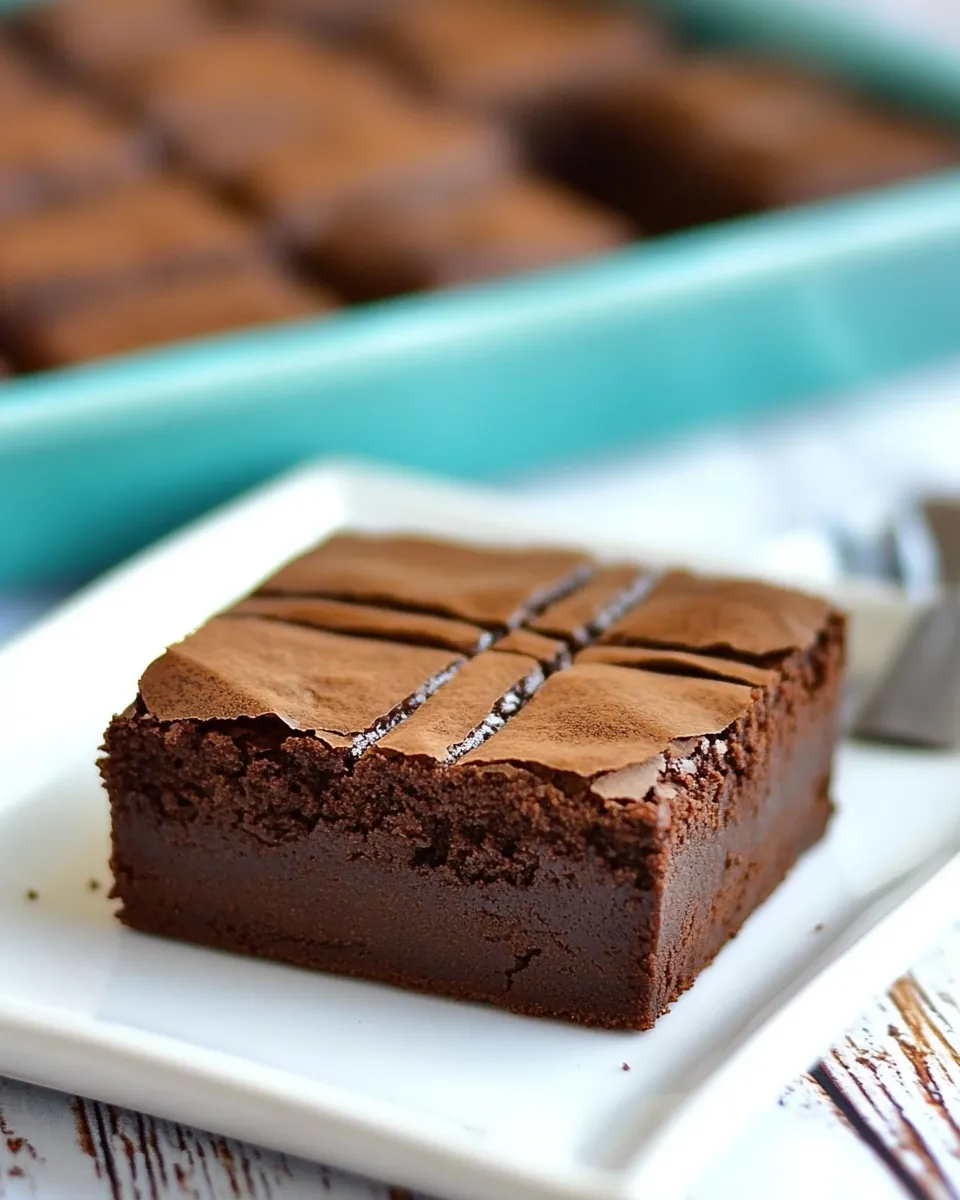
Mocha Truffle Brownies
Whenever I think of indulgence, Mocha Truffle Brownies come to mind. There’s something about the rich combination of chocolate and coffee that makes them feel like a luxurious treat. I vividly remember the first time I made these brownies. It was a chilly fall afternoon, and the aroma of melting chocolate filled my kitchen. Friends gathered around the table, eagerly waiting for a taste. These brownies quickly became a staple at gatherings, and every bite brings back memories of laughter and joy. The velvety texture paired with the hint of coffee makes for a delightful dessert that’s perfect for any occasion.
Recipe Snapshot
50 mins
10 mins
40 mins
Medium
200 kcal
2 g
Gluten-Free, Low FODMAP
10 g
Oven, Baking Sheet, Frying Pan, Large Pot, Mixing Bowl, Wooden Spoon
The Charm of This Mocha Truffle Brownies
Decadent Chocolate Flavor
The rich flavor of the dark chocolate chips combined with the creamy butter creates a luscious base for the brownies. This combination ensures each bite is packed with chocolate goodness.
Perfectly Balanced Sweetness
With just the right amount of granulated sugar, these brownies achieve a perfect balance between sweetness and richness. It’s not overwhelming, allowing the chocolate flavor to shine through.
Mocha Magic
The addition of instant coffee elevates the flavor profile, enhancing the chocolate’s richness while adding a subtle coffee aroma. It’s a delightful surprise that coffee lovers will appreciate.
Easy to Make
If you’re looking for a simple yet impressive dessert, these brownies are perfect. The steps are straightforward, making it easy for anyone to whip up a batch.
Versatile Treat
Whether you’re serving them at a dinner party or enjoying them with a cup of coffee at home, Mocha Truffle Brownies fit any occasion. They can be dressed up with a scoop of ice cream or served plain for a cozy treat.
Irresistible Ganache Topping
The whipping cream and chocolate ganache creates a glossy finish that adds an extra layer of indulgence. This topping not only looks beautiful but also complements the chewy brownie texture perfectly.
What Goes Into Mocha Truffle Brownies
The ingredients for Mocha Truffle Brownies come together beautifully to create a harmonious blend of flavors and textures. Each component plays a vital role in achieving that perfect brownie experience. From the rich chocolates to the fluffy eggs, let’s explore what makes these brownies so special.
- 6 ounces dark chocolate chips: The heart of the brownies, these chips provide a deep, rich chocolate flavor that forms the base of the dessert.
- 3 ounces semi-sweet chocolate chips: Adding a contrasting sweetness, this combination enhances the overall chocolate experience.
- 11 tablespoons butter: Essential for creating a moist and fudgy texture, the butter is melted together with chocolate for a silky blend.
- 1 teaspoon instant coffee: Works to elevate the chocolate flavor, making it even richer and more complex.
- ⅓ cup boiling water: Used to dissolve the coffee and enhance its flavor while integrating it seamlessly into the chocolate.
- 3 eggs: Vital for structure, the eggs help bind the ingredients and create a light texture.
- 1 ¾ cups granulated sugar: Sweetens the brownies, balancing the rich chocolate and coffee.
- 1 cup all-purpose flour: Provides structure, helping to create that chewy brownie texture we all love.
- 1 tablespoon cocoa powder: Adds depth to the chocolate flavor, enriching the overall taste.
- 2 cups semi-sweet chocolate chips: Used in the topping, these melt beautifully to create a luscious ganache.
- ⅔ cup heavy whipping cream: This adds creaminess to the ganache, contributing to its rich texture.
Preparation Steps for Mocha Truffle Brownies
Making Mocha Truffle Brownies is a straightforward process that yields delicious results. The steps below guide you through creating these delectable treats from start to finish. Let’s get started on this chocolate adventure!
Begin by melting the dark chocolate chips and butter together. Use a microwave-safe container and heat them on medium in thirty-second intervals. Stir in between until the chocolate is completely melted and smooth. This creates the base of your brownie batter that will be rich and luscious.
Next, combine boiling water and instant coffee in a bowl, stirring to dissolve the coffee granules completely. Then, pour one-third of a cup of this coffee mixture into your melted chocolate and stir until well combined. Let this mixture cool to room temperature; this step is critical to avoid cooking the eggs in the next step.
While your chocolate mixture is cooling, preheat your oven to 325°F. Grease and flour a 9×13 baking pan using cocoa powder, ensuring to tap out any excess. This will prevent the brownies from sticking and will give them a beautiful finish.
In a mixing bowl, beat three eggs until they are light and frothy. This aeration will help create a lighter texture in your brownies. Then, gradually add in the granulated sugar and beat for about two minutes on medium speed until the mixture is pale and creamy.
Reduce the mixer speed to low and pour in the cooled chocolate-coffee mixture. Beat until just combined, being careful not to overmix.
Gently stir in the all-purpose flour until just combined. Avoid overmixing this step as it can lead to dense brownies. You want to fold the mixture lightly to maintain that fudgy texture.
Pour the brownie batter into the prepared baking pan, spreading it evenly. Bake in the preheated oven for 40 minutes or until the brownies are set. They may crack on top, but that’s perfectly fine as they will be covered with ganache later.
Once baked, remove the brownies from the oven and let them cool completely in the pan. Patience is key here!
For the ganache, combine the semi-sweet chocolate chips and heavy whipping cream in a small saucepan. Stir over low heat until the chocolate has melted and the cream is fully incorporated, creating a smooth, glossy ganache.
Once the brownies are cool, pour the ganache over the top and spread it evenly. Refrigerate until the ganache has set completely. Finally, cut into bars and store in an airtight container to keep them fresh.
Things Worth Knowing
- Quality Chocolate Matters: Use high-quality chocolate for the best flavor. The better the chocolate, the richer your brownies will be.
- Room Temperature Ingredients: Ensure your eggs are at room temperature for a smoother batter. This helps in achieving the perfect texture.
- Don’t Open the Oven: Avoid opening the oven door while baking, as this can cause your brownies to sink in the middle.
- Cool Completely: Allow the brownies to cool completely before adding ganache. This prevents the ganache from melting into the brownies.
Customization Ideas
There are endless possibilities when it comes to customizing your Mocha Truffle Brownies. Here are some fun ideas to inspire your next batch:
- Add Nuts: Consider folding in some chopped walnuts or pecans for a crunchy texture that contrasts with the fudgy brownies.
- Flavored Ganache: Enhance the ganache with a touch of peppermint extract for a festive twist, or try using flavored chocolate.
- Swirl in Caramel: Drizzle some caramel sauce into the batter before baking for a sweet surprise.
- Use Different Chocolates: Experiment with milk chocolate or dark chocolate to suit your taste preferences.
- Top with Sea Salt: A sprinkle of flaky sea salt on top before serving can elevate the flavors and add a gourmet touch.
- Make it a Sundae: Serve warm brownies topped with vanilla ice cream and chocolate sauce for an irresistible dessert.
What Complements This Mocha Truffle Brownies
When serving Mocha Truffle Brownies, consider pairing them with a variety of delicious options that enhance their rich flavor:
- Coffee: A classic pairing, enjoy these brownies alongside a cup of brewed coffee to enhance the mocha flavor.
- Ice Cream: Vanilla or coffee ice cream makes a delightful topping, balancing the brownies’ richness.
- Fresh Berries: Serve with raspberries or strawberries for a fresh contrast to the fudgy texture.
- Whipped Cream: A dollop of whipped cream adds lightness and creaminess, perfect for enhancing every bite.
- Serving Occasion: These brownies are perfect for gatherings, holidays, or even as a sweet treat during a cozy night in.
- Storing Tips: Keep leftovers in an airtight container at room temperature for up to three days or refrigerate for up to a week.
FAQ
Conclusion
Mocha Truffle Brownies are a delightful combination of rich chocolate and coffee, making them a standout dessert. They are perfect for indulging sweet cravings or impressing guests at any gathering. I encourage you to try making these brownies soon; the process is simple, and the joy they bring is truly rewarding. Enjoy every luscious bite!
Mocha Truffle Brownies
Ingredients
Equipment
Method
- Begin by melting the dark chocolate chips and butter together. Use a microwave-safe container and heat them on medium in thirty-second intervals. Stir in between until the chocolate is completely melted and smooth. This creates the base of your brownie batter that will be rich and luscious.
- Next, combine boiling water and instant coffee in a bowl, stirring to dissolve the coffee granules completely. Then, pour one-third of a cup of this coffee mixture into your melted chocolate and stir until well combined. Let this mixture cool to room temperature; this step is critical to avoid cooking the eggs in the next step.
- While your chocolate mixture is cooling, preheat your oven to 325°F. Grease and flour a 9×13 baking pan using cocoa powder, ensuring to tap out any excess. This will prevent the brownies from sticking and will give them a beautiful finish.
- In a mixing bowl, beat three eggs until they are light and frothy. This aeration will help create a lighter texture in your brownies. Then, gradually add in the granulated sugar and beat for about two minutes on medium speed until the mixture is pale and creamy.
- Reduce the mixer speed to low and pour in the cooled chocolate-coffee mixture. Beat until just combined, being careful not to overmix.
- Gently stir in the all-purpose flour until just combined. Avoid overmixing this step as it can lead to dense brownies. You want to fold the mixture lightly to maintain that fudgy texture.
- Pour the brownie batter into the prepared baking pan, spreading it evenly. Bake in the preheated oven for 40 minutes or until the brownies are set. They may crack on top, but that’s perfectly fine as they will be covered with ganache later.
- Once baked, remove the brownies from the oven and let them cool completely in the pan. Patience is key here!
- For the ganache, combine the semi-sweet chocolate chips and heavy whipping cream in a small saucepan. Stir over low heat until the chocolate has melted and the cream is fully incorporated, creating a smooth, glossy ganache.
- Once the brownies are cool, pour the ganache over the top and spread it evenly. Refrigerate until the ganache has set completely. Finally, cut into bars and store in an airtight container to keep them fresh.
Notes
- Room temperature: Brownies can be stored in an airtight container for up to three days at room temperature.
- Refrigerator: To extend storage time, brownies can be stored in an airtight container in the refrigerator for up to one week.
- Freezing: While it’s possible to freeze brownies with ganache frosting, the frosting’s texture might be affected upon thawing. It’s generally recommended to freeze the brownies without the ganache and add it once they’ve thawed. Brownies can be frozen for up to three months when stored with a layer of plastic wrap and foil.