
Lemon Cherry Cheese Danish
There’s something incredibly special about a warm, flaky pastry that fills your kitchen with the sweet aroma of citrus and cherry. The Lemon Cherry Cheese Danish is exactly that kind of treat. Whenever I bake this delightful pastry, it takes me back to my childhood, when my grandmother would whip up her famous danishes on lazy Sunday mornings. I remember sitting at the kitchen table, excitedly waiting for that first bite, as she would explain the delicate balance of flavors and textures that this dish embodies. Each bite is a little celebration of the season, especially spring, when the fresh flavors of lemon and cherry are at their peak. This recipe is perfect for sharing with family and friends or simply enjoying by yourself with a cup of coffee. Whether it’s for brunch or a sweet snack, the Lemon Cherry Cheese Danish is sure to bring a little joy to your day!
Recipe Snapshot
30 mins
10 mins
20 mins
Medium
290 kcal
3 g
Vegan, Gluten-Free, AIP
15 g
Baking Sheet, Chef’s Knife, Mixing Bowl, Oven
Why This Lemon Cherry Cheese Danish Stands Out
Why I Love This Recipe
Bright and Flavorful
The combination of lemon and cherry creates a refreshing burst of flavor that perfectly balances the richness of the cream cheese. It’s like a springtime celebration in every bite!Easy to Make
Don’t let the impressive appearance fool you. The Lemon Cherry Cheese Danish comes together quickly using store-bought crescent dough, making it accessible for even novice bakers.Versatile Enjoyment
This danish can be served at brunch, as an afternoon snack, or even as a dessert. It’s suitable for various occasions, from casual gatherings to more formal celebrations.Perfectly Flaky Texture
The use of crescent dough gives the danish its light and flaky texture. When baked, the pastry puffs beautifully, creating a perfect vessel for the creamy filling and juicy toppings.Great for Sharing
This recipe yields enough slices to share, making it a fantastic choice for potlucks or family gatherings. Everyone will be asking for your secret!
Main Ingredients for Lemon Cherry Cheese Danish

The ingredients for a Lemon Cherry Cheese Danish are simple yet harmonious, each playing a crucial role in the overall flavor and texture of the dish. The star players are the crescent dough, which provides a flaky base, and the cream cheese, which adds richness and creaminess. Fresh lemon zest brightens the filling, while the cherry pie filling brings a sweet, tart contrast that elevates the entire pastry.
- Crescent Dough Sheet: This pre-made dough is a time-saver and provides that flaky texture that’s so irresistible. It rolls out easily and holds the filling beautifully.
- Cream Cheese: Softened to room temperature, this ingredient adds a rich and creamy layer to the danish. Its tangy flavor complements the sweetness of the cherries perfectly.
- Granulated Sugar: Just the right amount of sugar enhances the sweetness of the filling without overpowering the other flavors.
- Lemon Zest: Freshly grated lemon zest brightens the filling, adding a vibrant citrus flavor that pairs wonderfully with the cherries.
- Cherry Pie Filling: This sweet filling adds a burst of fruity flavor and a beautiful color, making the danish visually appealing.
- Powdered Sugar: Used for the glaze, powdered sugar creates that perfect sweet topping that adds an elegant finish to the danish.
- Fresh Lemon Juice: Mixed with powdered sugar, lemon juice helps create a pourable glaze that adds a touch of citrus brightness to the final pastry.
Directions for Lemon Cherry Cheese Danish
Making a Lemon Cherry Cheese Danish is a delightful process that fills your kitchen with heavenly aromas. Follow these simple steps to ensure your danish turns out beautifully every time. Let’s dive into the process!
- Preheat your oven to 375F degrees. This is an essential first step to make sure your danish bakes evenly and achieves that beautiful golden color.
- Top a baking sheet with parchment paper and set it aside. This will prevent sticking and make cleanup a breeze later on.
- Add the softened cream cheese, granulated sugar, lemon zest, and lemon extract to the bowl of a stand mixer. Beat them together until fully combined and smooth. Remember to stop once to scrape the sides of the bowl with a spatula to ensure everything is well mixed.
- Unroll the seamless dough sheet onto the prepared baking sheet. Make sure it lays flat and is evenly spread out to hold the filling.
- Spread the creamy lemon cream cheese filling down the middle of the dough sheet, ensuring an even layer.
- Spread the cherry filling on top of the cream cheese layer. You can use more or less depending on your preference, but I recommend around 1 cup for a burst of flavor.
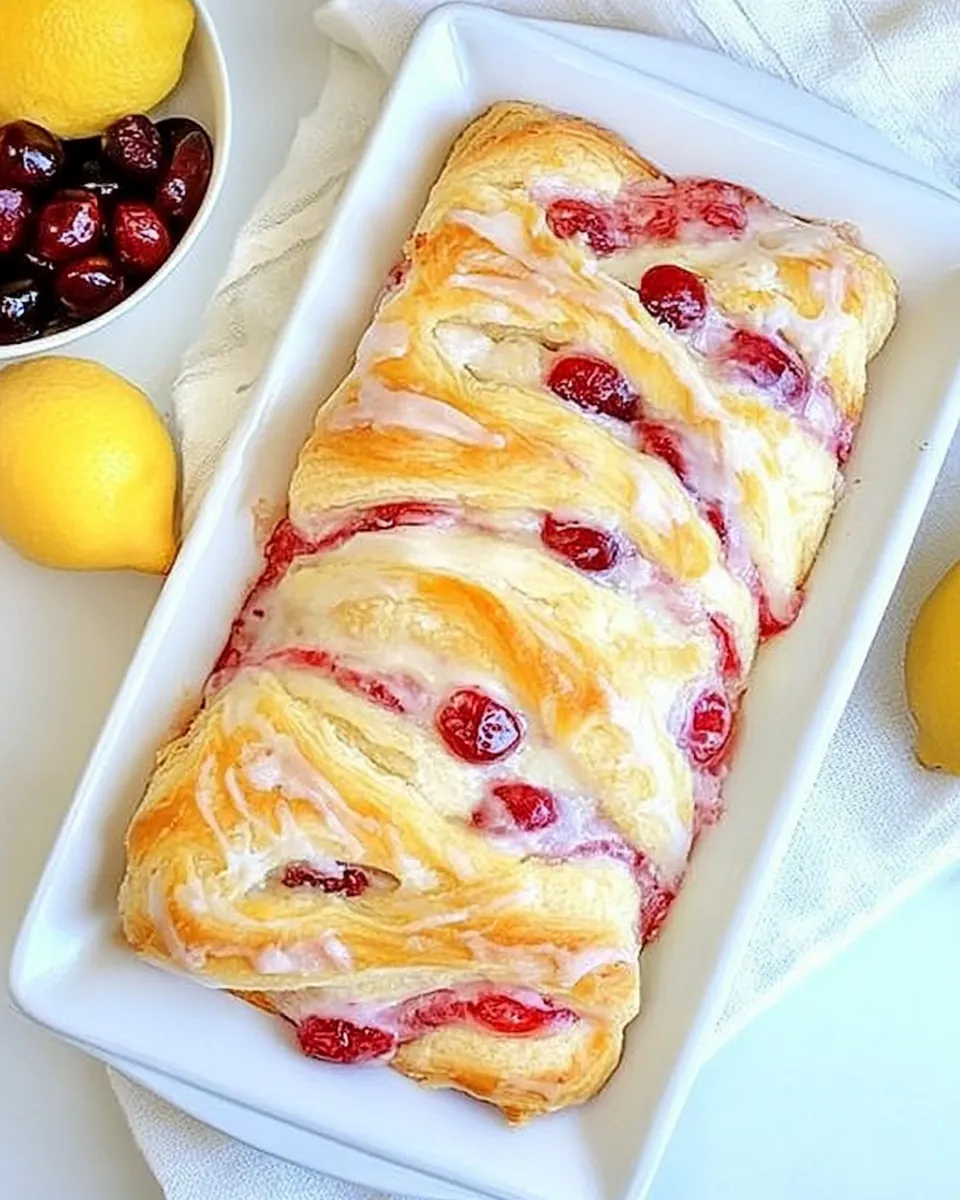
- On each long side of the dough, make 2-inch long cuts about 1 inch apart. This will allow the dough to fold beautifully over the filling.
- Starting from one end of the dough sheet, fold the strips over the filling from one side to the other, creating a beautiful braided effect.
- Bake the danish in the preheated oven for 15 to 20 minutes, or until it is golden brown. Keep an eye on it, checking at 15 minutes to see if it’s ready.
- Once baked, remove the danish from the oven and let it cool completely before icing, which should take around 20 to 30 minutes.
- For the lemon glaze, add the powdered sugar to a medium bowl and mix in two tablespoons of fresh lemon juice. Stir until fully combined with no lumps. If the mixture is too thick, add one more tablespoon of lemon juice until you reach your desired consistency.
- Once the danish has cooled, drizzle the lemon icing over it using a fork or spoon. This adds a sweet, tangy finish to your delightful pastry.
- Finally, slice the Lemon Cherry Cheese Danish and serve it warm or at room temperature!
Things Worth Knowing
- Watch the Dough: Ensure the crescent dough is not overbaked; it should be golden and flaky, not hard.
- Room Temperature Ingredients: Use softened cream cheese for a smooth filling that blends easily.
- Experiment with Flavors: While lemon and cherry are classic, feel free to explore other fruit fillings or flavored creams.
- Cooling Time: Allow the danish to cool completely before icing; this ensures the glaze doesn’t melt into the pastry.
Tips for Success
Follow these handy tips to ensure your Lemon Cherry Cheese Danish turns out perfectly every time. Each step is essential for achieving that bakery-quality pastry.
- Storage: Store leftovers in an airtight container in the refrigerator for up to three days. Reheat in the oven for a few minutes to revive its flakiness.
- Freezing: Can you freeze this? Yes! Wrap individual slices in plastic wrap and then place them in a freezer bag. They can be frozen for up to a month.
- Pairing: This danish pairs wonderfully with coffee or tea, making it a perfect addition to brunch gatherings.
- Serving Tip: Serve warm for the best flavor experience. A light dusting of powdered sugar on top also adds a nice touch.
- Variation: Try adding nuts or a different fruit filling to customize your danish to your taste!
What to Serve With Lemon Cherry Cheese Danish
Pairing the Lemon Cherry Cheese Danish with the right accompaniments can elevate your dining experience. Here are some ideas:
- Coffee or Tea: This danish is the perfect partner for a warm cup of coffee or a soothing cup of tea, making it ideal for breakfast or brunch.
- Fresh Fruit: Serve alongside a medley of fresh fruits such as strawberries, blueberries, or even citrus slices for a refreshing contrast.
- Yogurt Parfait: Complement your danish with a yogurt parfait, layering yogurt with granola and fresh fruits to balance the sweetness.
- Seasonal Salads: Pair with a light salad featuring seasonal greens and a citrus dressing for a refreshing lunch option.
- Special Occasions: This danish is perfect for Easter brunch, spring festivities, or even as a sweet treat during a casual gathering with friends.
FAQ
Conclusion
The Lemon Cherry Cheese Danish is truly a delightful treat that marries the crisp flakiness of pastry with a luscious creamy filling and sweet fruit. It’s an ideal recipe for those looking to impress at brunch or simply enjoy a special snack at home. I encourage you to try making this danish; once you do, you’ll want to share it with everyone you know!

Lemon Cherry Cheese Danish
Ingredients
Equipment
Method
- Preheat oven to 375F degrees.
- Top a baking sheet with parchment paper and set aside.
- Add the softened cream cheese, granulated sugar, lemon zest, and lemon extract to the bowl of a stand mixer and beat until fully combined and smooth. Stop once to scrape the sides of the bowl with a spatula to make sure the mixture is fully combined.
- Unroll the seamless dough sheet onto the prepared baking sheet.
- Spread the lemon cream cheese filling down the middle of the dough sheet.
- Spread the cherry filling on top of the lemon cream cheese layer. You can use more or less cherry filling, I like using 1 cup so the danish is bursting with cherry filling.
- On each long side of the dough, left and right from the filling, make 2 inch long cuts about 1 inch apart. Check the photo at the end of the recipe.
- Starting at one end of the dough sheet, fold the strips over the filling from one side to the other, if you want on an angle.
- Bake the danish for 15-20 minutes, or until it is golden brown. Check at 15 minutes as it is probably ready.
- Remove the danish from the oven and let it completely cool before icing, around 20 - 30 minutes.
- Add the powdered sugar to a medium bowl, add two tablespoons of fresh lemon juice and mix until fully combined with no lumps. If the mixture is too thick add one more tablespoon of lemon juice. I like the glaze on the thicker side, yet pourable, so it will look white and shiny on the danish, not transparent.
- After the danish has cooled, use a fork or spoon to drizzle the lemon icing over the danish.
- Slice the danish and serve!
Notes
- Storage: Store leftovers in an airtight container in the refrigerator for up to three days. Reheat in the oven for a few minutes to revive its flakiness.
- Freezing: Can you freeze this? Yes! Wrap individual slices in plastic wrap and then place them in a freezer bag. They can be frozen for up to a month.
- Pairing: This danish pairs wonderfully with coffee or tea, making it a perfect addition to brunch gatherings.
- Serving Tip: Serve warm for the best flavor experience. A light dusting of powdered sugar on top also adds a nice touch.
- Variation: Try adding nuts or a different fruit filling to customize your danish to your taste!

