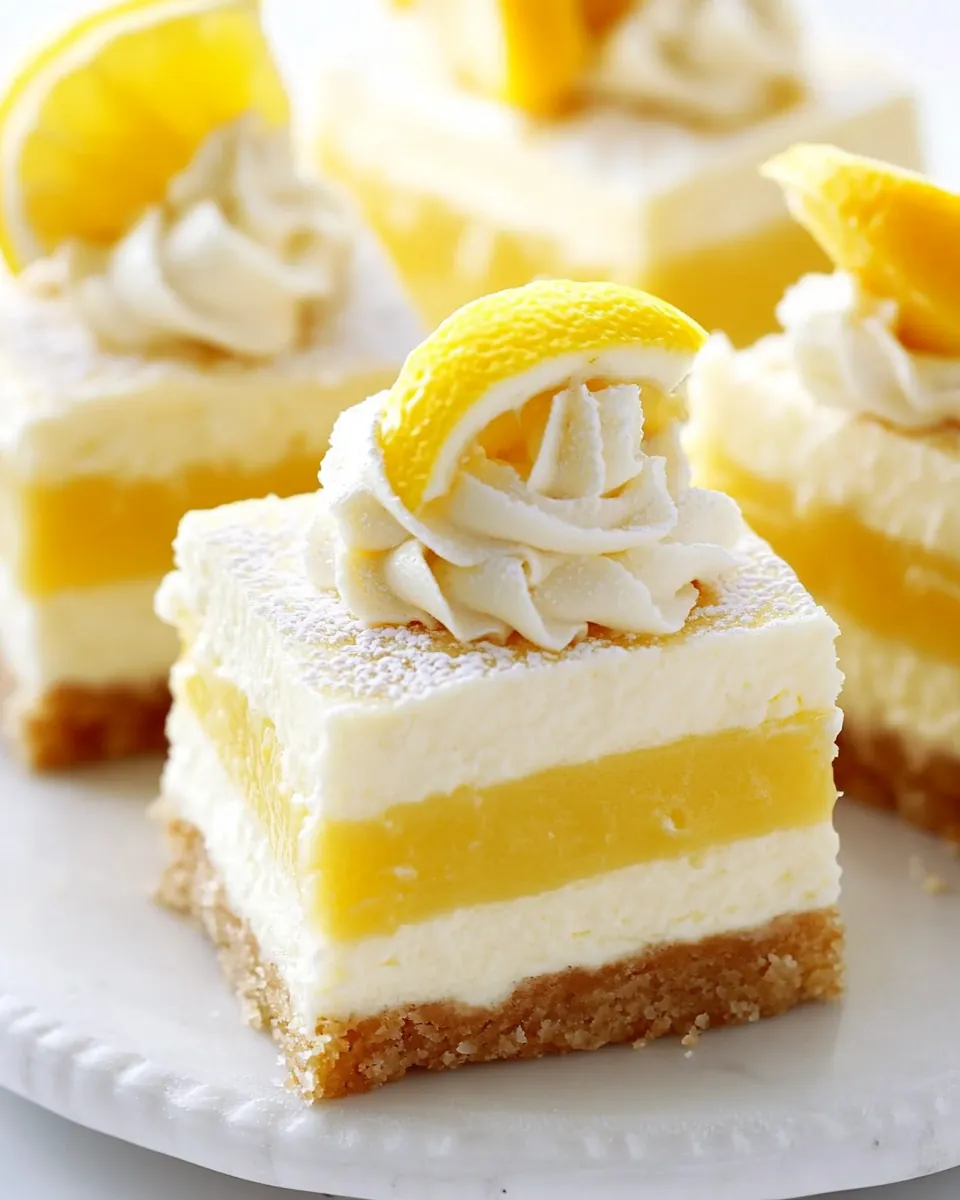
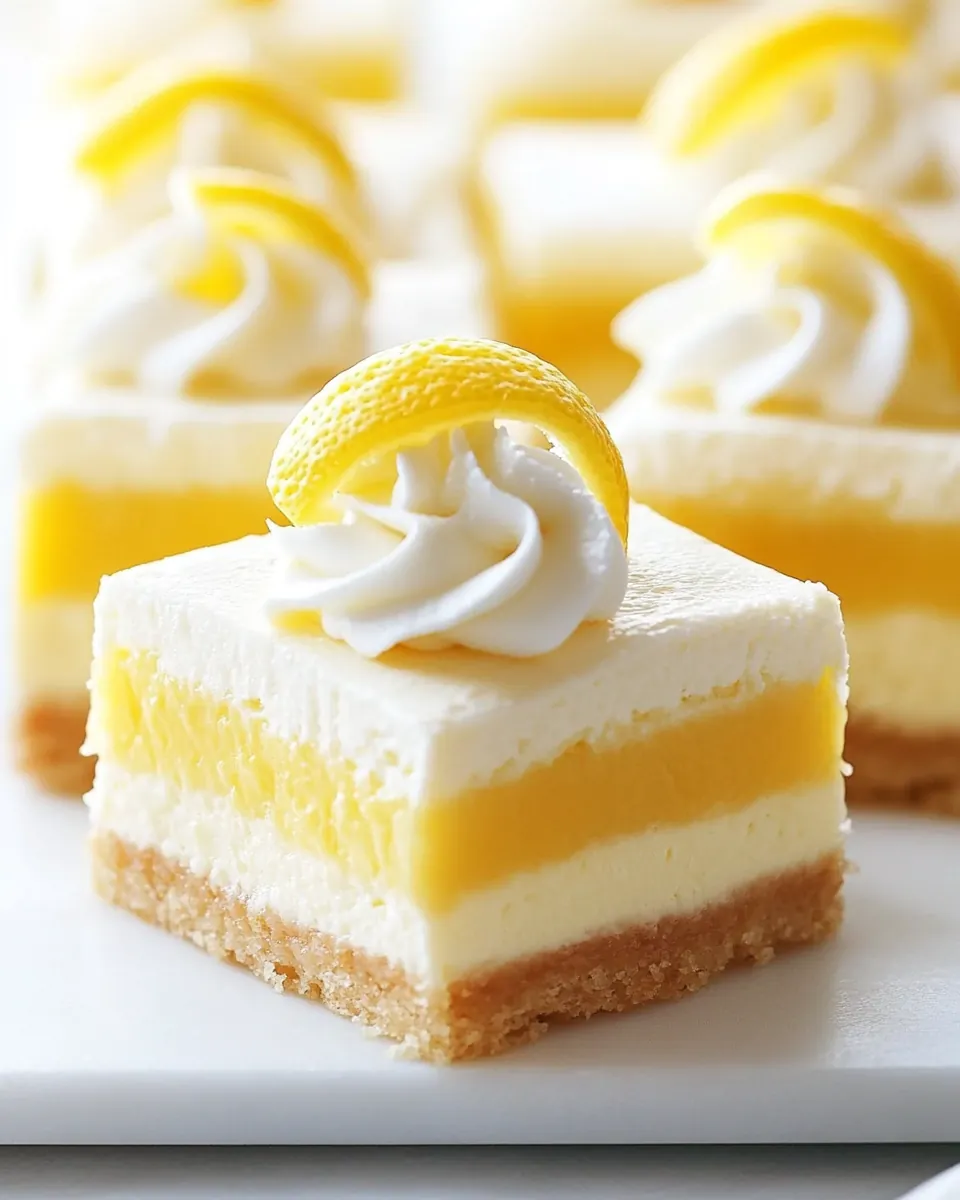
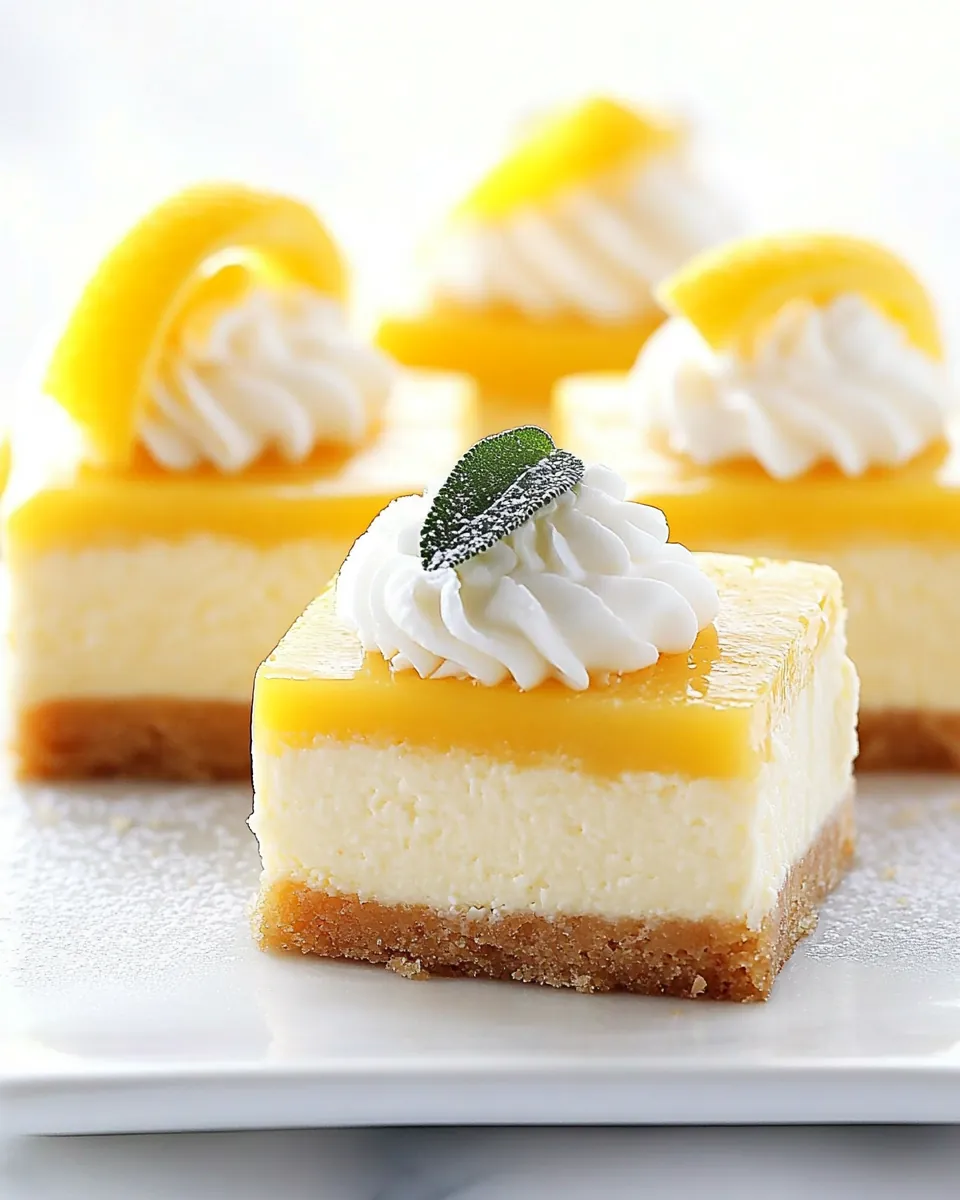
Lemon Cheesecake Bars
There’s something so incredibly refreshing about Lemon Cheesecake Bars. I still remember the first time I tried them at a family gathering—my aunt had made a batch that seemed to disappear in minutes. The creamy, tangy filling paired with a buttery crust was simply irresistible! Since then, I’ve made it my mission to perfect this delightful dessert for every spring celebration. These bars are not just a treat for the taste buds, but they evoke memories of bright sunshine, laughter, and joy. Whether it’s a picnic, a potluck, or just a sunny afternoon at home, Lemon Cheesecake Bars bring a taste of sunshine to any occasion. Today, I’m excited to share my version with you, hoping it becomes a beloved recipe in your home as it has in mine.
Recipe Snapshot
1 hr 50 mins
40 mins
70 mins
Hard
320 kcal
5 g
Gluten-Free, Low FODMAP
20 g
Oven, Baking Sheet, Frying Pan, Blender, Whisk, Mixing Bowl, Chef’s Knife, Wooden Spoon
Why You Need This Lemon Cheesecake Bars
Perfectly Balanced Flavor
The combination of tangy lemon and creamy cream cheese is an absolute dream. It creates a harmonious blend that’s neither too sweet nor too tart, making it a perfect dessert for those warm spring days. You can enjoy it after a meal or as an afternoon snack!
Texture That Impresses
One of the standout features of Lemon Cheesecake Bars is their texture. The buttery, crumbly Graham cracker crust contrasts beautifully with the creamy filling. Each bite offers a satisfying yet delicate mouthfeel, leaving you craving more!
Make-Ahead Convenience
If you’re hosting a gathering, these bars are a game changer. They can be made ahead of time and stored in the refrigerator for several days. This means more time for you to enjoy your guests and less time worrying about last-minute dessert prep!
Customizable Delight
These bars are incredibly versatile! You can easily add your touches, whether it’s a fruit topping, a drizzle of chocolate, or even a sprinkle of coconut. The possibilities are endless, allowing you to make it your own!
Whipped Cream Magic
Don’t forget about the whipped cream! Adding a dollop of freshly whipped cream, especially if it’s stabilized, elevates Lemon Cheesecake Bars to an entirely new level. It adds a layer of richness that complements the lemon flavor perfectly.
Perfect for Sharing
These bars are a hit at parties! Their portable nature makes them easy to cut into portions and share. Whether it’s a barbecue, birthday, or a casual get-together, they’re sure to be a crowd-pleaser!
Ingredient List for Lemon Cheesecake Bars
The ingredients for Lemon Cheesecake Bars are simple yet effective. Each component plays a crucial role in achieving that perfect balance of flavor and texture. The standout ingredient, of course, is the lemon, which provides that zesty brightness. Here’s what you’ll need:
- 12 tablespoons unsalted butter: Essential for a rich flavor and to help bind the crust.
- 18 full sheets Graham crackers: Crushed into fine crumbs for the base.
- 1/3 cup granulated sugar: Sweetens the crust, balancing the tartness of the filling.
- 3 (8 oz.) packages cream cheese: The core ingredient for the filling, providing its creamy texture.
- 1 ¼ cups granulated sugar: Adds sweetness to the filling.
- 3/4 cups sour cream: Adds creaminess and a slight tang to the filling.
- ¼ cup lemon juice: Freshly squeezed for optimal flavor.
- 2 teaspoons lemon zest: Enhances the lemon flavor.
- 1 tablespoon vanilla extract: Adds depth of flavor.
- 3 large eggs: Help set the filling.
- 1 egg yolk: Adds richness to the filling.
- 2/3 cup granulated sugar: For the lemon curd topping.
- 1 teaspoon cornstarch: Helps thicken the lemon curd.
- 4 large eggs: For the curd, providing structure and richness.
- 2 large egg yolks: Enhances the creaminess of the curd.
- 6 tablespoons unsalted butter: For richness in the curd.
- 1/2 teaspoon vanilla extract: Further depth of flavor.
- 1/8 teaspoon salt: Balances the sweetness.
- 1 teaspoon unflavored gelatin (optional): For stabilizing the whipped cream.
- 1 1/2 tablespoons water (optional): Needed for gelatin.
- 1 cup cold heavy whipping cream: For a luscious topping.
- 3 tablespoons powdered sugar: Sweetens the whipped cream.
- 1 teaspoon vanilla extract: For flavor in the whipped cream.
How to Make Lemon Cheesecake Bars
Making Lemon Cheesecake Bars might seem daunting, but it’s a rewarding experience! Allow yourself to enjoy the process, and soon enough, you’ll be savoring these delicious treats. Let’s dive into the steps!
Preheat your oven to 325 degrees F. This ensures that your cheesecake will cook evenly. You want the oven nice and warm before you start baking.
Lightly grease a 9×13 baking dish with nonstick cooking spray. This helps prevent sticking, ensuring that your bars come out cleanly. Additionally, line the baking dish with heavy-duty aluminum foil, allowing the edges to overhang. This makes lifting the cheesecake out later much simpler.
Melt 12 tablespoons of unsalted butter in a large microwave-safe bowl. Once melted, add the crushed Graham crackers and 1/3 cup of granulated sugar. Stir until well combined, ensuring each crumb is coated in buttery goodness.
Transfer the mixture into the prepared pan. Using the back of a measuring cup, firmly press the crumbs down to create an even layer. This step is crucial for a solid base!
Bake the crust in the preheated oven for 14 minutes. The crust should look slightly golden and smell delightful. Remove it from the oven and allow it to cool completely.
In a mixing bowl, add 3 packages of cream cheese. Beat on medium speed until light and fluffy, which should take about 4 minutes. It’s essential to beat it well, so you avoid lumps in your filling.
Add 1 ¼ cups of granulated sugar to the cream cheese and beat for an additional 5 minutes. This will create a smooth, creamy texture that’s essential for your cheesecake.
Next, mix in 3/4 cup of sour cream, ¼ cup of lemon juice, 2 teaspoons of lemon zest, and 1 tablespoon of vanilla extract. Blend until everything is well incorporated.
With the mixer still running on low, add 3 large eggs one at a time, followed by 1 egg yolk. Be careful not to overbeat, as this could lead to cracks in your cheesecake later.
Carefully pour the cheesecake mixture over the cooled crust, using a spatula to spread it evenly. It should look smooth and creamy.
Bake for 60 to 70 minutes, until the edges are set, and the center remains slightly jiggly. An instant-read thermometer inserted should read between 175°-185°F. Avoid opening the oven while baking, as it may cause cracking.
Once done, crack the oven door and let the cheesecake cool for about 15 minutes. This gradual cooling helps prevent cracks.
After cooling, transfer the pan to a cooling rack and let it cool for at least an hour before adding the lemon curd topping.
For the lemon curd, whisk together 2/3 cup of lemon juice, 1 cup of granulated sugar, 1 teaspoon of cornstarch, 4 large eggs, and 2 large egg yolks in a medium bowl until well combined. This mixture needs to be cooked.
Pour the mixture into a small saucepan and cook over medium-low heat, stirring constantly until thickened to the consistency of thick pudding. This should take about 4 to 8 minutes.
Once thickened, immediately remove from heat and stir in 6 tablespoons of butter until melted. Add 1/2 teaspoon of vanilla extract and 1/8 teaspoon of salt. Strain the curd through a fine-mesh sieve into a bowl and let it cool slightly.
Spread the warm lemon curd over the cooled cheesecake, creating an even layer. This adds a beautiful finish and a zesty punch!
Let the cheesecake cool to room temperature for another 1 to 2 hours. Then, cover and refrigerate for at least 6 hours, but ideally overnight, to let the flavors meld.
If making stabilized whipped cream, dissolve 1 teaspoon of unflavored gelatin in 1 1/2 tablespoons of water and microwave for 10 seconds. Let it cool slightly.
In a mixing bowl, whip 1 cup of heavy cream with 3 tablespoons of powdered sugar and 1 teaspoon of vanilla extract until soft peaks form. Then, slowly pour in the gelatin mixture while mixing until stiff peaks form.
Use a piping bag to pipe the stabilized whipped cream onto the cheesecake before serving. This adds a touch of elegance!
When ready to serve, use the foil overhang to lift the cheesecake out of the pan onto a cutting board. For clean cuts, dip a knife in hot water, wipe it, and slice.
Things Worth Knowing
- Cooling is Key: Allow the cheesecake to cool slowly in the oven to prevent cracks. Sudden temperature changes can lead to surface cracks.
- Use Room Temperature Ingredients: This helps create a smooth batter, reducing the risk of overbeating and cracks in your cheesecake.
- Don’t Open the Oven Door: Avoid peeking during baking, as the sudden change in temperature can cause the cheesecake to crack.
- Chill Overnight: For the best flavor and texture, refrigerate your cheesecake overnight before serving.
Ways to Customize

There are so many fun ways to make Lemon Cheesecake Bars uniquely yours. Here are some tips to customize your dessert:
- Fruit Toppings: Top with fresh berries or slices of kiwi or strawberries for a burst of color and flavor.
- Chocolate Drizzle: Add a drizzle of melted white chocolate or dark chocolate for a sweet contrast to the tart lemon.
- Coconut Flakes: Sprinkle toasted coconut flakes on top of the whipped cream for added texture and flavor.
- Shortbread Crust: For a twist, make a shortbread crust instead of a Graham cracker crust for a slightly different flavor profile.
- Layered Bars: Layer with a fruit gel or curd for a colorful, eye-catching presentation.
- Mini Versions: Bake in a muffin tin for individual servings that are perfect for parties!
- Seasonal Spices: Experiment with adding spices like cinnamon or nutmeg to the crust for a warm flavor.
Serving Options for Lemon Cheesecake Bars
When it comes to serving Lemon Cheesecake Bars, the possibilities are endless! Here are some ideas:
- Perfect for Picnics: Cut them into bars and pack them for a lovely picnic treat. They hold up well and are a refreshing dessert.
- Great for Parties: Serve them at birthday parties or gatherings. Everyone loves a slice of cheesecake!
- Garnish with Berries: Add a few fresh berries on top or a sprig of mint for an elegant touch.
- Pair with Coffee: Serve alongside a cup of coffee or tea for a satisfying afternoon snack.
- Storing Leftovers: Store any leftovers in an airtight container in the refrigerator for 3 to 4 days.
- Freezing Tips: These bars can be frozen for up to 2 to 3 months. Just make sure to wrap them well!
- Seasonal Serving: They make a fantastic dessert for spring and summer gatherings, refreshing your guests’ palates.
FAQ
Conclusion
Lemon Cheesecake Bars are not just a dessert; they are a delightful experience that takes you on a flavor journey with every bite. The creamy filling combined with the zesty lemon curd makes them a refreshing treat that everyone will love. I encourage you to make these bars for your next gathering or just to enjoy on a sunny afternoon. You won’t regret it!
Lemon Cheesecake Bars
Ingredients
Equipment
Method
- Preheat your oven to 325 degrees F. This ensures that your cheesecake will cook evenly. You want the oven nice and warm before you start baking.
- Lightly grease a 9×13 baking dish with nonstick cooking spray. This helps prevent sticking, ensuring that your bars come out cleanly. Additionally, line the baking dish with heavy-duty aluminum foil, allowing the edges to overhang. This makes lifting the cheesecake out later much simpler.
- Melt 12 tablespoons of unsalted butter in a large microwave-safe bowl. Once melted, add the crushed Graham crackers and 1/3 cup of granulated sugar. Stir until well combined, ensuring each crumb is coated in buttery goodness.
- Transfer the mixture into the prepared pan. Using the back of a measuring cup, firmly press the crumbs down to create an even layer. This step is crucial for a solid base!
- Bake the crust in the preheated oven for 14 minutes. The crust should look slightly golden and smell delightful. Remove it from the oven and allow it to cool completely.
- In a mixing bowl, add 3 packages of cream cheese. Beat on medium speed until light and fluffy, which should take about 4 minutes. It’s essential to beat it well, so you avoid lumps in your filling.
- Add 1 ¼ cups of granulated sugar to the cream cheese and beat for an additional 5 minutes. This will create a smooth, creamy texture that's essential for your cheesecake.
- Next, mix in 3/4 cup of sour cream, ¼ cup of lemon juice, 2 teaspoons of lemon zest, and 1 tablespoon of vanilla extract. Blend until everything is well incorporated.
- With the mixer still running on low, add 3 large eggs one at a time, followed by 1 egg yolk. Be careful not to overbeat, as this could lead to cracks in your cheesecake later.
- Carefully pour the cheesecake mixture over the cooled crust, using a spatula to spread it evenly. It should look smooth and creamy.
- Bake for 60 to 70 minutes, until the edges are set, and the center remains slightly jiggly. An instant-read thermometer inserted should read between 175°-185°F. Avoid opening the oven while baking, as it may cause cracking.
- Once done, crack the oven door and let the cheesecake cool for about 15 minutes. This gradual cooling helps prevent cracks.
- After cooling, transfer the pan to a cooling rack and let it cool for at least an hour before adding the lemon curd topping.
- For the lemon curd, whisk together 2/3 cup of lemon juice, 1 cup of granulated sugar, 1 teaspoon of cornstarch, 4 large eggs, and 2 large egg yolks in a medium bowl until well combined. This mixture needs to be cooked.
- Pour the mixture into a small saucepan and cook over medium-low heat, stirring constantly until thickened to the consistency of thick pudding. This should take about 4 to 8 minutes.
- Once thickened, immediately remove from heat and stir in 6 tablespoons of butter until melted. Add 1/2 teaspoon of vanilla extract and 1/8 teaspoon of salt. Strain the curd through a fine-mesh sieve into a bowl and let it cool slightly.
- Spread the warm lemon curd over the cooled cheesecake, creating an even layer. This adds a beautiful finish and a zesty punch!
- Let the cheesecake cool to room temperature for another 1 to 2 hours. Then, cover and refrigerate for at least 6 hours, but ideally overnight, to let the flavors meld.
- If making stabilized whipped cream, dissolve 1 teaspoon of unflavored gelatin in 1 1/2 tablespoons of water and microwave for 10 seconds. Let it cool slightly.
- In a mixing bowl, whip 1 cup of heavy cream with 3 tablespoons of powdered sugar and 1 teaspoon of vanilla extract until soft peaks form. Then, slowly pour in the gelatin mixture while mixing until stiff peaks form.
- Use a piping bag to pipe the stabilized whipped cream onto the cheesecake before serving. This adds a touch of elegance!
- When ready to serve, use the foil overhang to lift the cheesecake out of the pan onto a cutting board. For clean cuts, dip a knife in hot water, wipe it, and slice.
Notes
- Cooling is Key: Allow the cheesecake to cool slowly in the oven to prevent cracks. Sudden temperature changes can lead to surface cracks.
- Use Room Temperature Ingredients: This helps create a smooth batter, reducing the risk of overbeating and cracks in your cheesecake.
- Don’t Open the Oven Door: Avoid peeking during baking, as the sudden change in temperature can cause the cheesecake to crack.
- Chill Overnight: For the best flavor and texture, refrigerate your cheesecake overnight before serving.