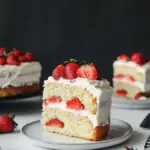
Homemade Strawberry Shortcake
There’s something so nostalgic about a warm summer day filled with the sweet aroma of fresh strawberries and baked goods. My favorite way to celebrate these moments is with Homemade Strawberry Shortcake. Growing up, I’d watch my grandmother whip up this delightful treat every spring, and the anticipation of that first bite was always a highlight of the season. The joy of layering fluffy biscuit-like cakes with luscious strawberry filling and a cloud of whipped cream brings back those sun-drenched afternoons spent in the garden, laughing and savoring life’s simple pleasures. I still remember the way the biscuits would melt in my mouth and how the sweetness of the strawberries would burst with flavor. Whether it’s a family gathering or a simple weekday indulgence, there’s always a reason to make this classic dessert.
Recipe Snapshot
50 mins
20 mins
30 mins
Medium
320 kcal
5 g
Gluten-Free, Low FODMAP
14 g
Baking Sheet, Skillet, Frying Pan, Whisk, Mixing Bowl, Chef’s Knife
What We Adore About This Homemade Strawberry Shortcake
1. It’s a Seasonal Delight
Nothing says spring quite like ripe strawberries! Making Homemade Strawberry Shortcake allows you to enjoy the freshest berries when they’re in season, enhancing the flavor and overall experience. There’s a certain satisfaction in knowing you’re using ingredients at their peak.
2. Light and Fluffy Texture
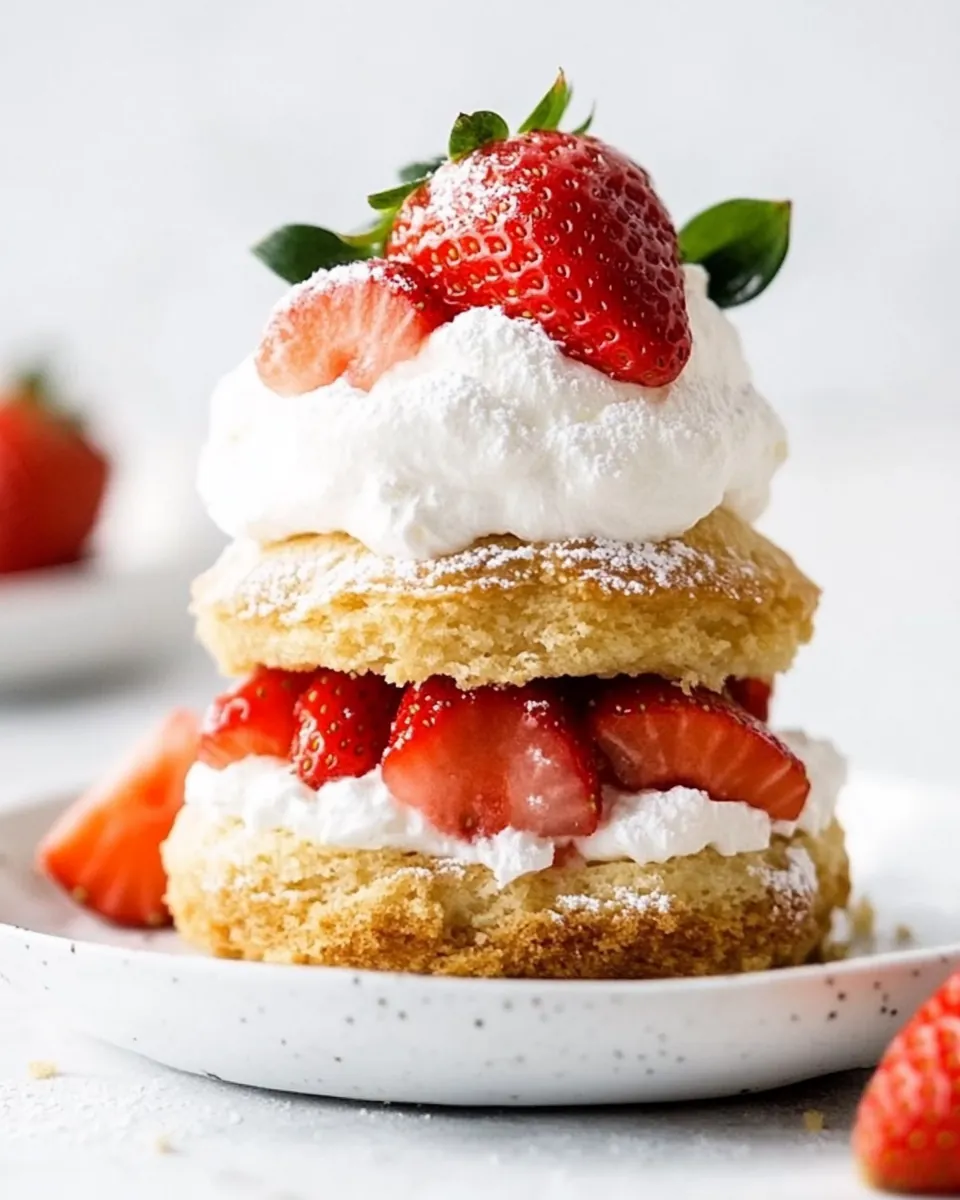
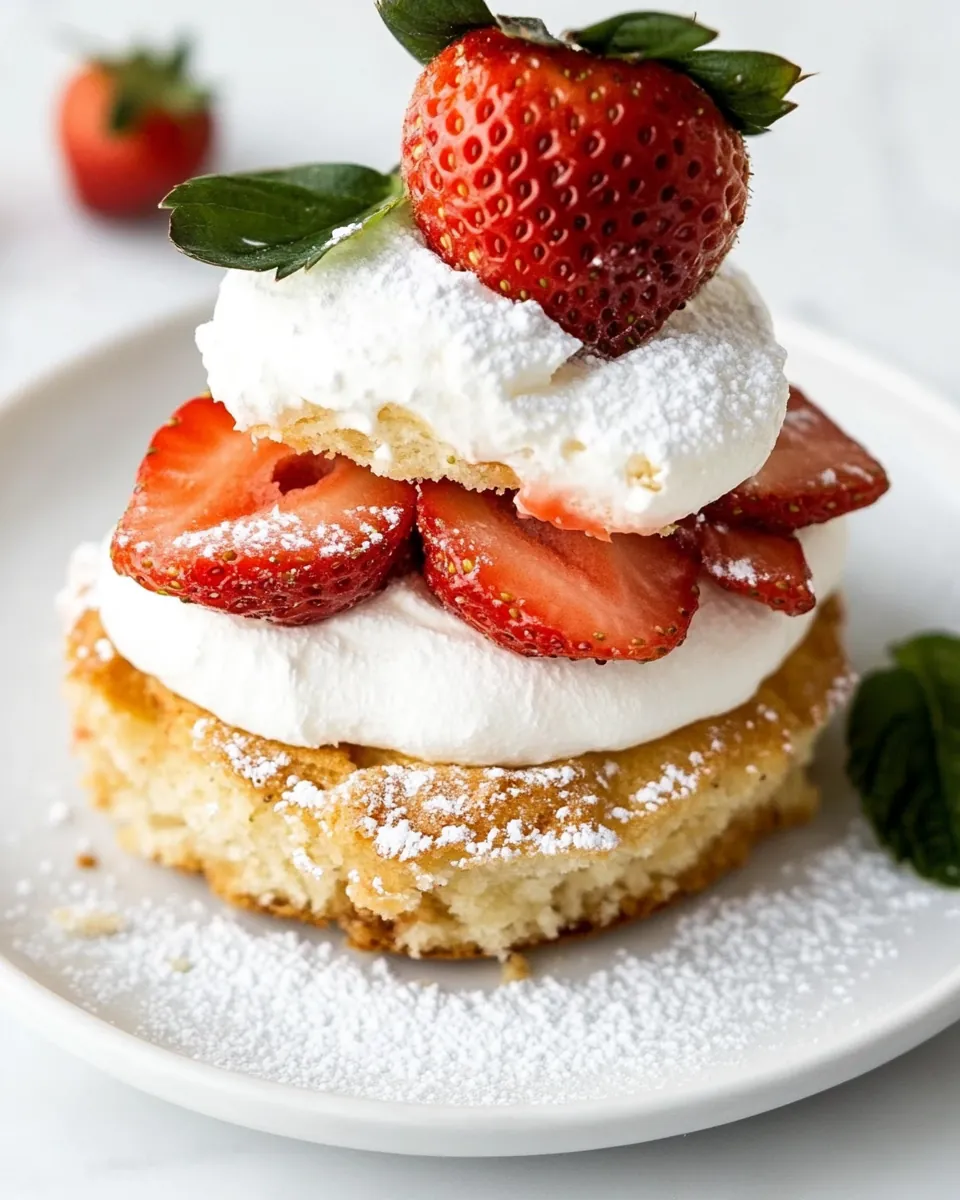
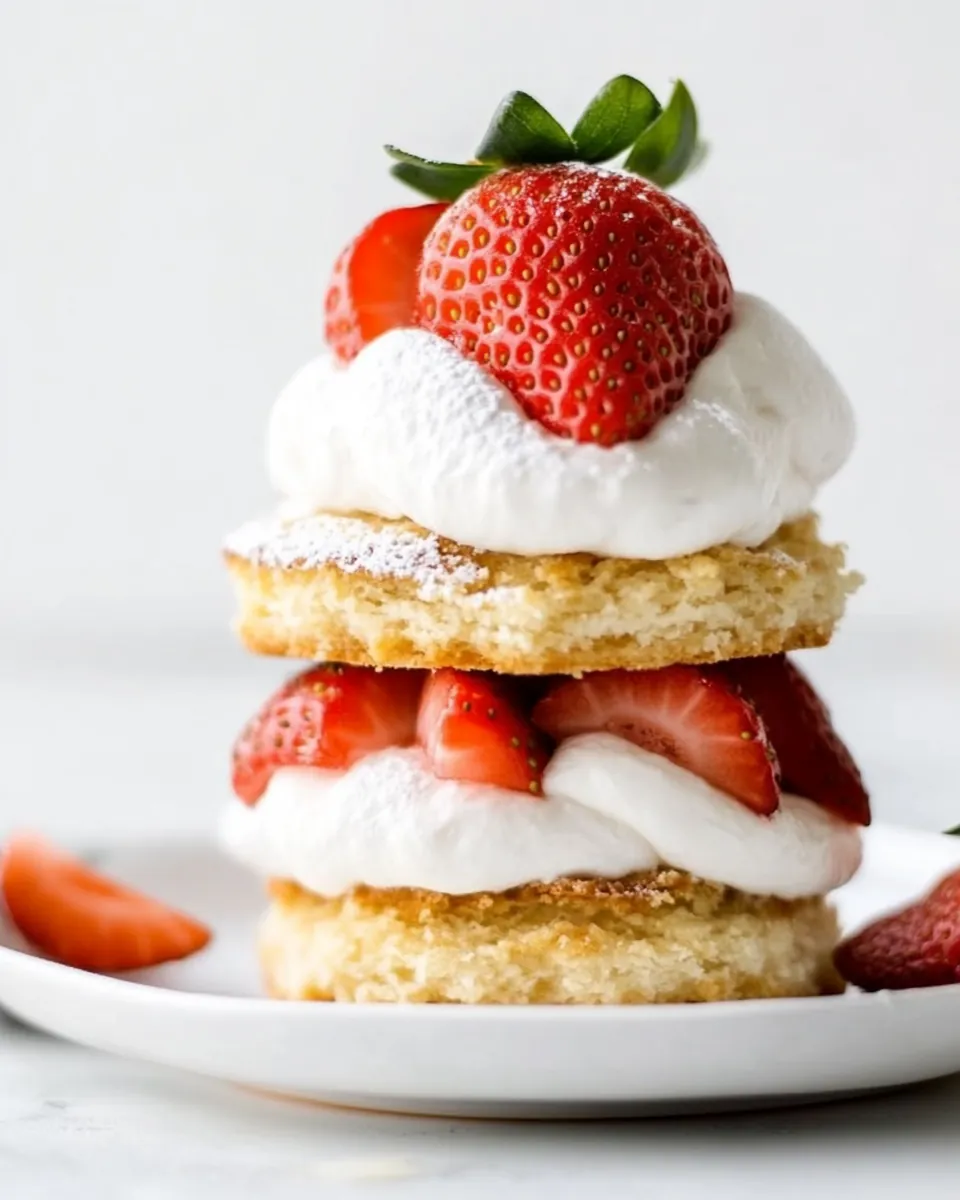
The beauty of this dessert lies in the texture. The biscuits are not just a base but are light and fluffy, creating a heavenly contrast with the creamy whipped cream and juicy strawberries. When you take a bite, you get a medley of textures that dance on your taste buds.
3. A Crowd-Pleaser
Whether it’s a barbecue, picnic, or birthday party, Homemade Strawberry Shortcake is universally loved. It’s a dessert that invites smiles and compliments, making it a great addition to any gathering. People often ask for seconds!
4. Easy to Make Ahead
You can prepare the biscuits and strawberries a day in advance, which makes this recipe perfect for entertaining. Just assemble right before serving for a fresh and delightful treat that doesn’t require you to spend hours in the kitchen on the day of your event.
5. Customizable Layers
While the classic version is always a hit, you can easily customize Homemade Strawberry Shortcake to suit your tastes. Add other fruits like raspberries or blueberries, or even a splash of lemon zest for added zing. The possibilities are endless!
Essential Ingredients for Homemade Strawberry Shortcake
The essence of Homemade Strawberry Shortcake lies in its simple yet delicious ingredients. Each component plays a crucial role in creating that iconic flavor and texture. Fresh strawberries take the spotlight, but when paired with fluffy biscuits and creamy whipped cream, the result is a dessert that’s truly irresistible.
- Strawberries: 1 quart of hulled and quartered fresh strawberries brings a natural sweetness and vibrant color to the dish.
- Simple Syrup: ¾ cup of cold simple syrup enhances the strawberries’ flavor and adds moisture.
- All-Purpose Flour: 3 cups provide the foundation for the biscuits, creating a tender texture.
- Baking Powder: 1 tablespoon ensures the biscuits rise perfectly.
- Baking Soda: ½ teaspoon helps with the leavening process for a light biscuit.
- Sea Salt: 1 teaspoon balances the sweetness and enhances flavors.
- Sugar: 2 tablespoons sweetens the biscuit dough.
- Unsalted Butter: 1 ¼ sticks cold and shredded gives the biscuits a rich flavor and flaky texture.
- Eggs: 2 large contribute richness to the biscuit dough.
- Buttermilk: 1 cup + 2 tablespoons keep the biscuits moist and tender.
- Whipped Cream: ½ recipe adds a light and airy layer between the biscuits and strawberries.
- Sugar in the Raw: for garnish adds a delightful crunch and sparkle.
Directions for Homemade Strawberry Shortcake
Making Homemade Strawberry Shortcake is a delightful experience, and I can’t wait to walk you through the steps. From mashing the strawberries to baking those perfect biscuits, each step takes you closer to your delicious creation. Let’s get started!
- Start by taking about a ½ cup of the strawberries and mash them in a medium-size bowl using a hand masher or fork. This releases their natural juices, creating a sweet sauce.
- Add in the remaining cut strawberries to the mashed berries and toss them with the simple syrup. Cover and keep this mixture in the refrigerator until you’re ready to assemble your shortcake.
- In a large bowl, whisk together the flour, baking powder, baking soda, sea salt, and sugar until well combined. This dry mixture sets the stage for your biscuits.
- Next, fold in the shredded cold butter until it’s mixed in. You want a crumbly texture, akin to coarse sand. Form a well in the center of the mixture using your hand.
- In another small bowl, whisk together the eggs and buttermilk. Remember to reserve 2 tablespoons of this mixture for later. This will add richness to your biscuits.
- Pour the egg mixture into the center of the well in the dry ingredients. Use a fork to combine all the ingredients until a thick dough forms. It’s okay if it looks a bit shaggy.
- Transfer the dough to a clean, lightly floured surface. Roll it out gently until it’s about 1 inch thick. Make sure not to overwork the dough for the best texture.
- Use a circle cookie cutter to cut out circles about 2 inches across. Place these in a 10-inch cast iron skillet or a 13×9 casserole dish lined with parchment paper. Aim for a total of 8 biscuits.
- Reroll the leftover dough and continue cutting until all the dough is used. Every biscuit matters! Place them in the skillet or dish.
- Brush the tops of the biscuits with the reserved egg and buttermilk mixture, then sprinkle with sugar in the raw. Bake in a preheated oven at 375°F for 25 to 30 minutes, or until they’re golden brown on top and cooked throughout.
- Once baked, let the biscuits cool completely on a cooling rack. This step is crucial for the perfect layering.
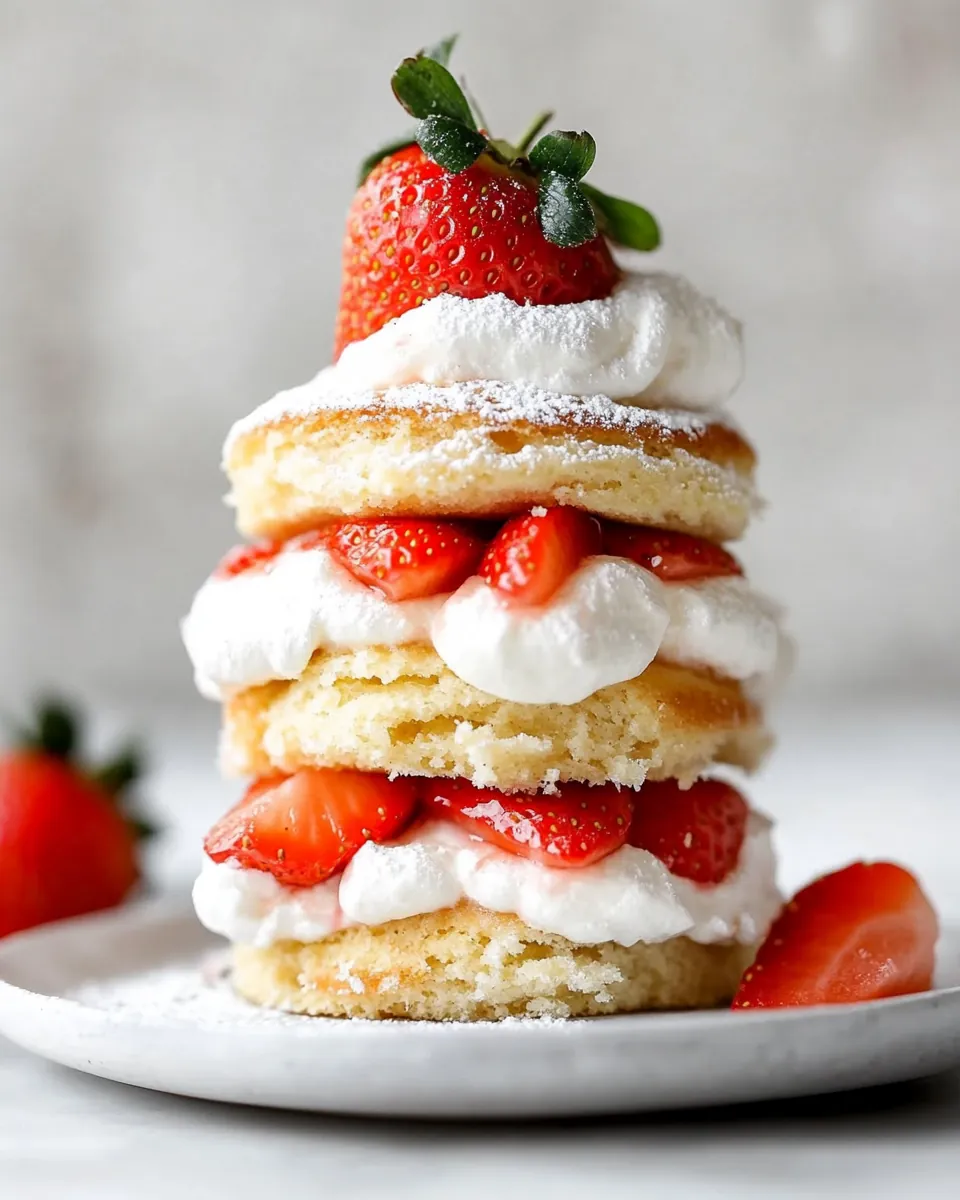
- To assemble, slice the biscuits in half or in thirds. Layer with whipped cream and the strawberry mixture between the biscuit layers. Serve immediately and watch them disappear!
Things Worth Knowing
- Quality Strawberries: Always choose ripe and fragrant strawberries for the best flavor. They should be bright red with no soft spots.
- Chill Your Tools: For a flakier biscuit, chill your mixing bowl and utensils. Cold butter plays an important role in achieving that perfect biscuit texture.
- Don’t Overmix: When combining the ingredients for the biscuits, mix just until it comes together. Overmixing can lead to tough biscuits.
- Cooling Time: Allow your biscuits to cool completely before layering. This prevents the whipped cream from melting and the biscuits from becoming soggy.
Pro Tips and Tweaks
Here are some professional tips and tweaks to make your Homemade Strawberry Shortcake even better. Follow these suggestions for an unforgettable dessert!
- Storage: To store leftovers, keep the biscuits, strawberries, and whipped cream in separate containers. This prevents sogginess and maintains freshness.
- Freezing: You can freeze the biscuits and strawberries separately. They can last up to 3 months in the freezer. Thaw overnight in the refrigerator before serving.
- Variations: Experiment with other fruits like peaches or blueberries for a twist on the traditional recipe.
- Whipped Cream Tip: Using heavy cream makes for a richer whipped cream. Sweeten it to your liking!
- Layering Alternatives: Instead of traditional layers, consider serving it in a trifle dish for a beautiful presentation.
Serving Suggestions
When it comes to serving Homemade Strawberry Shortcake, the possibilities are endless. Here are some ideas to elevate your experience:
- Perfect Pairings: Serve with a scoop of vanilla ice cream for an extra creamy texture that complements the fresh strawberries.
- Garnish: Add a sprig of mint on top for a refreshing touch and vibrant color.
- Occasions: This dessert is perfect for celebrations like birthdays, picnics, or BBQs, and it truly shines during spring and summer gatherings.
- Storage Tips: Keep any leftovers in the fridge for up to 3 days, but for best results, consume fresh.
- Seasonal Sides: Pair with light salads or a fruit platter for a well-rounded meal.
- Presentation: Consider serving individual portions in short glasses for a stylish touch.
FAQ
Conclusion
Homemade Strawberry Shortcake is not just a dessert; it’s an experience filled with sweet memories and delightful flavors. Every bite takes you back to the heart of spring, reminding us of the simple joys in life. I encourage you to try this recipe at home and share it with your loved ones. You’ll create new memories while enjoying this timeless treat.
Homemade Strawberry Shortcake
Ingredients
Equipment
Method
- Start by taking about a ½ cup of the strawberries and mash them in a medium-size bowl using a hand masher or fork. This releases their natural juices, creating a sweet sauce.
- Add in the remaining cut strawberries to the mashed berries and toss them with the simple syrup. Cover and keep this mixture in the refrigerator until you’re ready to assemble your shortcake.
- In a large bowl, whisk together the flour, baking powder, baking soda, sea salt, and sugar until well combined. This dry mixture sets the stage for your biscuits.
- Next, fold in the shredded cold butter until it’s mixed in. You want a crumbly texture, akin to coarse sand. Form a well in the center of the mixture using your hand.
- In another small bowl, whisk together the eggs and buttermilk. Remember to reserve 2 tablespoons of this mixture for later. This will add richness to your biscuits.
- Pour the egg mixture into the center of the well in the dry ingredients. Use a fork to combine all the ingredients until a thick dough forms. It’s okay if it looks a bit shaggy.
- Transfer the dough to a clean, lightly floured surface. Roll it out gently until it’s about 1 inch thick. Make sure not to overwork the dough for the best texture.
- Use a circle cookie cutter to cut out circles about 2 inches across. Place these in a 10-inch cast iron skillet or a 13x9 casserole dish lined with parchment paper. Aim for a total of 8 biscuits.
- Reroll the leftover dough and continue cutting until all the dough is used. Every biscuit matters! Place them in the skillet or dish.
- Brush the tops of the biscuits with the reserved egg and buttermilk mixture, then sprinkle with sugar in the raw. Bake in a preheated oven at 375°F for 25 to 30 minutes, or until they’re golden brown on top and cooked throughout.
- Once baked, let the biscuits cool completely on a cooling rack. This step is crucial for the perfect layering.
- To assemble, slice the biscuits in half or in thirds. Layer with whipped cream and the strawberry mixture between the biscuit layers. Serve immediately and watch them disappear!
Notes
- Make-Ahead: You can make the biscuits, strawberries, and whipped cream up to 2 days ahead of time if they are stored separately.
- How to Store: Cover the strawberries in a container or a bowl and keep them in the refrigerator for up to 4 days. The biscuits can be stored covered at room temperature for 3 days or in the refrigerator covered for up to 5 days. The strawberries and biscuits will both freeze separately and be covered for up to 3 months. Thaw in the refrigerator for 1 day before serving.
- Substitutions: If you do not want to use simple syrup, you can toss the fresh-cut strawberries with a ½ cup of granulated sugar or ¾ cup of powdered sugar.
- Rolling Tip: When rolling out the dough, your surface area does not need to be dusted with flour, but if it starts to stick a little, then I recommend doing it.