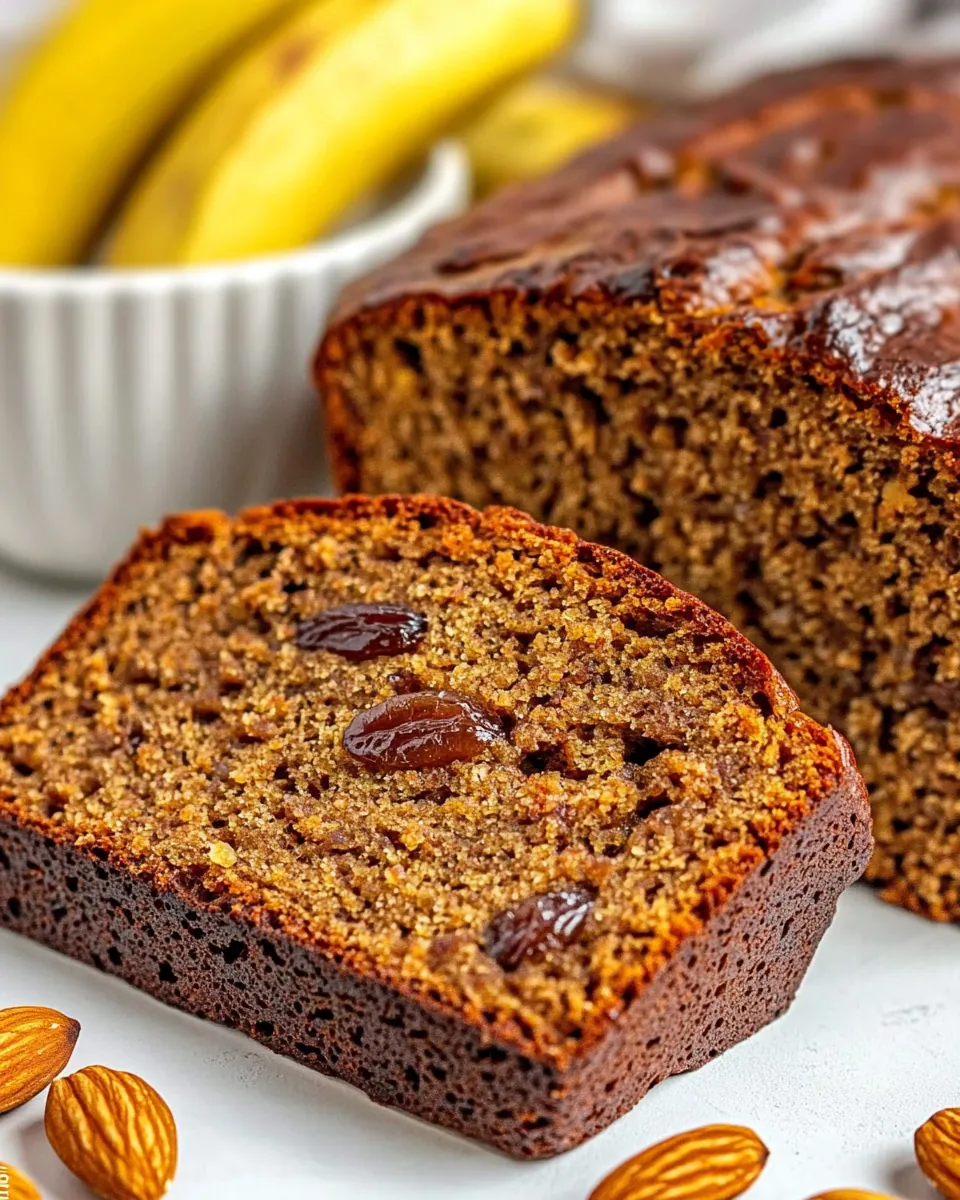
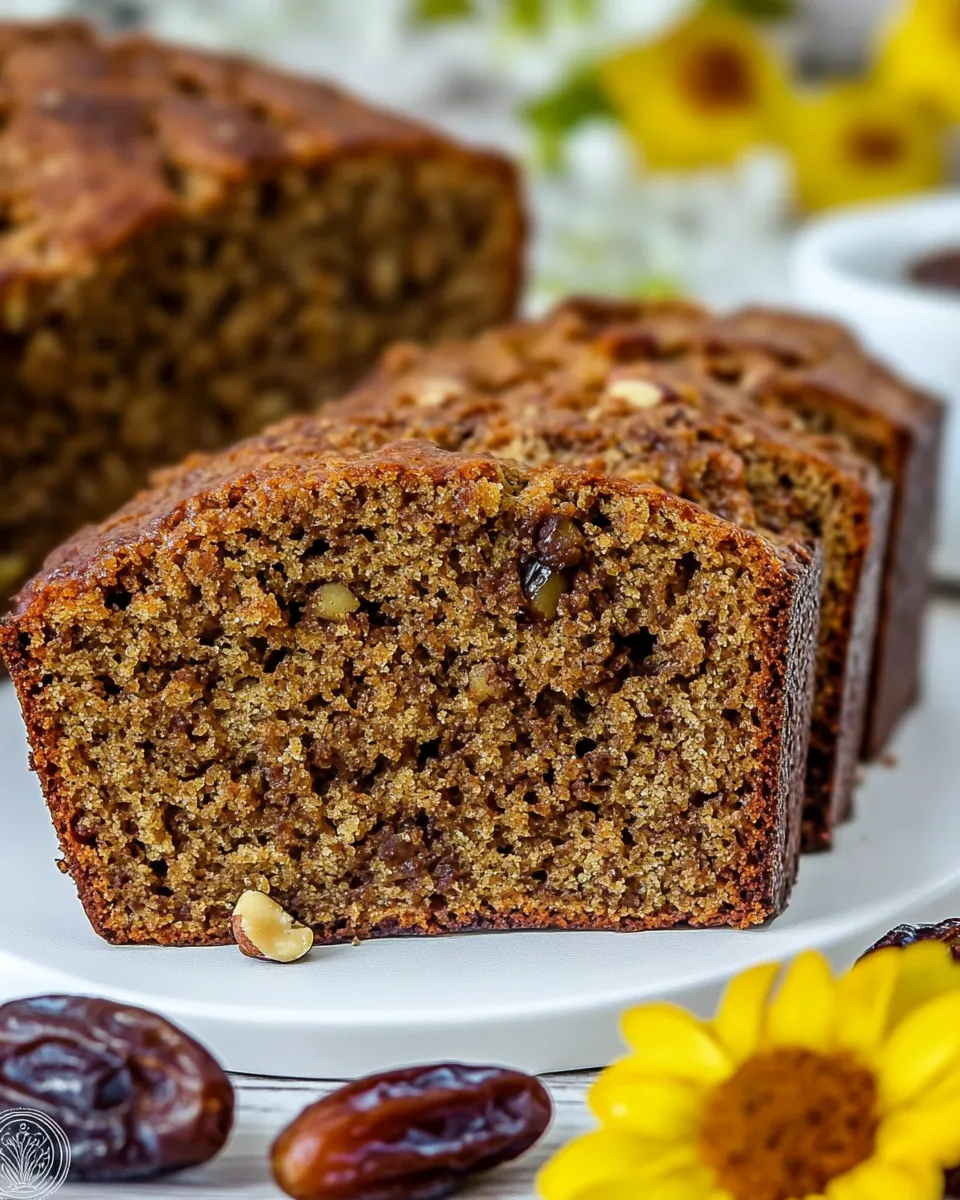
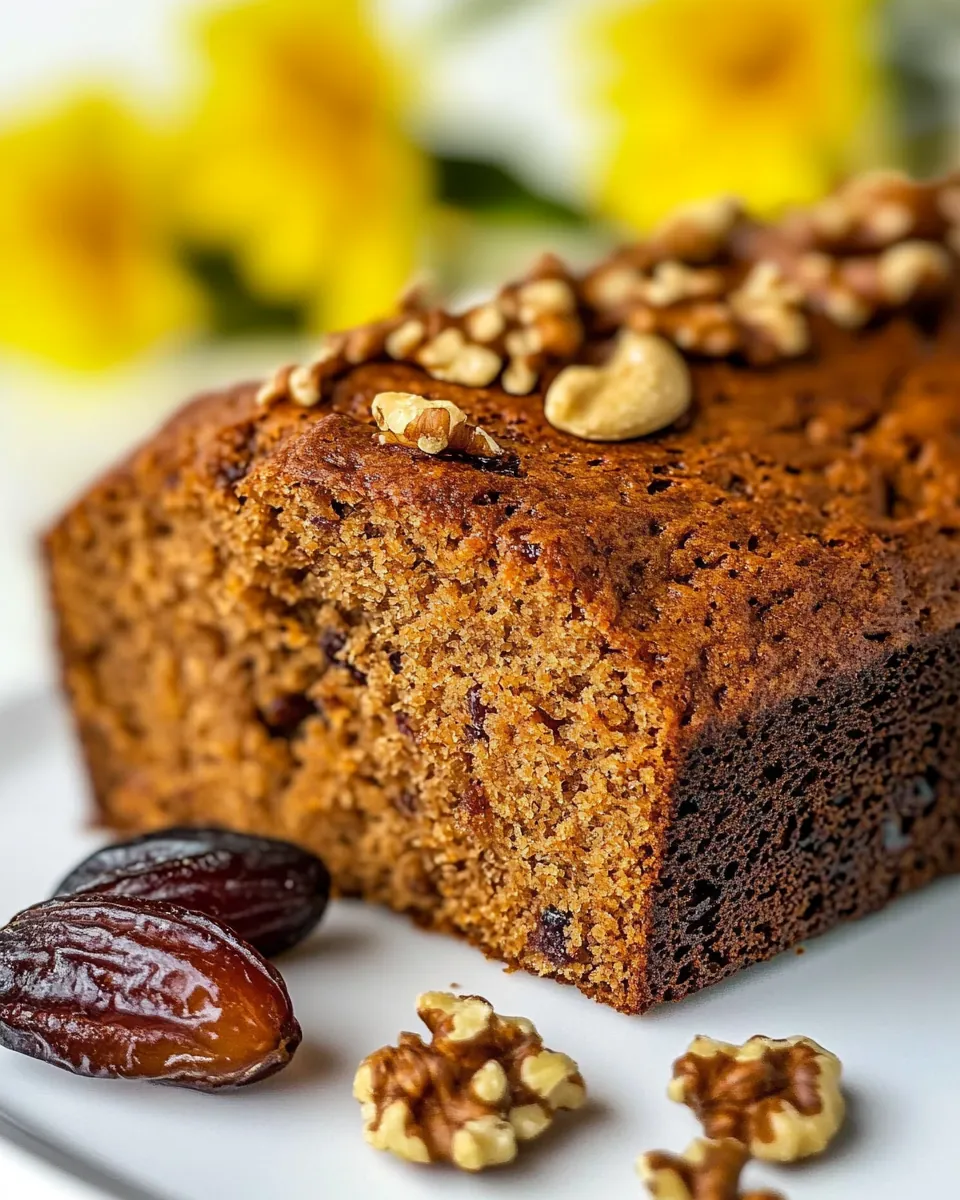
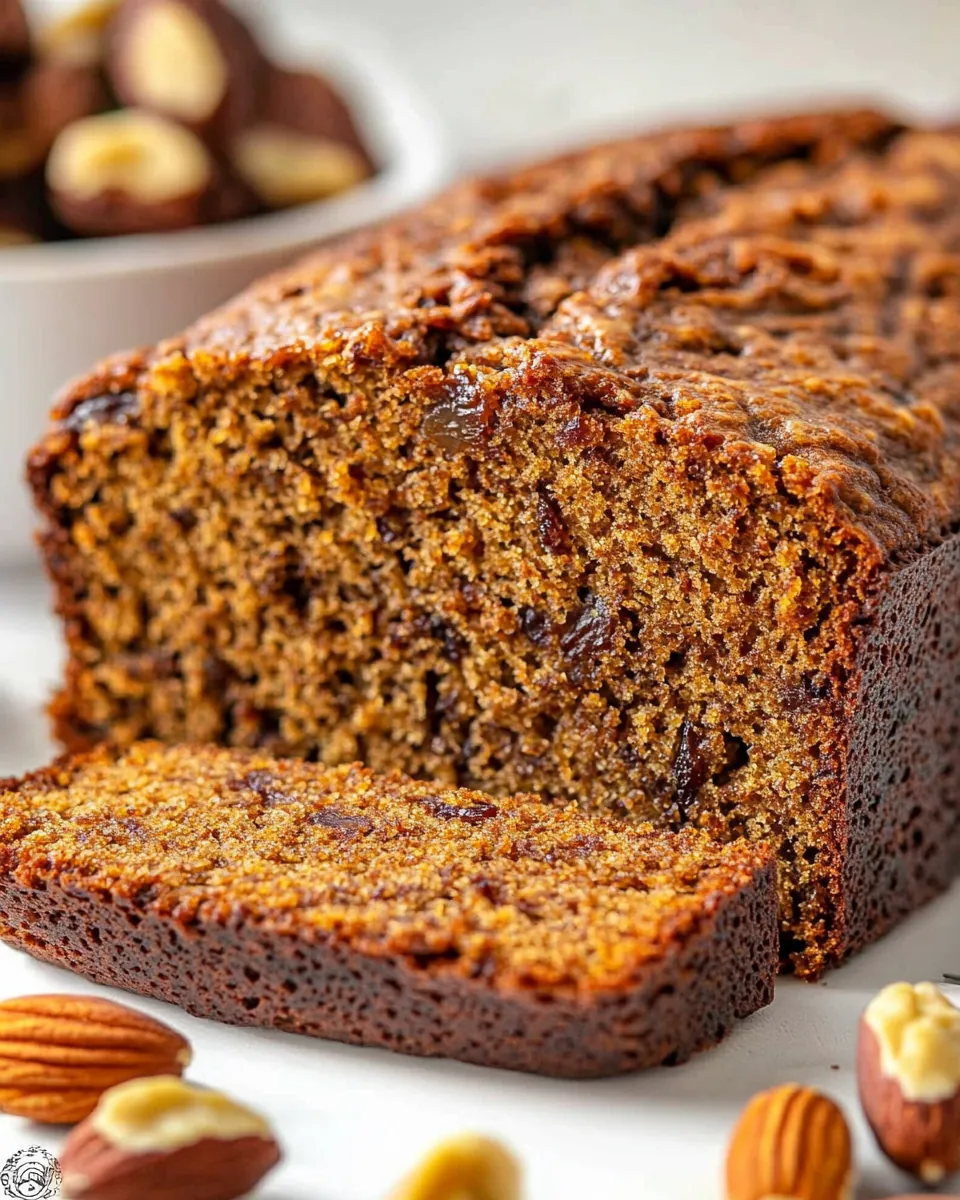
Date Nut Bread
There’s something incredibly comforting about the aroma of freshly baked Date Nut Bread wafting through the kitchen. I remember the first time I tried this recipe at my grandmother’s house, her warm smile welcoming me as I entered the room filled with the sweet scent of dates and nuts. It’s not just a bread; it’s a memory wrapped in the flavors of my childhood. Each slice tells a story of family gatherings and heartfelt conversations, and even today, as I bake this delightful treat, I can’t help but feel nostalgic. The way the Medjool dates blend seamlessly with the chopped walnuts creates an irresistible texture and flavor that’s perfect for any occasion, be it breakfast, a snack, or dessert.
This Date Nut Bread is not only easy to make, but it also brings together wholesome ingredients that come together in a perfect harmony. Whenever I have ripe bananas or a handful of forgotten dates lying around, I know exactly what I’ll be whipping up. Whether you’re having a quiet morning with a cup of tea or hosting friends for brunch, this bread is sure to impress. It’s moist, slightly sweet, and packed with flavor. Trust me, once you take that first bite, you’ll be reaching for another slice!
Recipe Snapshot
60 mins
20 mins
40 mins
Medium
210 kcal
4 g
Vegan, Gluten-Free, AIP
8 g
Mixing Bowls, Whisk, 8.5×4.5 inch loaf pan, Parchment paper, Wire rack
Why This Date Nut Bread Shines
Unforgettable Flavor
The combination of dates and walnuts in this Date Nut Bread creates a unique flavor profile that’s both sweet and nutty. The natural sweetness of the Medjool dates balances perfectly with the earthy notes of the walmuts, making each bite a delight.
Easy to Make
This recipe is straightforward, making it perfect for both novice and experienced bakers. With just a few simple steps, you can have a delicious loaf ready to enjoy!
Perfect for Any Occasion
Whether you’re hosting a brunch, enjoying a cozy afternoon tea, or looking for a healthy snack, this bread fits the bill. It’s versatile enough to be served warm, toasted, or even as a sandwich base.
Healthy Ingredients
Filled with wholesome ingredients, this Date Nut Bread is a healthier option compared to many store-bought options. With minimal sugar and the natural sweetness from dates, it’s a guilt-free treat!
Great for Gifting
Wrap a loaf of this delightful Date Nut Bread in some parchment paper and ribbons, and you’ve got a thoughtful homemade gift! Friends and family will appreciate the effort and love that goes into baking something so special.
Main Ingredients for Date Nut Bread
Each ingredient in this Date Nut Bread serves a purpose in creating the perfect loaf. The union of these ingredients not only enhances the flavor but also contributes to the texture and nutritional content. Let’s explore the key players that make this recipe a standout.
- 1 ½ cups (180g) all-purpose flour: The base of the bread, offering structure and a light texture.
- 2 teaspoons baking powder: A leavening agent that helps the bread rise.
- ½ teaspoon salt: Enhances the flavors of the other ingredients.
- ¾ cup (180ml) boiling water: Used to soak the dates, making them soft and easy to mix.
- 1 ½ cups (200g) Medjool dates: Adds natural sweetness and moisture to the bread.
- ½ teaspoon baking soda: Works in conjunction with the acidic dates to help the bread rise.
- 2 tablespoons (30ml) extra virgin olive oil: Adds moisture and richness.
- ½ cup (75g) brown sugar: Sweetens the bread and contributes to its color.
- 3 large eggs: Binds the ingredients and adds moisture.
- 1 teaspoon (5ml) pure vanilla extract: Enhances the flavor profile.
- 1 cup (120g) chopped walnuts: Adds a crunchy texture and nutty flavor.
Directions for Date Nut Bread
Making Date Nut Bread is a delightful process that fills your kitchen with wonderful aromas. Follow these steps to create your own loaf that will impress everyone!
- Preheat your oven to 350°F (180°C), or 160°C if you’re using a fan oven. This step is crucial as it ensures even baking and a perfect rise.
- Spread the raw walmuts on a sheet pan and toast them for about 7 minutes. This brings out their flavor and crunch. Let them cool and chop them into smaller pieces.
- In a medium bowl, whisk together the flour, baking powder, and salt. This mixture will serve as the dry ingredients for your bread.
- For the dates, pour the boiling water over the chopped pieces in a separate bowl. Allow them to soak until the mixture cools to room temperature. This step softens the dates and makes them easier to incorporate into the batter.
- Once cooled, stir in the baking soda into the date mixture. Then add in the olive oil, brown sugar, eggs, and vanilla. Whisk everything until well combined.
- Gradually add the dry mixture to the wet ingredients, stirring gently until just combined. Be careful not to overmix; this can lead to a denser bread.
- Fold in the toasted and chopped walmuts delicately into the batter.
- Grease and line a 9×5-inch (23×13 cm) loaf pan with parchment paper. Pour the batter into the pan and smooth the top with a spatula.
- Bake for 40 to 45 minutes, or until a toothpick inserted in the center comes out clean. The internal temperature should reach 200°F (93°C).
- Let the bread cool in the pan for 10 minutes. Then, carefully transfer it to a wire rack to cool completely before slicing. This step ensures that your slices will hold together nicely.
Things Worth Knowing
- Check for Doneness: To ensure your bread is perfectly baked, insert a toothpick into the center. If it comes out clean, it’s ready!
- Storage: Keep the bread in an airtight container at room temperature for up to 5 days. For longer storage, consider freezing.
- Cooling Time: Allow the bread to cool completely before slicing. This will help achieve clean, even slices.
- Ingredient Quality: Using fresh, high-quality dates and walmuts will elevate the flavor of your Date Nut Bread.
Helpful Hints
Here are some tips to keep in mind while making this delicious bread:
- Storage: Ensure your Date Nut Bread is stored in an airtight container to keep it moist and flavorful.
- Freezing: You can freeze slices of this bread for up to 3 months. Just ensure they’re wrapped tightly to avoid freezer burn.
- Pairing: This bread pairs wonderfully with a spread of cream cheese or a drizzle of honey.
- Variations: Add spices like cinnamon or nutmeg for a warm, spiced flavor profile.
- Gifting: This bread makes an excellent gift when wrapped in decorative paper or a gift box.
Perfect Pairings for Date Nut Bread
Serving your Date Nut Bread can be an enjoyable experience, especially when you think about what to pair it with. Here are some great ideas:
- Tea Time: Enjoy a slice with your favorite herbal tea or a cup of coffee for a cozy afternoon treat.
- Breakfast Delights: Serve it alongside scrambled eggs or yogurt for a wholesome breakfast.
- Snack Attack: This bread is perfect for a mid-afternoon snack, especially with a smear of cream cheese.
- Brunch Buffet: Include slices of Date Nut Bread in your brunch spread, paired with fresh fruit and cheeses.
- Holiday Gatherings: This bread makes a wonderful addition to holiday meals, bringing a sweet touch to the table.
FAQ
Conclusion
This Date Nut Bread is truly a delightful recipe that combines sweet and nutty flavors, creating a perfect harmony in every bite. Not only is it easy to make, but it also brings a warm and inviting atmosphere to any occasion. I encourage you to try baking this bread, as it is sure to become a cherished favorite. Enjoy the process and the delicious results!
Date Nut Bread
Ingredients
Equipment
Method
- Preheat your oven to 350°F (180°C), or 160°C if you’re using a fan oven. This step is crucial as it ensures even baking and a perfect rise.
- Spread the raw walmuts on a sheet pan and toast them for about 7 minutes. This brings out their flavor and crunch. Let them cool and chop them into smaller pieces.
- In a medium bowl, whisk together the flour, baking powder, and salt. This mixture will serve as the dry ingredients for your bread.
- For the dates, pour the boiling water over the chopped pieces in a separate bowl. Allow them to soak until the mixture cools to room temperature. This step softens the dates and makes them easier to incorporate into the batter.
- Once cooled, stir in the baking soda into the date mixture. Then add in the olive oil, brown sugar, eggs, and vanilla. Whisk everything until well combined.
- Gradually add the dry mixture to the wet ingredients, stirring gently until just combined. Be careful not to overmix; this can lead to a denser bread.
- Fold in the toasted and chopped walmuts delicately into the batter.
- Grease and line a 9×5-inch (23×13 cm) loaf pan with parchment paper. Pour the batter into the pan and smooth the top with a spatula.
- Bake for 40 to 45 minutes, or until a toothpick inserted in the center comes out clean. The internal temperature should reach 200°F (93°C).
- Let the bread cool in the pan for 10 minutes. Then, carefully transfer it to a wire rack to cool completely before slicing. This step ensures that your slices will hold together nicely.
Notes
- Soaking Dates: If your dates are dried, you will want to soak them for a bit longer so that they are nice and soft. Even fresh dates should be soaked though to make them perfect for this bread recipe.
- Toast the Walnuts: before adding them for better flavor.
- Don’t Overmix the Batter: Stir the dry ingredients in only until the batter is combined. Overmixing can lead to dry, crumbly bread.
- To Check for Doneness: insert a toothpick into the center of the loaf. If it comes out clean, the bread is ready! You can also check the temperature. Bread is cooked when it reaches a temperature of 200°F (93°C).
- Cool Completely: For neat, clean slices, try to avoid cutting into the loaf until it is fully cooled down.