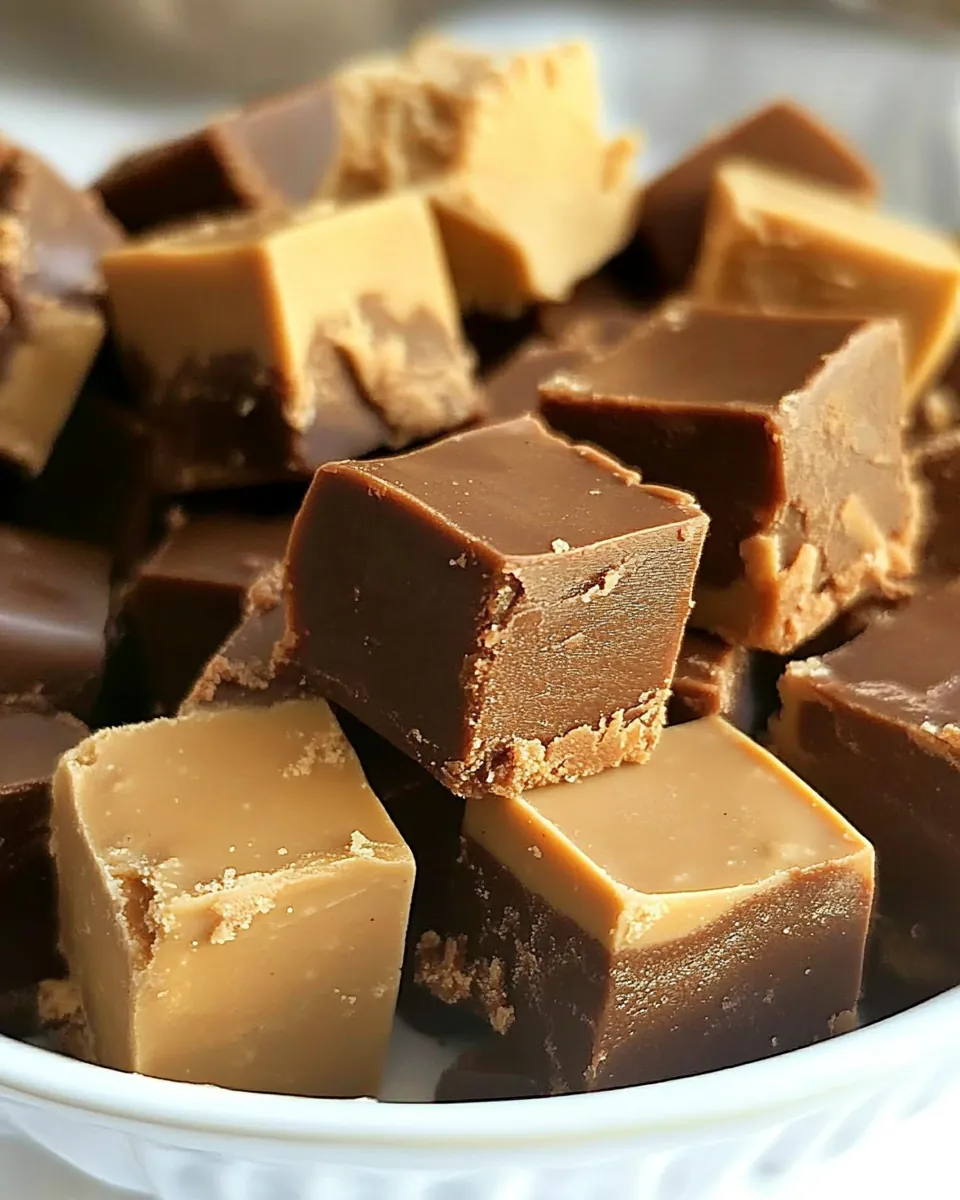
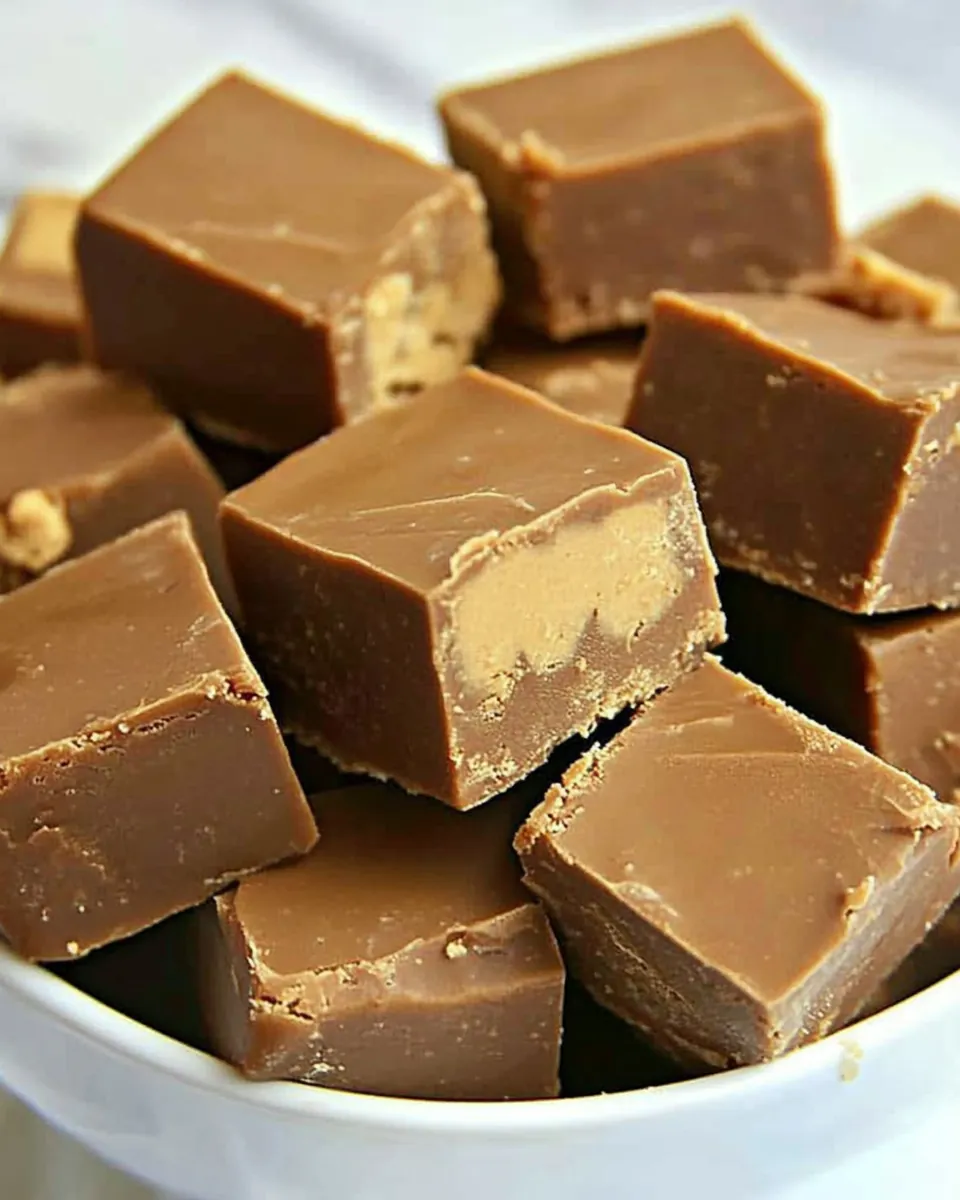
Chocolate Peanut Butter Fudge
There’s something magical about making Chocolate Peanut Butter Fudge in your kitchen. It takes me back to my childhood, where we would gather around the kitchen counter, eagerly waiting for the fudge to set. The rich aroma of melted chocolate and peanut butter would fill the air, making it impossible to resist sneaking a taste. This recipe is not just a treat; it’s a delicious memory that you can create with your family. Whether it’s a special occasion or just a cozy night in, this fudge is the perfect sweet to indulge in. Making it is a fun experience and the result is simply irresistible!
Recipe Snapshot
35 mins
25 mins
10 mins
Medium
214 kcal
2 g
Gluten-Free, Low FODMAP
12 g
Frying Pan, Large Pot, Wooden Spoon, Mixing Bowl
Why This Chocolate Peanut Butter Fudge Stands Out
Decadent Flavor Combination
The combination of chocolate and peanut butter is a match made in heaven. The creamy, nutty flavor of the peanut butter balances beautifully with the rich sweetness of the chocolate, creating a flavor explosion that’s hard to resist. Every bite is a little piece of bliss that melts in your mouth.
Easy to Make
You don’t need to be a professional pastry chef to whip up this Chocolate Peanut Butter Fudge. The process is straightforward and requires just a few steps, making it a great option for both novice and experienced bakers. It’s a fun activity you can do with kids or on your own.
Perfect for Any Occasion
Whether it’s a birthday party, holiday celebration, or just a simple gathering with friends, this fudge fits right in. It’s easy to cut into bite-sized pieces, making it a perfect treat for sharing. Plus, it adds a touch of homemade charm to any occasion.
Gifts from the Kitchen
Want to impress someone special? Wrap up some Chocolate Peanut Butter Fudge in a decorative box or tin and gift it to friends or family. They’ll appreciate the thoughtful gesture and love the delicious treat you’ve made just for them!
Customizable and Versatile
This recipe is a blank canvas! You can easily add your favorite nuts, sprinkles, or even a drizzle of extra melted chocolate on top to customize it to your liking. It’s fun to experiment and make it uniquely yours!
Long-Lasting Treat
Not only is this fudge delicious, but it also lasts! You can store it for several days, making it a great make-ahead treat for when you have guests or just want something sweet on hand. You’ll find yourself reaching for it time and time again!
Ingredient List for Chocolate Peanut Butter Fudge
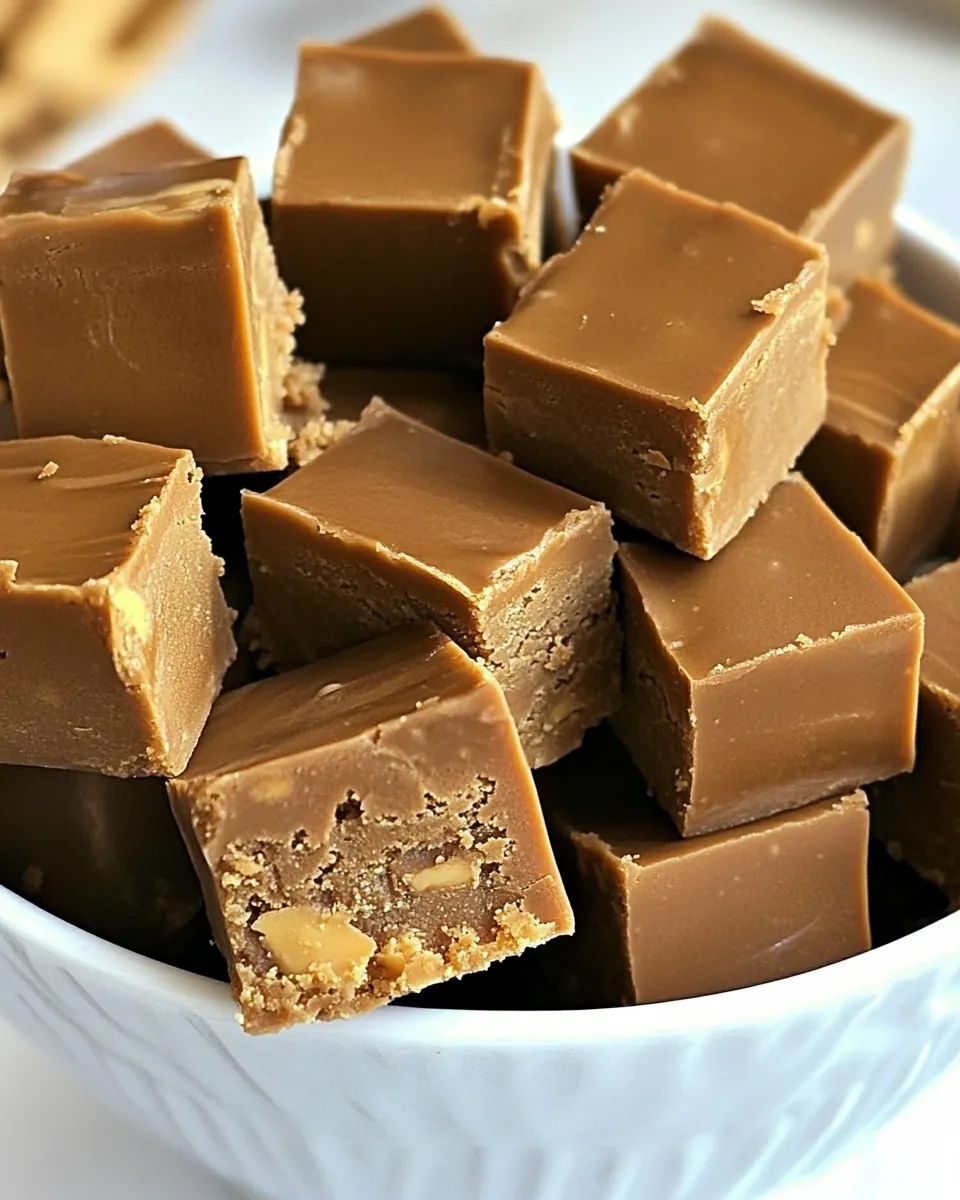
The magic of Chocolate Peanut Butter Fudge lies in its simple yet effective ingredients. Each one plays a vital role in creating that perfect texture and flavor profile. You have the rich sweetness from the granulated white sugar, creaminess from the butter, and of course, the star players, peanut butter chips and bittersweet chocolate chips. Together, they create a sweet harmony that’s truly delightful.
- 1 cup peanut butter chips: These are the backbone of the fudge, bringing that creamy, nutty flavor that pairs perfectly with chocolate.
- 1 cup bittersweet chocolate chips: They add a rich chocolate flavor that balances the sweetness of the other ingredients.
- 2¼ cups granulated white sugar: This sweetener is essential for achieving the perfect fudge texture and sweetness.
- One 7-ounce jar marshmallow creme: This ingredient gives the fudge its creamy consistency and helps it set properly.
- One 5-ounce can evaporated whole milk: Adds richness and creaminess to the fudge.
- ¼ cup (½ stick) butter: Provides a smooth texture and rich flavor.
- 1 teaspoon vanilla extract: Adds depth and enhances the overall flavor profile of the fudge.
How to Make Chocolate Peanut Butter Fudge
Making Chocolate Peanut Butter Fudge is an enjoyable process that will fill your kitchen with delightful aromas. Follow these detailed steps to create your own delicious fudge.
- Line an 8-inch by 8-inch pan with foil and spray lightly with nonstick spray. This will make it easy to remove the fudge once it has set.
- In two separate heat-safe medium bowls, place the peanut butter chips in one and the bittersweet chocolate chips in the other. This separation helps us work with the mixtures easily later on.
- In a 3-quart saucepan, combine the granulated white sugar, marshmallow creme, evaporated whole milk, and butter. Cook over medium heat, stirring constantly. You want to keep an eye on this mixture as it heats up.
- Keep stirring until the mixture comes to a boil. Once it does, continue stirring for 5 minutes. This step is crucial as it helps the fudge to achieve the right consistency. If you have a candy thermometer, your fudge is ready when it reaches 235°F.
- If you don’t have a thermometer, you can do the soft ball test. Take a spoon and drizzle a little fudge into a cup of ice water. If it forms a soft, pliable ball, you’re good to go!
- Remove the pan from heat and quickly stir in the vanilla extract. This adds a lovely aroma and flavor to your fudge.
- Now, divide the hot mixture: quickly stir one half into the bowl with the peanut butter chips until fully melted. Then do the same with the other half and the bittersweet chocolate chips. Stir them until completely combined.
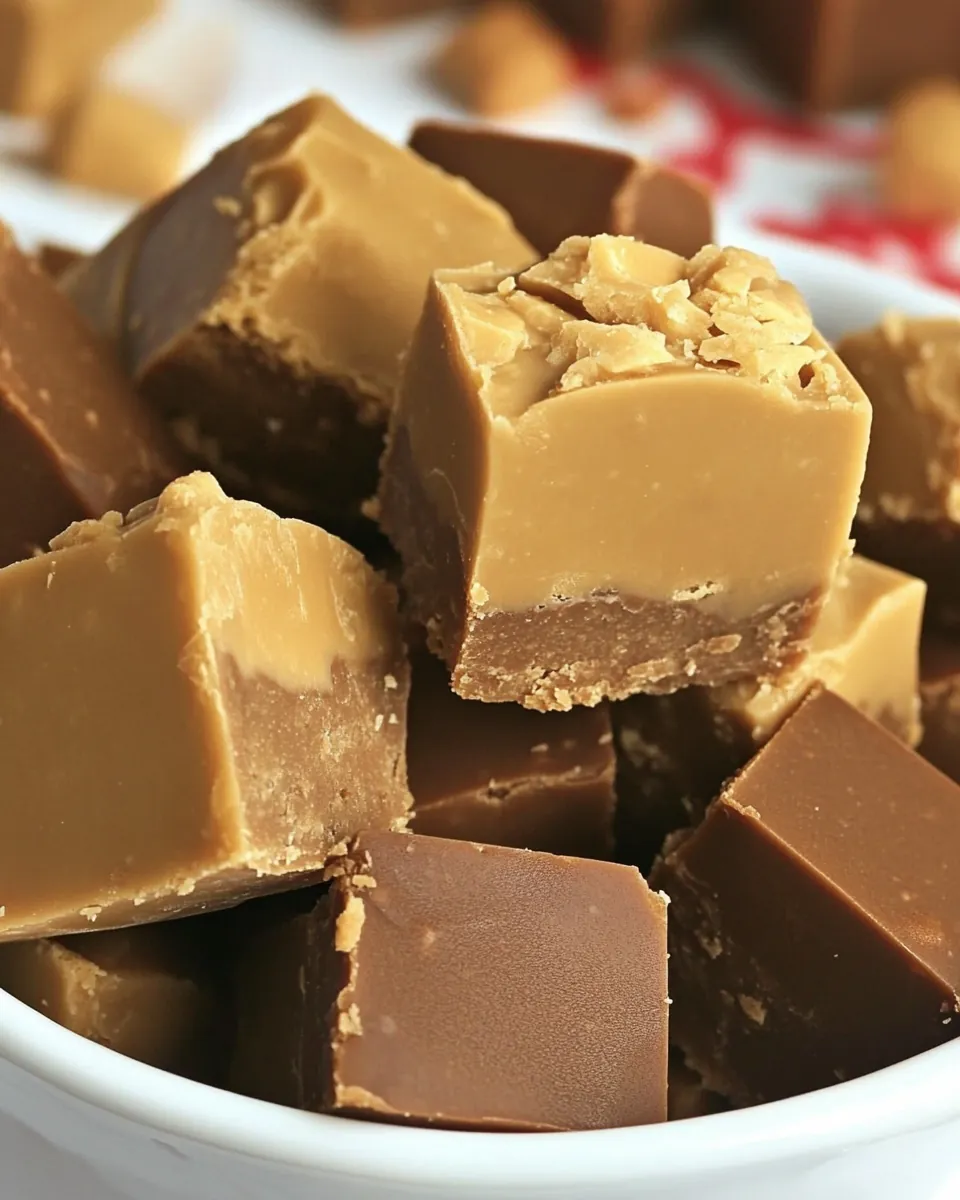
- Once the mixtures are melted, scrape the peanut butter mixture into the prepared pan, smoothing it evenly along the bottom. This will be the first layer of your fudge.
- Next, carefully spread the chocolate chip mixture evenly over the top of the peanut butter layer. Take your time to ensure it’s evenly distributed.
- Let the fudge sit at room temperature until completely cool. If you’re in a hurry, you can refrigerate it to speed up the process. Once set, cut into small squares and enjoy your delicious homemade fudge!
Things Worth Knowing
- Use a heavy-bottomed saucepan to ensure even heating and prevent burning.
- Make sure to stir continuously once the mixture starts boiling to avoid scorching.
- If the fudge is too soft after cooling, it may need more cooking time next time.
- For best results, allow the fudge to sit for at least four hours before cutting to let it set properly.
Expert Tips about Chocolate Peanut Butter Fudge
To ensure your Chocolate Peanut Butter Fudge turns out perfectly every time, here are some expert tips you can follow.
- Storage: Store your fudge in an airtight container at room temperature. It can last for up to two weeks, though it’s unlikely to stick around that long!
- Freezing: Yes, you can freeze this fudge! Just make sure it’s well wrapped in plastic wrap and then placed in an airtight container. It can be frozen for up to three months.
- Pairing: This fudge pairs wonderfully with a glass of cold milk or a hot cup of coffee. The contrast of temperatures enhances the flavor experience.
- Variations: Feel free to experiment by adding nuts, dried fruits, or sprinkles into the fudge mixture for added texture and flavor.
- Serving size: Cut the fudge into smaller pieces for a fun treat that’s easy to share.
Pairing Suggestions for Chocolate Peanut Butter Fudge
Finding the right way to serve your Chocolate Peanut Butter Fudge can elevate the experience even further. Here are some pairing suggestions that work beautifully:
- With a Glass of Milk: This classic pairing is a favorite among many. The cold, creamy milk balances the richness of the fudge.
- As a Dessert for Parties: Serve this fudge at your next gathering as a delightful dessert option. It’s easy to cut into bite-sized pieces for guests to enjoy.
- Ideal for Movie Nights: Bring this fudge out during your next movie night for a sweet treat that everyone can enjoy while watching their favorite film.
- Seasonal Celebrations: Perfect for holidays like Valentine’s Day or Christmas, where sweet treats are a must.
- Gift Giving: Wrap pieces of fudge in decorative packaging for a lovely homemade gift that friends and family will cherish.
- Office Treats: Bring a batch to work to share with colleagues. It’s an excellent way to brighten everyone’s day.
FAQ
Conclusion
In conclusion, Chocolate Peanut Butter Fudge is not just a treat; it’s a delicious experience that brings joy and nostalgia. The rich flavors of chocolate and peanut butter blend perfectly, creating an irresistible dessert that everyone loves. I encourage you to try making this fudge yourself and share it with friends and family. You’ll find that it becomes a favorite go-to recipe for any occasion, and the smiles it brings are truly priceless.
Chocolate Peanut Butter Fudge
Ingredients
Equipment
Method
- Line an 8-inch by 8-inch pan with foil and spray lightly with nonstick spray. This will make it easy to remove the fudge once it has set.
- In two separate heat-safe medium bowls, place the peanut butter chips in one and the bittersweet chocolate chips in the other. This separation helps us work with the mixtures easily later on.
- In a 3-quart saucepan, combine the granulated white sugar, marshmallow creme, evaporated whole milk, and butter. Cook over medium heat, stirring constantly. You want to keep an eye on this mixture as it heats up.
- Keep stirring until the mixture comes to a boil. Once it does, continue stirring for 5 minutes. This step is crucial as it helps the fudge to achieve the right consistency. If you have a candy thermometer, your fudge is ready when it reaches 235°F.
- If you don’t have a thermometer, you can do the soft ball test. Take a spoon and drizzle a little fudge into a cup of ice water. If it forms a soft, pliable ball, you’re good to go!
- Remove the pan from heat and quickly stir in the vanilla extract. This adds a lovely aroma and flavor to your fudge.
- Now, divide the hot mixture: quickly stir one half into the bowl with the peanut butter chips until fully melted. Then do the same with the other half and the bittersweet chocolate chips. Stir them until completely combined.
- Once the mixtures are melted, scrape the peanut butter mixture into the prepared pan, smoothing it evenly along the bottom. This will be the first layer of your fudge.
- Next, carefully spread the chocolate chip mixture evenly over the top of the peanut butter layer. Take your time to ensure it’s evenly distributed.
- Let the fudge sit at room temperature until completely cool. If you’re in a hurry, you can refrigerate it to speed up the process. Once set, cut into small squares and enjoy your delicious homemade fudge!
Notes
- Storage: Store your fudge in an airtight container at room temperature. It can last for up to two weeks, though it’s unlikely to stick around that long!
- Freezing: Yes, you can freeze this fudge! Just make sure it’s well wrapped in plastic wrap and then placed in an airtight container. It can be frozen for up to three months.
- Pairing: This fudge pairs wonderfully with a glass of cold milk or a hot cup of coffee. The contrast of temperatures enhances the flavor experience.
- Variations: Feel free to experiment by adding nuts, dried fruits, or sprinkles into the fudge mixture for added texture and flavor.
- Serving size: Cut the fudge into smaller pieces for a fun treat that’s easy to share.