
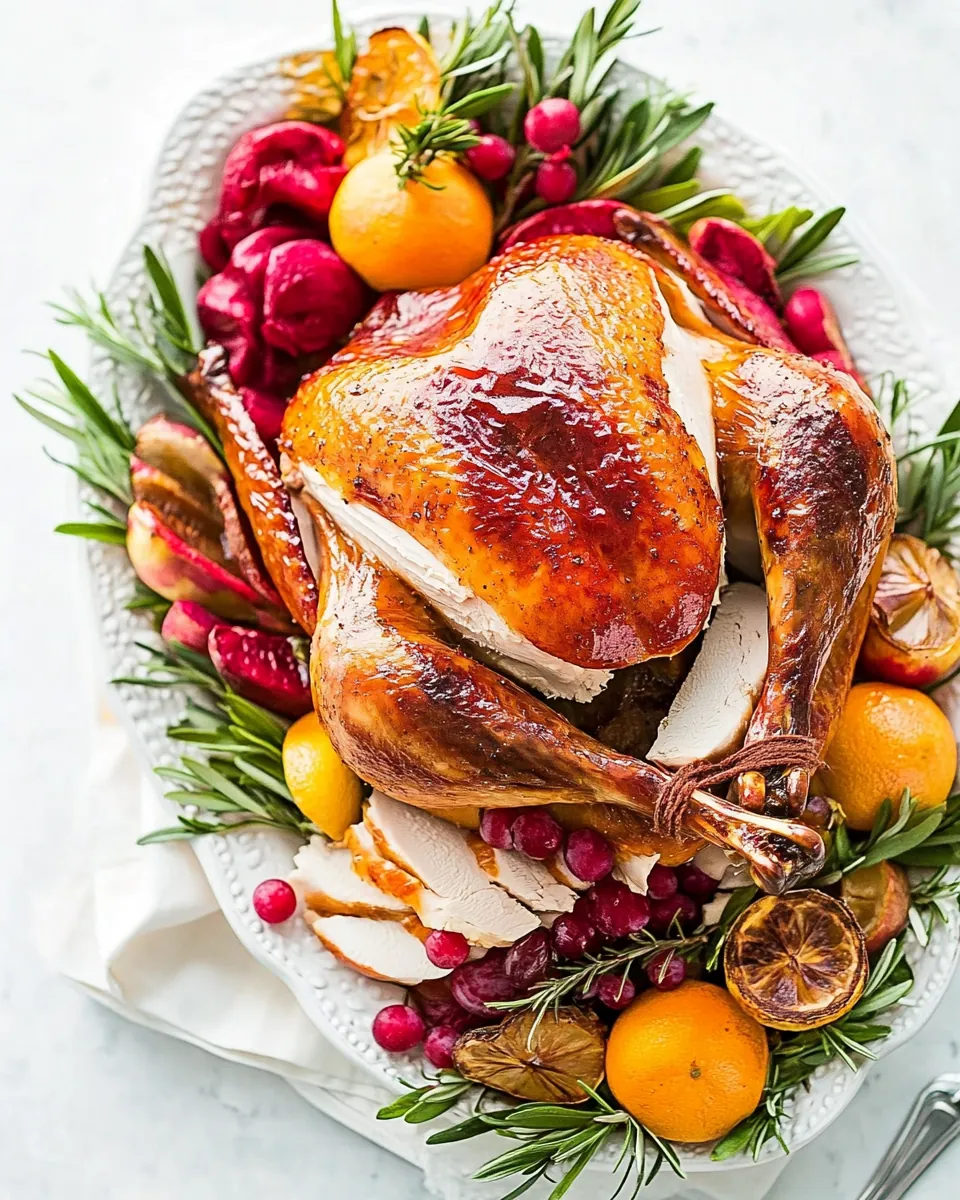
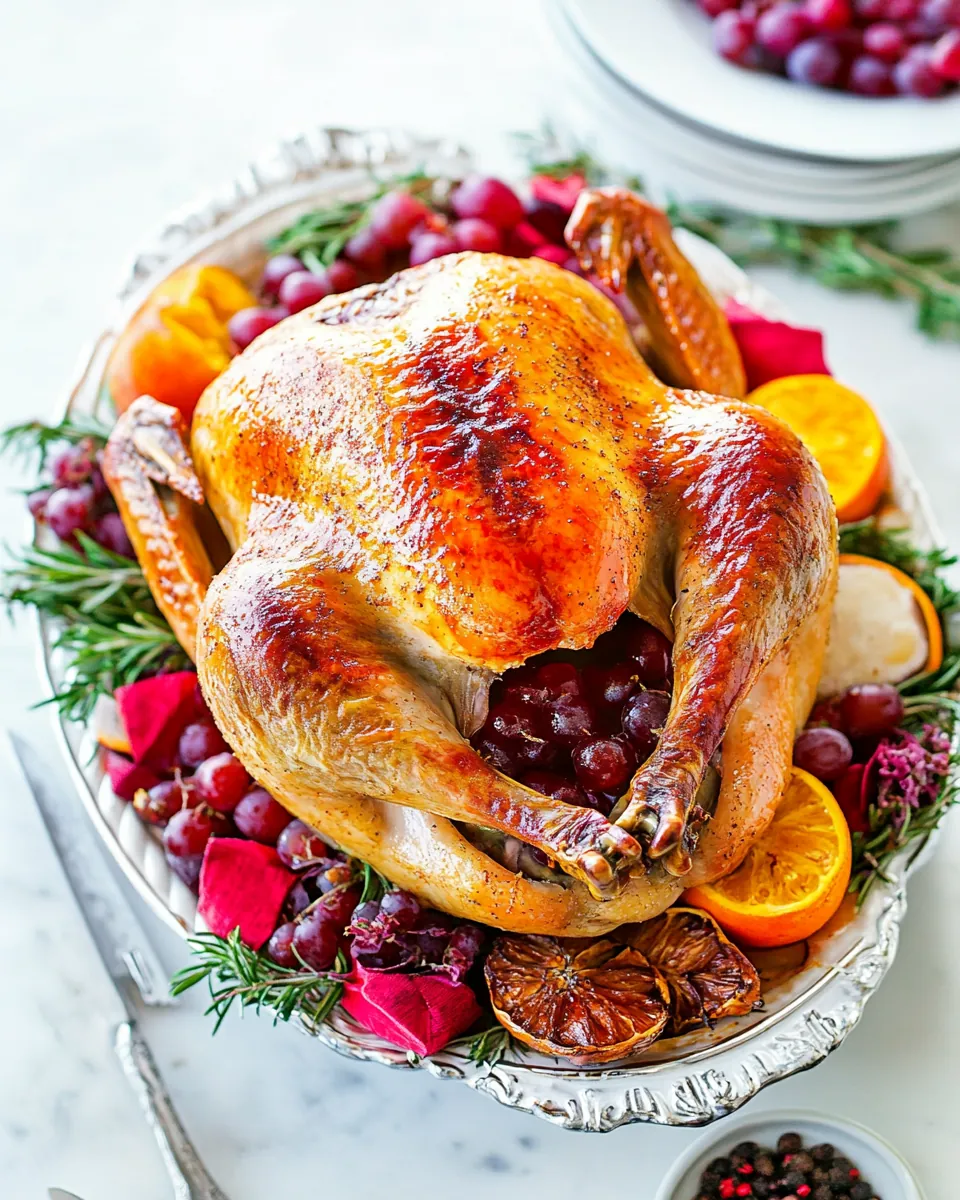
Brined Turkey
Every Thanksgiving, my family gathers around the table, but there’s one star that always shines brighter than the rest: the Brined Turkey. The aroma wafting through the house as it roasts is simply irresistible. I can still remember the first time I tried brining a turkey—it was a game changer! The meat was so tender and juicy, bursting with flavor. Brining is all about infusing moisture and seasoning, and trust me, once you try this technique, you won’t go back. It’s like giving your turkey a spa day before the big feast. Imagine serving a turkey that not only looks beautiful but also tastes incredible. My friends and family have come to expect nothing less during the holidays, and I love sharing this tradition with them. This is not just a recipe; it’s a way to create unforgettable memories around the dinner table.
Recipe Snapshot
26 hr
1440 mins
120 mins
Hard
250 kcal
40 g
Keto, Whole30, Gluten-Free
10 g
Food Processor, Oven, Baking Sheet, Frying Pan, Chef’s Knife, Wooden Spoon
The Charm of This Brined Turkey
1. Juiciness Guaranteed
One of the main reasons I absolutely adore this Brined Turkey recipe is the incredible juiciness it delivers. Brining allows the turkey to absorb water and salt, ensuring that every bite is moist and flavorful. Imagine carving into a turkey that’s bursting with savory juices—it’s a feast for the senses!
2. Flavor Infusion
This recipe takes flavor to a whole new level. By incorporating spices like cloves and bay leaves into the brine, you’ll infuse the turkey with a rich depth of flavor. It’s not just about seasoning the surface; the brine seeps into the meat itself!
3. Easy Preparation
While it may sound intimidating, the process is surprisingly simple. You can prepare the brine ahead of time and let the turkey soak overnight (or longer). This hands-off approach frees you up to focus on other dishes and enjoy your time with loved ones.
4. Perfect for Gatherings
This Brined Turkey is the ultimate centerpiece for your holiday table. It’s perfect for Thanksgiving or any family gathering. The sheer size and presentation of a beautifully roasted turkey make everyone feel special, and it’s a dish that brings people together.
5. Customizable Recipe
Don’t be afraid to make this recipe your own! The brine can be tailored to suit your taste. Want a hint of citrus? Add some orange or lemon peels! Prefer a sweeter undertone? Toss in some brown sugar. The possibilities are endless!
6. Memorable Leftovers
Let’s not forget about the leftovers! While the meal itself is fantastic, the sandwiches the next day are something to look forward to. A turkey sandwich with leftover brined turkey, cranberry sauce, and a touch of mayo? Yes, please!
Recipe Ingredients for Brined Turkey

The ingredients for this Brined Turkey are simple yet effective. The combination of salt and sugar is vital as it helps the turkey absorb moisture, ensuring a juicy result. The addition of spices like cloves and bay leaves enriches the flavor profile, making every bite a delight. Let’s take a closer look at the essential components:
- Water: The base of your brine, helping to dissolve the salt and sugar.
- Sugar: Adds a hint of sweetness, balancing the flavors.
- Kosher salt: Essential for brining; it helps to season the meat thoroughly.
- Turkey: A 10 to 12-pound turkey is ideal for this recipe.
- Cloves: These aromatic spices add warmth to the brine.
- Bay leaves: Bring an herbal note that enhances the overall flavor.
- Vegetable or canola oil: Helps to achieve a crispy, golden skin.
How to Make Brined Turkey

Making a Brined Turkey is a rewarding process that enhances the flavor and tenderness of the meat. Let’s walk through each step together, ensuring you achieve the perfect turkey for your holiday feast.
- Start by placing the sugar and salt in a large bowl with 4 cups of hot water. Stir it until the sugar and salt are completely dissolved, creating a sweet and salty brine.
- Next, transfer the brine mix to a large stockpot. Add a gallon of cold water, cloves, and bay leaves. Toss in a handful of ice to ensure the mixture is cold. This step is crucial for safely bringing the turkey.
- Now, carefully place the turkey breast side down in the stockpot. The brine should completely cover the bird. If it doesn’t, feel free to add more cold water until it does.
- Refrigerate the turkey in the brine for 18 to 48 hours. If you’re in a colder climate, you can keep it outside as long as the temperature stays below 55 degrees.
- When ready to roast, preheat your oven to 450°F. Prepare to transform your kitchen into a welcoming haven!
- Remove the turkey from the brine, discarding the brining liquid. Use a paper towel to blot the turkey dry; this step is crucial for achieving crispy skin.
- Tuck the wings back and rub the skin of the turkey with vegetable oil. This will help give it a lovely golden color.
- Roast the turkey on the lowest oven rack for 30 minutes. After that, cover the breast loosely with a piece of foil to prevent overcooking.
- Pour 1 cup of water into the roasting pan, then reduce the oven temperature to 350°F. Continue roasting for 1 hour.
- After an hour, remove the foil from the breast. Cook for another 15 to 30 minutes. Insert a meat thermometer into the deepest part of the thigh (avoiding the bone) until it reaches 160 to 165 degrees.
- Once done, let the turkey rest for 20 to 30 minutes. This step is vital for the juices to redistribute throughout the meat.
- Finally, slice the turkey, serve, and enjoy the fruits of your labor!
Things Worth Knowing
- Brining Time: The longer you brine, the more flavorful the turkey will be. Aim for at least 18 hours but don’t exceed 48 hours.
- Cold Water: Always ensure the brine is cold before adding the turkey. This prevents bacteria growth.
- Temperature Check: Use a meat thermometer to ensure safety and doneness. Aim for 160°F to 165°F in the thigh.
- Resting Period: Never skip the rest period! It allows the juices to settle, making for a moist turkey.
Helpful Notes about Brined Turkey
As we dive into making the perfect Brined Turkey, here are some helpful tips to ensure your success:
- Storage: Store leftovers in an airtight container in the refrigerator for up to 4 days.
- Freezing: Yes, you can freeze the leftovers! Wrap them tightly in plastic wrap and foil, and they will last for up to 3 months.
- Pairing: Serve with classic sides like mashed potatoes, green bean casserole, or cranberry sauce for a festive meal.
- Presentation: A beautifully garnished turkey with fresh herbs or citrus slices makes for a stunning table centerpiece.
- Leftover Ideas: Use leftover turkey for sandwiches, soups, or salads to extend the deliciousness beyond the holiday.
Serving Options for Brined Turkey
When it comes to serving your Brined Turkey, the possibilities are endless! Here are some fantastic ideas:
- Traditional Feast: Serve it with stuffing, mashed potatoes, and a selection of seasonal vegetables for a classic Thanksgiving dinner.
- Festive Luncheon: A sliced turkey platter with cranberry sauce and fresh bread is perfect for holiday lunches.
- Family Gatherings: This dish is excellent for family reunions, where everyone can come together and enjoy a hearty meal.
- Holiday Picnics: If the weather permits, take your turkey outside for a festive picnic with friends and family.
- Leftover Turkey Sandwiches: Don’t forget about the best part—serve sandwiches the next day with your favorite toppings!
- Seasonal Pairings: Pair your turkey with fall-inspired salads, roasted root vegetables, or pumpkin pie for dessert.
FAQ
Conclusion
The Brined Turkey truly elevates any holiday gathering, ensuring a tender and flavorful centerpiece that everyone will love. With a few simple steps, you can create a dish that will be remembered long after the meal is over. I encourage you to give this recipe a try this Thanksgiving or at your next family get-together. You won’t regret it—every bite is worth celebrating!
Brined Turkey
Ingredients
Equipment
Method
- Start by placing the sugar and salt in a large bowl with 4 cups of hot water. Stir it until the sugar and salt are completely dissolved, creating a sweet and salty brine.
- Next, transfer the brine mix to a large stockpot. Add a gallon of cold water, cloves, and bay leaves. Toss in a handful of ice to ensure the mixture is cold. This step is crucial for safely bringing the turkey.
- Now, carefully place the turkey breast side down in the stockpot. The brine should completely cover the bird. If it doesn't, feel free to add more cold water until it does.
- Refrigerate the turkey in the brine for 18 to 48 hours. If you're in a colder climate, you can keep it outside as long as the temperature stays below 55 degrees.
- When ready to roast, preheat your oven to 450°F. Prepare to transform your kitchen into a welcoming haven!
- Remove the turkey from the brine, discarding the brining liquid. Use a paper towel to blot the turkey dry; this step is crucial for achieving crispy skin.
- Tuck the wings back and rub the skin of the turkey with vegetable oil. This will help give it a lovely golden color.
- Roast the turkey on the lowest oven rack for 30 minutes. After that, cover the breast loosely with a piece of foil to prevent overcooking.
- Pour 1 cup of water into the roasting pan, then reduce the oven temperature to 350°F. Continue roasting for 1 hour.
- After an hour, remove the foil from the breast. Cook for another 15 to 30 minutes. Insert a meat thermometer into the deepest part of the thigh (avoiding the bone) until it reaches 160 to 165 degrees.
- Once done, let the turkey rest for 20 to 30 minutes. This step is vital for the juices to redistribute throughout the meat.
- Finally, slice the turkey, serve, and enjoy the fruits of your labor!
Notes
- Storage: Store leftovers in an airtight container in the refrigerator for up to 4 days.
- Freezing: Yes, you can freeze the leftovers! Wrap them tightly in plastic wrap and foil, and they will last for up to 3 months.
- Pairing: Serve with classic sides like mashed potatoes, green bean casserole, or cranberry sauce for a festive meal.
- Presentation: A beautifully garnished turkey with fresh herbs or citrus slices makes for a stunning table centerpiece.
- Leftover Ideas: Use leftover turkey for sandwiches, soups, or salads to extend the deliciousness beyond the holiday.

