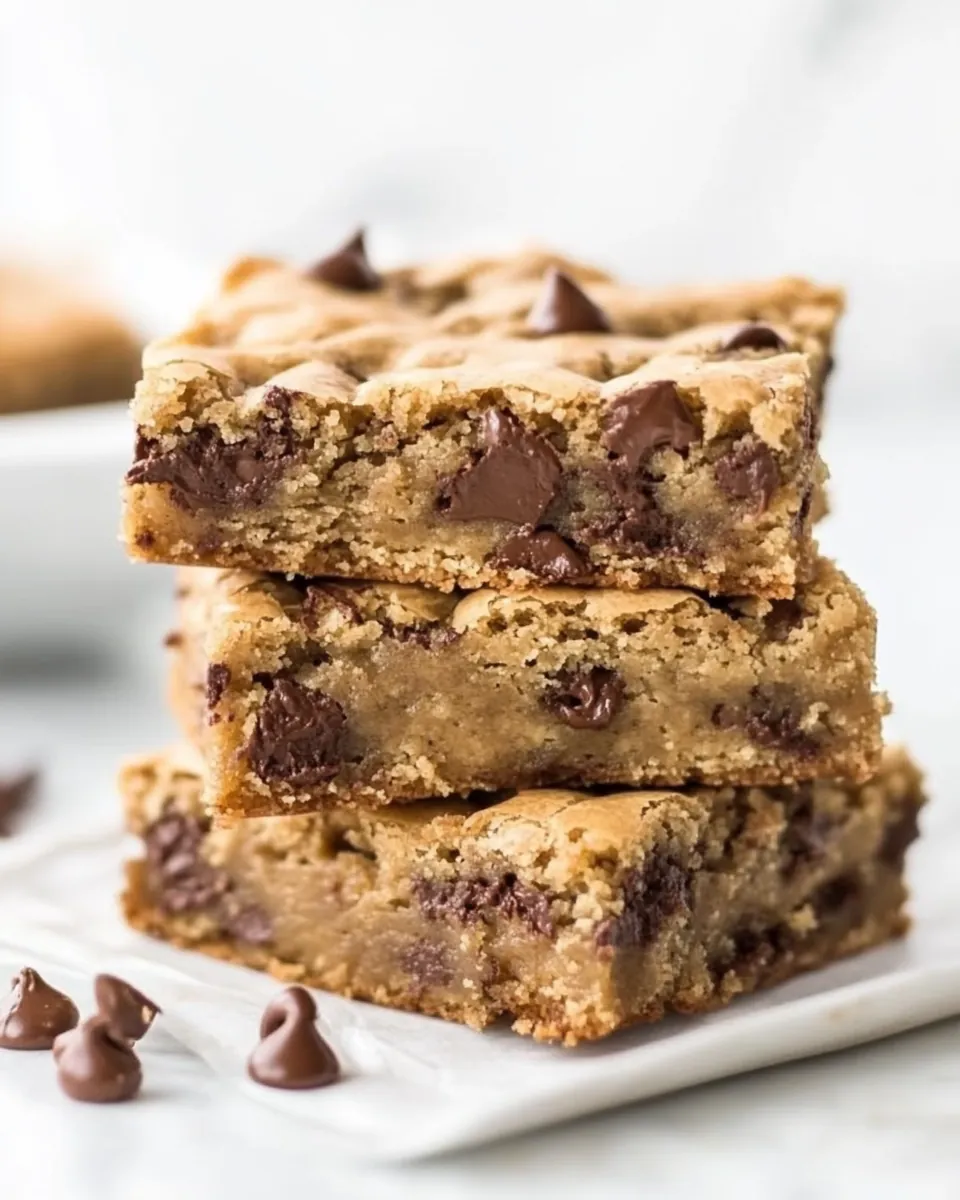
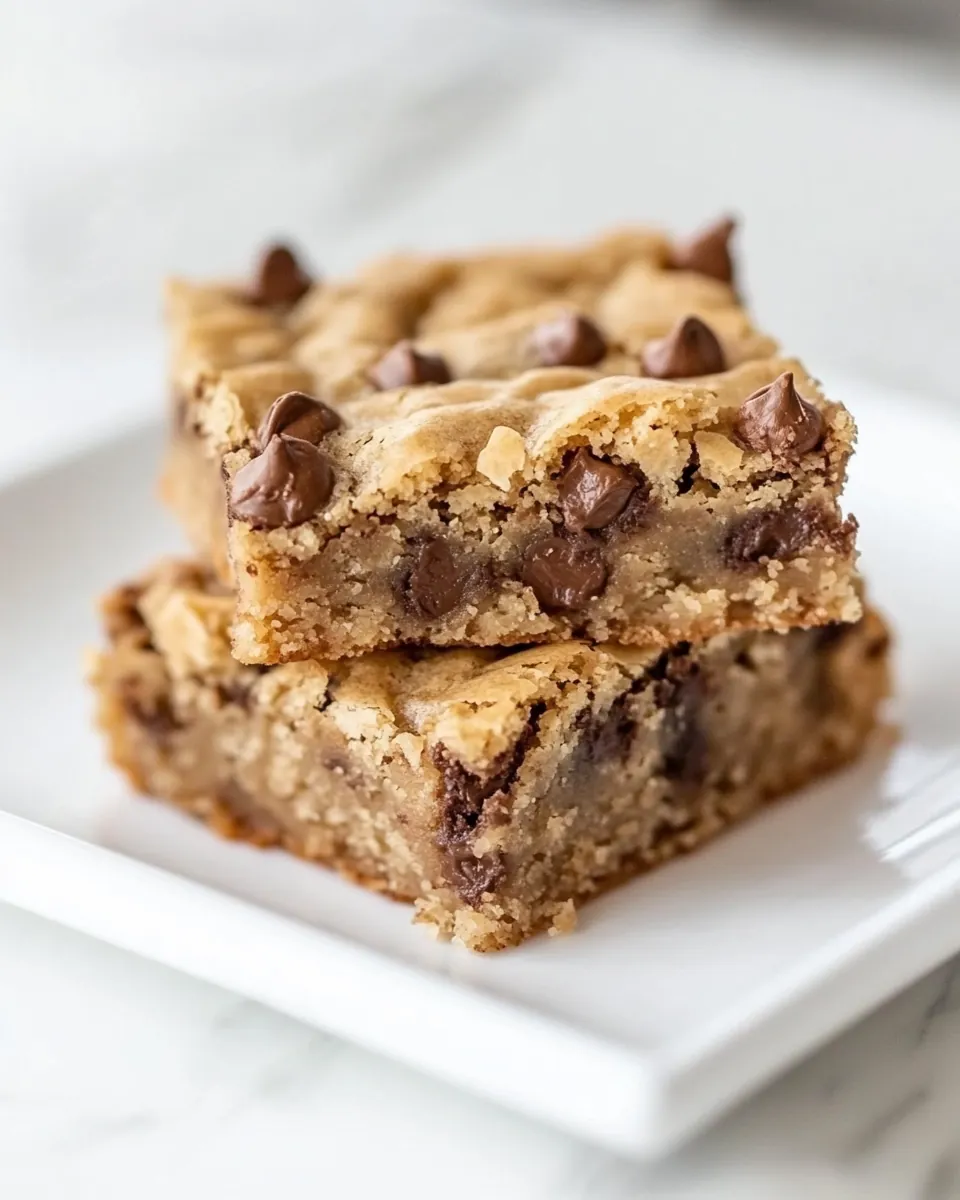
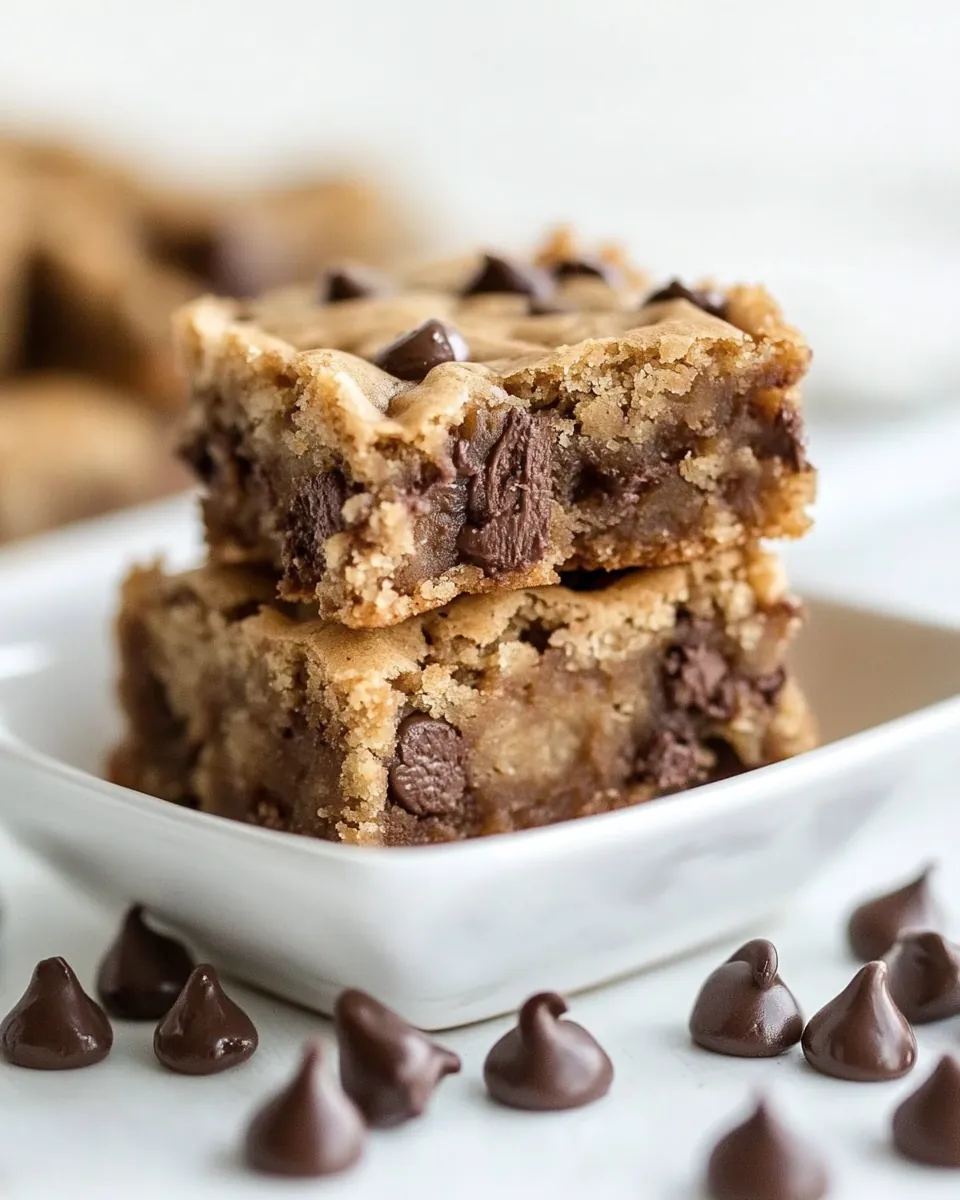
Blondies
There’s something so comforting about a batch of Blondies fresh from the oven, and I can’t help but smile every time I bake them. Growing up, these sweet treats were a staple in my home, and the sweet aroma of melting chocolate and warm butter would waft through the kitchen, luring my family in like moths to a flame. Whether it was an ordinary Wednesday or a special occasion, I always found a reason to whip up a batch of Blondies. Their golden-brown hue and soft, chewy texture make them the perfect indulgence, and they never fail to brighten up my day. I still remember the first time I made them on my own, excitedly following my mother’s handwritten recipe. It felt like a rite of passage, and the first bite was a revelation. The blend of rich brown sugar and chocolate is simply irresistible, and each square is an explosion of flavor that brings warmth and happiness.
Recipe Snapshot
35 mins
5 mins
30 mins
Medium
212 kcal
2 g
Gluten-Free, Low FODMAP
10 g
Oven, Baking Sheet, Frying Pan, Whisk, Mixing Bowl
When I think about why these Blondies hold such a special place in my heart, it’s clear that they’re not just a dessert; they’re a connection to my past, a way to share joy with loved ones, and a testament to the power of homemade treats. Whether you’re baking them for a gathering or just as a little self-care on a rainy day, there’s nothing quite like the satisfaction of enjoying a chewy, chocolatey square of bliss. Let’s dive into why this recipe is a must-try!
What’s Great About This Blondies
1. The Perfect Balance of Flavors
The combination of light brown sugar and butter creates a deep, rich flavor profile in Blondies that stands out from traditional chocolate brownies. The sweetness of the sugars adds a caramel-like depth that pairs beautifully with the semi-sweet chocolate chips.
2. Quick & Easy to Make
One of the reasons I love making Blondies is how simple the process is. You can whip them together in just a few minutes, making them perfect for when unexpected guests drop by or you simply need a quick treat to satisfy your sweet tooth.
3. Versatile Treat
These Blondies can be customized to your liking. Feel free to add nuts, dried fruits, or even swirl in some peanut butter for an extra twist. They’re a blank canvas for your creativity!
4. Great for Sharing
Cut these treats into squares and serve them at parties, potlucks, or family gatherings. They’re always a hit and are perfect for sharing with friends and loved ones.
5. Nostalgic Comfort Food
For me, Blondies evoke memories of childhood and family gatherings. They bring a sense of nostalgia and comfort, reminding me of family traditions and love.
Blondies Ingredients
The ingredients for Blondies are simple yet effective, making them an easy choice for anyone looking to whip up something delicious. Each ingredient plays a vital role in achieving that perfect chewy texture and rich flavor. At the heart of this recipe are unsalted butter, light brown sugar, and chocolate chips, all working together to create a harmony of sweetness and richness.
- ½ cup unsalted butter (melted) – This is the base that gives Blondies their rich flavor and moist texture.
- ½ cup packed light brown sugar – Adds sweetness and that signature caramel flavor that makes Blondies so irresistible.
- ⅓ cup granulated sugar – Balances the sweetness and enhances the overall taste.
- 1 large egg (room temperature) – Provides structure and helps bind the ingredients together.
- 1 teaspoon vanilla extract – Adds depth and warmth to the flavor profile.
- 1 cup all-purpose flour – The main structure of the Blondies, giving them their chewy texture.
- ¼ teaspoon salt – Enhances the flavors and balances the sweetness.
- 1 cup semi-sweet chocolate chips – The star of the show, adding melty pockets of chocolate goodness.
Preparation Steps for Blondies
Making Blondies is a delightful experience that fills your kitchen with warmth and the sweet scent of baking. Let’s take it step by step and create these scrumptious treats together!
- Start by preheating your oven to 350°F. This step is crucial for ensuring that your Blondies bake evenly. While the oven heats, prepare your baking pan. Brush an 8×8-inch square baking pan with a bit of melted butter, ensuring that every corner is covered to prevent sticking.
- Line the pan with parchment paper, leaving a 2-inch overhang on two sides. This clever trick will make it easy to lift your Blondies out of the pan once baked, making cutting them into squares a breeze.
- In a large mixing bowl, combine the melted butter and both types of sugar: brown sugar and granulated sugar. Use a whisk to blend them together until the mixture is smooth and creamy. You should see a lovely glossy texture forming.
- Add the egg and vanilla extract into the bowl. Whisk these in until they are fully incorporated, and the mixture is light and fluffy. This step is essential for incorporating air, which helps achieve that lovely chewy texture.
- Next, add the flour and salt to the mixture. Stir gently with a spatula until just combined. Be careful not to overmix; the batter should be slightly lumpy and not too smooth.
- Fold in ½ cup of the chocolate chips using a spatula or wooden spoon. This will create delicious pockets of melty chocolate throughout your Blondies. Save the remaining chips for the topping!
- Transfer the batter into your prepared baking pan, smoothing the top with a rubber spatula. Make sure it’s evenly spread out, reaching all corners of the pan.
- Sprinkle the rest of the chocolate chips on top, pressing them gently into the batter to ensure they stick during baking.
- Bake in the preheated oven for about 30 minutes. You’ll know they’re done when the top is golden brown and a toothpick inserted into the center comes out clean.
- Once baked, remove the pan from the oven and set it on a wire rack to cool completely. This will allow the Blondies to firm up and make cutting easier. Using the overhanging parchment, lift them out of the pan and transfer to a cutting board. Cut into squares and enjoy!
Things Worth Knowing
- Room Temperature Ingredients: Ensure that your egg is at room temperature for better incorporation. This helps achieve a smoother batter.
- Don’t Overmix: Mix just until combined. Overmixing can lead to tough Blondies; you want them chewy, not dense!
- Check for Doneness: Always do the toothpick test! If it comes out clean or with a few moist crumbs, your Blondies are done.
- Cooling Time: Allowing your Blondies to cool completely in the pan ensures they slice neatly into squares without crumbling.
Helpful Hints
Here are some helpful hints to ensure your Blondies turn out perfectly every time. These tips will enhance your baking experience and help you create the best treats!
- Storage: Keep your Blondies in an airtight container at room temperature. They can last up to a week, but I guarantee they won’t last that long!
- Freezing: Yes, you can freeze these! Wrap them tightly in plastic wrap and place them in a freezer bag. They’ll stay fresh for up to three months!
- Serving Suggestions: Pair your Blondies with a scoop of vanilla ice cream or a drizzle of caramel sauce for an indulgent dessert.
- Variations: Feel free to mix in chopped nuts or dried fruit for added texture and flavor.
Pairing Suggestions for Blondies
When it comes to serving Blondies, the possibilities are endless! Here’s how you can enjoy them best:
- With Ice Cream: A warm Blondie topped with a scoop of vanilla ice cream is a match made in heaven. The contrast of warm and cold really takes it over the top.
- For a Snack: These Blondies are perfect for an afternoon snack! Pack some in your lunch box or enjoy a piece with your coffee.
- At Gatherings: Bring these treats to parties, and watch them disappear! They’re a crowd-pleaser and easy to slice and serve.
- With a Drink: Pair your Blondies with a glass of milk or even a warm cup of coffee for a delightful treat.
- Seasonal Occasions: These Blondies are perfect for any time of year. Whether it’s a summer picnic or a winter holiday gathering, they fit right in!
FAQ
Conclusion
In summary, Blondies are a heartwarming treat that brings joy with every bite. Their soft, chewy texture and rich flavor make them a favorite among many, and they’re perfect for any occasion. So why not try making these delicious bars for yourself? Whether for a special event or just a cozy evening at home, Blondies are sure to be a hit!
Blondies
Ingredients
Equipment
Method
- Start by preheating your oven to 350°F. This step is crucial for ensuring that your Blondies bake evenly. While the oven heats, prepare your baking pan. Brush an 8×8-inch square baking pan with a bit of melted butter, ensuring that every corner is covered to prevent sticking.
- Line the pan with parchment paper, leaving a 2-inch overhang on two sides. This clever trick will make it easy to lift your Blondies out of the pan once baked, making cutting them into squares a breeze.
- In a large mixing bowl, combine the melted butter and both types of sugar: brown sugar and granulated sugar. Use a whisk to blend them together until the mixture is smooth and creamy. You should see a lovely glossy texture forming.
- Add the egg and vanilla extract into the bowl. Whisk these in until they are fully incorporated, and the mixture is light and fluffy. This step is essential for incorporating air, which helps achieve that lovely chewy texture.
- Next, add the flour and salt to the mixture. Stir gently with a spatula until just combined. Be careful not to overmix; the batter should be slightly lumpy and not too smooth.
- Fold in ½ cup of the chocolate chips using a spatula or wooden spoon. This will create delicious pockets of melty chocolate throughout your Blondies. Save the remaining chips for the topping!
- Transfer the batter into your prepared baking pan, smoothing the top with a rubber spatula. Make sure it’s evenly spread out, reaching all corners of the pan.
- Sprinkle the rest of the chocolate chips on top, pressing them gently into the batter to ensure they stick during baking.
- Bake in the preheated oven for about 30 minutes. You’ll know they’re done when the top is golden brown and a toothpick inserted into the center comes out clean.
- Once baked, remove the pan from the oven and set it on a wire rack to cool completely. This will allow the Blondies to firm up and make cutting easier. Using the overhanging parchment, lift them out of the pan and transfer to a cutting board. Cut into squares and enjoy!
Notes
- Adding the overhanging parchment paper: This will allow you to lift the bars out of the pan for easy transfer to a cutting board so you can slice the bars.
- If you use salted butter: Reduce the amount of salt added to the recipe.
- Do not overmix: The batter or the blondies may come out tough or crumbly and not as chewy as they should.