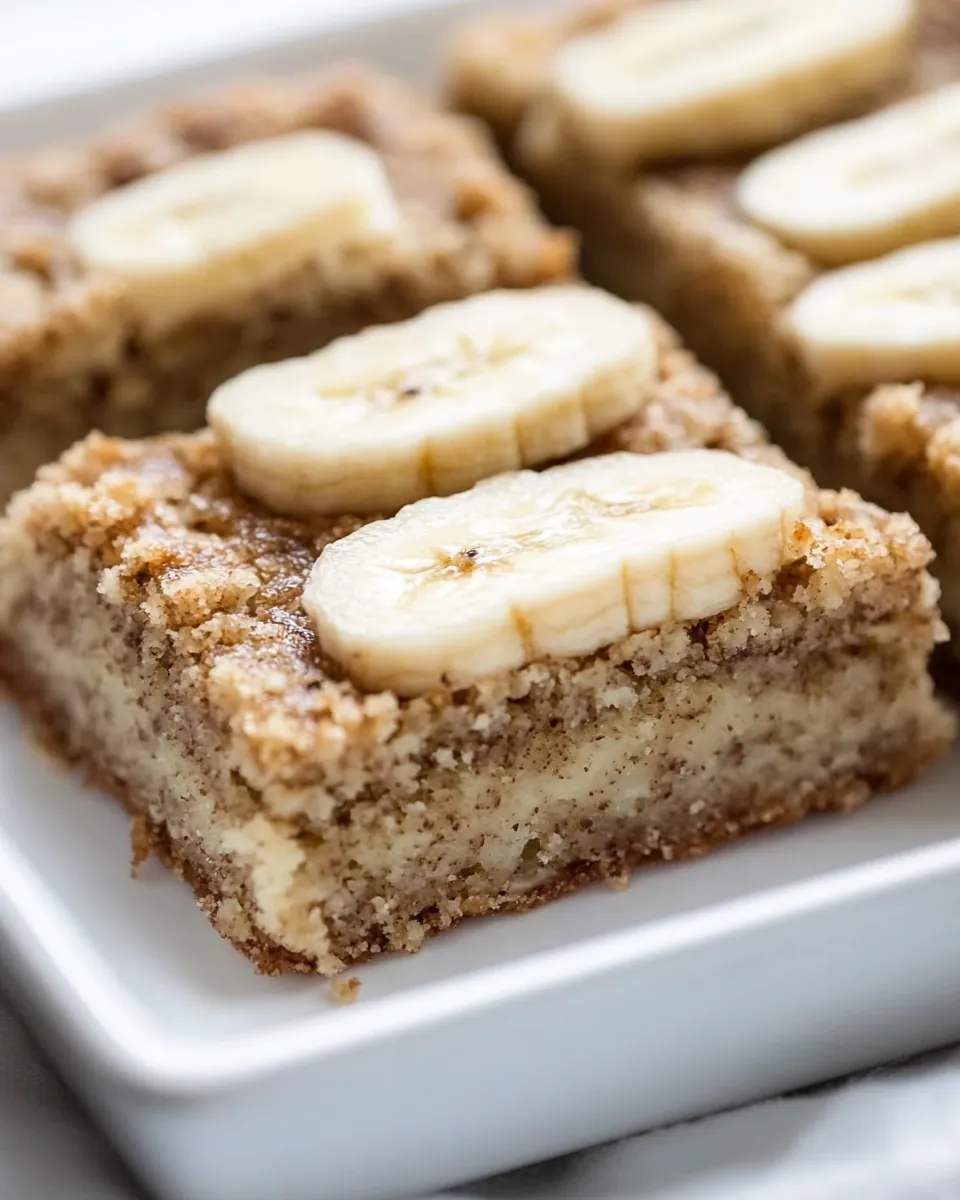
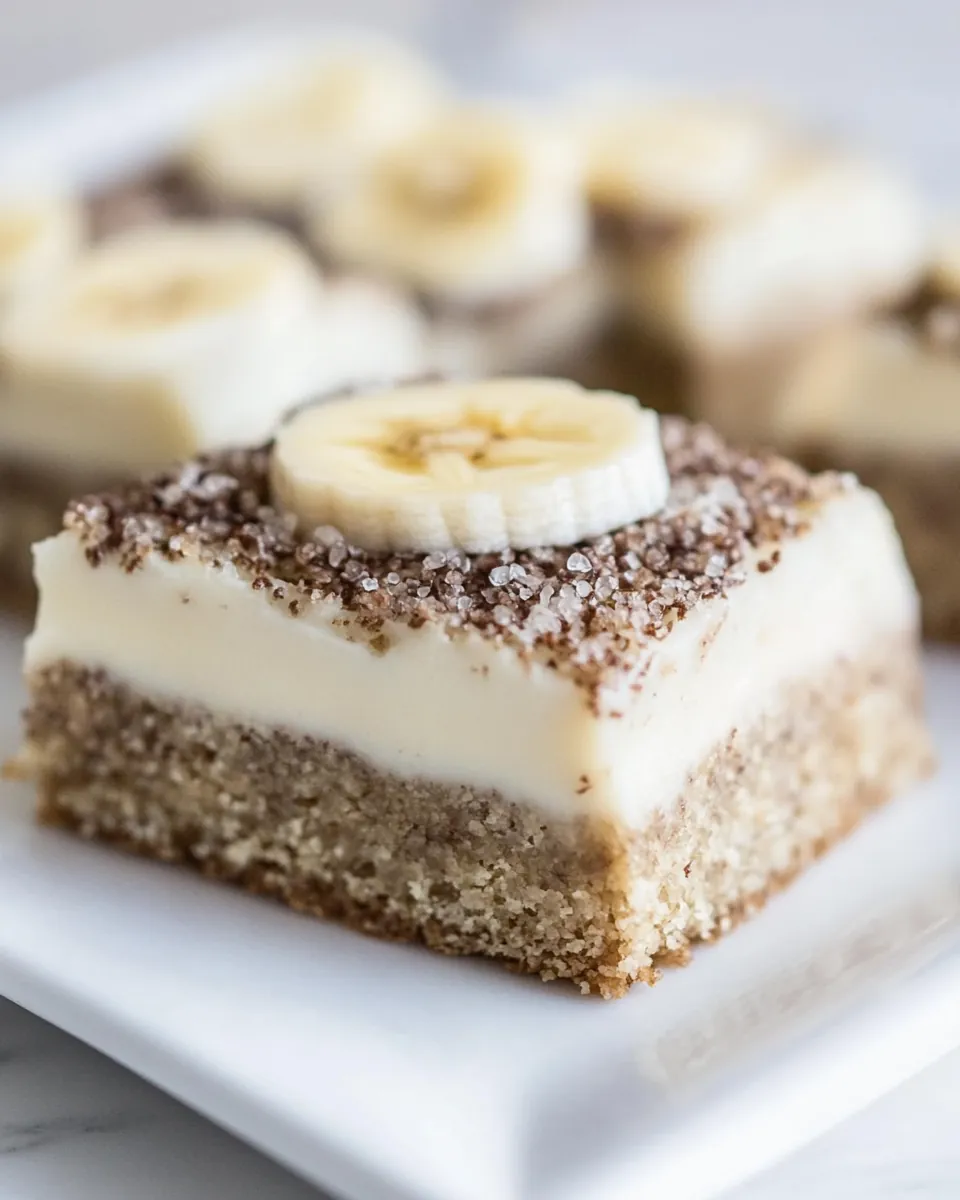
Banana Bars
There’s something incredibly comforting about a warm batch of Banana Bars straight from the oven. I remember the first time I made these delicious treats; the aroma of ripe bananas and sweet sugar wafted through my kitchen, drawing my family in like a magnet. I could hardly wait for them to cool before diving in! These bars are not just easy to make; they’re a perfect way to use up those overripe bananas sitting on your counter. When I serve them at gatherings, they vanish almost instantly, leaving everyone asking for the recipe. If you haven’t tried Banana Bars yet, you’re in for a real treat. With a creamy frosting on top, these bars are the ultimate indulgence that feels like a warm hug on a plate.
Recipe Snapshot
50 mins
20 mins
30 mins
Medium
210 kcal
2 g
Vegan, Gluten-Free, AIP
10 g
15-inch x 10-inch jelly roll pan
The Charm of This Banana Bars
Deliciously Moist
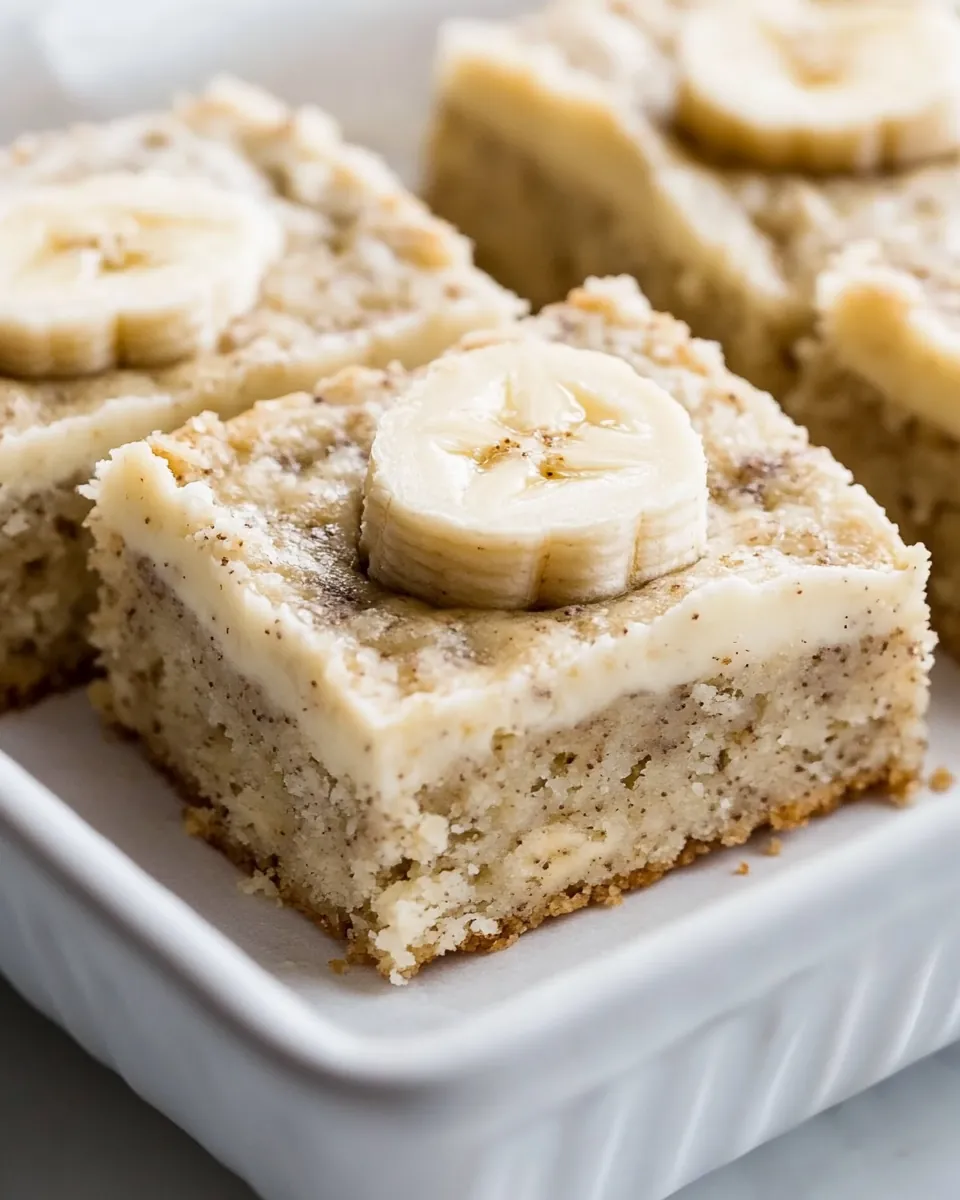
One of the standout features of Banana Bars is their incredible moisture. The combination of ripe bananas and butter creates a rich texture that melts in your mouth. Unlike traditional cakes, these bars are so moist that they practically require no additional toppings. However, that creamy frosting takes them over the top!
Easy to Make
Even if you’re not a seasoned baker, you’ll find that making Banana Bars is straightforward and enjoyable. The ingredients are simple and affordable, making this recipe accessible for anyone. With just a few mixing bowls and a whisk, you can create a perfect dessert that impresses.
Perfect for Any Occasion
These bars are versatile enough to fit any occasion. Whether it’s a potluck, a birthday party, or just a cozy family gathering, Banana Bars will always be welcomed with open arms. You can even dress them up for special occasions with colorful sprinkles or festive decorations!
Great for Leftovers
Leftover Banana Bars are a delightful treat for breakfast or an afternoon snack. You can enjoy them cold from the fridge or warmed slightly in the microwave for a few seconds. They hold their flavor and texture well, making them a sweet reminder of your baking skills throughout the week.
Kid-Friendly Fun
Kids love helping in the kitchen, and making Banana Bars is a great way to engage them. They can mash the bananas, mix the ingredients, and even help decorate the bars. It’s a fun activity that results in a delicious reward!
Banana Bars Ingredients
When it comes to the ingredients for Banana Bars, each one plays an essential role in developing the flavors and textures that make this dessert irresistible. The backbone of this recipe includes ripe bananas, which provide moisture and natural sweetness, complemented by the richness of butter. Together, these ingredients create a mouthwatering treat that’s perfect for any occasion.
- 2 cups all-purpose flour: The base of our bars, giving them structure and a delightful chew.
- 1 teaspoon baking soda: This leavening agent helps the bars rise and gives them a light texture.
- 1/8 teaspoon salt: A pinch to enhance all the flavors in the recipe.
- 1/2 cup butter, softened (1 stick): Adds richness and moisture, making the bars tender.
- 2 cups granulated sugar: Sweetens the bars and contributes to their delightful texture.
- 3 eggs: Binds the ingredients together while adding moisture and richness.
- 1 1/2 cups mashed ripe banana (about 3 medium): The star ingredient, infusing the bars with natural sweetness and moisture.
- 2 teaspoons vanilla extract: Enhances the overall flavor.
- 1 (8 ounce) package cream cheese, softened: Used in the frosting for a creamy and tangy finish.
- 1/2 cup butter, softened (1 stick): Adds richness to the frosting, making it smooth and spreadable.
- 4 cups powdered sugar: Sweetens the frosting and gives it a fluffy texture.
- 1 teaspoon vanilla extract: Adds an extra layer of flavor to the frosting.
Banana Bars Instructions
Getting started on your Banana Bars is simple and fun. Each step leads you closer to that heavenly moment when you take your first bite. Let’s dive into the detailed instructions to ensure your baking experience is a breeze.
- Preheat your oven to 350 degrees. This temperature is perfect for baking your bars evenly. Ensure your oven is fully heated before placing the batter inside.
- Coat a 15-inch x 10-inch x 1-inch jelly roll pan with nonstick cooking spray. This will prevent the bars from sticking and make for easy removal once baked.
- In a medium bowl, whisk together 2 cups all-purpose flour, 1 teaspoon baking soda, and 1/8 teaspoon salt. This dry mixture is essential for the structure and flavor of your bars.
- In a stand mixer fitted with the paddle attachment, or with an electric hand mixer on medium-high speed, beat 1/2 cup softened butter and 2 cups granulated sugar until pale and fluffy, about 2 minutes. This process incorporates air, making the bars light.
- Add the 3 eggs and beat until well incorporated. They add moisture and richness to the batter.
- Beat in the 1 1/2 cups mashed ripe banana and 2 teaspoons vanilla extract until fully combined. This step infuses your batter with delicious banana flavor.
- Reduce the mixer speed to low and gradually add the flour mixture. Mix until uniformly combined, ensuring not to overmix; this keeps your bars tender.
- Spread the batter evenly into the prepared pan. Use a spatula to ensure it’s level.
- Bake for about 30 to 35 minutes, or until a toothpick inserted in the center comes out clean with a few crumbs attached. This is crucial to avoid overbaking your bars.
- Once baked, remove from the oven and cool completely in the pan for at least 30 minutes. This helps set the bars.
- In a stand mixer, beat 1 (8 ounce) package of softened cream cheese and 1/2 cup softened butter until smooth. This creates the creamy frosting.
- Reduce the mixer speed to medium-low and gradually add 4 cups powdered sugar and 1 teaspoon vanilla extract. Beat well until fluffy.
- Spread the cream cheese frosting evenly over the cooled bars. The frosting is the perfect finishing touch to your delicious creation!
Things Worth Knowing
- Overripe bananas work best: The riper the bananas, the sweeter and more flavorful your bars will be.
- Cooling completely: Allow your bars to cool completely before frosting to prevent the icing from melting.
- Check for doneness: Bake until a toothpick comes out clean; this will ensure a moist but not gooey texture.
- Frosting variations: Feel free to experiment with flavored cream cheese or add a bit of lemon zest to your frosting for a citrus kick.
Making Adjustments
There are countless ways to adjust and modify your Banana Bars recipe to suit your preferences. Here are some tips to enhance your baking experience.
- Storage: Any leftover bars can be refrigerated within 2 hours and stored covered for up to 4 days.
- Freezing: You can freeze the bars! Just wrap them tightly and store them in an airtight container for up to 3 months.
- Pairing: Consider adding nuts or chocolate chips to the batter for an extra crunch or sweetness.
- Serving suggestion: Serve these bars warm, topped with a dollop of whipped cream for a delightful treat.
- Customizing the frosting: Instead of cream cheese frosting, you can use chocolate ganache or whipped cream for a lighter top.
Perfect Pairings for Banana Bars
When it comes to enjoying Banana Bars, there are several delightful pairings to consider. Here are some recommendations:
- Coffee: A strong cup of coffee complements the sweetness of the bars beautifully.
- Tea: Pair your bars with herbal or chai tea for a cozy afternoon snack.
- Ice Cream: A scoop of vanilla or cinnamon ice cream on the side makes for a decadent dessert.
- Fruits: Fresh fruits like strawberries or a fruit salad can provide a refreshing contrast.
- Occasions: These bars are excellent for potlucks, birthday parties, or even as a sweet treat during the holidays.
FAQ
Conclusion
In conclusion, Banana Bars are a delightful treat that brings a smile to anyone’s face. Their moist texture and sweet frosting make them a favorite among friends and family. I encourage you to give this recipe a try; you won’t be disappointed. Enjoy baking and sharing these delicious bars with your loved ones!

Banana Bars
Ingredients
Equipment
Method
- Preheat your oven to 350 degrees. This temperature is perfect for baking your bars evenly. Ensure your oven is fully heated before placing the batter inside.
- Coat a 15-inch x 10-inch x 1-inch jelly roll pan with nonstick cooking spray. This will prevent the bars from sticking and make for easy removal once baked.
- In a medium bowl, whisk together 2 cups all-purpose flour, 1 teaspoon baking soda, and 1/8 teaspoon salt. This dry mixture is essential for the structure and flavor of your bars.
- In a stand mixer fitted with the paddle attachment, or with an electric hand mixer on medium-high speed, beat 1/2 cup softened butter and 2 cups granulated sugar until pale and fluffy, about 2 minutes. This process incorporates air, making the bars light.
- Add the 3 eggs and beat until well incorporated. They add moisture and richness to the batter.
- Beat in the 1 1/2 cups mashed ripe banana and 2 teaspoons vanilla extract until fully combined. This step infuses your batter with delicious banana flavor.
- Reduce the mixer speed to low and gradually add the flour mixture. Mix until uniformly combined, ensuring not to overmix; this keeps your bars tender.
- Spread the batter evenly into the prepared pan. Use a spatula to ensure it’s level.
- Bake for about 30 to 35 minutes, or until a toothpick inserted in the center comes out clean with a few crumbs attached. This is crucial to avoid overbaking your bars.
- Once baked, remove from the oven and cool completely in the pan for at least 30 minutes. This helps set the bars.
- In a stand mixer, beat 1 (8 ounce) package of softened cream cheese and 1/2 cup softened butter until smooth. This creates the creamy frosting.
- Reduce the mixer speed to medium-low and gradually add 4 cups powdered sugar and 1 teaspoon vanilla extract. Beat well until fluffy.
- Spread the cream cheese frosting evenly over the cooled bars. The frosting is the perfect finishing touch to your delicious creation!
Notes
- Jelly roll pan: To get the ideal cake-to-frosting ratio, bake this cake in a 10-inch by 15-inch jelly roll pan.
- Mashed ripe bananas: If frozen, thaw on the counter while you prep the other ingredients. To ripen bananas in real time, preheat the oven to 300 degrees and line a baking sheet with foil. Arrange the unpeeled bananas on the baking sheet. Bake until banana skins are completely black all over, about 15 to 20 minutes. Cool. Scoop the banana pulp from the peel, then mash.
- Yield: This recipe makes 24 squares, 2 1/2-inch by 2 1/2-inch each, cut in a 4×6 configuration. Obviously, you can cut the bars however you want!
- Storage: Refrigerate any uneaten bars within 2 hours and store covered in the refrigerator for up to 4 days. You can bring them to room temperature before serving or eat them cold (I personally love cold cream cheese frosting).