Angel Food Cake
There’s something truly magical about making a perfect Angel Food Cake. In my experience, it’s a delightful journey of transforming simple ingredients into a light, airy cake that’s as beautiful as it is delicious. The first time I made this cake, I was mesmerized by how the egg whites whipped up to form soft peaks, creating a fluffy batter that seemed almost ethereal. Every bite is a cloud of sweetness, and it reminds me of sunny afternoons spent with family, enjoying dessert after a hearty meal. Whether you serve it at a summer gathering or as a sweet treat just for yourself, this cake is bound to bring smiles and compliments.
Recipe Snapshot
60 mins
0 mins
0 mins
Medium
120 kcal
2 g
Gluten-Free, Low FODMAP
0 g
Stand Mixer, Tube Pan, Thermometer, Balloon Whisk, Mini Spatula, Ultimate Spatula, Williams Sonoma Olivewood Offset Icing Spatula, Fine-Mesh Sieve, Prep Knives, Mixing Bowls
The Magic of This Angel Food Cake
It’s Light and Fluffy
One of the standout features of Angel Food Cake is its incredible lightness. Made primarily of whipped egg whites and sugar, this cake doesn’t weigh you down like a traditional cake would. It’s perfect for warm days when you want something sweet but refreshing.
Perfect for Any Occasion
This cake is incredibly versatile. You can dress it up with berries, a drizzle of cream, or even chocolate sauce for a more decadent touch. It’s suitable for birthdays, summer picnics, or even as a simple dessert after dinner. Every occasion feels special with a slice of Angel Food Cake.
Easy to Make
Don’t let the delicate nature of this cake intimidate you. The process is straightforward! With just a few steps – whipping egg whites, folding in flour, and baking – you can create a show-stopping dessert without much fuss.
Low in Fat
If you’re looking for a dessert that’s lower in fat, Angel Food Cake is a fantastic choice. Since it’s primarily made from egg whites and doesn’t contain any butter or oil, you can indulge a bit more without the guilt.
Endless Flavor Combinations
The basic recipe can be adapted in so many ways. Add citrus zest for a hint of lemon or orange, or mix in spices like cinnamon for some warmth. The possibilities are endless, making this cake a great base for whatever flavor you’re craving.
Beautiful Presentation
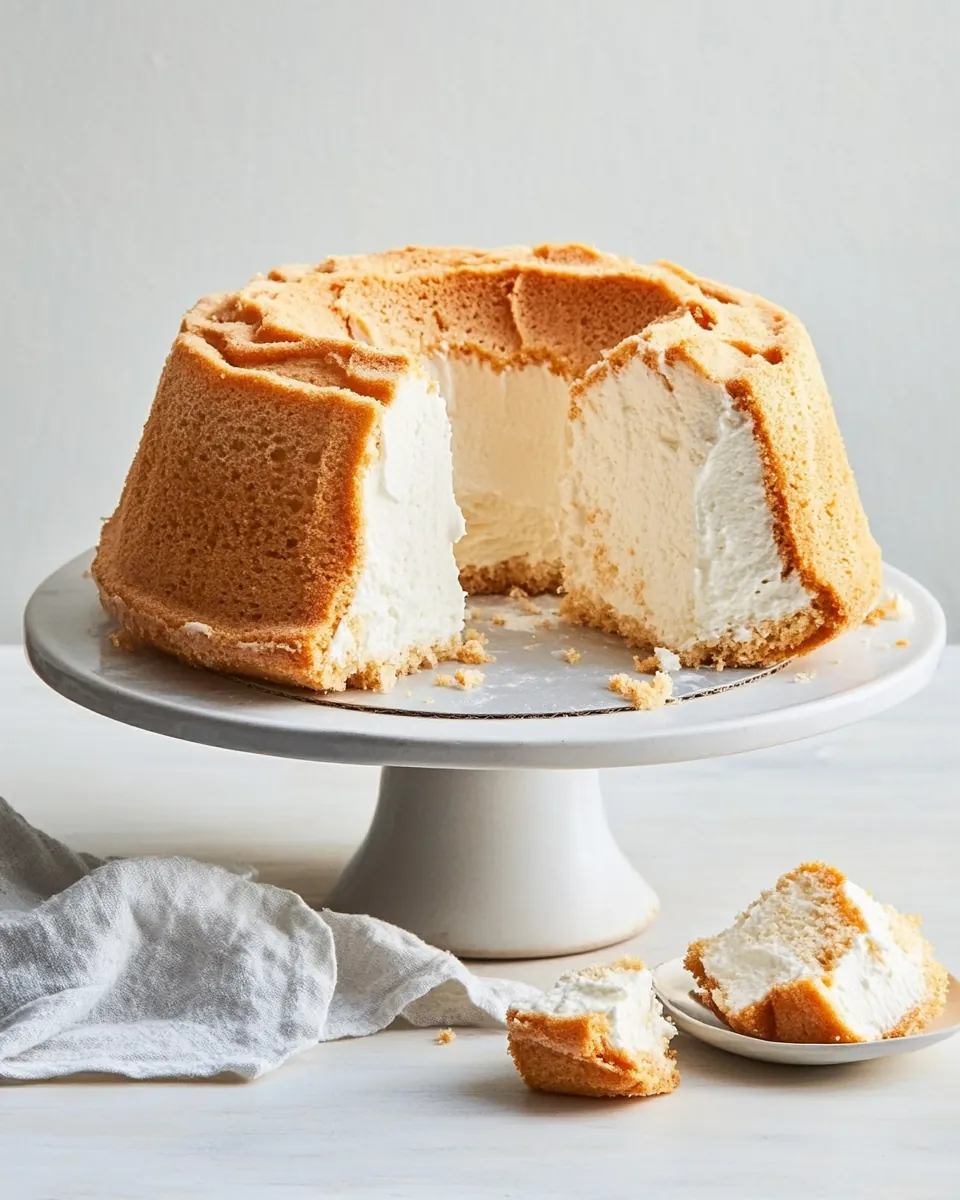
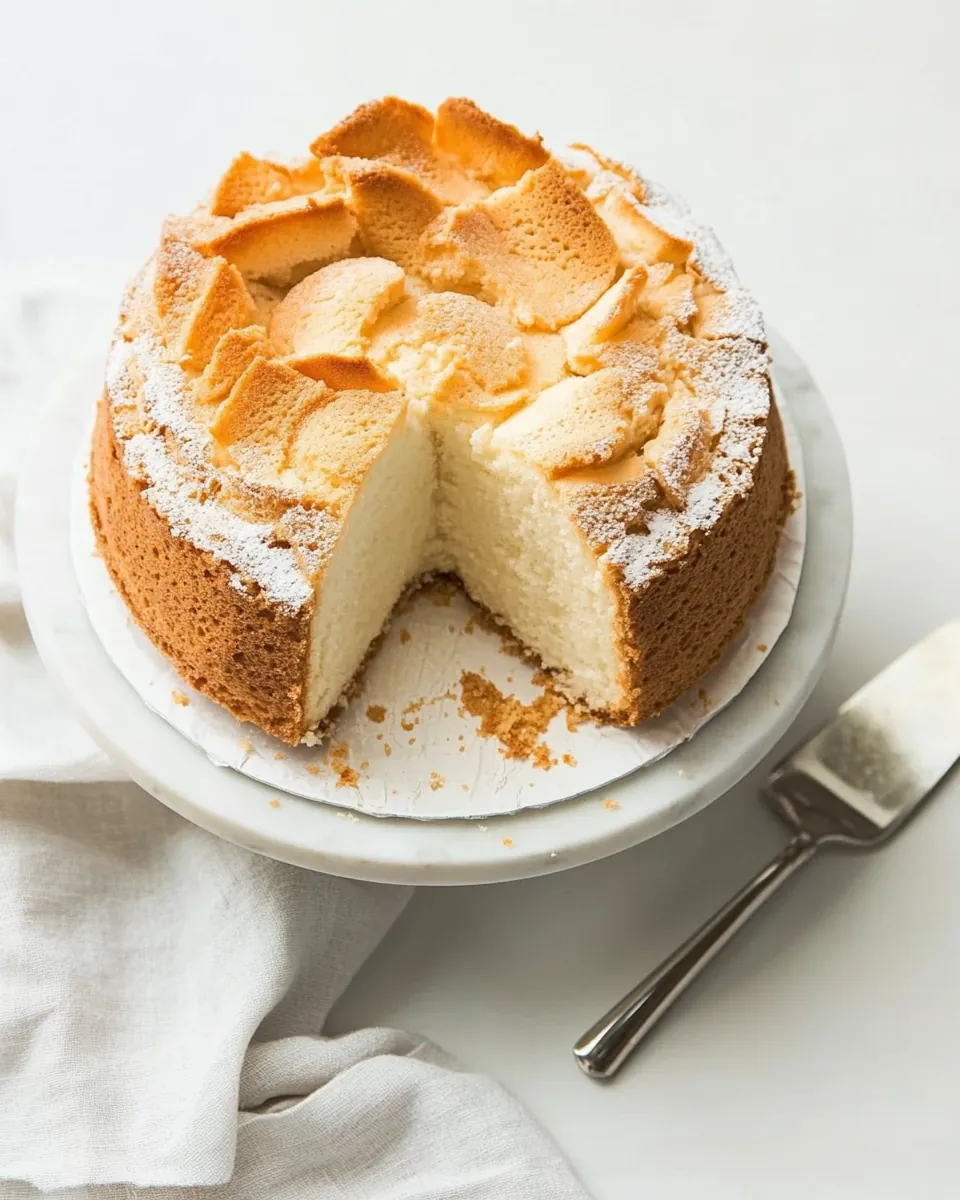
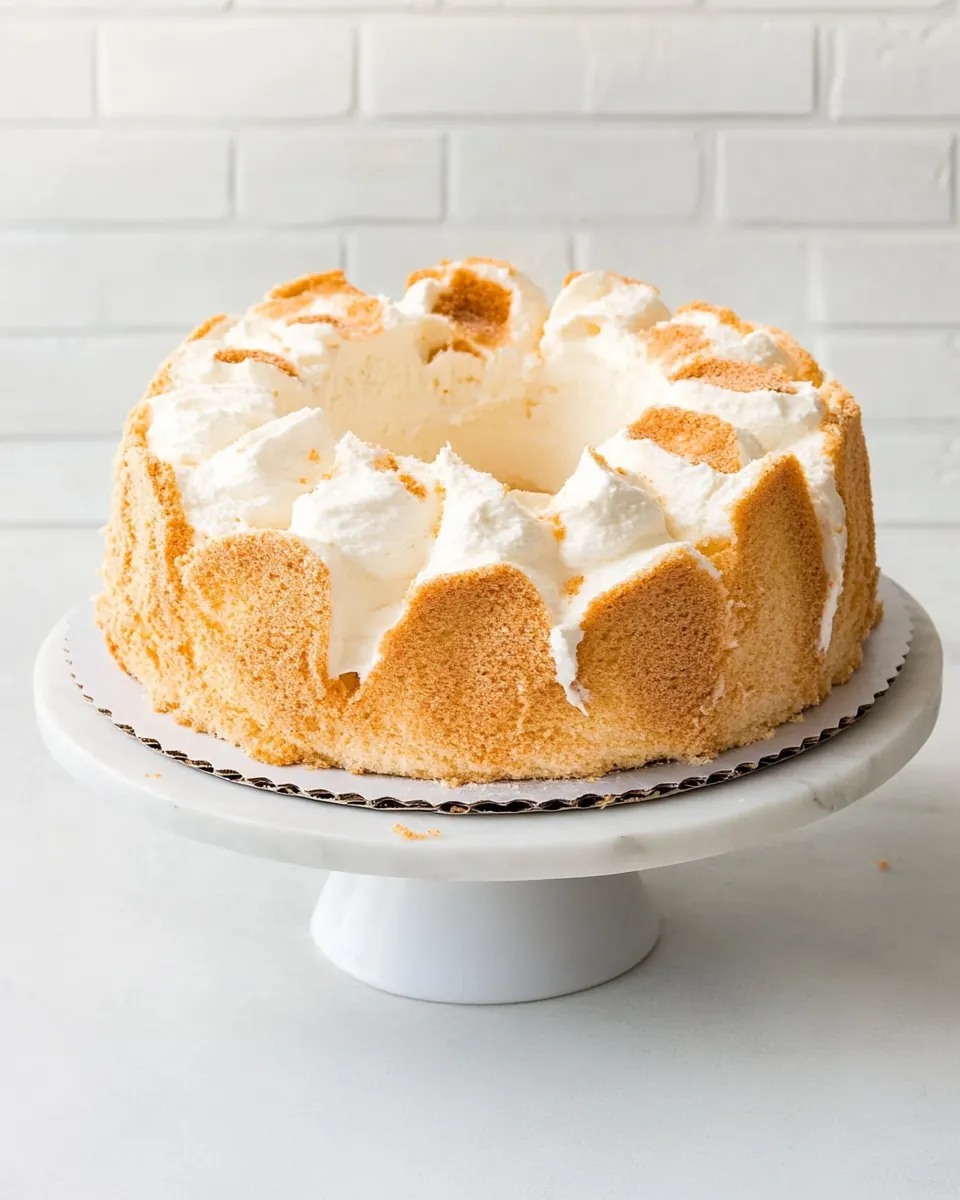
Lastly, let’s talk about presentation. A lovely Angel Food Cake topped with whipped cream and fresh fruit is a feast for the eyes as much as the stomach. It’s a cake that’s sure to impress your guests!
What You Need for Angel Food Cake
The ingredients for Angel Food Cake are simple yet essential for achieving that signature light and airy texture. The key players in this cake are the egg whites, which provide the lift, and the bleached cake flour, which adds structure without weighing it down.
- 1½ cups (188 grams) bleached cake flour – This flour is finely milled and gives the cake its delicate texture.
- 2 cups (400 grams) granulated sugar, divided – Sugar sweetens and helps stabilize the egg whites.
- 2 cups (480 grams) egg whites (about 16 large) – The heart of this cake, providing the lovely lift.
- 1 teaspoon (3 grams) cream of tartar – This helps stabilize the egg whites during whipping.
- 1/2 teaspoon (1.5 grams) kosher salt – Enhances flavor.
- 2 teaspoons (8 grams) vanilla extract – Adds a lovely aroma and flavor.
- Fresh peaches, to serve – A delightful topping for a refreshing finish.
Cooking Instructions for Angel Food Cake

Making Angel Food Cake is a rewarding experience that fills your kitchen with a sweet aroma. Follow these detailed steps to create your own masterpiece. Trust me; the results will be worth it!
- Preheat your oven to 350°F (180°C). This temperature is crucial for achieving the right texture. A properly preheated oven ensures the cake rises well.
- In a medium bowl, sift together the bleached cake flour and 1 cup (200 grams) of granulated sugar. Sifting helps aerate the flour, making it easier to incorporate into the egg whites later.
- Using a stand mixer fitted with the whisk attachment, beat the egg whites on medium-high speed until they become foamy, about 1 minute. Watch as they transform, becoming light and fluffy.
- Gradually add the remaining 1 cup (200 grams) of granulated sugar to the egg whites while continuing to beat. Increase the mixer speed to high and add the cream of tartar and kosher salt. Beat until medium-soft peaks form, which should take about 2 to 3 minutes.
- Gently fold in the flour mixture in four additions using a large balloon whisk. Be careful not to deflate the egg whites; this folding technique is crucial to maintaining the fluffiness.
- Once combined, gently spread the batter into an ungreased 10-inch removable-bottom tube pan. Make sure to smooth the top using a small offset spatula for an even bake.
- Run a knife through the batter to eliminate any large air pockets, which will help the cake rise evenly.
- Bake in the preheated oven until the cake is firm to the touch and an instant-read thermometer inserted near the center registers 205°F (96°C), which should take about 40 to 45 minutes.
- Immediately invert the pan onto a bottle if needed to cool completely. This step is vital as it prevents the cake from collapsing while cooling.
- Once cooled, use an offset spatula to carefully loosen the cake from the sides, center, and bottom of the pan.
- Transfer the cake to a serving plate and enjoy it with whipped cream and fresh peaches. Store any leftovers in an airtight container for up to 3 days.
Things Worth Knowing
- Egg Whites Matter: Ensure your egg whites are at room temperature for the best volume.
- Don’t Grease the Pan: Leaving the tube pan ungreased allows the cake to cling to the sides and rise.
- Fold Gently: When incorporating the flour mixture, fold gently to maintain the airiness of the batter.
- Cooling is Key: Always invert the cake to cool completely to avoid collapsing.
Recipe Variations about Angel Food Cake
There are numerous ways to put a twist on the classic Angel Food Cake. Here are some tips to enhance your baking experience:
- Fruit Flavors: Add different fruit purees or zests to the batter for unique flavors.
- Cocoa Powder: For a chocolate version, gently fold in unsweetened cocoa powder.
- Spices: Experiment with spices like cinnamon or nutmeg for a warm flavor.
- Layer it Up: Use this cake as layers for a more elaborate dessert, like a trifle.
- Syrup Soak: A light soak with simple syrup can add extra moisture and flavor.
Accompaniments for Angel Food Cake
Serving a Angel Food Cake is as fun as making it! Here are some ideas on how to enjoy this fluffy delight:
- Fresh Fruits: Serve with a medley of seasonal fruits like strawberries, blueberries, or peaches for a refreshing contrast.
- Whipped Cream: A generous dollop of freshly whipped cream complements the cake beautifully.
- Custards: Pair with a light vanilla custard for a richer dessert experience.
- Ice Cream: A scoop of vanilla or fruit-flavored ice cream is a delightful addition.
- Drizzled Sauces: Caramel or chocolate sauce can elevate the dessert to another level.
- Celebratory Occasions: Perfect for birthdays, picnics, or as a lighter dessert after a heavy meal.
- Storage Tips: Store any leftovers in an airtight container to keep them fresh and fluffy.
FAQ
Conclusion
The Angel Food Cake is truly a special dessert that combines simplicity with elegance. Its lightness and versatility make it a favorite for any occasion, whether it’s a birthday celebration or a casual summer picnic. I encourage you to try this recipe and experience the joy of creating a cake that is not only visually appealing but also a delight for the taste buds. You’ll find that once you master this recipe, it will become a go-to in your baking repertoire!
Angel Food Cake
Ingredients
Equipment
Method
- Preheat your oven to 350°F (180°C). This temperature is crucial for achieving the right texture. A properly preheated oven ensures the cake rises well.
- In a medium bowl, sift together the bleached cake flour and 1 cup (200 grams) of granulated sugar. Sifting helps aerate the flour, making it easier to incorporate into the egg whites later.
- Using a stand mixer fitted with the whisk attachment, beat the egg whites on medium-high speed until they become foamy, about 1 minute. Watch as they transform, becoming light and fluffy.
- Gradually add the remaining 1 cup (200 grams) of granulated sugar to the egg whites while continuing to beat. Increase the mixer speed to high and add the cream of tartar and kosher salt. Beat until medium-soft peaks form, which should take about 2 to 3 minutes.
- Gently fold in the flour mixture in four additions using a large balloon whisk. Be careful not to deflate the egg whites; this folding technique is crucial to maintaining the fluffiness.
- Once combined, gently spread the batter into an ungreased 10-inch removable-bottom tube pan. Make sure to smooth the top using a small offset spatula for an even bake.
- Run a knife through the batter to eliminate any large air pockets, which will help the cake rise evenly.
- Bake in the preheated oven until the cake is firm to the touch and an instant-read thermometer inserted near the center registers 205°F (96°C), which should take about 40 to 45 minutes.
- Immediately invert the pan onto a bottle if needed to cool completely. This step is vital as it prevents the cake from collapsing while cooling.
- Once cooled, use an offset spatula to carefully loosen the cake from the sides, center, and bottom of the pan.
- Transfer the cake to a serving plate and enjoy it with whipped cream and fresh peaches. Store any leftovers in an airtight container for up to 3 days.
Notes
- Egg Whites Matter: Ensure your egg whites are at room temperature for the best volume.
- Don’t Grease the Pan: Leaving the tube pan ungreased allows the cake to cling to the sides and rise.
- Fold Gently: When incorporating the flour mixture, fold gently to maintain the airiness of the batter.
- Cooling is Key: Always invert the cake to cool completely to avoid collapsing.