Leftover Halloween Candy Bark
Leftover Halloween Candy Bark is one of those delightful treats that turns a post-Halloween sugar rush into something magical. Just imagine the joy on kids’ faces as they indulge in vibrant, colorful candy mixed with rich chocolate. After the Halloween festivities, you might find yourself with an abundance of leftover candy, and what better way to use it than by creating this fun and easy recipe? My first time making this bark was a spontaneous decision after seeing a pile of uneaten candy sitting on the counter. I thought, why not turn this into something special? So, I melted down some bittersweet chocolate, sprinkled on those fun-size candy bars, and voila! It was a hit with my family, and it quickly became a holiday tradition. This delicious treat is perfect for sharing, or you can keep it all to yourself!
Recipe Snapshot
15 mins
15 mins
0 mins
Medium
200 kcal
3 g
Gluten-Free
10 g
Baking Sheet, Chef’s Knife, Wooden Spoon
Why This Leftover Halloween Candy Bark Is a Winner
It’s a Creative Way to Use Leftovers
One of the most enjoyable aspects of making Leftover Halloween Candy Bark is how you can transform an assortment of leftover candies into a delicious confection. Instead of letting the candy go to waste, you can combine them into a rich chocolate bark that everyone loves. It’s like a fun treasure hunt where you get to pick and choose your favorite candies to include!
Super Easy to Make
If you’re looking for a simple recipe, this is it! The method is straightforward: melt chocolate, add the candy, chill, and serve. Even the kids can get involved, making it a fun family activity. They can help decide which candies to use and sprinkle them on the melted chocolate!
Perfect for Any Occasion
While it’s great for Halloween, Leftover Halloween Candy Bark can be made any time of year. Have some leftover candy from a birthday party or a holiday? Just whip up a batch of this bark! It’s versatile and can easily be adapted based on the candies you have on hand.
A Colorful Treat
Each piece of bark is a feast for the eyes as well as the taste buds. The colorful assortment of candies adds a visual appeal that makes it perfect for parties, gifts, or simply enjoying at home. It’s a treat that is as much about the experience as it is about the flavor.
Make It Your Own
You can personalize Leftover Halloween Candy Bark by using your favorite chocolate and candy combinations. Whether you love peanut butter cups, caramel candies, or crispy treats, this bark is flexible enough to accommodate all tastes. The possibilities are endless!
Fun for All Ages
This recipe is a hit for both kids and adults. It brings out the child in everyone, sparking joy and nostalgia as you enjoy a treat that reminds us all of Halloween fun. Sharing this bark with friends and family can bring smiles and create memories!
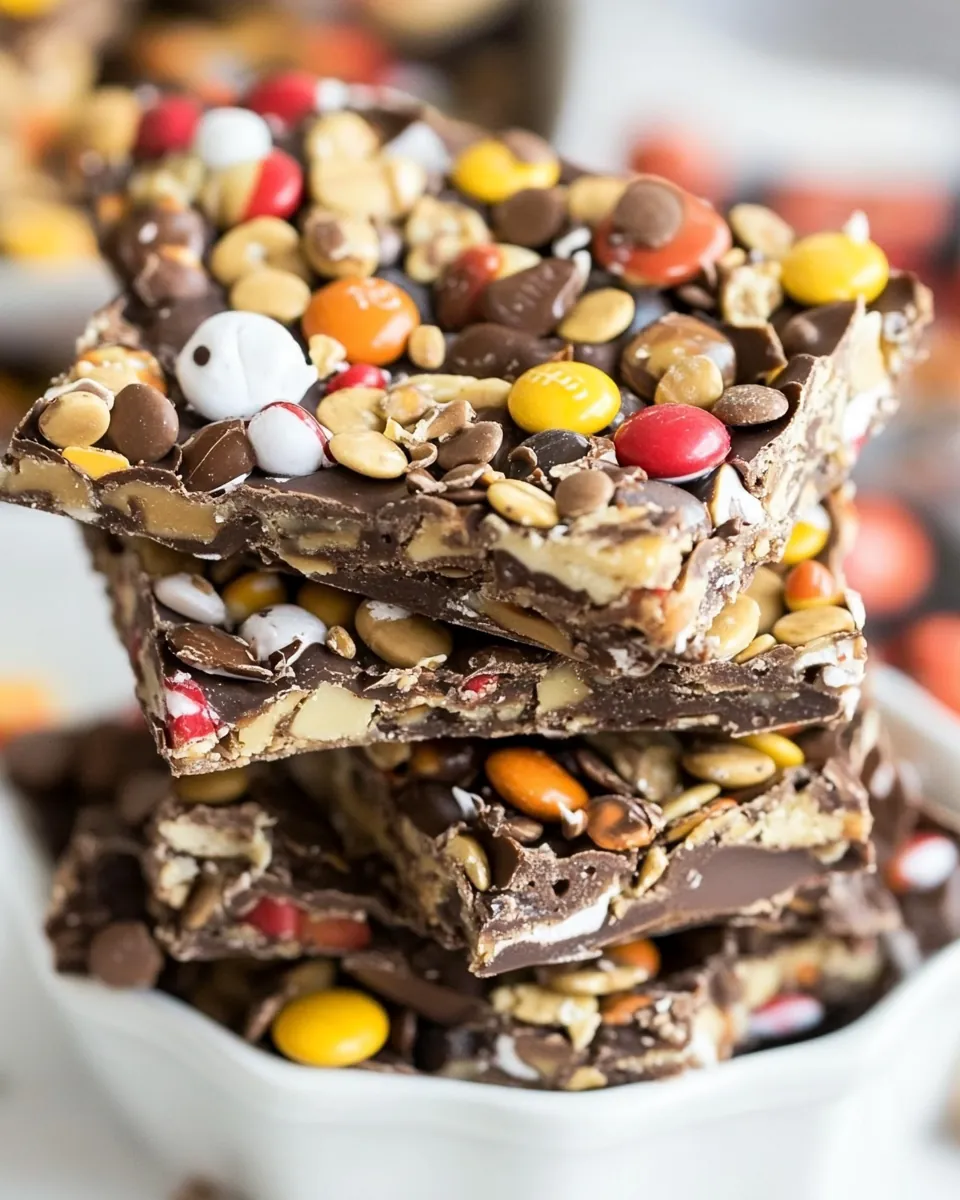
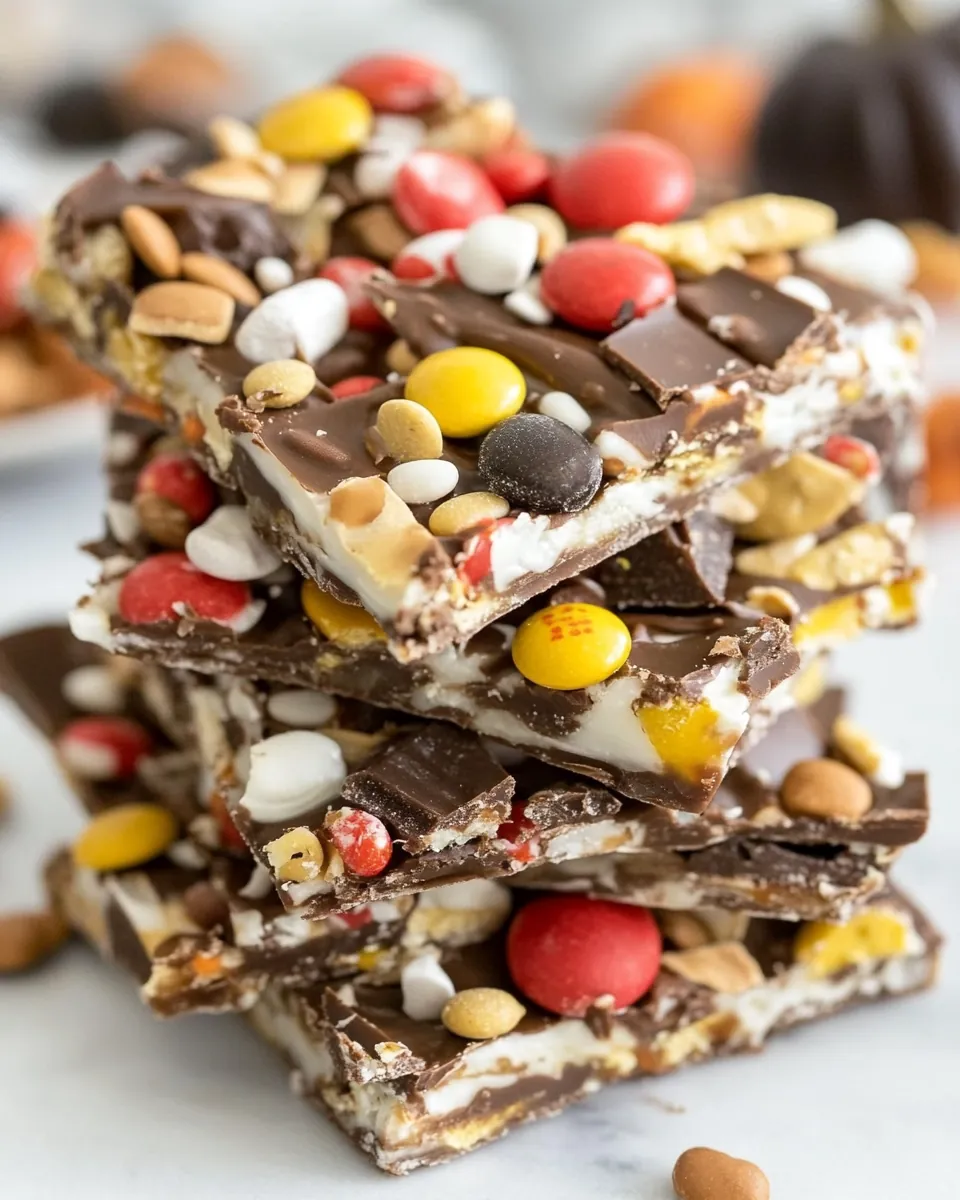
Ingredient List for Leftover Halloween Candy Bark
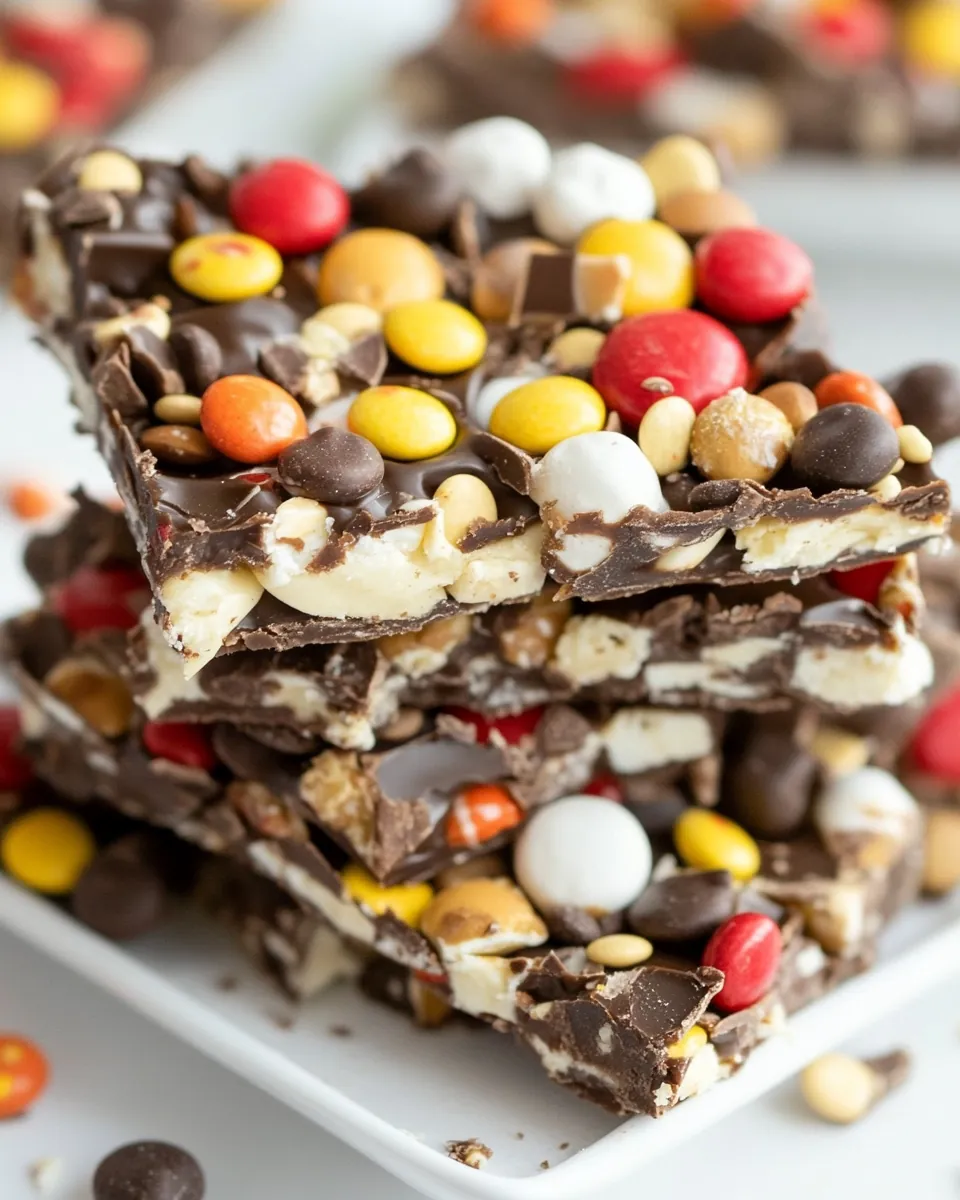
The beauty of Leftover Halloween Candy Bark lies in its simplicity. The ingredients come together in a deliciously chaotic yet harmonious way. Using different types of chocolate and candy not only creates a fantastic flavor profile but also adds a fun texture to every bite!
- 1 pound (453.59g) bittersweet chocolate, chopped — This is the base of your bark, providing a rich, deep chocolate flavor.
- 3 Butterfinger candy bars, or 8 fun-size bars, cut into 1-inch pieces — Their crunch and peanut butter flavor offer a delightful contrast to the smooth chocolate.
- 3 Heath candy bars, or 6 fun-size bars, cut into ¾-inch pieces — With their toffee crunch, they add an irresistible buttery sweetness.
- 8 Reese’s peanut butter cups, each cut into 8 wedges — These are a must for any peanut butter lover, adding creamy notes to your bark.
- ¼ cup (36.5g) honey roasted peanuts — They provide a satisfying crunch and a touch of sweetness.
- 3 ounces (85.05g) white chocolate, chopped — This will drizzle beautifully over the bark and add a creamy sweetness.
- ½ cup (73g) Peanut M&M’s, Halloween colors! or Pretzel M&M’s or Reese’s Pieces — These colorful candies not only look great but also add a fun texture and sweetness.
Recipe Steps for Leftover Halloween Candy Bark

Making Leftover Halloween Candy Bark is almost as fun as eating it! You’ll appreciate how quickly it comes together, making it an excellent choice for last-minute treat-making. Let’s dive into the steps!
- Line a baking sheet with parchment paper and set it aside. This will help prevent the chocolate from sticking, making it easier to remove later.
- In a medium bowl, place the chopped bittersweet chocolate. Microwave it at 50% power in 30-second increments, stirring after each, until completely melted and smooth. Watch closely as it melts to avoid burning.
- Once melted, pour the bittersweet chocolate onto the prepared baking sheet. Using an offset spatula, spread it out into a thin layer, about ¼-inch thick, creating a rectangle approximately 12×10 inches.
- Next, sprinkle the melted chocolate with the chopped Butterfinger, Heath bars, Reese’s peanut butter cups, and honey roasted peanuts. Ensure every piece touches the melted chocolate for them to adhere properly.
- Gently press down on the candy pieces to make sure they stick to the chocolate.
- Refrigerate the sheet for 30 minutes, allowing the chocolate to set.
- While waiting, melt the white chocolate using the same microwave method as the bittersweet chocolate. Stir until it’s completely smooth.
- Once the bittersweet chocolate is set, drizzle the melted white chocolate over the bark in a zigzag pattern.
- Scatter the Peanut M&M’s (or the alternative candies you chose) over the white chocolate drizzle. Again, press them lightly to ensure they stick.
- Chill the bark once more until the white chocolate is set, about 30 minutes.
- Finally, cut or break the bark into irregular pieces and serve. Store any leftovers in an airtight container in the refrigerator to keep them fresh.
Things Worth Knowing
- Using good quality chocolate is key for a rich flavor and smooth texture. Don’t skimp on the chocolate if you can help it.
- Make sure to let the chocolate sit for a moment after melting as it can be very hot and can burn you if you touch it immediately.
- Pressing the candy gently into the chocolate helps them adhere and makes for a beautiful presentation.
- Feel free to change up the candies based on your preferences! Use any favorite candy bars to create your own unique bark.
Helpful Hints
When preparing Leftover Halloween Candy Bark, several tips can enhance your experience and result. Let’s explore some of the best ways to ensure your bark turns out fantastic every time.
- Storage: Store leftovers in an airtight container in the refrigerator. This helps maintain freshness for a longer time.
- Freezing: You can freeze bark for up to three months. Just wrap it well in plastic wrap before placing it in a freezer bag.
- Pairing: Serve with milk or coffee for a delicious treat. The flavors of rich chocolate and creamy milk complement each other perfectly.
- Presentation: Consider cutting the bark into fun shapes for parties or gifting. This makes it more visually appealing.
- Substitutions: While specific candies work beautifully, feel free to substitute with any of your favorites!
What to Serve With Leftover Halloween Candy Bark
There are many fun and festive ways to serve Leftover Halloween Candy Bark. Here are some ideas to get you started:
- Festive Treats: Serve this bark alongside other Halloween-themed snacks, like pumpkin cupcakes or ghost-shaped cookies, for a fun treat platter.
- Gifts: Wrap pieces of bark in cellophane bags with a cute ribbon for a sweet homemade gift for friends and neighbors.
- Game Night: This bark is perfect for game nights with friends! Pair it with popcorn and sodas for a fun and casual evening.
- Seasonal Parties: Take the bark to any holiday gathering. It’s a conversation starter and an instant crowd-pleaser.
- Storage Tips: When preparing for storage, ensure the bark is completely cooled so it remains fresh and doesn’t become sticky!
FAQ
Conclusion
The Leftover Halloween Candy Bark is a delightful way to repurpose your leftover candy into a fun and colorful treat. By combining various chocolates and candies, you create a dessert that will please both children and adults alike. I encourage you to try making it with your family or friends — it’s not just about the end product, but the fun you have in the kitchen creating something delicious together. Enjoy every bite of this sweet treat!
Leftover Halloween Candy Bark
Ingredients
Equipment
Method
- Line a baking sheet with parchment paper; set aside.
- Place the chopped bittersweet chocolate in a medium bowl and microwave at 50% power in 30-second increments, stirring after each, until completely melted and smooth.
- Pour the chocolate onto the prepared baking sheet and, using an offset spatula, spread into a thin layer (about ¼-inch thick - a 12x10-inch rectangle).
- Sprinkle the melted chocolate with the chopped Butterfingers, Heath bars, peanut butter cups, and honey roasted peanuts, making sure all pieces touch melted chocolate (so they adhere).
- Lightly press to make sure the candy adheres to the melted chocolate.
- Refrigerate for 30 minutes.
- Melt the white chocolate using the same method as the bittersweet chocolate (in a microwave in intervals) until completely smooth.
- Using a spoon, drizzle the melted white chocolate over the chilled bark in a zigzag pattern.
- Scatter the M&M's (or Reese's Pieces) over the white chocolate drizzle, and again press to make sure the candy adheres to the melted white chocolate.
- Chill again until the white chocolate is set, about 30 minutes.
- Cut/break the bark into irregular pieces and serve. Store leftovers in an airtight container in the refrigerator.