Gluten Free Pumpkin Pie Streusel Bars
Nothing says fall quite like the flavor of pumpkin, especially when it’s transformed into Gluten Free Pumpkin Pie Streusel Bars. Growing up, my family had a tradition of baking pumpkin treats when the leaves started changing colors. The entire house would fill with the warm scent of cinnamon and nutmeg, signaling that something delicious was on the way. These bars have quickly become a favorite in my home, offering a delightful twist on the classic pumpkin pie. They’re perfect for gatherings, cozy nights in, or simply indulging by yourself with a warm cup of tea.
Recipe Snapshot
60 mins
30 mins
30 mins
Medium
180 kcal
3 g
Gluten-Free, Low FODMAP
7 g
Oven, Baking Sheet, Frying Pan, Mixing Bowl, Wooden Spoon
What Sets This Gluten Free Pumpkin Pie Streusel Bars Apart
Perfect for Any Occasion
One of the best things about Gluten Free Pumpkin Pie Streusel Bars is their versatility. Whether it’s Thanksgiving dinner, a casual get-together, or a festive fall party, these bars fit right in. They bring that holiday spirit with every bite, making them a hit among friends and family.
Easy to Make
If you’re anything like me, you appreciate recipes that are simple yet impressive. These bars require minimal effort but deliver maximum flavor. With straightforward steps, you can whip them up and have them ready in no time.
Nutritious and Delicious
What’s even better is that they’re gluten-free! Made with wholesome ingredients like oat flour and pumpkin, these bars are a treat you can feel good about enjoying. They offer a satisfying sweetness without the guilt, allowing you to indulge freely.
Layered with Flavor
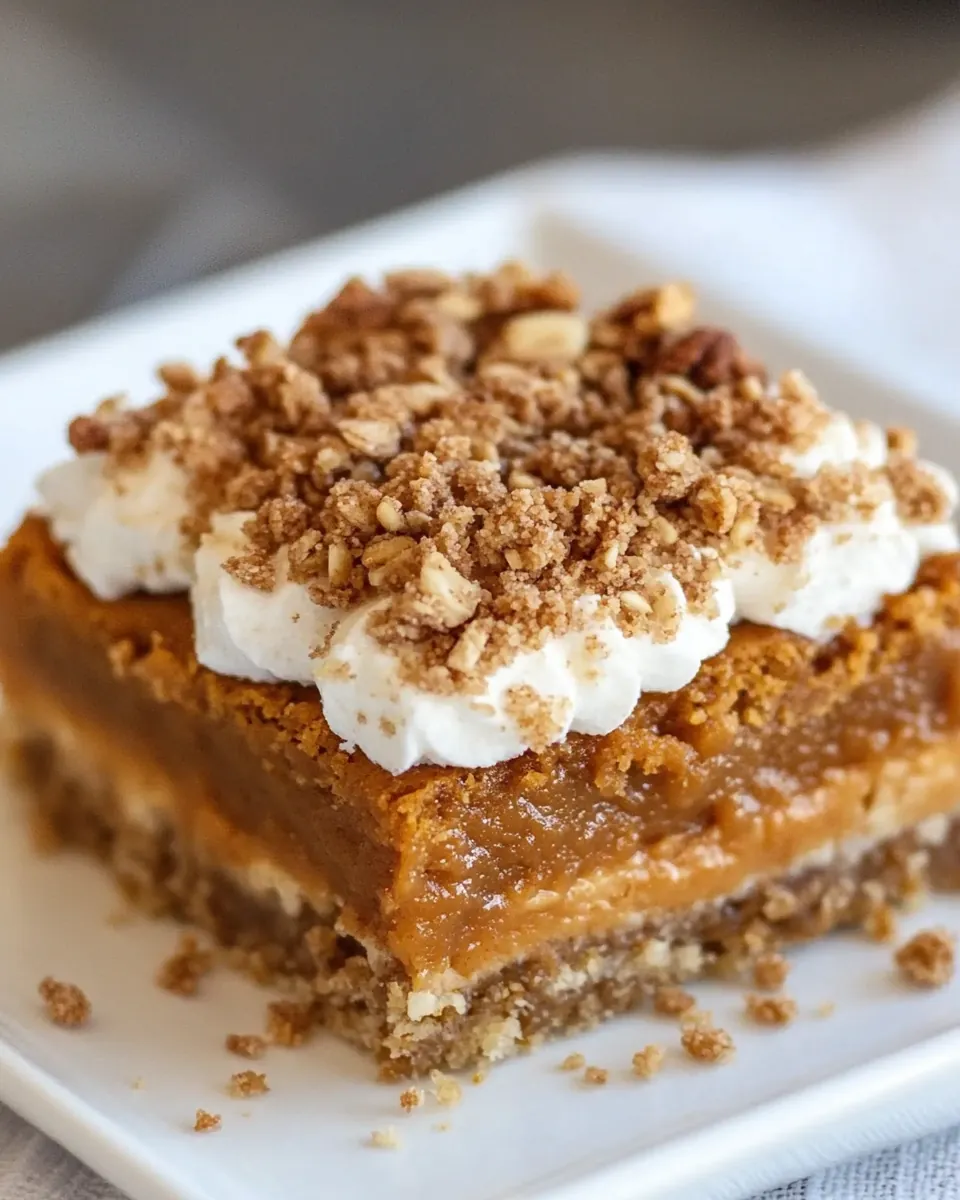
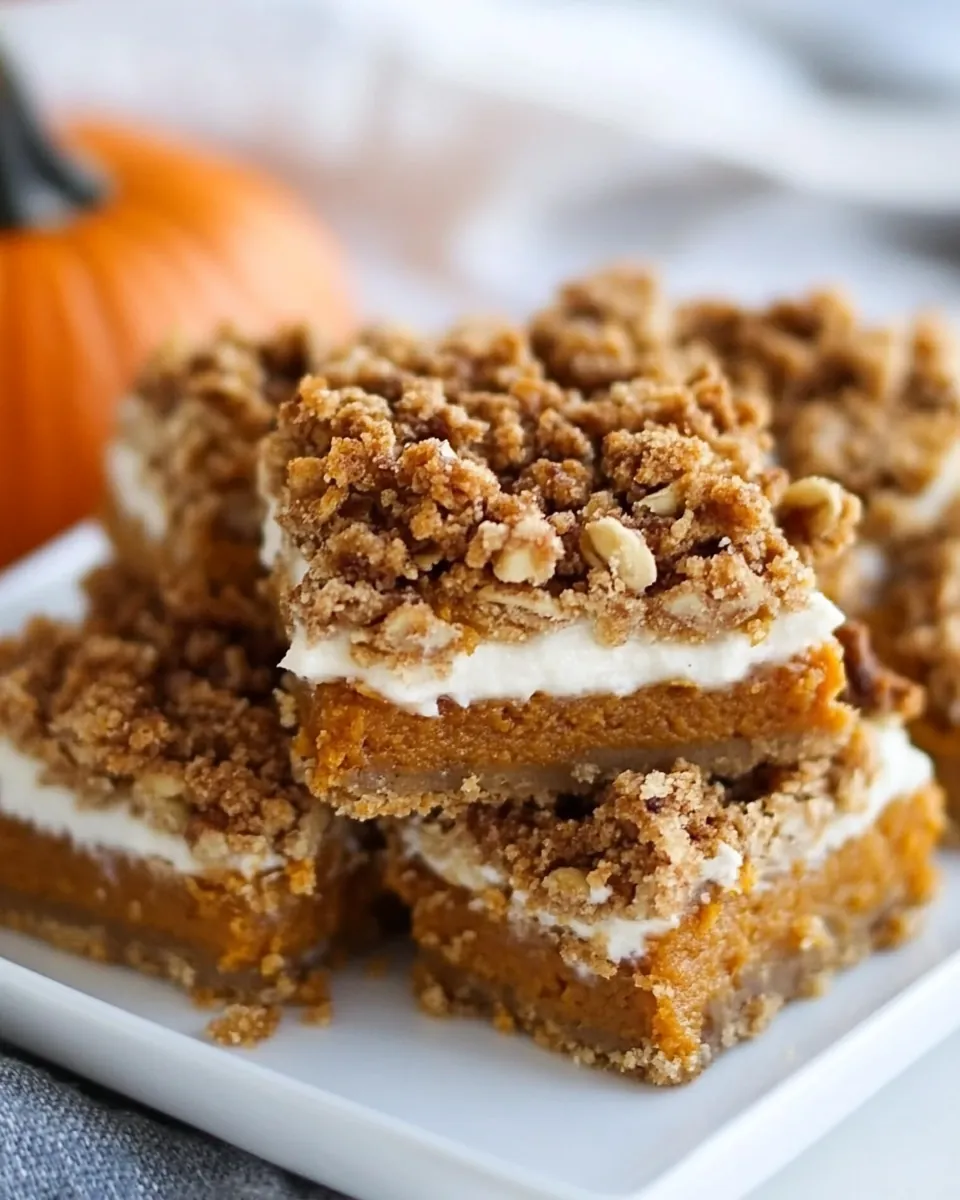
The combination of textures in Gluten Free Pumpkin Pie Streusel Bars is truly delightful. The buttery crust provides a rich base, while the spiced pumpkin filling bursts with flavors of cinnamon and nutmeg. Topped with a crumbly streusel, each bite is a heavenly experience.
Perfect for Sharing
These bars are also great for sharing—pack them up for a potluck or serve them at a cozy coffee date. They’re easy to cut into squares, making them a favorite for friends who love to indulge in sweet treats. Plus, everyone will appreciate that they’re gluten-free!
Great for Leftovers
If you somehow have leftovers, they store beautifully! Keep them in the refrigerator, and they’re just as delicious the next day. Each slice tastes just as fresh, making them a fantastic treat for any time of day.
What to Gather for Gluten Free Pumpkin Pie Streusel Bars
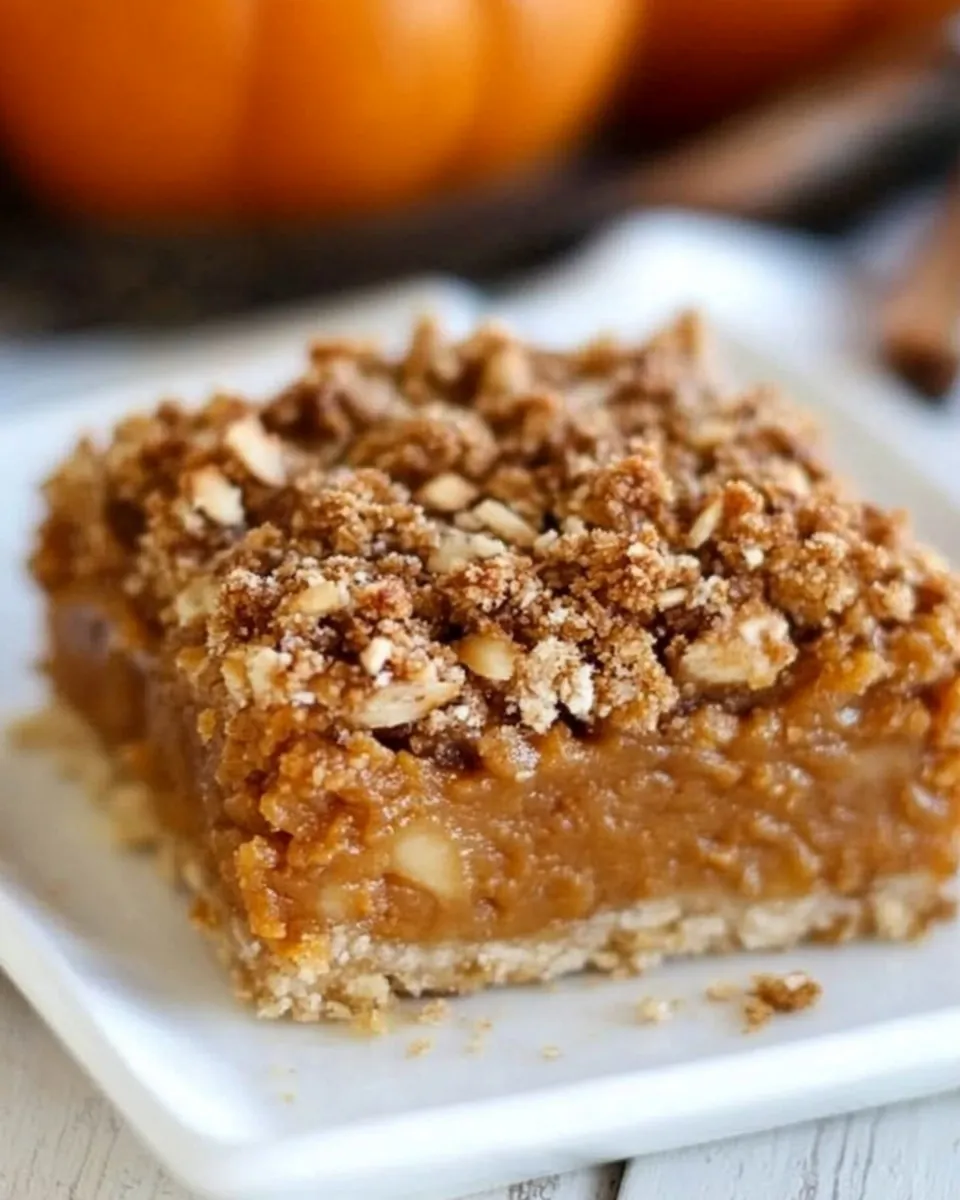
Gathering the right ingredients is crucial for making these amazing bars. The combination of flavors and textures from each ingredient plays an essential role in achieving the perfect taste. The stars of this recipe include the rich pumpkin filling and the scrumptious oat topping, which come together to create a mouthwatering dessert.
- 1 1/4 cups certified gluten-free oat flour: A key component for the base and topping, it offers a light texture while keeping the bars gluten-free.
- 2 cups certified gluten-free rolled oats: These oats add a hearty texture to the streusel topping that contrasts beautifully with the smooth filling.
- 1 tablespoon cinnamon: This spice brings warmth and depth to the filling and complements the pumpkin flavor perfectly.
- 1 cup brown sugar: Adding a rich sweetness, brown sugar enhances the overall flavor while creating a delightful caramel-like essence.
- 1/4 teaspoon salt: A pinch of salt balances the sweetness and highlights the other flavors.
- 3/4 cup + 2 tablespoons unsalted butter, melted: This is crucial for the richness of the crust and topping, providing moisture and flavor.
- 1 15-ounce can pumpkin puree: The star of the show, it gives the bars their signature flavor and creamy texture.
- 2 large eggs: They help bind the filling together, adding structure and richness.
- 1/3 cup granulated sugar: This adds sweetness to the filling, creating a deliciously balanced flavor.
- 1/3 cup brown sugar: A second measure enhances the filling’s sweetness and depth.
- 2 1/2 teaspoons pumpkin pie spice: Combining spices like nutmeg and ginger, this adds complexity and warmth to the filling.
- 1 teaspoon vanilla extract: It enhances the overall flavor of the bars, bringing everything together.
- 1/4 teaspoon salt: Another pinch to balance the sweetness in the filling.
- 1/2 cup evaporated milk: This adds creaminess to the filling, ensuring it’s rich and satisfying.
How to Assemble Gluten Free Pumpkin Pie Streusel Bars
Making these bars is a fun and rewarding experience! You’ll love seeing the transformation from simple ingredients to a beautiful treat. Follow the steps closely, and soon you’ll have a delicious dessert ready to impress!
- Preheat your oven to 350 degrees Fahrenheit. Line an 8 x 8-inch pan with parchment paper, allowing some excess to hang over the sides for easy removal.
- In a large mixing bowl, combine oat flour, rolled oats, cinnamon, brown sugar, and salt. Stir these dry ingredients together until well mixed.
- Pour in the melted butter and mix well until everything is combined. The texture should be crumbly but hold together when pressed.
- Take half of the mixture and firmly pat it down into the bottom of the prepared pan. Ensure it’s even and compact, creating a solid base.
- Place the pan in the oven and bake for 18 to 22 minutes, or until the edges are lightly golden. You’ll notice a slight bubbling in the crust during baking.
- While the crust bakes, prepare the filling. In another large bowl, combine the pumpkin puree, eggs, granulated sugar, brown sugar, pumpkin pie spice, vanilla extract, salt, and evaporated milk. Mix until smooth and well incorporated.
- Once the crust is done baking, remove it from the oven and allow it to cool for about 5 to 10 minutes. This will help the filling set better.
- Pour the pumpkin filling evenly over the crust and return the pan to the oven. Bake for an additional 12 minutes, allowing the filling to set.
- After the initial bake, take the pan out again and sprinkle walnut-sized pieces of the remaining oat mixture over the top of the filling. Don’t worry if some of it sinks slightly; that’s perfectly normal.
- Return the pan to the oven and bake for another 30 minutes, or until the filling is golden brown and firm to the touch. The middle should be set but still slightly jiggly.
- Once done, let the bars cool in the pan for about 1 hour. This step is crucial for ensuring they hold together when you cut them.
- After cooling, carefully lift the bars out of the pan using the parchment paper. Slice into squares and serve with a dollop of whipped cream or drizzle of maple caramel sauce, if desired.
- Store any leftovers in an airtight container at room temperature for up to 2 days or refrigerate for up to 4 days.
Things Worth Knowing
- Cooling is Crucial: Allowing the bars to cool completely helps them firm up, making slicing easier and cleaner.
- Don’t Overmix: When combining the filling ingredients, mix until just combined. Overmixing can lead to a gummy texture.
- Check for Doneness: The filling should be set and slightly jiggly in the center. If it looks too soft, give it a little more baking time.
- Oat Flour vs. Regular Flour: Using oat flour is key for gluten-free baking, creating a unique texture and flavor that complements the pumpkin.
Ways to Customize
If you’re looking to make these Gluten Free Pumpkin Pie Streusel Bars your own, there are plenty of ways to customize them! Here are some creative tips:
- Add Nuts: Consider adding chopped walnuts or pecans for an extra crunch in the streusel topping.
- Spice it Up: Experiment with different spices, such as ginger or cloves, to give the filling a unique twist.
- Sweeten to Taste: Adjust the amount of brown sugar or granulated sugar to suit your preference, making them more or less sweet as desired.
- Use Pure Maple Syrup: Substitute some of the sugar with pure maple syrup for a natural sweetness and added flavor.
- Chocolate Drizzle: Drizzle melted chocolate on top for a decadent finish that pairs well with pumpkin.
- Serve Warm: Try serving these bars warm out of the oven with a scoop of vanilla ice cream for a delightful dessert experience.
- Make it Vegan: Substitute the eggs with flax eggs and use dairy-free butter to make this recipe vegan-friendly.
What Goes Well With This Gluten Free Pumpkin Pie Streusel Bars
These Gluten Free Pumpkin Pie Streusel Bars are a versatile dessert that can be paired with a variety of delightful options:
- Whipped Cream: A classic topping that adds creaminess and complements the sweet, spiced filling beautifully.
- Maple Syrup: Drizzling some warm maple syrup enhances the fall flavors and adds a touch of sweetness.
- Ice Cream: Vanilla or cinnamon ice cream pairs perfectly, creating a delicious contrast with the warm bars.
- Fresh Fruits: Serve with slices of fresh apples or pears to introduce a fresh and crisp element to the dish.
- Hot Beverages: Pair them with a warm cup of chai tea or spiced cider for a comforting fall treat.
- Cheese Plate: For a unique twist, add a cheese board with soft cheeses to enhance the sweet and savory flavors.
- Seasonal Salads: Serve alongside a crisp autumn salad with kale, nuts, and a light vinaigrette for a balanced meal.
FAQ
Conclusion
The Gluten Free Pumpkin Pie Streusel Bars are a delightful treat that perfectly captures the essence of fall. With a scrumptious blend of pumpkin and spices, they’re sure to be a crowd-pleaser. I encourage you to try making them for your next gathering or simply as a cozy dessert at home. You won’t regret it, and I’m sure they’ll become a new favorite!

Gluten Free Pumpkin Pie Streusel Bars
Ingredients
Equipment
Method
- Preheat your oven to 350 degrees Fahrenheit. Line an 8 x 8-inch pan with parchment paper, allowing some excess to hang over the sides for easy removal.
- In a large mixing bowl, combine oat flour, rolled oats, cinnamon, brown sugar, and salt. Stir these dry ingredients together until well mixed.
- Pour in the melted butter and mix well until everything is combined. The texture should be crumbly but hold together when pressed.
- Take half of the mixture and firmly pat it down into the bottom of the prepared pan. Ensure it’s even and compact, creating a solid base.
- Place the pan in the oven and bake for 18 to 22 minutes, or until the edges are lightly golden. You’ll notice a slight bubbling in the crust during baking.
- While the crust bakes, prepare the filling. In another large bowl, combine the pumpkin puree, eggs, granulated sugar, brown sugar, pumpkin pie spice, vanilla extract, salt, and evaporated milk. Mix until smooth and well incorporated.
- Once the crust is done baking, remove it from the oven and allow it to cool for about 5 to 10 minutes. This will help the filling set better.
- Pour the pumpkin filling evenly over the crust and return the pan to the oven. Bake for an additional 12 minutes, allowing the filling to set.
- After the initial bake, take the pan out again and sprinkle walnut-sized pieces of the remaining oat mixture over the top of the filling. Don’t worry if some of it sinks slightly; that’s perfectly normal.
- Return the pan to the oven and bake for another 30 minutes, or until the filling is golden brown and firm to the touch. The middle should be set but still slightly jiggly.
- Once done, let the bars cool in the pan for about 1 hour. This step is crucial for ensuring they hold together when you cut them.
- After cooling, carefully lift the bars out of the pan using the parchment paper. Slice into squares and serve with a dollop of whipped cream or drizzle of maple caramel sauce, if desired.
- Store any leftovers in an airtight container at room temperature for up to 2 days or refrigerate for up to 4 days.