Easter Dirt Cups
Every year, as spring rolls around, I get excited about one particular dessert that never fails to bring a smile to everyone’s faces: Easter Dirt Cups. These whimsical treats are a staple at our family gatherings, especially during Easter. I remember the first time I made them for a family picnic, and the joy on my kids’ faces was priceless. They were not only delicious but also so much fun to make together. Each layer of creamy pudding and crushed cookies reminded us all of the earth coming back to life after winter.
Recipe Snapshot
15 mins
15 mins
0 mins
Easy
250 kcal
4 g
Keto, Gluten-Free, Low FODMAP
11 g
Whisk, Mixing Bowl
Why Try This Easter Dirt Cups
Perfect for All Ages
One of the best aspects of Easter Dirt Cups is that they appeal to both kids and adults alike. We all have that inner child who gets excited over fun and playful desserts, and these cups certainly deliver on that front.
Easy to Assemble
You don’t need to be a professional chef to whip up these delightful cups. The process is straightforward and allows for creativity in assembling the layers. I love how quick they come together, making them an ideal last-minute dessert option.
Fun Presentation
Each cup becomes a mini masterpiece, showcasing the different layers of pudding, crushed cookies, and festive toppings like Peeps and chocolate eggs. It’s a visual treat that becomes the centerpiece of your table.
Customizable
While the classic version is always a hit, I often encourage experimenting with different ingredients. Whether it’s adding different types of candies or changing the flavor of the pudding, the possibilities are endless!
Perfect for Celebrations
These tasty cups bring an element of festivity to any gathering. They’re especially great during holidays like Easter, but honestly, they can brighten up any occasion.
Leftovers Are a Treat
Not only do these cups taste amazing, but they also store well in the fridge. Having a few leftovers is always a sweet bonus, perfect for a late-night snack.
Essential Ingredients for Easter Dirt Cups
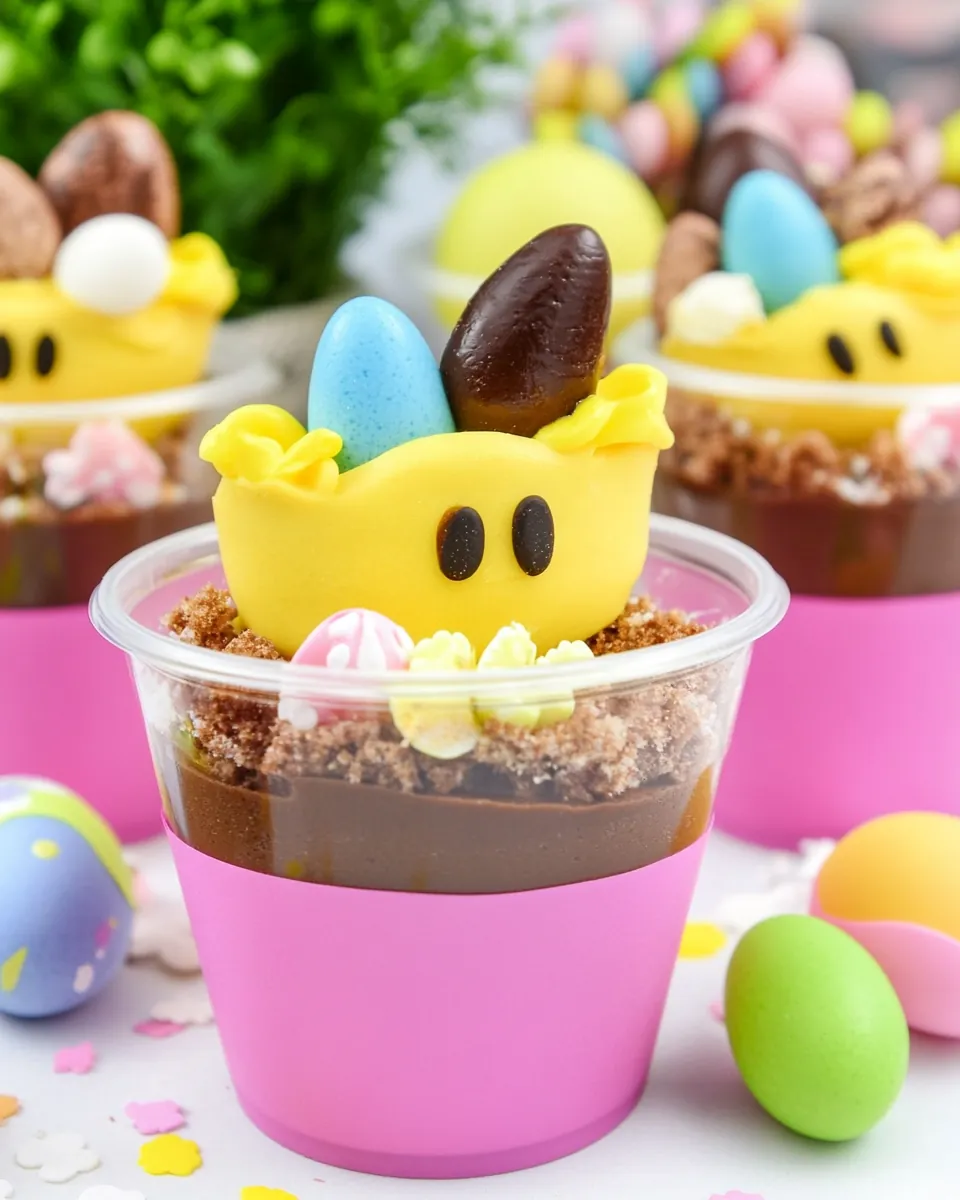
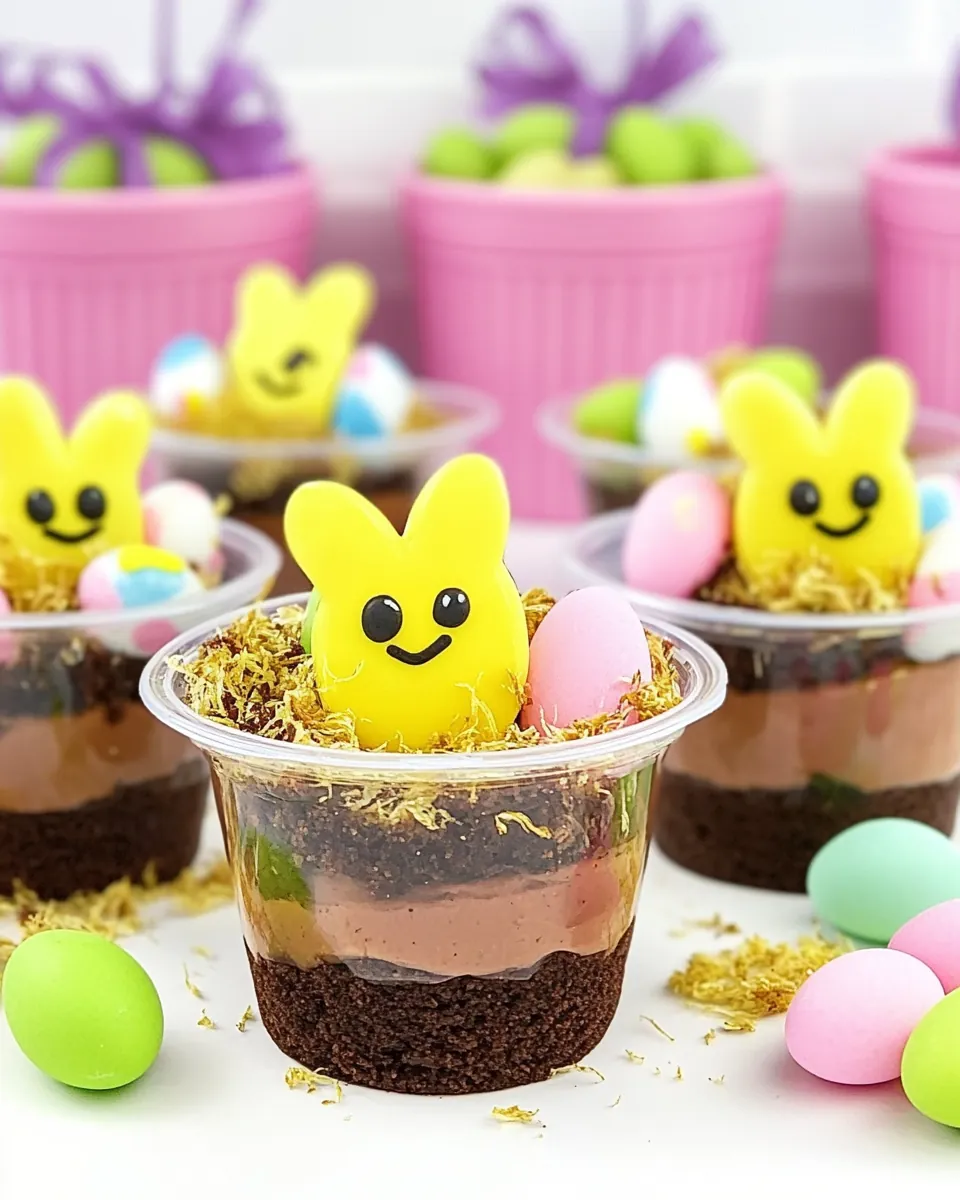
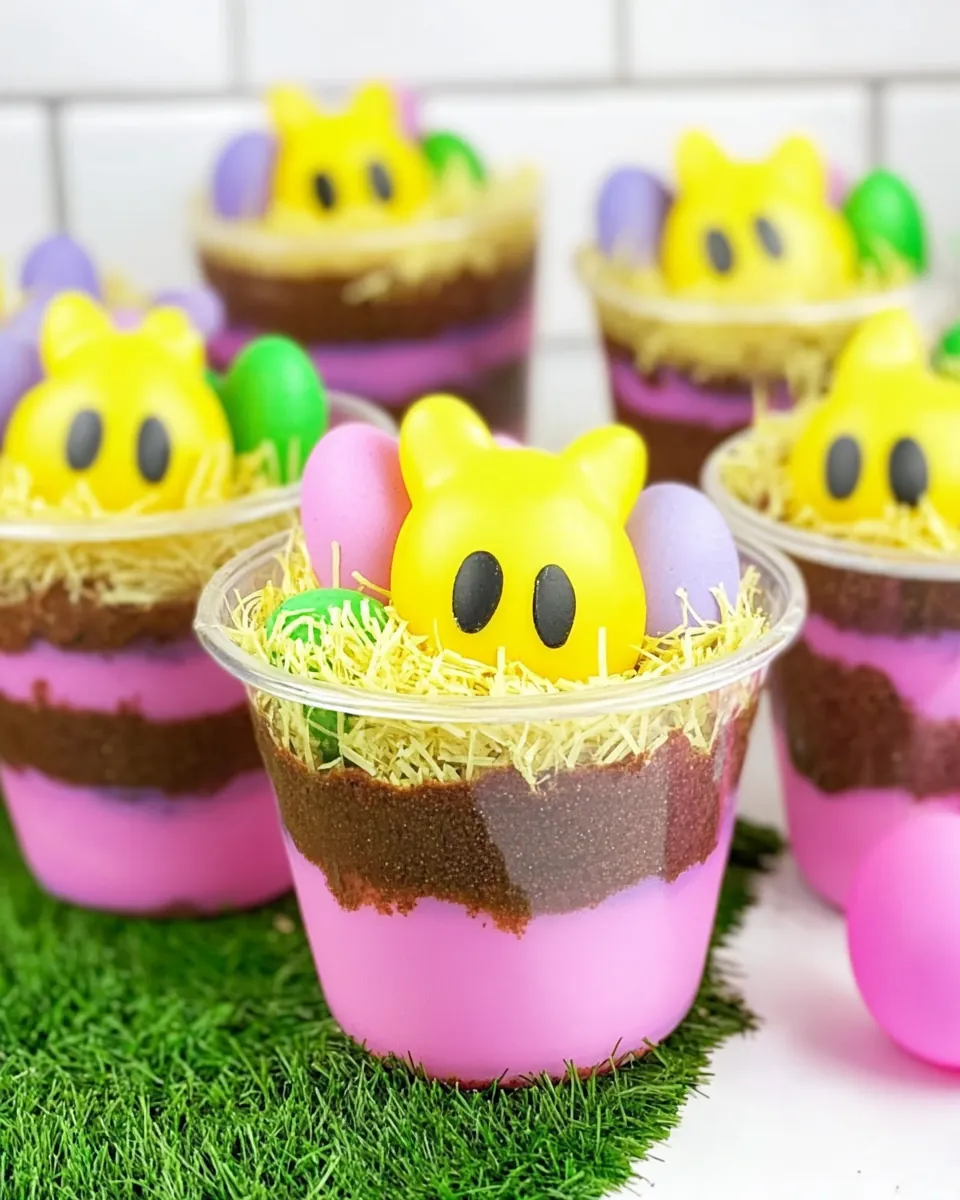
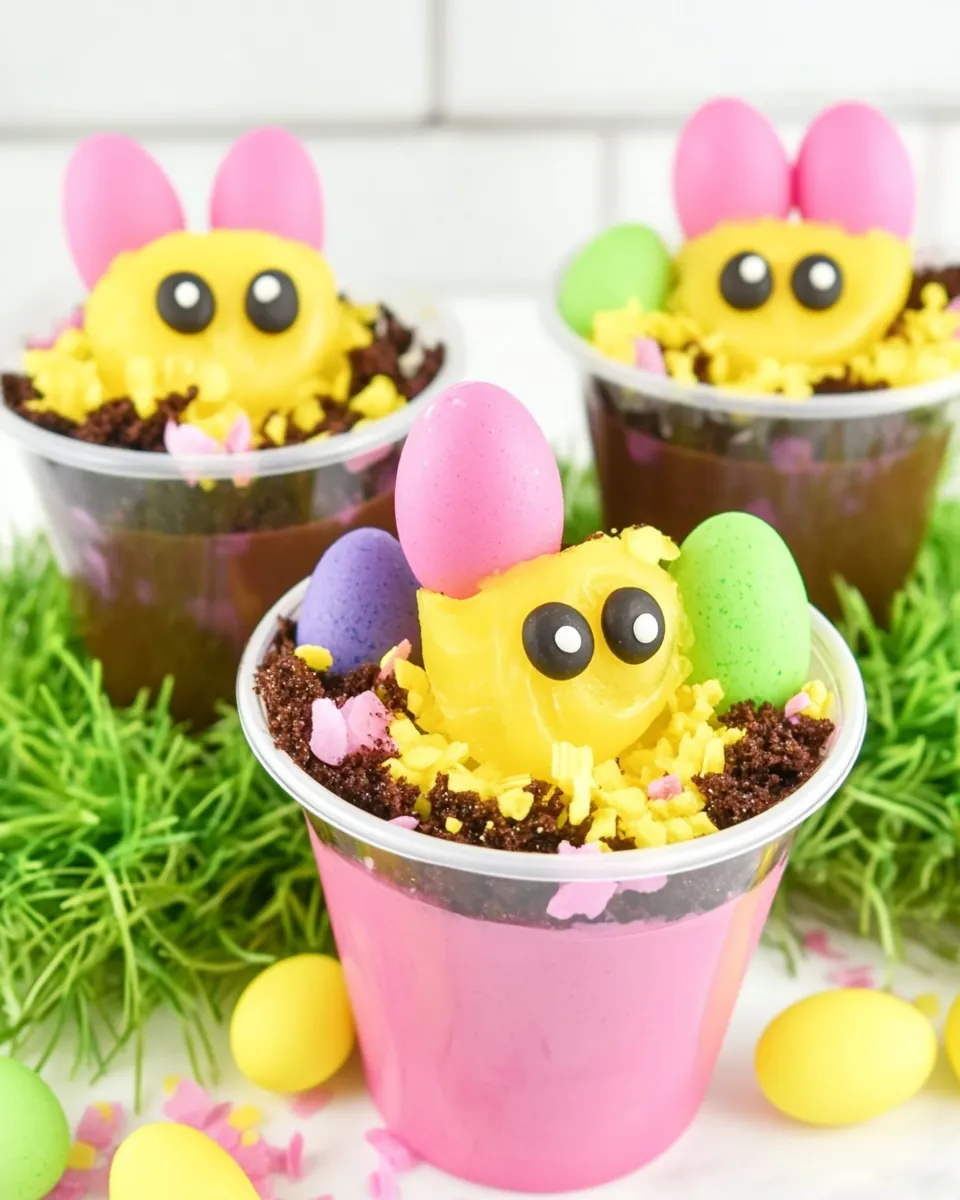
The secret behind the delightful layers of Easter Dirt Cups lies in the simplicity and harmony of the ingredients. Each component plays a vital role, creating textures and flavors that work beautifully together. The creamy instant chocolate pudding serves as the base, while the crushed Oreo cookies add a delicious crunch. The sweetened shredded coconut brings a fun aesthetic, and the colorful Peeps and chocolate eggs make them irresistibly festive.
- 5.85 ounces instant chocolate pudding mix – This family-sized package contains rich, creamy pudding that serves as the base of our dessert, providing that delightful chocolate flavor.
- 3 cups milk – Milk is essential for making the pudding. Feel free to use your favorite type, whether it’s whole, 2%, or a non-dairy alternative.
- 15 pieces Oreo cookies – Crushed into pieces, these cookies form the “dirt” layer that gives the cups their signature look and texture.
- 1 cup sweetened shredded coconut – This adds a light, tropical flavor and a pop of color, especially when dyed green.
- 8 pieces Peeps marshmallows – These cute marshmallows add a whimsical touch and sweetness, making the dessert visually appealing.
- 12 pieces mini chocolate egg candies – These candies are perfect for decoration, providing a delightful crunch and chocolate flavor.
- Green food coloring – Used to dye the shredded coconut, this adds a festive touch, completing the look of the dessert.
Recipe Directions for Easter Dirt Cups
Making Easter Dirt Cups is as much fun as eating them! This recipe is designed to engage your creativity as you layer the ingredients. Let’s dive into the fun.
- Start by adding the dry instant chocolate pudding mix and milk to a large mixing bowl. Using a whisk, mix these together well until all the pudding has dissolved completely. This should take about five minutes, and you’ll want to make sure there are no lumps left.
- Allow the pudding to rest for about five minutes. During this time, it will thicken, creating a lovely, creamy texture that you’re going to love.
- Now, let’s assemble the cups! Begin by sprinkling a generous layer of crushed Oreo cookies at the bottom of four small cups. This will be the first layer, setting the stage for the deliciousness to come.
- Next, fill each cup halfway with the prepared pudding. Take a moment to admire the layers forming! You’ll want to ensure each cup has an even amount of pudding to keep them consistent.
- Top the pudding layer with another layer of crushed Oreo cookies. This adds a delightful crunch and makes the dessert visually appealing with the contrasting colors.
- Then, fill each cup with more pudding, leaving just a little space at the top for your toppings. You want to ensure there’s room for all the fun decorations.
- Sprinkle the remaining crushed Oreo cookies over the pudding in each cup. This final layer of cookies will create an amazing “dirt” look that is so characteristic of these cups.
- Now, for the fun part! Take a strong zip-top bag and pour in the shredded coconut. Add 3 to 4 drops of green food coloring. Seal the bag tightly and give it a good shake to coat the coconut in that vibrant green color.
- Sprinkle the green coconut over the top of each pudding cup, creating a grassy effect that is perfect for Easter.
- Finally, press two Peeps marshmallows into the top of each cup, and add three mini chocolate egg candies. This will make them look festive and inviting. Serve immediately, or refrigerate them until you’re ready to enjoy!
Things Worth Knowing
- Layering is Key: Pay attention to the layering of ingredients for a beautiful presentation. Use clear cups so the layers can be seen.
- Pudding Thickness: Allow the pudding to thicken properly; this ensures that it holds up well in the cups.
- Serving Size: Consider the size of your cups and adjust the quantity of ingredients accordingly if you wish to make more or fewer servings.
- Chilling Time: Refrigerating the cups before serving can enhance the flavors and make them more refreshing.
Recipe Notes about Easter Dirt Cups
As you prepare to make Easter Dirt Cups, here are some notes and tips to ensure your dessert turns out perfectly!
- Storage: Keep any leftovers in the refrigerator. They can be stored for up to three days without losing their texture.
- Freezing: I don’t recommend freezing these cups, as the texture of the pudding and toppings may change.
- Pairing: These dessert cups pair wonderfully with spring-themed meals, Easter brunch, or as a fun after-dinner treat.
- Variations: Feel free to change the flavor of pudding (vanilla, butterscotch) and use different toppings to create your own version!
- Serving Tip: Serve these cups cold for the best experience, especially on warmer days.
Serving Options for Easter Dirt Cups
When it comes to serving Easter Dirt Cups, the options are just as fun as the preparation. Here are some great ideas to elevate your serving game:
- Individual Portions: Serve them in clear plastic cups or glass jars for a charming presentation that showcases the layers.
- Buffet Style: Set up a dessert table for gatherings, allowing guests to personalize their cups with extra toppings.
- Picnic Treats: These cups are perfect for outdoor picnics, as they hold up well when packed carefully in a cooler.
- Kids’ Parties: They are a hit at birthday parties or school events, and kids will love getting creative with their own toppings.
- Holiday Dessert: Make these cups a regular part of your Easter celebrations or family gatherings to add a touch of nostalgia.
- Storage Notes: If you have leftovers, make sure to cover them tightly to maintain freshness.
FAQ
Conclusion
In summary, Easter Dirt Cups are not just a treat; they’re a delightful way to celebrate spring and the joy of togetherness. I encourage you to try this recipe and share the fun with your loved ones. The smiles on their faces will be worth every delicious bite you take!
Easter Dirt Cups
Ingredients
Equipment
Method
- Add the dry instant chocolate pudding mix and milk to a large bowl, mix with a whisk until all the pudding has been dissolved, around 5 minutes. Allow the pudding to rest 5 minutes until thickened.
- Sprinkle crushed Oreo cookies over the bottom of four small cups. Fill each cup halfway full of pudding.
- Top the pudding layer with another layer of crushed Oreo cookies. Fill each cup with pudding, leaving a small amount of space at the top of the cup for decorations. Sprinkle the remaining crushed Oreo cookies over the pudding.
- Pour the shredded coconut into a strong zip-top bag and add 3 to 4 drops of green food coloring. Seal the bag and squeeze and shake the bag to coat the coconut shreds evenly in food coloring. Sprinkle the green coconut over the top of each pudding cup.
- Press two Peeps marshmallows into the top of each cup, then add three chocolate eggs to each pudding. Serve and enjoy!
Notes
- Tip 1: You could also use two 3.9 ounce packages (7.8 ounces total) of instant pudding, but you will need to increase the milk to four cups total. I would suggest using slightly larger cups or making 6 total pudding cups when using the two smaller packages of pudding.
- Tip 2: I used 9 ounce clear cups for this recipe so you can see the layers.
- Tip 3: A food processor can be used to crush the chocolate cookies quickly.