Chocolate Cheesecake Bars
There’s something incredibly satisfying about making homemade desserts that get everyone excited, and Chocolate Cheesecake Bars are at the top of that list for me. I remember the first time I decided to whip up a batch of these delectable bars; it was a lazy Sunday afternoon, and I had a craving for something sweet yet decadent. I rummaged through my pantry and stumbled upon some leftover butterscotch chips and a few other ingredients, and that was the beginning of a delightful journey into baking. The rich, creamy texture of the cheesecake combined with the crunch of the brownie brittle crust creates a perfect balance that has become a family favorite.
These bars are not just any dessert; they’re a celebration of flavors. Each bite is a harmonious blend of chocolatey goodness and a hint of buttery sweetness from the butterscotch. Whether you’re hosting a gathering or simply treating yourself, Chocolate Cheesecake Bars are sure to impress. I love serving these cool and creamy bars as a sweet finish to any meal, and they’re also perfect for birthday parties, potlucks, or a midweek treat. Over the years, I’ve received so many compliments on these bars, and it’s always a joy to share them with friends and family.
One of the best things about Chocolate Cheesecake Bars is how easy they are to make. With a few simple ingredients and steps, you can create something that looks and tastes like it came from a gourmet bakery. Plus, they’re made ahead of time, which means you can sit back and relax while they set in the fridge. So, if you’re looking for a dessert that will wow your guests and satisfy your sweet tooth, look no further than these delicious bars. Let’s get started on making a batch that will leave everyone asking for seconds!
Recipe Snapshot
1 hr 15 mins
25 mins
50 mins
Medium
250 kcal
4 g
Gluten-Free, Low FODMAP
12 g
Food Processor, Oven, Baking Sheet, Frying Pan, Mixing Bowl, Chef’s Knife, Wooden Spoon
The Magic of This Chocolate Cheesecake Bars
Flavor Explosion
What makes Chocolate Cheesecake Bars so special is the combination of flavors. The creamy cheesecake infused with rich chocolate and sweet butterscotch creates a mouthwatering experience that dances on your taste buds.
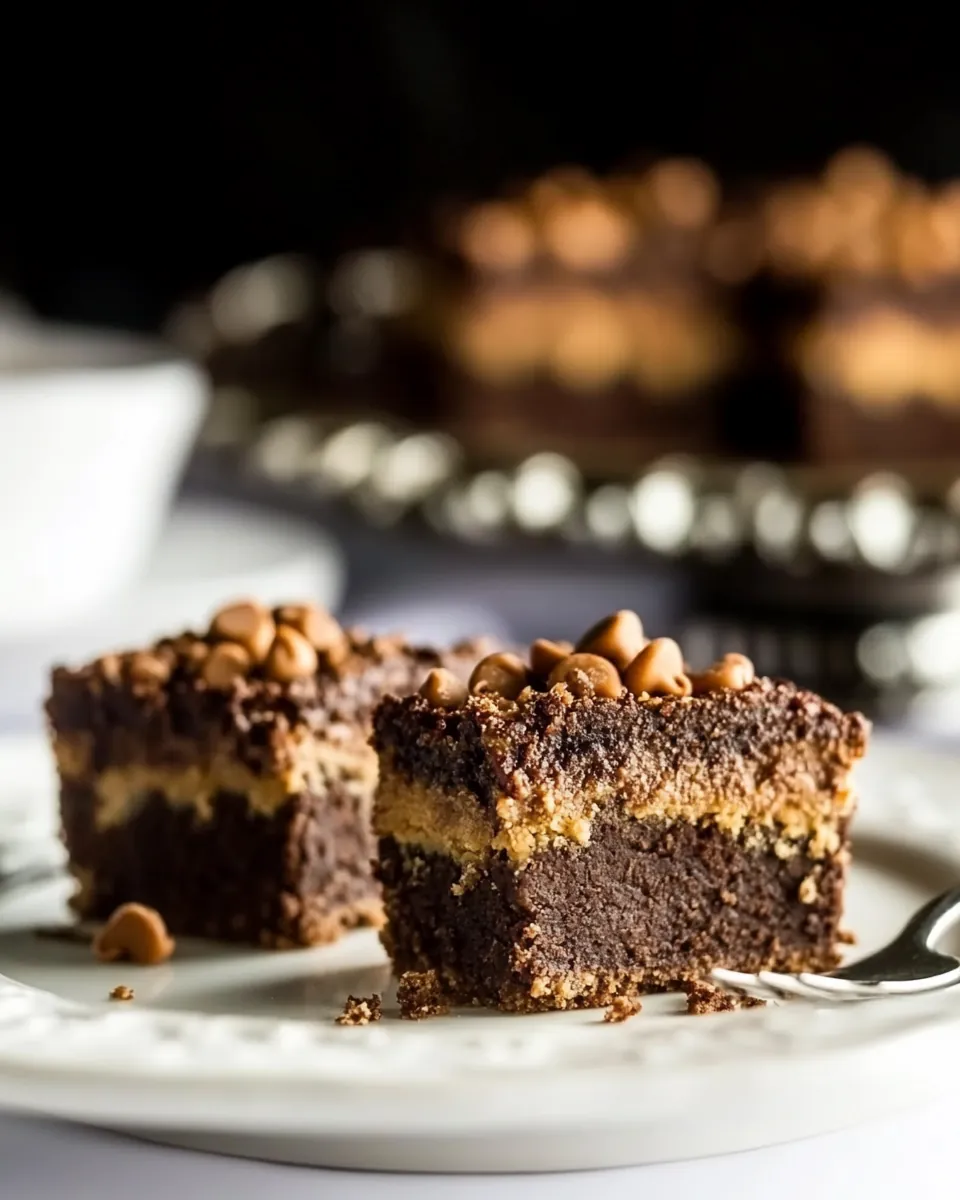
Perfect Texture
These bars have a delightful contrast between the smooth, creamy filling and the crunchy brownie brittle crust. It’s a satisfying bite that keeps you coming back for more.
Customizable
One of the things I love most about this recipe is its versatility. You can easily swap out the butterscotch chips for any other flavor you like, such as peanut butter or even white chocolate. Make it your own!
Make Ahead Convenience
These bars are perfect for prepping ahead of time. You can make them a day before your event, which allows the flavors to meld beautifully while saving time on the day of serving.
Shareable Goodness
With 12 generous servings, Chocolate Cheesecake Bars are ideal for sharing. They’re perfect for parties, family gatherings, or simply enjoying with a good cup of coffee.
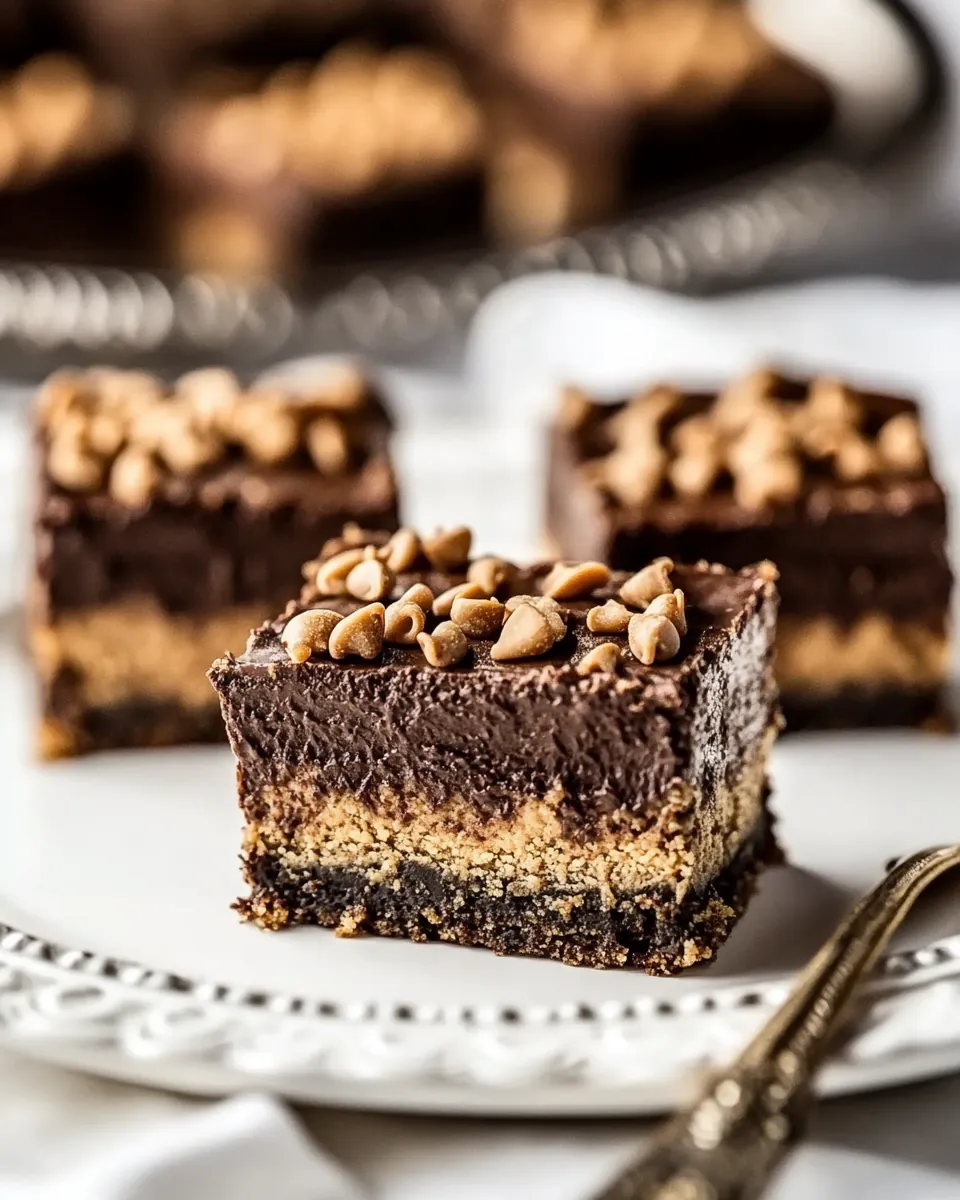
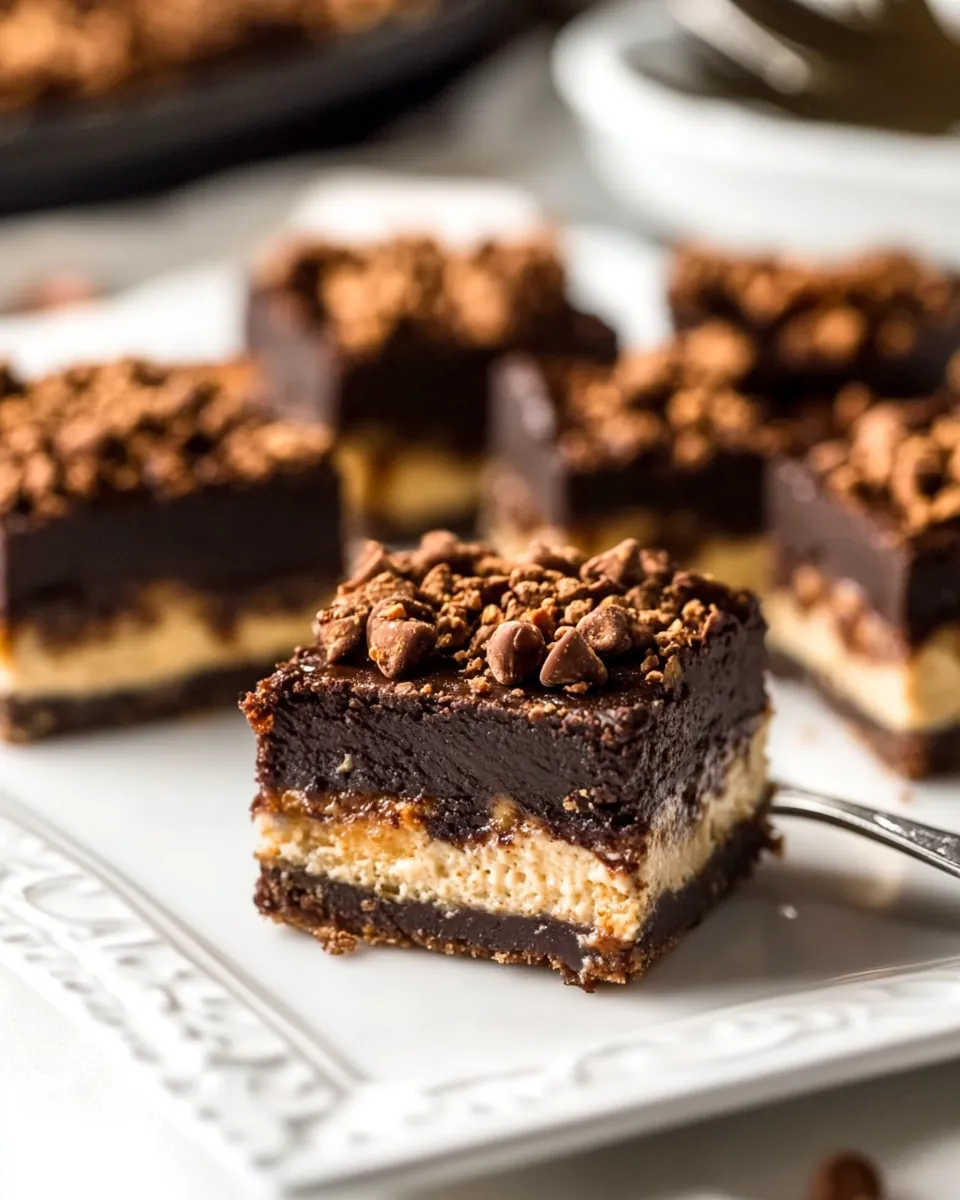
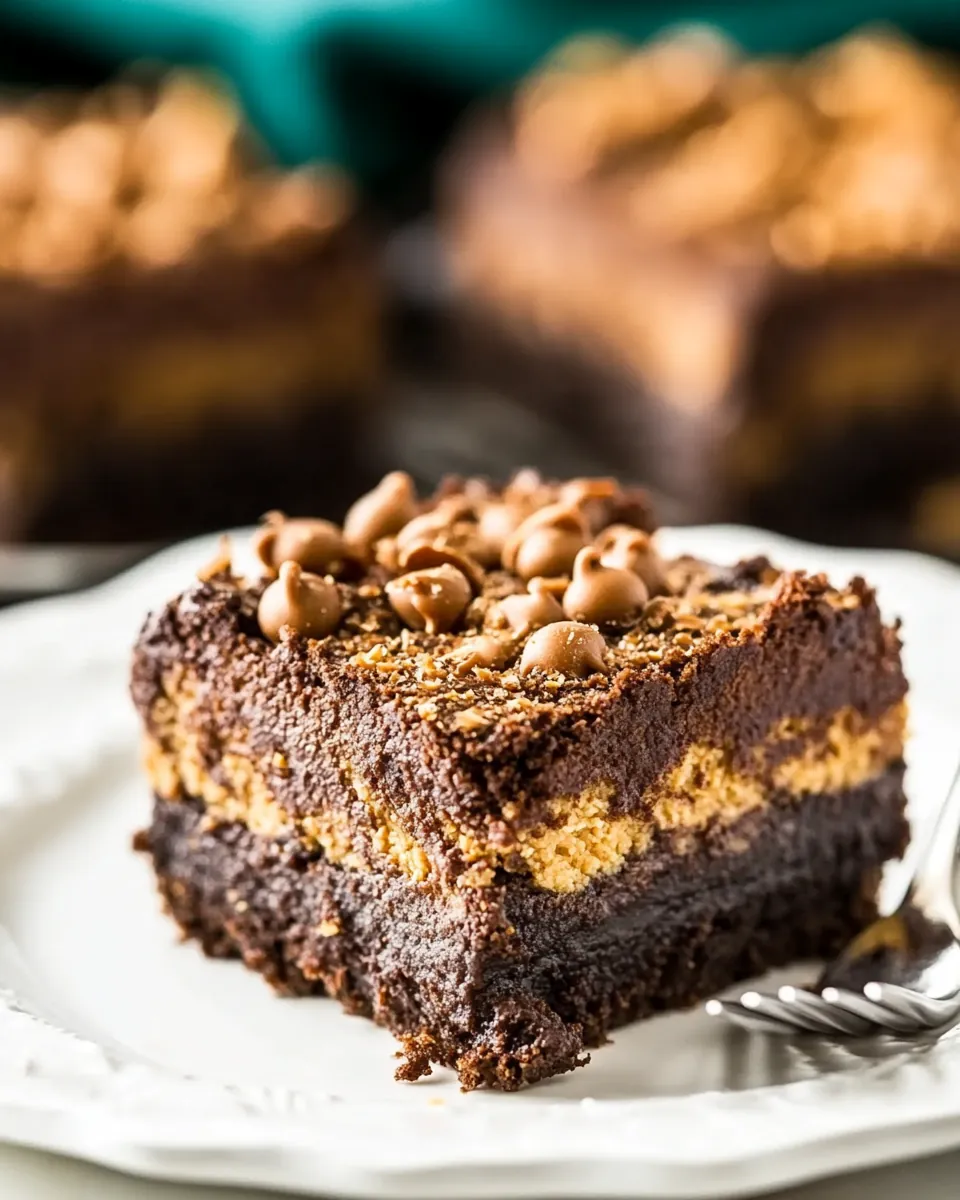
Visually Stunning
Not only do they taste amazing, but they also look gorgeous when plated. The layers of crust, cheesecake, and the sprinkle of brownie brittle on top create a beautiful presentation.
Shopping List for Chocolate Cheesecake Bars
When it comes to making Chocolate Cheesecake Bars, the ingredients play a crucial role in achieving that perfect flavor and texture. Each component complements the others, resulting in a rich dessert that is sure to impress. The key players in this recipe include the creamy cream cheese, which forms the base, and the Brownie Brittle, which adds a delicious crunch.
- 1 cup Salted Caramel Brownie Brittle, crushed (about 3 cups before crushing) – This forms the crust and gives a chocolatey crunch to the bars, making each bite a delightful experience.
- 1/4 cup granulated sugar – This sweetener balances the richness of the cheesecake and enhances the overall flavor.
- 1/4 cup butter, melted – Adds moisture and richness to the crust, helping it hold together beautifully.
- 8 ounces reduced-fat cream cheese – The star of the show, providing a creamy base that’s both rich and smooth.
- 1/4 cup + 3 tablespoons granulated sugar – Additional sweetness for the cheesecake filling to achieve the perfect balance.
- 1 tablespoon all-purpose flour – Helps to stabilize the cheesecake and gives it a nice structure.
- 2 ounces semi-sweet chocolate – Adds a deep, rich chocolate flavor to the filling, making it irresistibly delicious.
- 1/2 teaspoon vanilla extract – Enhances the flavor and brings all the elements together.
- 1/4 cup + 2 tablespoons nonfat plain Greek yogurt – Contributes creaminess while keeping the cheesecake lighter.
- 1 large egg white – Provides structure and helps the cheesecake set perfectly.
- 1/4 cup + 2 tablespoons butterscotch chips – Adds bursts of sweetness and a delightful flavor contrast in each bite.
- 1/4 cup Salted Caramel Brownie Brittle, crushed, for topping – Extra crunch and a beautiful finish to the bars.
Preparation Steps for Chocolate Cheesecake Bars
Getting started on Chocolate Cheesecake Bars is a breeze, and I can’t wait to share the detailed steps with you. This process not only yields delicious results but also fills your kitchen with mouthwatering aromas. Just follow along, and let’s create something fantastic together!
First, preheat your oven to 350°F. As it heats, line an 8-inch baking pan with aluminum foil, shiny side down. It’s essential to lightly spritz the foil with a nonstick cooking spray to ensure easy removal later. This step helps in keeping the bars intact when it’s time to cut them.
Next, grab your food processor and crush the pieces of Brownie Brittle until they’re reduced to about 1 cup of crumbs. This will serve as the crust. The texture should be fine enough to pack down without any large pieces.
In a medium bowl, mix the Brownie Brittle crumbs with the granulated sugar. Once mixed, add in the melted butter and stir until all the crumbs are evenly coated. You want a mixture that resembles wet sand.
Now it’s time to pack the crumb mixture into the bottom of the prepared baking pan. Use your fingers or a clean drinking glass to press the crust down tightly and evenly. This step is crucial for a sturdy base.
Place the crust in the oven and bake until the edges just begin to harden, which should take about 20 minutes. Keep an eye on it; you want it firm but not browned. Let it cool for a bit, allowing it to set further.
While the crust cools, take a large bowl and use an electric mixer to beat together the softened cream cheese and granulated sugar until the mixture is light and fluffy. This step ensures a smooth cheesecake filling.
Add the flour to the cream cheese mixture and mix only until well combined. Don’t overmix; we want to keep the airiness of the batter.
In a small microwave-safe bowl, melt the semi-sweet chocolate in the microwave at 50% power in 20-second intervals. Stir between each interval until the chocolate is smooth and uniformly melted. This is where the rich chocolate flavor comes from!
Combine the melted chocolate, vanilla extract, Greek yogurt, and egg white into the cheesecake mixture. Beat until just combined; don’t overmix, as you want to maintain the fluffiness.
Now, gently fold in the butterscotch chips into the cheesecake mixture. This is where the fun begins! You’ll see the little bursts of flavor throughout the filling.
Pour the cheesecake mixture into the baked crust and use a spatula to smooth it out evenly. Sprinkle the top with the remaining crushed Brownie Brittle crumbs for extra texture and visual appeal.
Slide the baking pan back into the oven and bake until the cheesecake just feels set but the center looks a little jiggly, about 25 to 30 minutes. It’s important to not overbake, as you want a creamy consistency.
Once baked, let the cheesecake cool on the countertop for about 20 minutes. Then, transfer it to the refrigerator to chill for at least 3 hours or overnight for the best results.
After it’s completely chilled, use the foil to help lift the cheesecake out of the baking pan. Slice into bars and serve cold. Enjoy the deliciousness of your homemade Chocolate Cheesecake Bars!
Things Worth Knowing
- Chilling Time: Allowing the bars to chill in the refrigerator for at least 3 hours is crucial for the perfect texture. Don’t skip this step!
- Storage: Store leftover bars in an airtight container in the refrigerator for up to 5 days. They taste even better the next day!
- Serving Temperature: These bars are best served cold. The chill enhances their creamy texture and flavors.
- Ingredient Quality: Using high-quality chocolate and cream cheese can make a noticeable difference in taste, elevating your bars to a whole new level.
Making Adjustments
Here are some fantastic tips for making Chocolate Cheesecake Bars that suit your taste and occasion. Whether you’re looking to modify flavors or make them more wholesome, these tips will help you out!
- Storage: Properly store leftovers in an airtight container in the fridge, where they can last up to 5 days. You’ll find that they keep their flavor and texture well.
- Freezing: Yes, you can freeze these bars! Wrap them tightly in plastic wrap and then in aluminum foil. They can be frozen for up to 2 months. Just thaw them in the fridge before serving.
- Pairing: Consider serving these bars with a dollop of whipped cream or a scoop of vanilla ice cream for an added indulgence.
- Flavor Variations: Feel free to experiment with different types of chips, like white chocolate or peanut butter chips, for a unique twist on the classic recipe.
- Serving Suggestions: These bars are great for parties, potlucks, or as a sweet treat after dinner. They can be cut into smaller squares for bite-sized indulgence.
- Occasion Adaptation: You can turn these bars into a festive dessert by adding seasonal toppings, like crushed peppermint for the holidays!
What to Pair With Chocolate Cheesecake Bars
When it comes to serving Chocolate Cheesecake Bars, there are plenty of delicious options to consider. These bars are versatile and can complement a variety of occasions and meals.
- Fresh Fruits: Pair these bars with fresh berries or sliced fruits like strawberries or raspberries for a refreshing contrast to the richness of the cheesecake.
- Coffee: Serve with a strong cup of coffee or espresso for a delightful contrast in flavors. The bitterness of coffee pairs beautifully with the sweetness of the bars.
- Ice Cream: A scoop of vanilla or caramel ice cream can elevate the dessert experience, making it even more indulgent.
- Variety of Toppings: Consider offering toppings like whipped cream, chocolate drizzle, or chopped nuts for guests to customize their serving.
- Seasonal Events: These bars are great for gatherings during any season. Serve them at summer barbecues, fall gatherings, or as a cozy winter dessert to warm up the cold nights.
- Picnic Treat: These bars travel well, making them a great option for picnics or potlucks. Just be sure to keep them chilled until serving!
FAQ
Conclusion
In summary, Chocolate Cheesecake Bars are a delightful treat that balances creamy cheesecake with a crunchy brownie brittle crust, creating a unique dessert that everyone loves. I encourage you to give them a try; you won’t regret it! These bars are not just about satisfying your sweet tooth, but they also bring a smile to everyone you share them with. Happy baking!
Chocolate Cheesecake Bars
Ingredients
Equipment
Method
- Preheat oven to 350°F. Line an 8-inch baking pan with aluminum foil, shiny side down. Lightly spritz the foil with a nonstick cooking spray.
- In a food processor, crush the Brownie Brittle pieces until they're reduced to about 1 cup of crumbs.
- In a medium bowl, mix the crumbs with the sugar. Add the melted butter and stir well until the crumbs are all evenly coated.
- Press the crumb mixture into the bottom of the prepared baking pan. Use your fingers or a clean drinking glass to pack the crust down tightly and evenly.
- Bake until the edges of the crust just begin to harden, about 20 minutes. Set the crust aside to continue hardening as it cools.
- In a large bowl, use an electric mixer to beat together the softened cream cheese and sugar until the mixture is light and fluffy. Add the flour, mixing only until it is well combined.
- In a small microwave-safe bowl, melt the chocolate in the microwave at 50% power in 20-second intervals. Stir between each interval until the chocolate is smooth and uniformly melted.
- Stir the melted chocolate, vanilla, Greek yogurt, and egg white into the cheesecake mixture. Beat until just combined. Fold in the butterscotch chips.
- Pour the cheesecake mixture into the baked crust and smooth it out. Sprinkle the top with the remaining Brownie Brittle crumbs.
- Bake until the cheesecake just feels set but the center looks a little jiggly, about 25-30 minutes.
- Let the cheesecake cool on the countertop for 20 minutes. Chill it in the the refrigerator for at least 3 hours or overnight.
- After it's completely chilled, use the foil to help lift the cheesecake out of the baking pan.
- Slice into bars and serve cold.
Notes
- Tip 1: Properly store leftovers in an airtight container in the fridge, where they can last up to 5 days. You’ll find that they keep their flavor and texture well.
- Tip 2: Yes, you can freeze these bars! Wrap them tightly in plastic wrap and then in aluminum foil. They can be frozen for up to 2 months. Just thaw them in the fridge before serving.
- Tip 3: Consider serving these bars with a dollop of whipped cream or a scoop of vanilla ice cream for an added indulgence.
- Tip 4: Feel free to experiment with different types of chips, like white chocolate or peanut butter chips, for a unique twist on the classic recipe.
- Tip 5: These bars are great for parties, potlucks, or as a sweet treat after dinner. They can be cut into smaller squares for bite-sized indulgence.