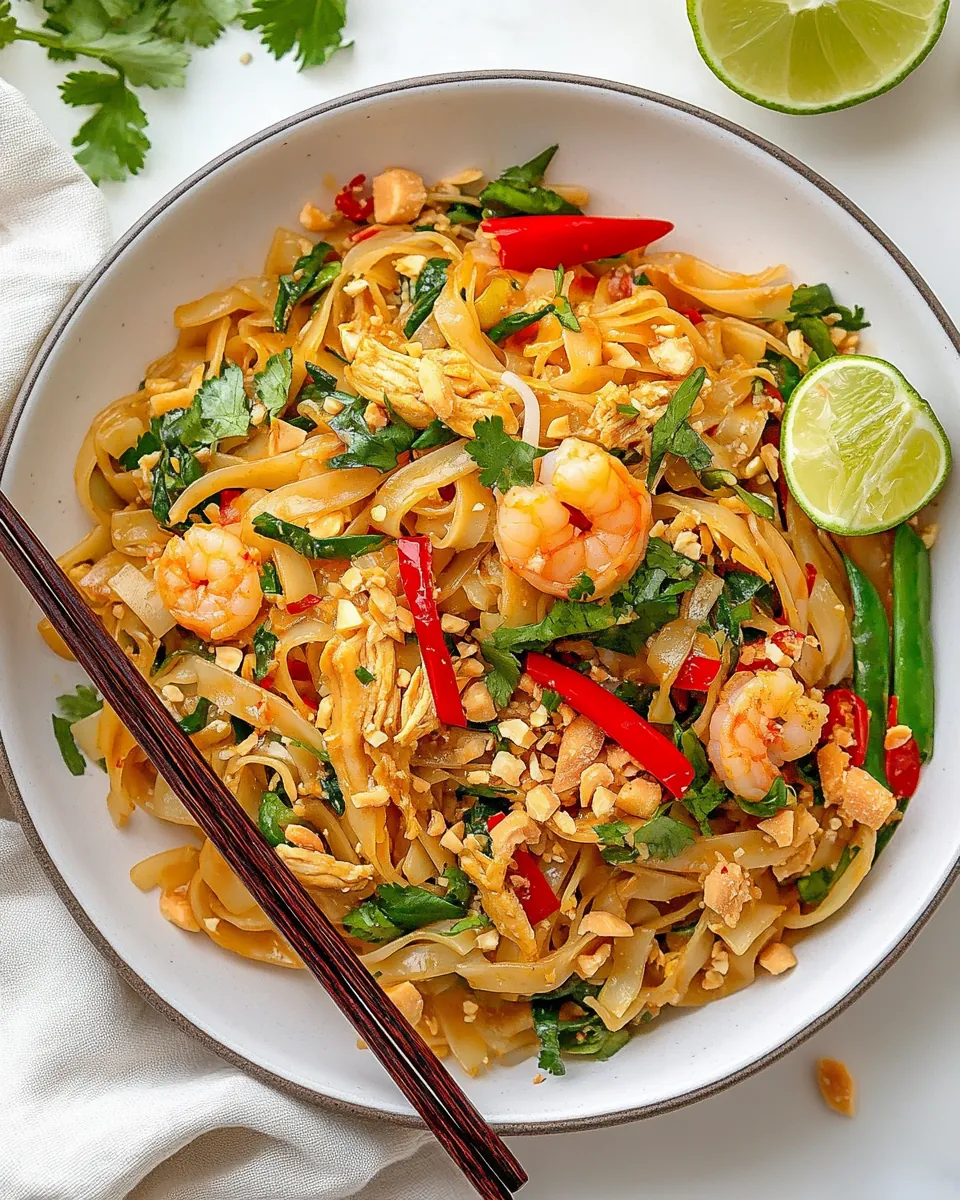
Pad Thai
There’s something about the smell of Pad Thai wafting through the kitchen that instantly transports me back to my favorite local Thai restaurant. I remember the first time I tried this dish, sitting outside on a warm evening, the sun setting, and the vibrant city sounds surrounding me. It was love at first bite! The combination of flavors, from the sweet and tangy sauce to the crunch of the peanuts, has always captivated me. Over time, I’ve made it my mission to recreate that authentic experience at home, experimenting with different ingredients until I found the perfect balance. What I love most is how adaptable Pad Thai can be, allowing you to swap out proteins based on what’s in the fridge. You can use chicken or shrimp, or even go vegetarian with tofu. So, if you’re looking for a dish that’s both comforting and exuberantly flavorful, let’s dive into making your own Pad Thai! You’ll find that it’s not just delicious, but also incredibly satisfying to whip up in your own kitchen.
Recipe Snapshot
35 mins
15 mins
20 mins
Easy
550 kcal
30g g
Whole30, Gluten-Free, Low FODMAP
20g g
Chef’s Knife, Peeler, Whisk, Mixing Bowl, Frying Pan
What Sets This Pad Thai Apart
Authentic Thai Flavors
When you make Pad Thai at home, you’re embracing authentic Thai flavors that dance on your palate. The combination of tamarind, lime, and fish sauce creates a complex flavor profile that’s both sweet and savory. Each ingredient plays a crucial role in harmonizing the dish.
Customization at Its Best
One of my favorite aspects of Pad Thai is its versatility. You can easily tailor it to your taste preferences. Want it spicier? Add more red pepper flakes. Prefer it richer? A dash of extra fish sauce or a sprinkle of peanuts can elevate the dish. The possibilities are endless!
Quick and Easy to Prepare
With most of the prep being straightforward, Pad Thai is perfect for a busy weeknight dinner. In less than an hour, you can have a delicious meal that feels gourmet. It’s an excellent choice for impressing guests or for a cozy dinner with loved ones.
Healthy Ingredients
This dish is packed with fresh vegetables and protein, making it a balanced meal. The inclusion of fresh veggies like bell peppers and carrots adds not just color but crunch and nutrition. By choosing chicken or shrimp, you’re adding lean protein to your plate.
Perfect for Meal Prep
Another reason to love Pad Thai is that it keeps well. Preparing it in batches makes it ideal for meal prepping. You can easily store leftovers for lunch the next day, and it still tastes amazing!
A Dish for Everyone
Whether you’re cooking for family or friends, Pad Thai is universally loved. It has a way of bringing people together over a shared meal, creating memories that linger long after the plates are cleared. So let’s jump into the ingredients and get started on this delightful journey!
Pad Thai Shopping List
The ingredients for Pad Thai are not only simple but also work beautifully together to create a dish bursting with flavor. Each component serves a purpose, enhancing the overall taste and texture.
- Thai rice noodles: Essential for achieving that classic chewy texture.
- Boneless skinless chicken breasts (or shrimp): Provides protein and a satisfying bite.
- Vegetable oil: For sautéing and achieving that perfect stir-fry.
- Dark-brown sugar: Adds a hint of sweetness and depth to the sauce.
- Soy sauce: The backbone of the sauce, imparting savory umami notes.
- Rice vinegar: Balances the sweetness and adds acidity.
- Lime juice: Freshens up the flavors and adds brightness.
- Fish sauce: A key ingredient that brings an authentic taste to your dish.
- Red bell pepper: For crunch and sweetness.
- Matchstick carrots: Adds color and nutrition.
- Garlic: Infuses the dish with aromatic flavor.
- Green onions: Adds freshness and a mild onion flavor.
- Bean sprouts: Offers a delightful crunch.
- Large eggs: Adds richness and binds everything together.
- Unsalted peanuts: For crunch and a nutty flavor.
- Cilantro: A fresh herb that brightens up the dish.
The Process for Making Pad Thai
Making Pad Thai is an adventure filled with vibrant flavors and enticing aromas. As you follow these steps, you’ll feel like a chef in a bustling Thai kitchen. Let’s get started!
Begin by preparing the rice noodles. Follow the directions on the package, usually soaking them in warm water until tender. This is crucial because perfectly cooked noodles are the heart of great Pad Thai. Once they’re ready, drain and set them aside.
In a mixing bowl, whisk together the dark-brown sugar, soy sauce, rice vinegar, lime juice, and fish sauce until well combined. This sauce is what ties all the flavors together, so taste it and adjust as needed. Set this mixture aside as you move on to the next steps.
Heat a wok or a deep sauté pan over medium-high heat and add the vegetable oil. Once the oil is shimmering, it’s time to add the chicken. Sauté the chicken until it’s cooked through and golden brown, about 6 minutes. If you’re using shrimp, cook it for about 1 and a half minutes per side until opaque. This step is crucial for getting that lovely sautéed flavor.
Once the chicken is done, transfer it to a plate but leave the oil in the pan. Add the red bell pepper and matchstick carrots to the hot pan. Sauté these for about 1 to 2 minutes until they start to become tender. Then, add the minced garlic, chopped green onions, and bean sprouts. Keep sautéing for another minute, allowing the flavors to meld.
Now, push the veggies to the edges of the pan, creating a well in the center. Crack the large eggs into this well and scramble them until they’re fully cooked. This adds richness to the overall dish and binds everything nicely.
Next, add the prepared noodles back into the pan along with the sauce you made earlier. Toss everything together gently, ensuring the noodles are well coated with the sauce. Keep an eye on the heat; you want everything to heat through without overcooking.
Finally, cook the entire mixture for another 1 to 2 minutes, stirring occasionally. You’re looking for everything to be heated through and well combined. The noodles should be slightly sticky and flavorful, showcasing the perfect blend of all the ingredients.
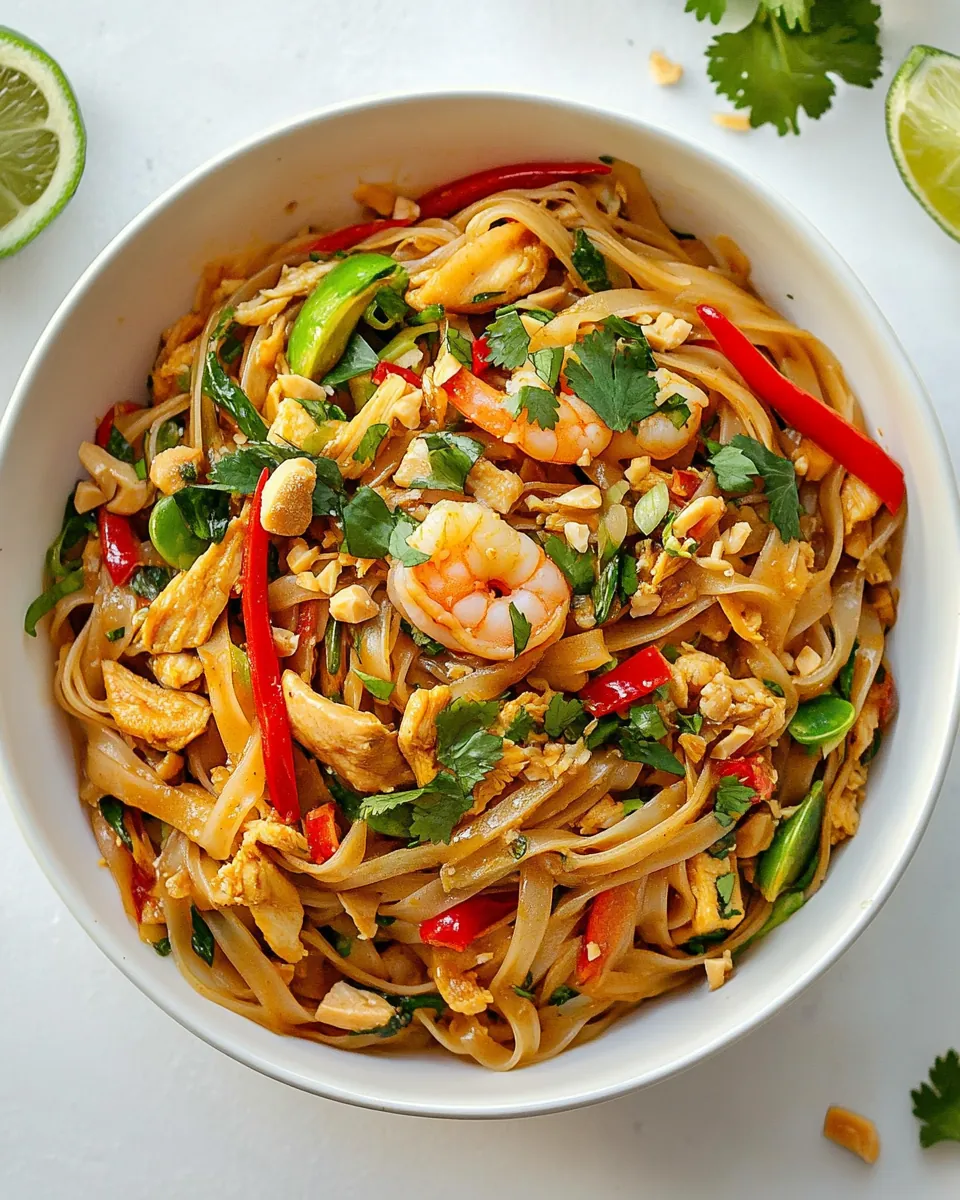
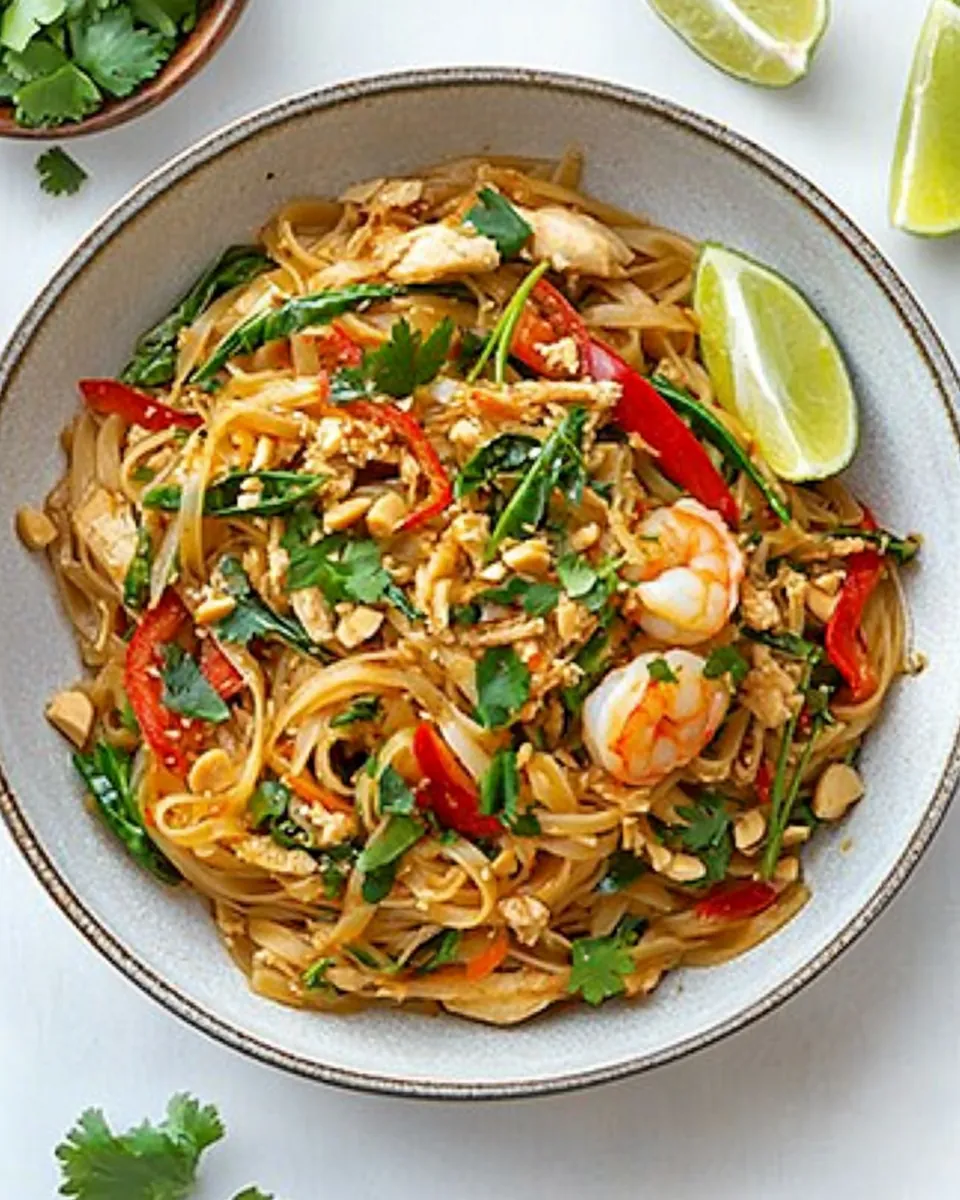
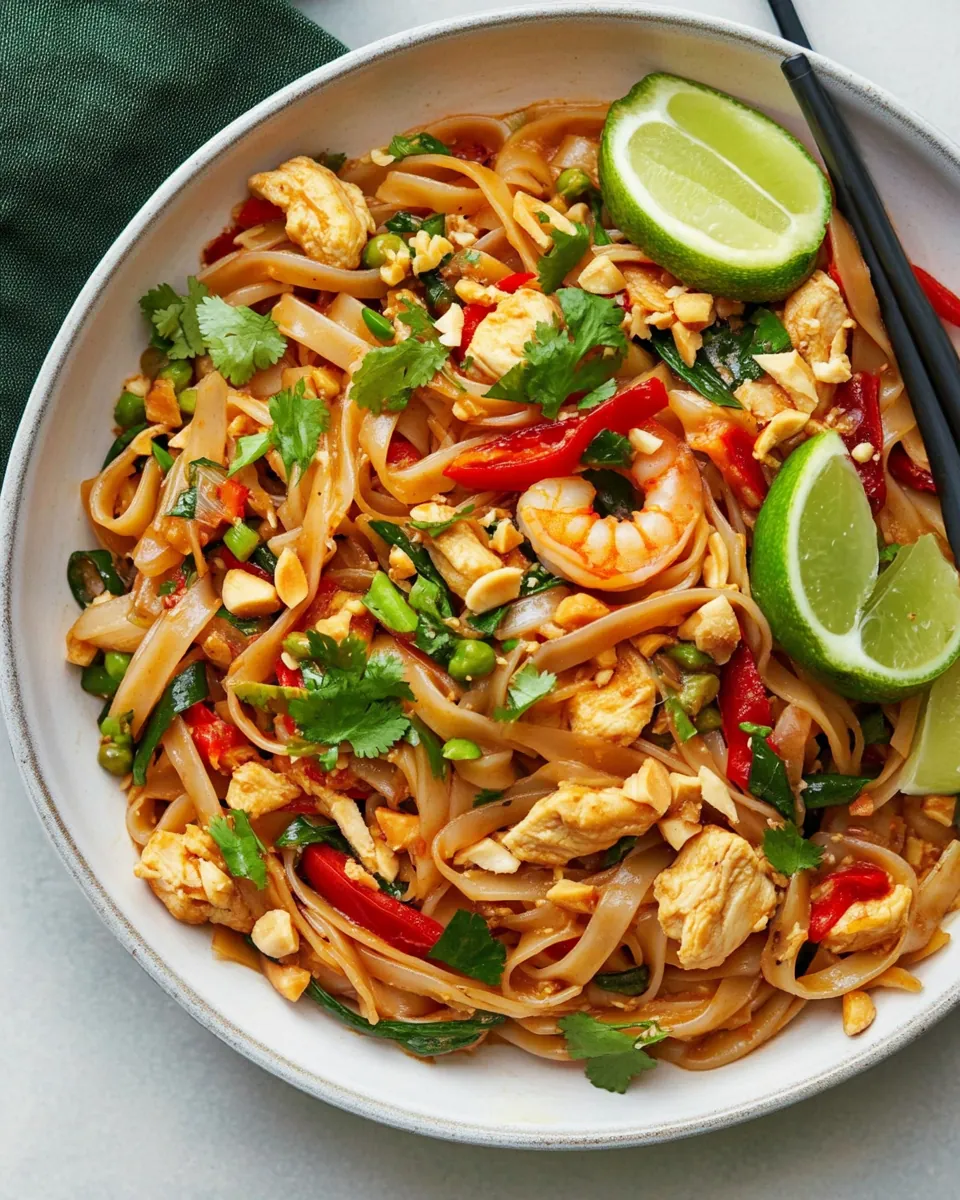
Once done, serve your Pad Thai warm, topped with cilantro and chopped peanuts. If you like a little heat, don’t forget to sprinkle on some red pepper flakes or sesame seeds for an extra kick!
Things Worth Knowing
- Getting the Noodles Right: Ensure you don’t over-soak your rice noodles as they can become mushy. Aim for al dente!
- Temp Control: When sautéing, maintain a high enough temperature to achieve that lovely sear on your chicken or shrimp without burning the veggies.
- Flavor Balance: Taste your sauce before adding it to the pan. Adjust the sweetness or saltiness as per your preference to match your taste buds.
- Ingredient Freshness: Use fresh ingredients, especially the vegetables and herbs, to enhance the flavors of your Pad Thai.
- Don’t Rush: Give each ingredient the time it needs to cook properly. Rushing results in unevenly cooked dishes.
Tips for Success
To make sure your Pad Thai turns out perfect every time, here are some tips to keep in mind:
- Storage: Store any leftovers in an airtight container in the fridge. It should last for up to three days, although the noodles may soften over time.
- Freezing: While Pad Thai is best fresh, you can freeze it for up to a month. Just make sure to separate the components as the noodles can get mushy when thawed.
- Pairing: This dish pairs wonderfully with a side of fresh salad or spring rolls for a refreshing contrast.
- Serving Size: If you’re serving a crowd, you can easily double the recipe. Just make sure your pan can accommodate the extra ingredients.
- Customization: Feel free to experiment with other veggies like snap peas or broccoli to add variety.
Serving This Pad Thai
When it comes to serving Pad Thai, the presentation can elevate your culinary experience. Here are some ideas:
- Family Style: Serve it in a large bowl for everyone to share. This creates a warm, communal dining experience perfect for family dinners.
- Garnishing: Always top with a handful of fresh cilantro and crushed peanuts just before serving for added texture and flavor.
- Accompanying Dishes: Consider serving it alongside a light cucumber salad or Thai spring rolls to balance the meal.
- Occasions: Pad Thai is versatile enough for casual lunches or elegant dinners, making it suitable for any occasion.
- Storage Tips: If you have leftovers, let them cool before storing in an airtight container. They’re great for lunch the next day!
- Seasonal Pairings: This dish shines in the summer with fresh summer rolls or a chilled soup on the side.
FAQ
Conclusion
The vibrant flavors and delightful textures of Pad Thai make it a truly special dish. It’s perfect for any occasion, whether it’s a casual weeknight or a gathering with friends. I encourage you to try making your own version at home, experimenting with flavors and ingredients to make it your own. You won’t be disappointed with the delicious results.
Pad Thai
Ingredients
Equipment
Method
- Prepare rice noodles according to directions listed on package. In a mixing bowl, whisk together brown sugar, soy sauce, rice vinegar, lime juice and fish sauce, set aside.
- While noodles are cooking, heat oil in a wok or a 12-inch deep sauté pan set over medium-high heat. Add chicken and sauté until cooked through, about 6 minutes. If using shrimp, cook about 1 and a half minutes per side or until opaque.
- Transfer to a plate, leaving oil in pan. Add bell pepper and carrots, sauté for 1 to 2 minutes then add garlic, green onions and bean sprouts, sauté for 1 minute longer.
- Push veggies to edges of pan and crack eggs into center. Cook and scramble until eggs have cooked through. Add in chicken, noodles and sauce and toss everything together, cook for 1 to 2 minutes.
- Serve warm topped with cilantro, peanuts and optional red pepper flakes and sesame seeds.
Notes
- If you like it extra saucy: you can double the sauce mixture.
- For a creamy, peanuty sauce: you can add 2 Tbsp peanut butter to the mixture.
- If you can't find bean sprouts: they can be omitted or replaced with napa cabbage.