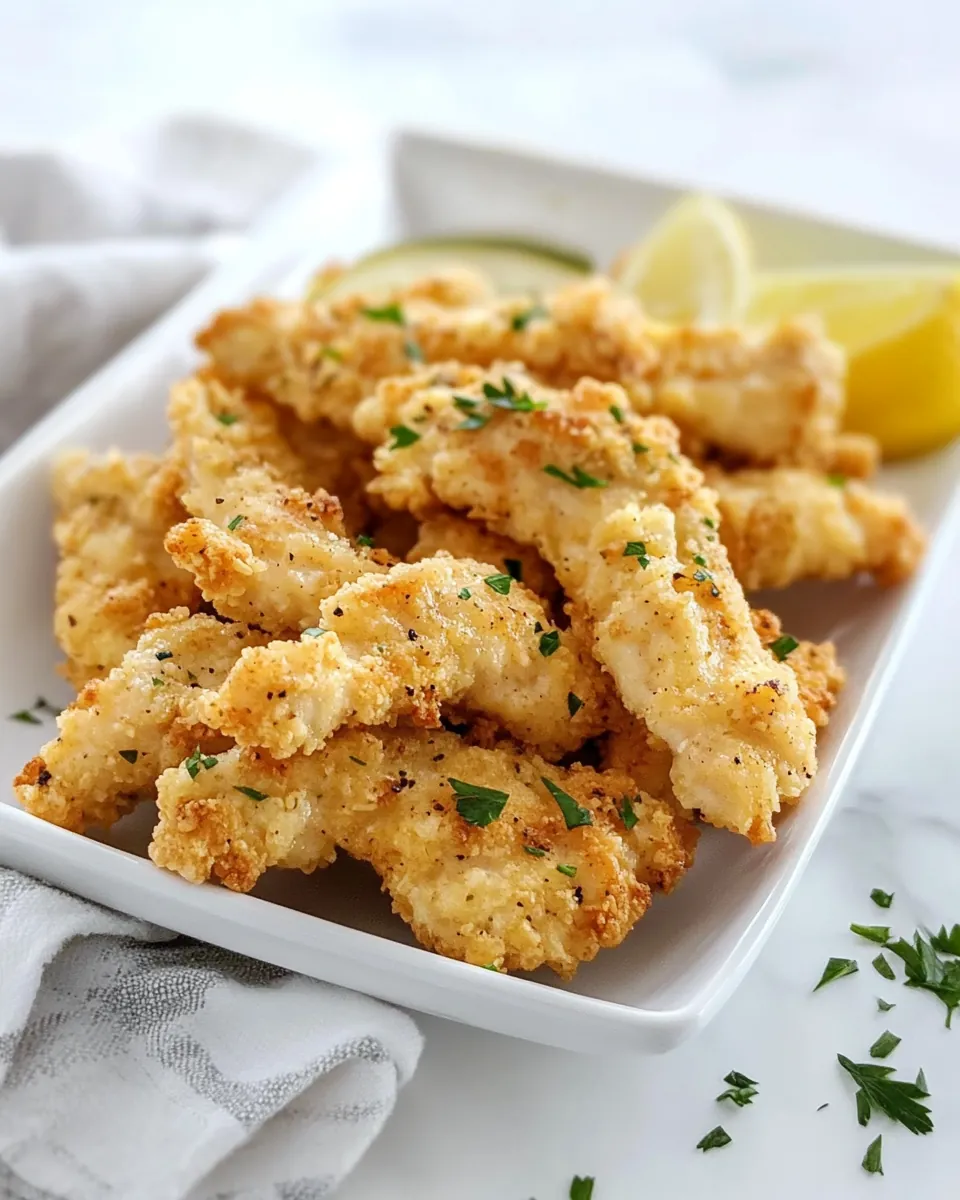
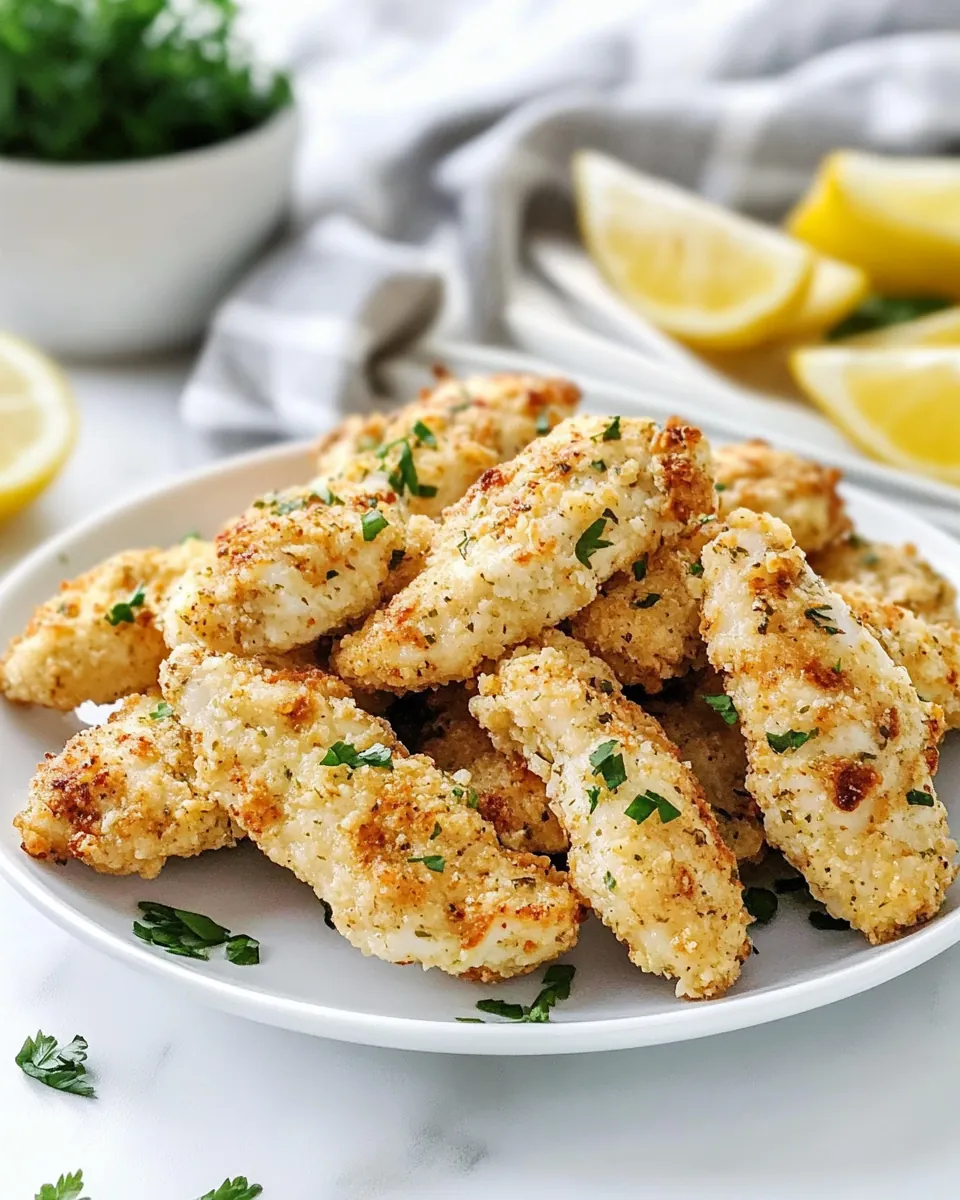
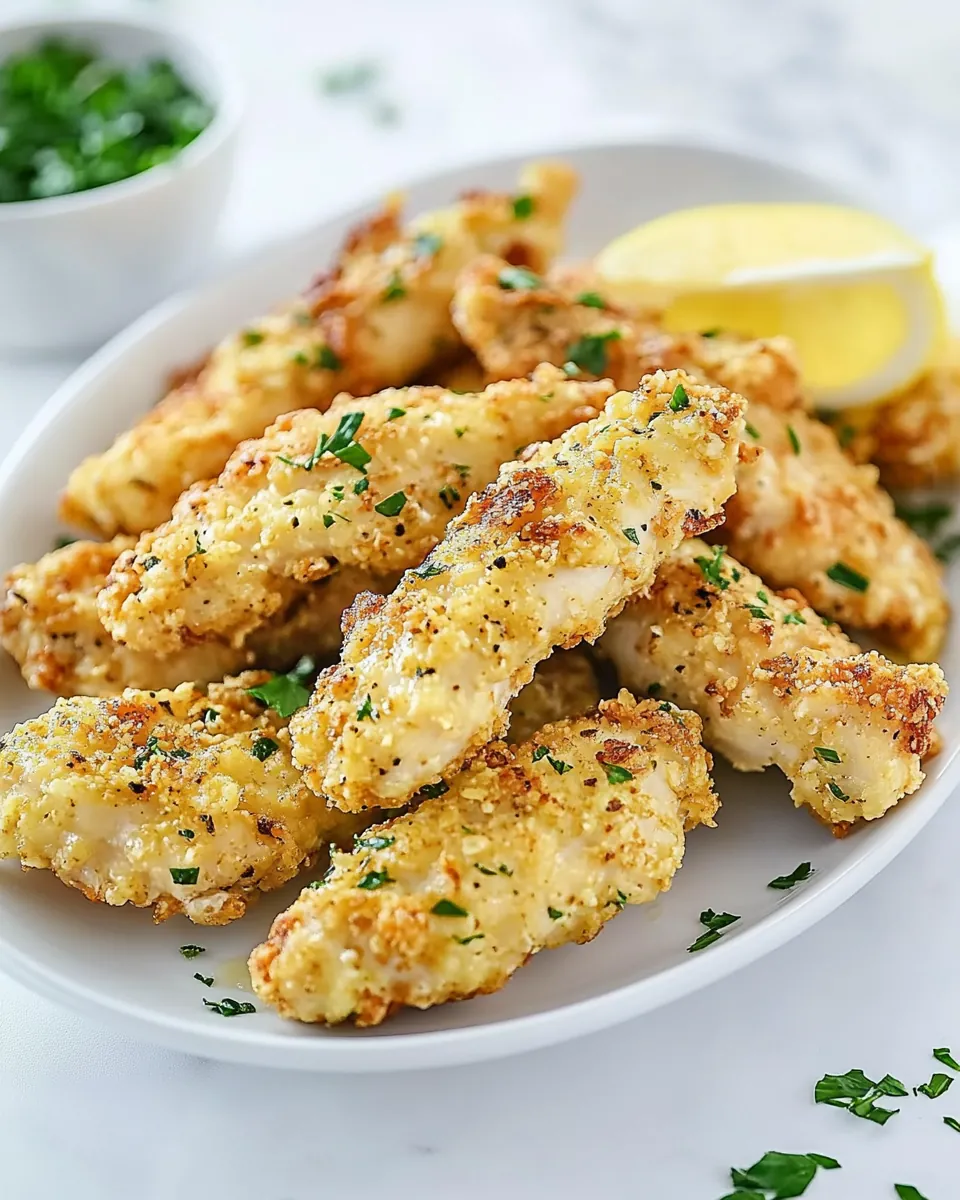
Piada Chicken Tenders
When I first stumbled upon the idea of making Piada Chicken Tenders, I was on a quest for something crispy, flavorful, and utterly satisfying. You know those days when you crave something comforting and indulgent, yet easy enough to whip up without a hassle? That’s precisely what these tenders deliver. The thought of tender pieces of chicken, perfectly marinated and fried to a golden brown, sends my taste buds into a frenzy. Each bite is a delightful combination of crunch and juiciness that reminds me of family gatherings where laughter is shared over delicious homemade meals.
Picture a sunny weekend afternoon, where the scent of fried chicken wafts through the kitchen, beckoning everyone to the table. As I prepare the chicken tenders, I can already envision dipping them into a zesty sauce, or perhaps serving them alongside a fresh salad. This dish is more than just food; it’s a celebration of flavors, a memory in the making. Whether you choose to serve it for a casual family dinner or at a weekend gathering with friends, Piada Chicken Tenders always steal the show.
Recipe Snapshot
25 mins
15 mins
10 mins
Medium
350 kcal
30 g
Paleo, Whole30, Vegan
18 g
Chef’s Knife, Mixing Bowl, Skillet
Why This Piada Chicken Tenders Shines
1. Irresistible Crunch
The first thing I love about Piada Chicken Tenders is their unbeatable crunch. The marriage of cake flour and cornstarch creates a light, crispy coating that holds up beautifully during frying. When you take that first bite, the satisfying crunch combined with the tender chicken makes your heart sing.
2. Perfect for Any Occasion
These tenders are incredibly versatile. Whether you’re serving them at a party, packing them for lunch, or enjoying them for dinner, they fit right in. The chicken tenders can be easily dressed up or down, depending on your mood, making them a fantastic addition to your recipe repertoire.
3. Simple Ingredients
I appreciate how simple and accessible the ingredients are. You’ll find most of them in your pantry already. The combination of buttermilk and chicken is a classic, but the addition of fresh parsley adds a vibrant touch that elevates the dish. It’s amazing how such basic ingredients can create something so delicious.
4. Quick and Easy Preparation
The preparation is a breeze! With just a bit of marinating time, the actual cooking is quick and straightforward. This means you can whip up a batch of Piada Chicken Tenders on a busy weeknight or when unexpected guests drop by. It’s a lifesaver when you want something homemade but don’t have hours to spend in the kitchen.
5. Endless Dipping Options
What’s not to love about the dipping sauces? From tangy barbecue to creamy ranch, the options are endless. You can customize your meal based on what you or your guests enjoy, allowing everyone to create their perfect bite.
6. Family Friendly
Lastly, Piada Chicken Tenders are a hit with kids and adults alike. Everyone loves crispy chicken, and these tenders are no exception. They’re an excellent way to introduce little ones to cooking as they can help with the breading process.
Ingredients to Make Piada Chicken Tenders
The ingredients in Piada Chicken Tenders come together to create a dish that’s both comforting and delicious. Each component plays a vital role in achieving that perfect bite. The star of the show is, of course, the chicken, which is marinated to absorb all the flavors. The buttermilk tenderizes the meat, while the blend of cake flour and cornstarch ensures a crunchy crust. Fresh parsley adds a hint of brightness to the overall flavor.
- 1 pound chicken tenders – The main protein in this dish, providing tenderness and flavor.
- 2 cups buttermilk – This ingredient helps to tenderize the chicken and adds moisture.
- Vegetable oil for frying – Essential for achieving that crispy texture when frying the tenders.
- 1 cup cake flour – This flour creates a light and crispy coating.
- 1/2 cup cornstarch – Helps to enhance the crunchiness of the coating.
- 1 1/2 teaspoons salt – Enhances the flavor of the chicken.
- 1/2 teaspoon ground black pepper – Adds a touch of spice to the coating.
- 1 tablespoon chopped fresh parsley – Provides a fresh flavor and a pop of color.
Preparation Steps for Piada Chicken Tenders
Preparing Piada Chicken Tenders is a delightful experience that fills your kitchen with wonderful aromas. Follow these steps closely, and you’ll have delicious tenders in no time. Don’t be afraid to get your hands a little messy; it’s all part of the fun!
First off, start by marinating the chicken tenders. In a gallon-sized zip-top bag or container, combine the chicken tenders and buttermilk. Make sure all the pieces are well-coated. Seal the bag and let it marinate in the refrigerator for about one hour. This step is crucial, as the buttermilk will tenderize the chicken and infuse it with flavor.
Next, it’s time to heat the oil. In a deep fryer or a heavy-bottomed pot, pour enough vegetable oil to submerge the tenders. Heat the oil to 350°F (175°C). Keep an eye on the temperature, as too hot can burn the coating, while too cold can make them greasy.
While the oil is heating, prepare the coating. In a shallow bowl, mix together the cake flour, cornstarch, salt, ground black pepper, and chopped parsley. Stir to combine. This dry mixture will create a beautiful crunchy exterior for your tenders.
After the marinating time is up, remove the chicken from the buttermilk and allow any excess to drip off. This is important to ensure that the coating sticks properly.
Now, dredge the chicken tenders in the flour mixture. Make sure each piece is thoroughly coated, then shake off the excess. This will help form a nice crust when frying. For best results, place the breaded chicken on a wire rack for about two minutes before cooking.
Once your oil is hot enough, carefully place a few tenders in the hot oil without overcrowding the fryer. Fry the chicken until it’s lightly golden brown, which should take about three to five minutes. The key here is to keep an eye on them to prevent burning.
After frying, use tongs to remove the tenders from the oil and place them on a paper towel-lined plate to drain any excess oil. This step is crucial for maintaining the crispiness of your Piada Chicken Tenders.
Repeat the frying process with the remaining chicken tenders, ensuring to keep the oil temperature consistent between batches. Once all the tenders are fried, it’s time to dig in!
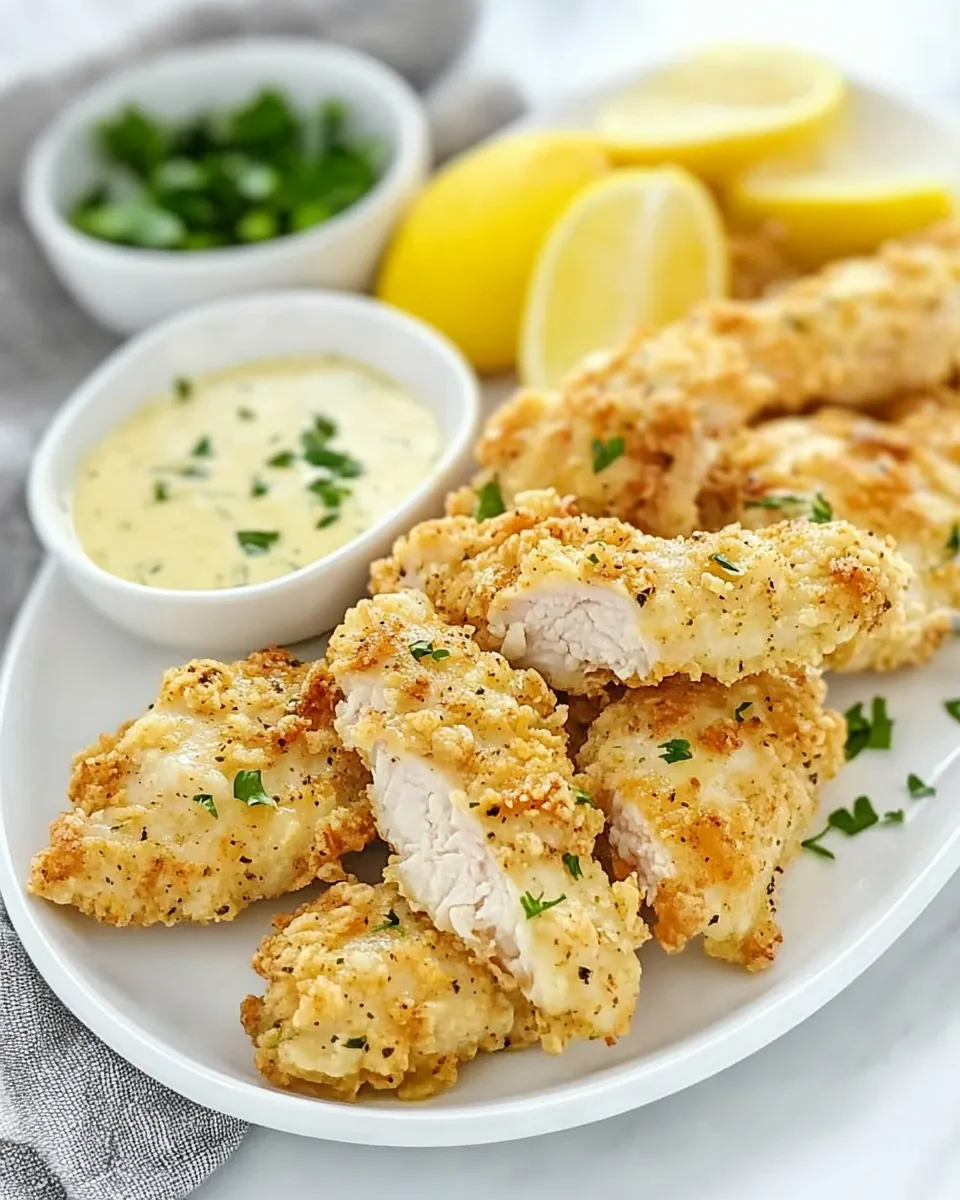
Serve your Piada Chicken Tenders hot with your favorite dipping sauces or enjoy them as they are. No matter how you serve them, they’re sure to be a hit!
Things Worth Knowing
- Marinating Time: Allowing the chicken to marinate in buttermilk is essential for flavor and tenderness. Don’t skip this step!
- Oil Temperature: Always use a thermometer to check the oil temperature. This ensures your tenders are crispy and cooked perfectly.
- Batch Cooking: Fry the tenders in batches to prevent overcrowding, which can lead to uneven cooking.
- Letting Excess Drip: Allowing excess buttermilk to drain from the tenders before dredging helps the coating stick better.
Helpful Notes about Piada Chicken Tenders
When it comes to making the perfect Piada Chicken Tenders, having a few tips in your back pocket can be a game-changer. These notes will help you achieve the best results!
- Storage: Store any leftovers in an airtight container in the refrigerator for up to three days. Reheat in the oven to retain crispiness.
- Freezing: You can freeze cooked tenders for up to two months. To enjoy, thaw in the refrigerator overnight and reheat in the oven.
- Pairing: These tenders pair beautifully with a refreshing salad or crispy fries for a complete meal.
- Variations: Experiment with different spices in the coating for a unique flavor twist!
- Serving Size: Keep in mind that these tenders are very filling, so adjust the serving size according to your guests.
Best Served With
Piada Chicken Tenders are an exciting dish that can be served in countless ways. Here’s how you can elevate your dining experience:
- Classic Fries: Pair the tenders with crispy French fries for the ultimate comfort food experience.
- Fresh Salad: A light green salad with a tangy vinaigrette complements the richness of the fried chicken.
- Dipping Sauces: Provide a variety of dipping sauces, such as honey mustard, ranch, or barbecue, to cater to everyone’s taste.
- Casual Gatherings: Serve these tenders at casual gatherings or family get-togethers where comfort food is a must.
- Game Day: These tenders are perfect for game day snacks. Serve them with a cold drink and enjoy the game!
- Picnics: Pack these tenders for a picnic; they are delicious even when cold!
FAQ
Conclusion
In summary, Piada Chicken Tenders combine irresistible flavors and textures, making them a dish that’s sure to please everyone at the table. With simple ingredients and a straightforward frying method, they allow for creativity in the kitchen while being incredibly satisfying. I encourage you to give this recipe a try; you’ll love the results and the smiles they bring. Serve them with your favorite sides and enjoy a wonderful meal with family and friends!
Piada Chicken Tenders
Ingredients
Equipment
Method
- First off, start by marinating the chicken tenders. In a gallon-sized zip-top bag or container, combine the chicken tenders and buttermilk. Make sure all the pieces are well-coated. Seal the bag and let it marinate in the refrigerator for about one hour. This step is crucial, as the buttermilk will tenderize the chicken and infuse it with flavor.
- Next, it’s time to heat the oil. In a deep fryer or a heavy-bottomed pot, pour enough vegetable oil to submerge the tenders. Heat the oil to 350°F (175°C). Keep an eye on the temperature, as too hot can burn the coating, while too cold can make them greasy.
- While the oil is heating, prepare the coating. In a shallow bowl, mix together the cake flour, cornstarch, salt, ground black pepper, and chopped parsley. Stir to combine. This dry mixture will create a beautiful crunchy exterior for your tenders.
- After the marinating time is up, remove the chicken from the buttermilk and allow any excess to drip off. This is important to ensure that the coating sticks properly.
- Now, dredge the chicken tenders in the flour mixture. Make sure each piece is thoroughly coated, then shake off the excess. This will help form a nice crust when frying. For best results, place the breaded chicken on a wire rack for about two minutes before cooking.
- Once your oil is hot enough, carefully place a few tenders in the hot oil without overcrowding the fryer. Fry the chicken until it’s lightly golden brown, which should take about three to five minutes. The key here is to keep an eye on them to prevent burning.
- After frying, use tongs to remove the tenders from the oil and place them on a paper towel-lined plate to drain any excess oil. This step is crucial for maintaining the crispiness of your Piada Chicken Tenders.
- Repeat the frying process with the remaining chicken tenders, ensuring to keep the oil temperature consistent between batches. Once all the tenders are fried, it’s time to dig in!
- Serve your Piada Chicken Tenders hot with your favorite dipping sauces or enjoy them as they are. No matter how you serve them, they’re sure to be a hit!
Notes
- Storage: Store any leftovers in an airtight container in the refrigerator for up to three days. Reheat in the oven to retain crispiness.
- Freezing: You can freeze cooked tenders for up to two months. To enjoy, thaw in the refrigerator overnight and reheat in the oven.
- Pairing: These tenders pair beautifully with a refreshing salad or crispy fries for a complete meal.
- Variations: Experiment with different spices in the coating for a unique flavor twist!
- Serving Size: Keep in mind that these tenders are very filling, so adjust the serving size according to your guests.