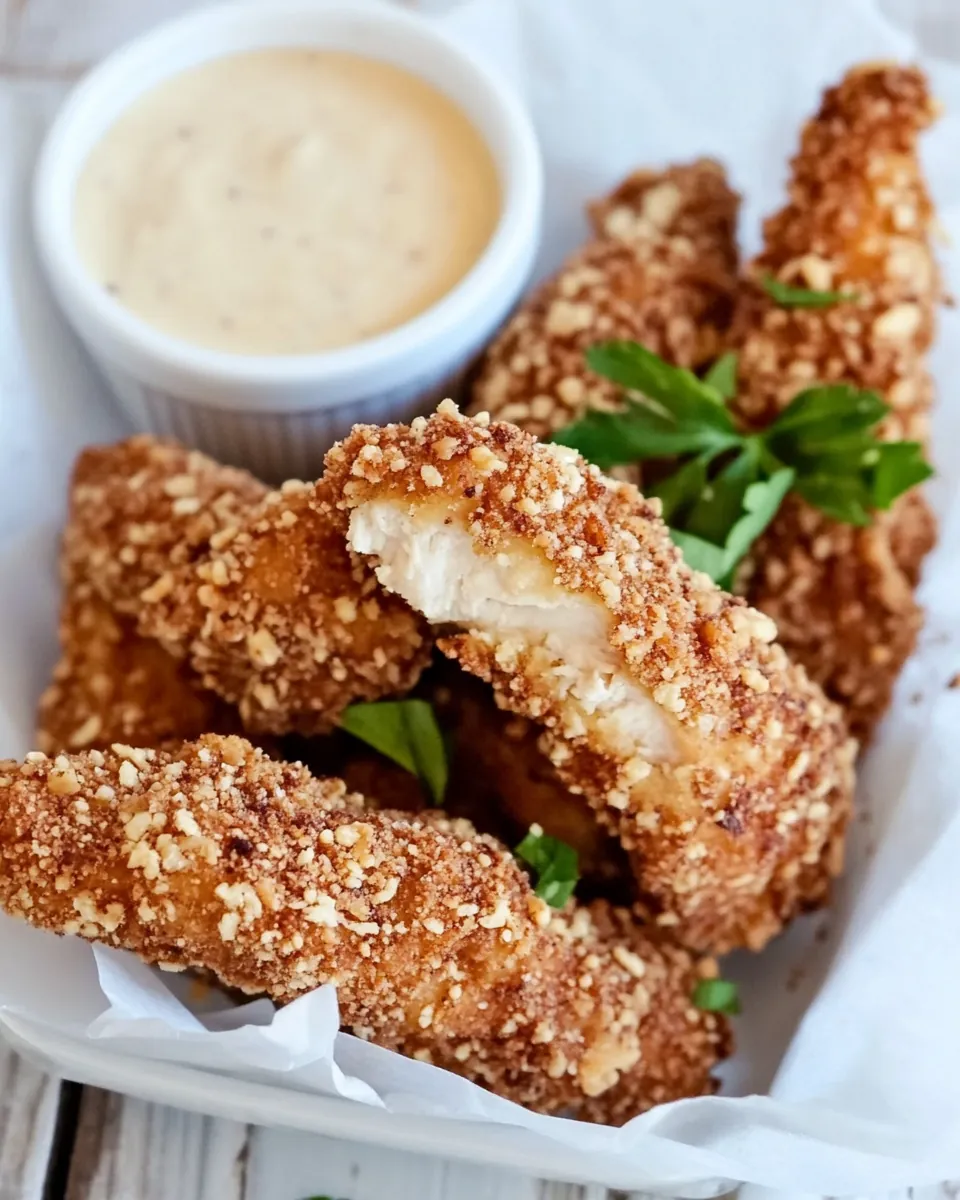
Peanut Crusted Chicken Fingers
There’s something undeniably satisfying about biting into a crispy, crunchy piece of chicken, especially when it’s coated in a deliciously nutty blend. That’s why I love making Peanut Crusted Chicken Fingers for my family. They’re not just a meal; they’re an experience. I remember the first time I made them for a weekend gathering. The kids were running around, and I was worried they wouldn’t be satisfied with anything less than finger food. That’s when I decided to whip up these tasty chicken fingers, and let me tell you, they were gone in minutes! The kids couldn’t get enough of that nutty crunch, and the adults were just as smitten. I think the secret lies in the combination of the honey roasted peanuts and the creamy dipping sauce that perfectly complements the juicy chicken. It’s one of those dishes that makes everyone feel at home, and the best part is, it’s incredibly easy to prepare. Whether it’s a casual family dinner or a game night, these chicken fingers always hit the spot.
Recipe Snapshot
45 mins
30 mins
15 mins
Medium
480 kcal
23 g
Gluten-Free, Low FODMAP
30 g
Dutch Oven, Deep-Frying Thermometer
Why This Peanut Crusted Chicken Fingers Hits Different
Irresistibly Crunchy
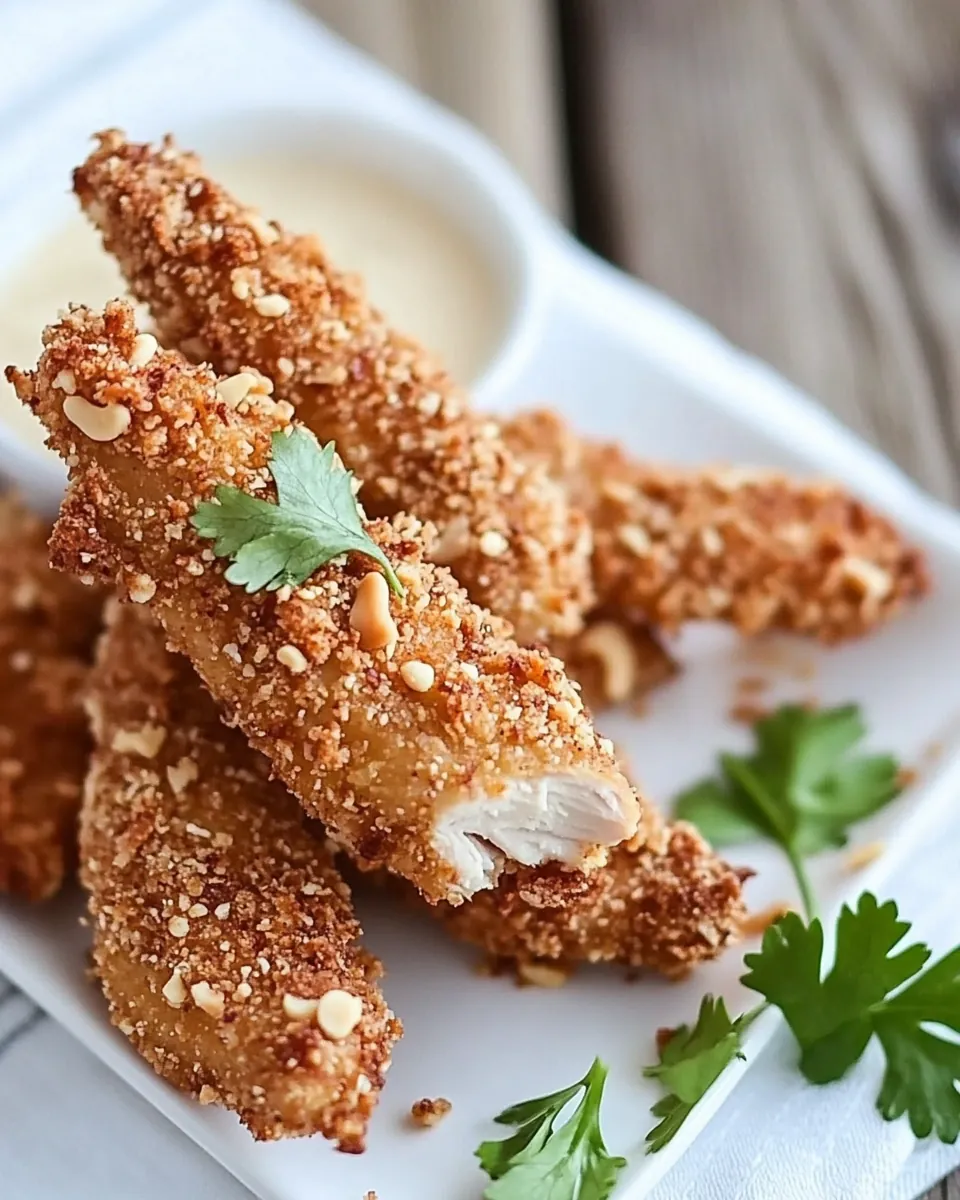
The texture of Peanut Crusted Chicken Fingers is something that truly sets it apart. Each bite is a delightful crunch from the panko and peanuts that contrasts beautifully with the tender, juicy chicken inside. It’s a texture combination that makes these chicken fingers not just food, but a real treat.
Nutty Flavor Explosion
What I love most about this recipe is the unique flavor profile. The sweetness of the honey roasted peanuts paired with the savory flavors of the chicken creates a taste sensation that’s hard to resist. It’s not just another chicken dish; it’s an adventure for your taste buds!
Perfect for Dipping
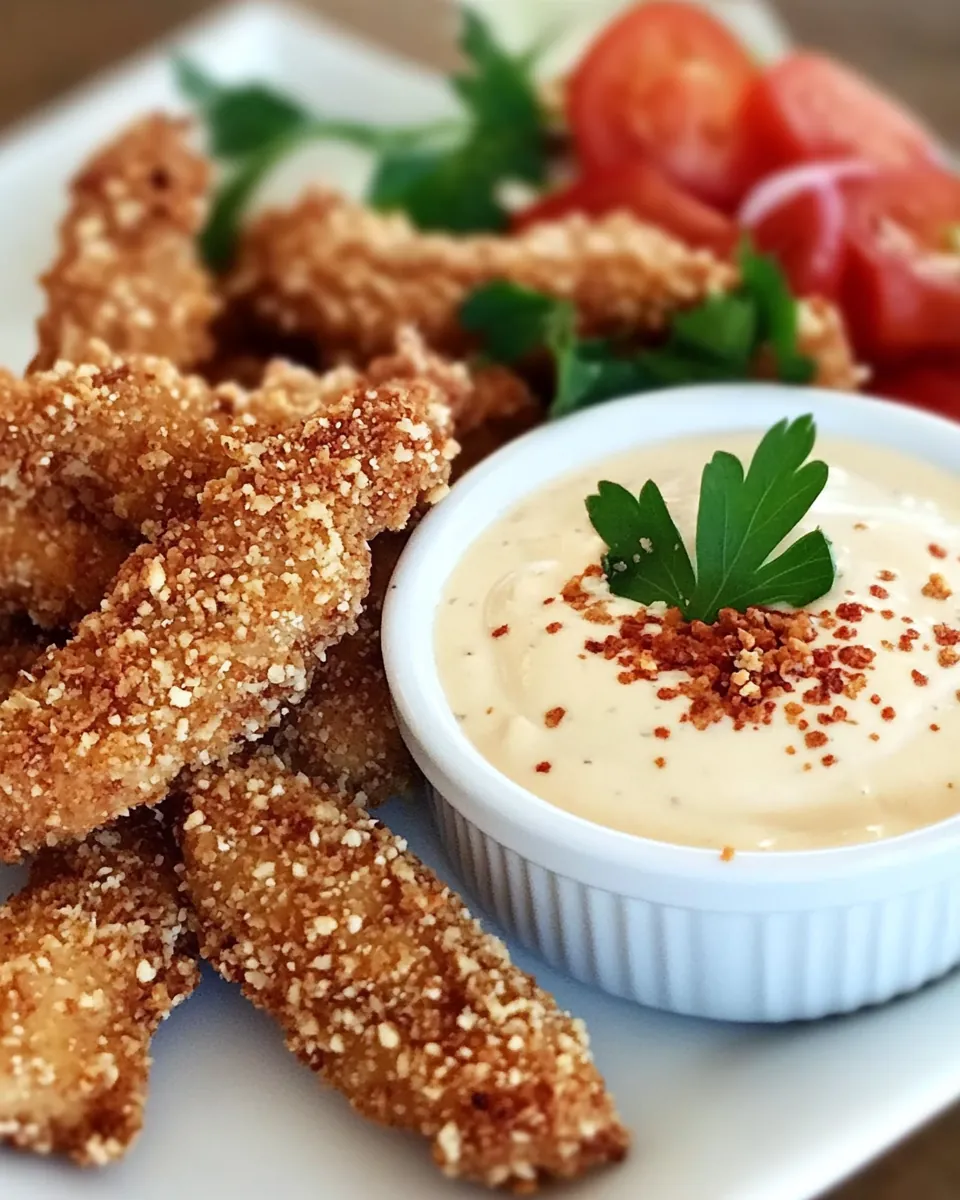
No finger food is complete without a great dip, and this recipe doesn’t disappoint. The creamy sauce you whip together enhances the rich flavors and adds a delightful creaminess that pairs wonderfully with the crunchy chicken. It’s perfect for dipping and makes every bite even more enjoyable.
Family-Friendly Fun
Kids love food they can eat with their hands, and these chicken fingers fit the bill perfectly. They’re fun to eat and even more fun to make together in the kitchen. I always invite the kids to help with the coating process, and it’s a fantastic way to get them involved in cooking.
Endless Versatility
One of my favorite aspects of the Peanut Crusted Chicken Fingers is their versatility. You can serve them as an appetizer, a main dish, or even add them to salads for a protein-packed meal. They’re just as great hot out of the fryer as they are served cold for lunch the next day!
Quick and Easy
On busy weeknights, the last thing you want is a complicated meal. Thankfully, these chicken fingers come together quickly and easily, making them the perfect solution for a weeknight dinner without sacrificing flavor or fun.
What to Gather for Peanut Crusted Chicken Fingers

When it comes to making Peanut Crusted Chicken Fingers, the ingredients are not only simple but also contribute to a fantastic flavor. Each component plays a crucial role in creating the perfect balance of crunchiness and taste. The key players here are the chicken, which provides a juicy base, and the honey roasted peanuts, which give that irresistible crunch and sweetness. Together, they create a dish that’s sure to please everyone.
- 1/2 cup Mayonnaise – Adds creaminess to the dipping sauce and keeps it rich.
- 2 tablespoons Dijon mustard – Brings a subtle tang that complements the sweetness of the peanuts.
- 2 tablespoons Maple syrup – Infuses the dip with natural sweetness.
- Salt and pepper – Essential seasonings that enhance all the flavors.
- 3 boneless, skinless chicken breasts – The heart of the dish; tender and juicy.
- 1 1/2 cups Panko bread crumbs – Creates that delightful crunch on the chicken.
- 1 cup Honey roasted peanuts – Ground to add a sweet, nutty flavor to the coating.
- 1/4 heaping teaspoon Cayenne pepper – Adds a little kick to the mix.
- 3/4 cup All-purpose flour – Helps the coating adhere to the chicken.
- 3 large eggs, lightly beaten – Binds the coating to the chicken.
- Vegetable oil – Needed for frying the chicken to golden perfection.
Directions for Peanut Crusted Chicken Fingers
Making Peanut Crusted Chicken Fingers is a delightful process that will fill your kitchen with mouthwatering aromas. Follow these steps to create a dish that’s sure to impress.
- In a small bowl, whisk together mayonnaise, Dijon mustard, and maple syrup. Don’t forget to season with a pinch of salt and pepper. Once mixed, refrigerate the sauce until it’s time to serve. This will allow the flavors to meld beautifully.
- Next, take the chicken breasts and cut each one lengthwise into 4 to 5 pieces. You want them to be evenly sized so they cook uniformly. Sprinkle these strips with salt and pepper to ensure they have flavor from the inside out.
- Now it’s time for the coating! Place the panko crumbs, honey roasted peanuts, and cayenne pepper in a food processor. Pulse until the mixture is finely ground. Transfer this crunchy mixture to a shallow bowl or pie pan for easy coating.
- In another shallow bowl, pour in the all-purpose flour. Make sure to season it generously with salt and pepper as well. This step is essential for building flavor. In yet another shallow bowl, crack and beat the eggs.
- Now comes the fun part! Take each piece of chicken, coat it in the seasoned flour, then dip it into the beaten eggs, and finally press it into the peanut mixture, ensuring each piece is well-coated. Lay the coated strips on a baking sheet lined with parchment paper.
- Preheat your oven to 350 degrees Fahrenheit. This will ensure the chicken gets that perfect finishing touch.
- In a Dutch oven, pour in about 1 to 2 inches of vegetable oil and heat it to 375 degrees. You can use a deep-frying thermometer to check the temperature; it’s crucial for achieving that crispy exterior.
- Working in batches, carefully place the chicken strips into the hot oil. Fry them for about 3 minutes on each side or until they’re golden brown and perfectly crispy. Once done, transfer them to a baking sheet lined with paper towels to absorb the excess oil.
- Finally, bake the fried chicken strips in the preheated oven for an additional 10 to 15 minutes. This step ensures they are cooked through and remain juicy inside.
- Serve your crispy Peanut Crusted Chicken Fingers with the creamy dipping sauce on the side. Enjoy every bite!
Things Worth Knowing
- Frying Temperature: Ensure your oil is at 375 degrees for that perfect crunch. If the oil is too cold, the chicken will absorb too much oil and become greasy.
- Coating Technique: Press the chicken into the peanut mixture firmly to create a thick, even coating. This will enhance the crunchiness after frying.
- Resting Time: Allow the fried chicken fingers to rest on paper towels. This helps absorb excess oil and keeps them crispy.
- Batch Cooking: Fry in small batches to prevent the oil temperature from dropping too much, which helps maintain the crispiness.
Variations to Try
If you’re looking to mix things up, here are some creative variations to try with your Peanut Crusted Chicken Fingers recipe. Each offers a unique twist that’s sure to delight!
- Spicy Kick: Add more cayenne pepper or even some hot sauce to the mayonnaise dip for an extra kick.
- Nut Mix: Experiment with different nuts like almonds or cashews for the coating – just make sure to adjust the grinding time.
- Oven-Baked Version: For a healthier option, bake the coated chicken fingers in the oven at 400 degrees for 20 to 25 minutes instead of frying.
- Herb Infusion: Mix in some dried herbs like thyme or oregano into the flour for added flavor.
- Fun Shapes: Instead of strips, try cutting the chicken into fun shapes using cookie cutters for the kids!
- Vegetarian Twist: Substitute chicken with firm tofu cut into strips for a vegetarian version.
- Serving Styles: Serve with a variety of dips like sweet chili sauce, ranch, or even a spicy peanut sauce for a fun dipping experience.
Serving Suggestions
When it comes to serving your Peanut Crusted Chicken Fingers, the possibilities are endless! Here are some delicious suggestions to elevate your meal experience:
- Pair with Fresh Salads: Serve alongside a vibrant mixed greens salad dressed with a light vinaigrette to balance the richness of the chicken.
- Casual Family Dinner: These chicken fingers make for a perfect weeknight dinner option that everyone will enjoy.
- Game Day Snack: Perfect for watching the big game. Serve them with a variety of dipping sauces for a fun finger food spread.
- Kids’ Lunchbox: Pack leftover chicken fingers in lunchboxes for an easy and satisfying meal at school.
- Seasonal Dishes: Complement your chicken fingers with seasonal sides, like sweet potato fries or a warm corn salad during summer.
- Dip Pairing: Offer an assortment of dips like barbecue sauce, honey mustard, or a spicy aioli to cater to different tastes.
- Picnic Ready: These chicken fingers are excellent for picnics or potlucks where they can be served cold.
FAQ
Conclusion
The Peanut Crusted Chicken Fingers are a delightful combination of flavors and textures, perfect for any occasion. Whether you’re hosting a party or just enjoying a family meal, these crispy chicken fingers will surely impress. I encourage you to give this recipe a try and experience the deliciousness for yourself!
Peanut Crusted Chicken Fingers
Ingredients
Equipment
Method
- In a small bowl, whisk together mayonnaise, Dijon mustard, and maple syrup. Season with salt and pepper. Refrigerate until needed.
- Cut each chicken breast lengthwise into 4-5 pieces. Season with salt and pepper.
- Place panko crumbs, peanuts, and cayenne pepper in a food processor and process until finely ground. Pour into a shallow bowl or pie pan.
- Place flour in another shallow bowl or pie pan. Season generously with salt and pepper.
- Place eggs in a shallow bowl.
- Coat each chicken piece in flour, dip in eggs, and then coat in peanut mixture, pressing to coat well. Place strips on a baking sheet.
- Preheat oven to 350 degrees.
- Pour 1-2 inches oil in a Dutch oven and heat oil to 375 degrees.
- Working in batches, fry strips until golden brown, about 3 minutes on each side. Place on baking sheet.
- Bake chicken strips for 10 to 15 minutes, or until cooked through.
- Serve with dipping sauce.
Notes
- Storage: Keep leftovers in an airtight container in the fridge for up to 3 days.
- Freezing: You can freeze uncooked, coated chicken for up to 2 months. Thaw in the fridge before frying.
- Pairing: Serve with fresh vegetable sticks or a light salad for a complete meal.
- Serving Cold: These chicken fingers can be served cold, making them great for lunchboxes.
- Creative Dips: Experiment with different dips like ranch or barbecue for varied flavors.