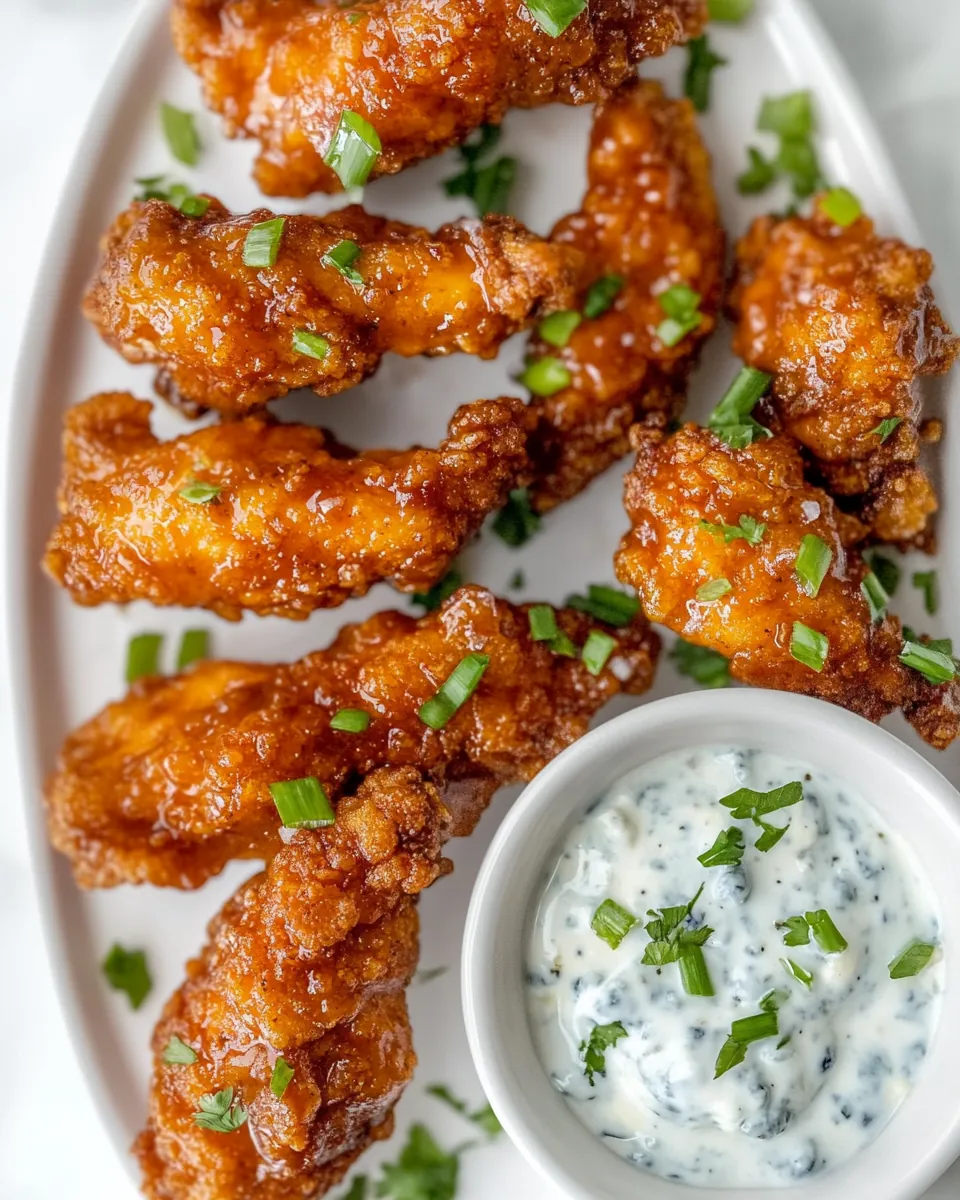
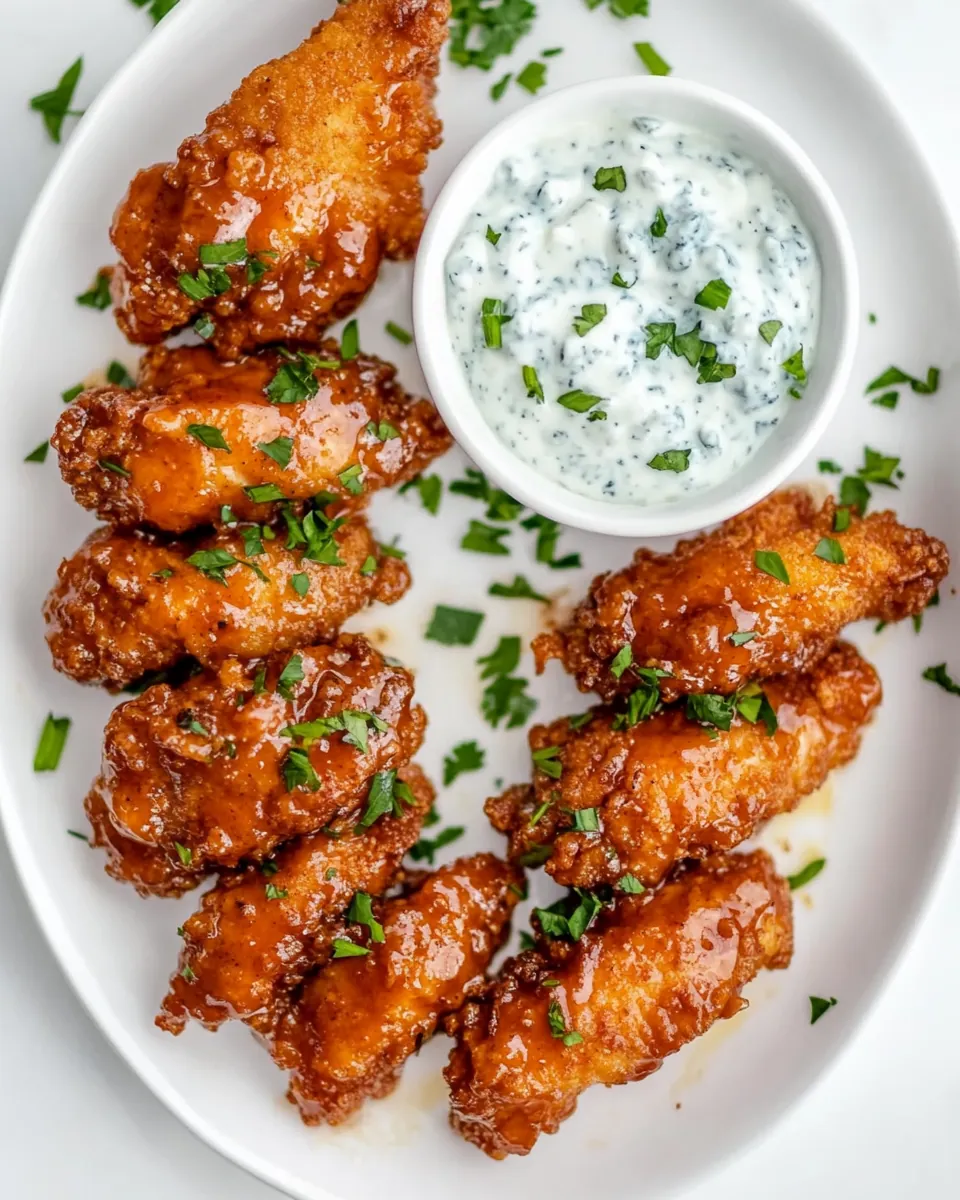
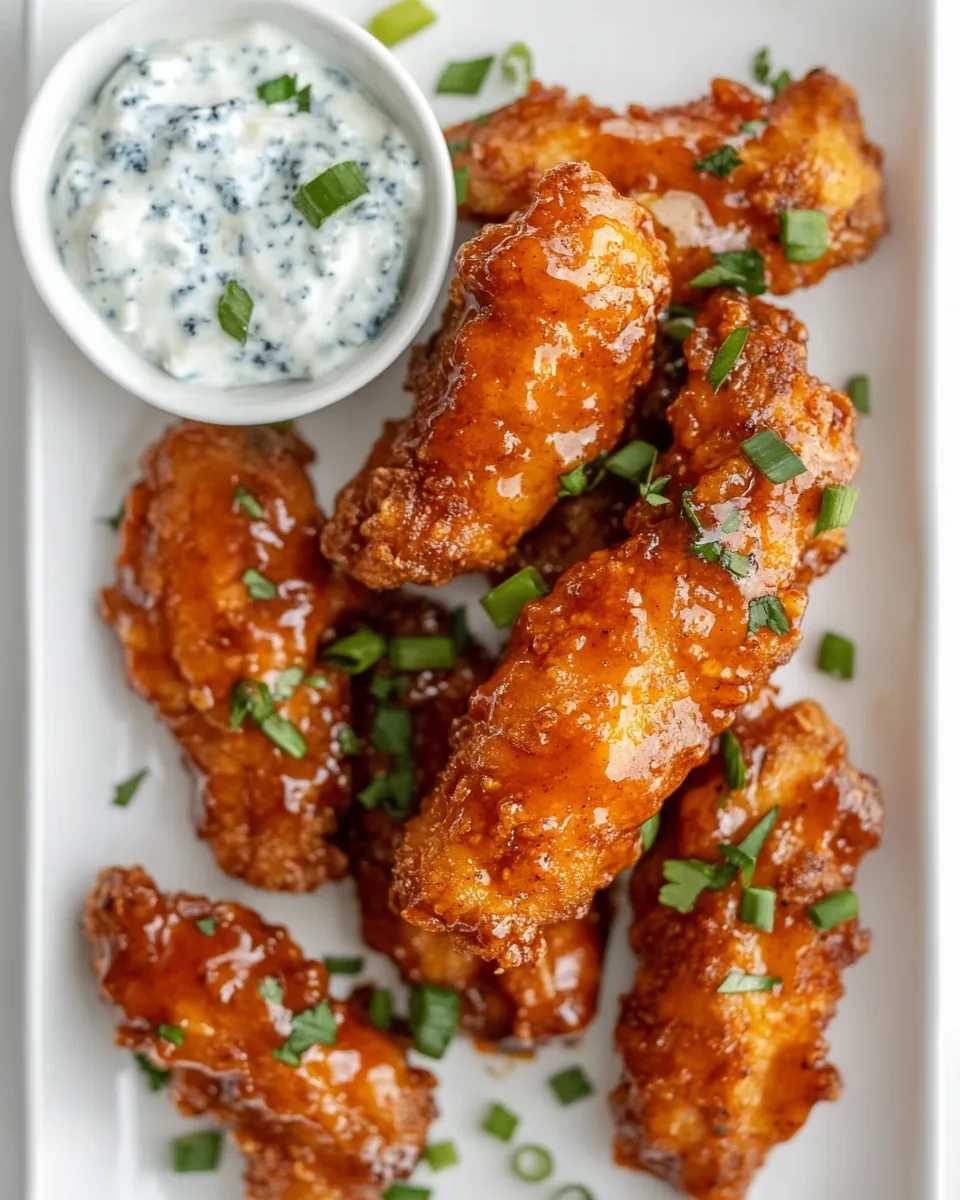
Sticky Chicken Fingers
The first time I made Sticky Chicken Fingers, I was searching for a dish that could bring my friends together for a casual game night. As the aroma of crispy, tender chicken filled my kitchen, I could see their faces light up. This dish is not just a meal; it’s a fun, interactive experience that turns any gathering into a memorable occasion. Dipped in a creamy yogurt blue cheese sauce, these chicken fingers became the star of the evening, leaving everyone wanting more. Each bite was a crunchy delight, with a sweet and spicy twist that had everyone raving. I knew I had struck gold with this recipe, and it quickly became a go-to in my household for both family dinners and friendly gatherings.
Recipe Snapshot
45 mins
15 mins
30 mins
Medium
440 kcal
25 g
Gluten-Free
22 g
Chef’s Knife, Whisk, Large Pot, Wooden Spoon, Saucepan, Mixing Bowl, Frying Pan, Baking Sheet, Oven
The Beauty of This Sticky Chicken Fingers
Perfectly Crispy Texture
One of the standout features of Sticky Chicken Fingers is the texture. The combination of panko breadcrumbs and seasoned fine breadcrumbs creates an incredibly crispy coating that holds up beautifully, even when tossed in sauce.
Flavorful Sauce
The sauce, a delightful blend of brown sugar and buffalo wing sauce, adds a perfect balance of sweetness and heat. It’s a crowd-pleaser that elevates the simple chicken fingers into something extraordinary.
Healthier Option
I love that this recipe offers a healthier alternative to traditional fried chicken fingers. By baking instead of frying, we get all the crunch without the guilt, making it a fantastic choice for those conscious about their health.
Versatile Serving Options
Whether it’s game day, a family dinner, or a casual get-together, Sticky Chicken Fingers fit in perfectly. They can be served as an appetizer or a main dish, allowing for versatility in any meal setting.
Fun to Customize
This dish invites creativity! Add your favorite spices or adjust the sauce to make it your own. I love experimenting with different dipping sauces, making it fun for everyone to find their perfect match.
Great for Kids and Adults
Kids love the fun of dipping their chicken fingers, while adults appreciate the sophisticated flavors. It’s a dish that bridges generations and brings everyone together, making it a staple in my recipe collection.
Ingredients to Make Sticky Chicken Fingers
When it comes to the ingredients for Sticky Chicken Fingers, each one plays a vital role in creating a delectable dish. The key players, from the tender chicken to the crispy breadcrumbs, come together to create a symphony of flavors and textures that is sure to impress.
- 1 pound chicken tenders – These juicy pieces are perfect for quick cooking and are easy to handle, making them ideal for finger food.
- Kosher salt and pepper – Essential seasonings that enhance the flavor of the chicken.
- Garlic powder – Adds a savory depth that complements the other ingredients beautifully.
- 1 cup flour – This is used to create a base coating that helps the egg and breadcrumbs stick to the chicken.
- 2 large eggs, lightly beaten – These act as a binding agent, ensuring the breadcrumbs adhere well.
- 3/4 cup panko breadcrumbs – Provides an extra crunch that makes the fingers irresistible.
- 1/4 cup seasoned fine breadcrumbs – Adds flavor and texture to the coating.
- Olive oil spray – A light mist helps achieve a golden-brown crust without excessive oil.
- 1 cup brown sugar – Sweetens the sauce and balances the heat from the wing sauce.
- 1/4 cup buffalo wing sauce – Provides a spicy kick that elevates the dish.
- 3 tablespoons unsalted butter – Adds richness to the sauce and enhances its flavor.
- 1 tablespoon water – Helps to combine the sauce ingredients smoothly.
- 1 cup plain Greek yogurt – A creamy base for dipping, offering a cooling contrast to the heat.
- 1 lemon, juiced – Brightens the dip and enhances the overall flavor.
- Big pinch of kosher salt and pepper – Used in the dip to boost the flavor.
- 3/4 cup crumbled blue cheese – Crumbled on top of the dip, adding tanginess and creaminess.
- 2 green onions, thinly sliced – Adds a fresh crunch and visual appeal to the dish.
How to Assemble Sticky Chicken Fingers

Assembling Sticky Chicken Fingers is a straightforward process that anyone can master. The steps are simple and each one brings you closer to that crispy, savory delight. Let’s dive into the method!
Preheat your oven to 425 degrees F. This is essential for achieving that golden-brown color on your chicken. Line a baking sheet with a wire rack to allow for even cooking and crispiness.
Generously spray the wire rack with nonstick spray, such as olive oil or avocado oil. This step ensures that your chicken fingers won’t stick and helps the breading stay intact.
Prepare three shallow bowls or large plates for breading. In the first, pour in the flour. In the second, crack and lightly beat the eggs. In the third bowl, mix together the panko breadcrumbs and the seasoned fine breadcrumbs.
Sprinkle the chicken tenders all over with kosher salt, pepper, and garlic powder. This seasoning enhances the flavor and ensures the chicken is well-seasoned.
One at a time, dip each piece of chicken into the flour, making sure to coat it completely, shaking off any excess. This helps the egg stick.
Next, dip the floured chicken into the beaten eggs, allowing any excess to drip off. This step is key for making the breadcrumbs adhere.
Now, roll the chicken in the breadcrumb mixture, pressing gently so the crumbs adhere well. Place each coated piece on the sprayed wire rack, giving them space to breathe.
Once all the chicken is coated, bake in the preheated oven for 12 minutes. After that, gently flip each piece and bake for another 12 minutes. You want them to be golden and cooked through.
While the chicken bakes, prepare the sauce. In a saucepan, combine brown sugar, buffalo wing sauce, butter, and water. Heat over medium heat, whisking until the sugar dissolves.
Allow the mixture to come to a boil, watching carefully to prevent burning. Once boiling, reduce to a simmer and cook for about 2 minutes. Then, turn off the heat and let it cool.
Once the chicken is cooked, carefully lift it from the wire rack using a spatula or tongs. Place it in a bowl and drizzle the sauce over the top. Toss lightly to coat, but avoid letting the chicken sit too long in the sauce to keep the breading intact.
For the creamy dip, combine plain Greek yogurt, lemon juice, blue cheese, and a pinch of kosher salt and pepper in a bowl. Mash the blue cheese as you mix until well combined. Serve this dip alongside your chicken fingers for a delightful contrast.
Finally, garnish with green onions for a fresh touch. Enjoy your Sticky Chicken Fingers with family and friends!
Things Worth Knowing
- Ensure even cooking: Using a wire rack allows hot air to circulate around the chicken, ensuring all sides get crispy.
- Be mindful of the sauce: If the chicken sits too long in the sauce, the coating can become soggy. Toss just before serving.
- Experiment with spices: Feel free to add your favorite spices or herbs to the breadcrumb mixture for extra flavor.
- Check for doneness: The chicken should reach an internal temperature of 165 degrees F to be safe for consumption.
Tips for Success
To ensure your Sticky Chicken Fingers turn out perfectly, here are some invaluable tips to keep in mind:
- Storage: Store any leftovers in an airtight container in the refrigerator for up to 3 days.
- Freezing: You can freeze the unbaked chicken fingers for up to 3 months. Just bread them and place them on a baking sheet before freezing.
- Pairing: Serve these chicken fingers with classic sides like fries, coleslaw, or a fresh salad for a complete meal.
- Make it a meal: Pair with a refreshing drink or a light dessert to balance out the flavors.
- Adjust the spice level: If you prefer a milder flavor, reduce the amount of buffalo wing sauce or serve with ranch dressing instead.
What Goes Well With This Sticky Chicken Fingers
When it comes to serving Sticky Chicken Fingers, the possibilities are endless. Here are some fantastic ideas to complement your dish:
- Fries: A classic pairing, crispy fries are always a hit. Try them with a sprinkle of seasoning for an added kick.
- Coleslaw: The crunch and creaminess of coleslaw provide a refreshing contrast to the crispy chicken.
- Salads: A light salad with a tangy vinaigrette can balance the richness of the chicken fingers.
- Dips: Offer a variety of dips, such as ranch or honey mustard, to enhance the flavor experience.
- Occasions: These chicken fingers are perfect for game nights, casual dinners, or even as appetizers at parties.
- Seasonal Pairings: In warmer months, serve with fresh vegetable sides or a fruit salad to lighten the meal.
FAQ
Conclusion
In conclusion, Sticky Chicken Fingers stand out as a delightful fusion of flavors and textures that never fails to impress. Their crispy coating and flavorful sauce make them a favorite for any occasion. I encourage you to try making these chicken fingers at home; they just might become your new go-to recipe for gatherings! Trust me, once you serve these at your next event, everyone will be asking for seconds.
Sticky Chicken Fingers
Ingredients
Equipment
Method
- Step 1: Preheat your oven to 425 degrees F. This is essential for achieving that golden-brown color on your chicken. Line a baking sheet with a wire rack to allow for even cooking and crispiness.
- Step 2: Generously spray the wire rack with nonstick spray, such as olive oil or avocado oil. This step ensures that your chicken fingers won’t stick and helps the breading stay intact.
- Step 3: Prepare three shallow bowls or large plates for breading. In the first, pour in the flour. In the second, crack and lightly beat the eggs. In the third bowl, mix together the panko breadcrumbs and the seasoned fine breadcrumbs.
- Step 4: Sprinkle the chicken tenders all over with kosher salt, pepper, and garlic powder. This seasoning enhances the flavor and ensures the chicken is well-seasoned.
- Step 5: One at a time, dip each piece of chicken into the flour, making sure to coat it completely, shaking off any excess. This helps the egg stick.
- Step 6: Next, dip the floured chicken into the beaten eggs, allowing any excess to drip off. This step is key for making the breadcrumbs adhere.
- Step 7: Now, roll the chicken in the breadcrumb mixture, pressing gently so the crumbs adhere well. Place each coated piece on the sprayed wire rack, giving them space to breathe.
- Step 8: Once all the chicken is coated, bake in the preheated oven for 12 minutes. After that, gently flip each piece and bake for another 12 minutes. You want them to be golden and cooked through.
- Step 9: While the chicken bakes, prepare the sauce. In a saucepan, combine brown sugar, buffalo wing sauce, butter, and water. Heat over medium heat, whisking until the sugar dissolves.
- Step 10: Allow the mixture to come to a boil, watching carefully to prevent burning. Once boiling, reduce to a simmer and cook for about 2 minutes. Then, turn off the heat and let it cool.
- Step 11: Once the chicken is cooked, carefully lift it from the wire rack using a spatula or tongs. Place it in a bowl and drizzle the sauce over the top. Toss lightly to coat, but avoid letting the chicken sit too long in the sauce to keep the breading intact.
- Step 12: For the creamy dip, combine plain Greek yogurt, lemon juice, blue cheese, and a pinch of kosher salt and pepper in a bowl. Mash the blue cheese as you mix until well combined. Serve this dip alongside your chicken fingers for a delightful contrast.
- Step 13: Finally, garnish with green onions for a fresh touch. Enjoy your Sticky Chicken Fingers with family and friends!
Notes
- Tip 1: Store any leftovers in an airtight container in the refrigerator for up to 3 days.
- Tip 2: You can freeze the unbaked chicken fingers for up to 3 months. Just bread them and place them on a baking sheet before freezing.
- Tip 3: Serve these chicken fingers with classic sides like fries, coleslaw, or a fresh salad for a complete meal.
- Tip 4: Pair with a refreshing drink or a light dessert to balance out the flavors.
- Tip 5: If you prefer a milder flavor, reduce the amount of buffalo wing sauce or serve with ranch dressing instead.