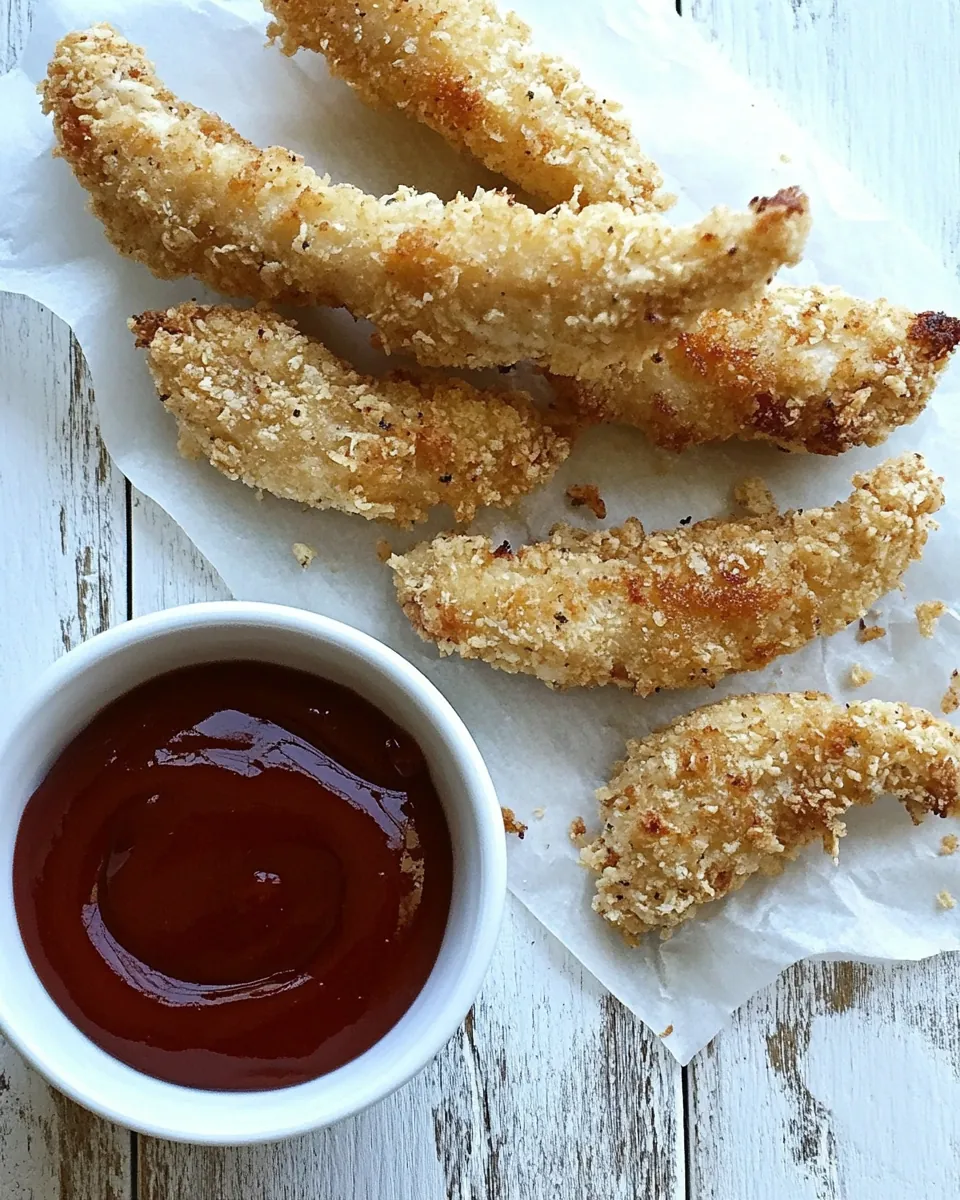
Shake and Bake Chicken Fingers
When it comes to family favorites, Shake and Bake Chicken Fingers always hits the spot. I remember growing up and watching my parents whip up the perfect crispy chicken tenders, filling the house with mouthwatering aromas. It’s one of those dishes that instantly transports me to my childhood kitchen, where laughter and joy were as common as the delicious food being served. This recipe is not just about the chicken; it’s a celebration of flavors and memories. Whether it’s a casual weeknight dinner or a gathering with friends, Shake and Bake Chicken Fingers is sure to impress. Let’s dive into the details of this delightful dish!
Recipe Snapshot
30 mins
10 mins
20 mins
Medium
320 kcal
35 g
Gluten-Free, Low FODMAP
12 g
Whisk, Wooden Spoon, Mixing Bowl, Baking Sheet, Oven
The Best Thing About This Shake and Bake Chicken Fingers
Quick and Easy Preparation
Nothing beats the simplicity of Shake and Bake Chicken Fingers. With minimal prep time, you can have a delicious meal ready in no time. It’s perfect for those busy weeknights or when unexpected guests drop by.
Crispy and Flavorful
The coating made from Corn Chex or Rice Chex not only adds a delightful crunch but also infuses the chicken with a savory flavor that everyone loves. You won’t miss the deep frying, and your waistline will thank you!
Customizable to Your Taste
One of my favorite aspects of Shake and Bake Chicken Fingers is how versatile it is. You can easily adjust the seasonings or even the type of dipping sauces to cater to your family’s preferences. Spicy, tangy, or sweet, the choice is yours!
Kid-Approved
This recipe has consistently won the hearts of kids and adults alike. My children love to help in the kitchen, shaking the bag to coat the chicken, and they always look forward to devouring these crispy bites.
Perfect for Any Occasion
Whether it’s a casual picnic, a birthday party, or just a cozy family dinner, Shake and Bake Chicken Fingers are a fantastic choice. They’re fun to eat and guaranteed to be a hit!
Healthier Alternative
By opting for baking instead of frying, you’re making a healthier choice without sacrificing taste. This dish allows you to enjoy the flavors you love while keeping your meal a bit lighter.
Ingredients to Make Shake and Bake Chicken Fingers
The ingredients for Shake and Bake Chicken Fingers come together beautifully, creating a dish that is not only delicious but also simple to prepare. Each ingredient has its own role in enhancing the overall flavor and texture of this dish. The key players like chicken tenders and the crunchy cereal coating work in harmony to bring out the best in each other.
- Corn Chex Cereal or Rice Chex Cereal – 2 cups; These cereals provide the perfect crunch and a delightful texture to the chicken fingers.
- Parmesan cheese – 1/4 cup; Adds a savory depth of flavor that enhances the overall taste.
- Garlic salt – 1 teaspoon; Brings a wonderful aromatic flavor that complements the chicken.
- Parsley flakes – 1 teaspoon; A touch of color and freshness to the dish.
- Salt and pepper – to taste; Essential seasonings that enhance the flavors.
- Eggs – 2 beaten; Acts as a binding agent for the crumb coating.
- Milk – 2 tablespoons; Helps to enhance the flavor of the egg wash.
- Chicken tenders – 1 to 1.5 lbs; The star of the dish, juicy and tender.
- Dipping sauces – any desired flavor; Perfect for adding an extra dimension to each bite.
Step by Step Instructions for Shake and Bake Chicken Fingers
Making Shake and Bake Chicken Fingers is a satisfying experience. From the first step to the last, you’ll see how easy and rewarding this recipe is. Let’s get cooking!
Preheat your oven to 375 degrees Fahrenheit. This is the perfect temperature for achieving that golden brown crust on your chicken fingers.
Prepare your baking sheet by lining it with foil and placing a cooling rack on top. Spray it lightly with some non-stick spray to ensure nothing sticks.
In a large Ziploc bag, pour in the Corn Chex or Rice Chex. Seal the bag tightly and crush the cereal into fine crumbs. You can use a rolling pin or your hands for this step.
Once the cereal is crushed, stir in the parmesan cheese, garlic salt, parsley flakes, and a pinch of salt and pepper. Seal the bag again and shake well to mix all the ingredients.
In a large bowl, whisk together the eggs and milk. This mixture will coat the chicken, helping the crumbs adhere better.
Take the chicken tenders and dip each piece into the egg mixture, ensuring they are fully coated.
Next, place the coated chicken tenders into the Ziploc bag with the prepared crumb coating. Seal the bag and shake gently until all the chicken is well coated with crumbs.
Remove each chicken tender from the bag and place them on the prepared cooling rack. Make sure they are well spaced for even cooking.
Bake in the preheated oven for about 15 to 20 minutes. The cooking time may vary depending on the size of your chicken tenders. Keep an eye on them until they are golden brown and cooked through.
Once baked, let the chicken fingers cool for about 5 minutes. This will allow them to crisp up even more. Serve them warm with your choice of dipping sauces and enjoy!
Things Worth Knowing
- Don’t Skip the Cooling Rack: Using a cooling rack helps air circulate around the chicken fingers, ensuring they stay crispy instead of getting soggy.
- Experiment with Seasonings: Feel free to adjust the seasonings in the crumb mixture to suit your taste. Adding a bit of cayenne pepper can give it a nice kick!
- Use Quality Chicken: Opt for high-quality chicken tenders for the best flavor and texture. Fresh chicken makes a significant difference.
- Check for Doneness: Use a meat thermometer to check that the internal temperature of the chicken reaches 165 degrees Fahrenheit for safety.
Ways to Customize
There are so many ways to make Shake and Bake Chicken Fingers your own. Here are some ideas to help you customize the recipe.
- Storage: To store leftovers, place them in an airtight container in the refrigerator for up to three days. Reheat them in the oven for crispiness.
- Freezing: You can freeze uncooked chicken fingers. Just assemble them, freeze them on a baking sheet, and then transfer to a freezer bag. Bake from frozen for a longer time.
- Pairing: Serve these chicken fingers with a variety of dipping sauces such as honey mustard, ranch, or a spicy mayo for added flavor.
- Herb Variations: Try adding different herbs to the crumb mixture, such as oregano or thyme, to switch up the flavor profile.
- Serving with Sides: Pair your chicken fingers with a refreshing salad or some crispy fries for a complete meal.
- Grain-Free Option: Substitute the cereal with crushed nuts or seeds for a grain-free version.
Great Combinations for Shake and Bake Chicken Fingers
When serving Shake and Bake Chicken Fingers, consider adding complementary sides that enhance the meal. Here are some great ideas:
- Fresh Salad: A simple green salad with a light vinaigrette complements the crispy chicken well.
- Sweet Potato Fries: These provide a delicious balance to the savory chicken fingers and are a healthier alternative to regular fries.
- Dipping Sauces: Offer a selection of dipping sauces like barbecue, ranch, or a zesty garlic aioli for variety.
- Corn on the Cob: A buttery corn on the cob pairs perfectly, adding a sweet crunch to the meal.
- Family Gatherings: These chicken fingers are a hit at parties, picnics, or barbecues, making them the perfect dish for social occasions.
- Lunchbox Treat: They can also be packed into lunchboxes as a tasty and fun meal option for kids.
FAQ
Conclusion
Shake and Bake Chicken Fingers are more than just a meal; they evoke warm memories and delicious flavors. I truly believe this recipe is a staple for any kitchen, combining ease and taste into one delightful package. I encourage you to try making them for your next dinner—trust me, everyone will be asking for seconds!
Shake and Bake Chicken Fingers
Ingredients
Equipment
Method
- Preheat your oven to 375 degrees Fahrenheit. This is the perfect temperature for achieving that golden brown crust on your chicken fingers.
- Prepare your baking sheet by lining it with foil and placing a cooling rack on top. Spray it lightly with some non-stick spray to ensure nothing sticks.
- In a large Ziploc bag, pour in the Corn Chex or Rice Chex. Seal the bag tightly and crush the cereal into fine crumbs. You can use a rolling pin or your hands for this step.
- Once the cereal is crushed, stir in the parmesan cheese, garlic salt, parsley flakes, and a pinch of salt and pepper. Seal the bag again and shake well to mix all the ingredients.
- In a large bowl, whisk together the eggs and milk. This mixture will coat the chicken, helping the crumbs adhere better.
- Take the chicken tenders and dip each piece into the egg mixture, ensuring they are fully coated.
- Next, place the coated chicken tenders into the Ziploc bag with the prepared crumb coating. Seal the bag and shake gently until all the chicken is well coated with crumbs.
- Remove each chicken tender from the bag and place them on the prepared cooling rack. Make sure they are well spaced for even cooking.
- Bake in the preheated oven for about 15 to 20 minutes. The cooking time may vary depending on the size of your chicken tenders. Keep an eye on them until they are golden brown and cooked through.
- Once baked, let the chicken fingers cool for about 5 minutes. This will allow them to crisp up even more. Serve them warm with your choice of dipping sauces and enjoy!