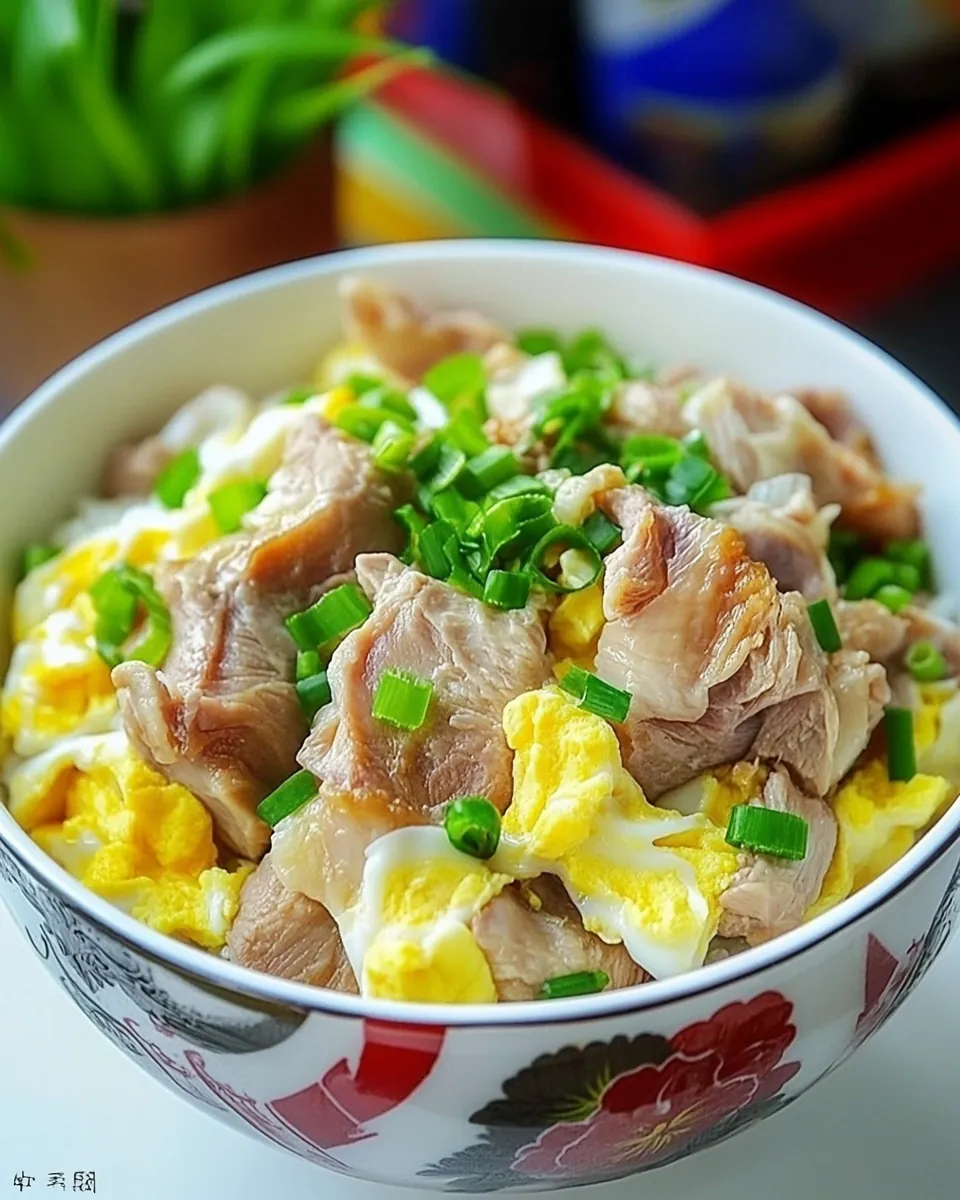
Oyakodon
The Oyakodon has a special place in my kitchen. It’s one of those dishes that brings back fond memories, a warm hug on a chilly day, or a quick comfort meal after a long day at work. Whenever I make Oyakodon, I can’t help but recall the first time I tasted this delightful Japanese chicken and egg rice bowl. The savory aroma wafting through the kitchen made my mouth water, and with each bite, I was transported to a cozy izakaya in Tokyo. The combination of tender chicken, fluffy eggs, and perfectly cooked rice is truly a match made in heaven.
This dish isn’t just about the food; it’s about connection. It brings family and friends together, whether you’re enjoying it for a casual lunch or a relaxed dinner. The beauty of Oyakodon is in its simplicity; it’s made with everyday ingredients, and yet it delivers a burst of flavor that leaves you craving more. Plus, it’s so quick and easy to whip up, making it perfect for weeknight dinners when you’re short on time but still want something delicious. I often find myself tweaking the recipe, adding a bit of this or that, and it never fails to hit the spot. Whether you’re a seasoned chef or a beginner, making Oyakodon is an experience worth having.
Recipe Snapshot
20 mins
10 mins
10 mins
Medium
450 kcal
30 g
Keto, Low FODMAP
20 g
Chef’s Knife, Large Pot, Wooden Spoon, Saucepan, Frying Pan
What You’ll Enjoy About This Oyakodon
It’s Comforting
Every bite of Oyakodon feels like a warm hug. The combination of tender chicken, fluffy eggs, and savory broth creates a dish that is immensely satisfying and comforting, especially on cold days.
Easy to Make
This recipe is perfect for those busy weeknights. With just a few ingredients, you can have a delicious and fulfilling meal on the table in no time.
Flavorful and Rich
The rich flavors of the broth, enhanced by the mirin and soy sauce, make every mouthful of Oyakodon burst with umami, leaving you wanting another bite.
Versatile
You can easily customize Oyakodon to your taste. Feel free to add vegetables or adjust the seasonings to make it your own.
Perfect for Leftovers
This dish reheats beautifully, making it an excellent option for meal prep. The flavors deepen and improve after a day in the fridge.
A Great Way to Use Leftover Chicken
If you have leftover chicken, Oyakodon is a fantastic way to utilize it, transforming it into a new and exciting meal.
What to Buy for Oyakodon
The ingredients for Oyakodon are simple yet essential. Each component plays a critical role in creating that delicious harmony of flavors. The combination of chicken and eggs is classic in Japanese cuisine, representing the mother and child relationship, which is reflected in the name ‘Oyakodon’ itself. Here’s what you need:
- 1/4 onion, cut into rings – For a sweet and aromatic base.
- 8 oz (230g) chicken thigh or leg, cut into bite-sized pieces – Tender and flavorful; perfect for this dish.
- 3 large eggs, lightly beaten – Adds creaminess and richness.
- 3/4 cup water – For the broth that binds everything together.
- 1 stalk scallion, cut diagonally – For a fresh and vibrant garnish.
- 2 tablespoons Mizkan bonito flavored soup base – This adds depth and umami.
- 1 1/2 tablespoons mirin – For sweetness and balance.
- 1 teaspoon sugar – Enhances the overall flavor.
Oyakodon Instructions
Making Oyakodon is straightforward; just follow these steps, and you’ll be rewarded with a delicious meal. Let’s dive into the process!
- Start by gathering all your ingredients. It’s always best to have everything prepped and ready to go. Chop the onion into rings, and cut your chicken into bite-sized pieces. Having everything ready will make the cooking process smooth.
- In a small bowl, combine the bonito flavored soup base, mirin, and sugar. Mix well until everything is combined. This is the flavorful sauce that will elevate your Oyakodon.
- Next, heat a small saucepan over high heat and add the water. Bring it to a boil, and then toss in the sliced onion and your prepared chicken pieces. Make sure to cook until the chicken is no longer pink and cooked through, which should take about 2 minutes. Keep an eye on the pot and skim off any scum that forms on the surface for a cleaner broth.
- Once the chicken is cooked, pour in the sauce mixture from the bowl. Allow it to simmer for a minute to meld those beautiful flavors together.
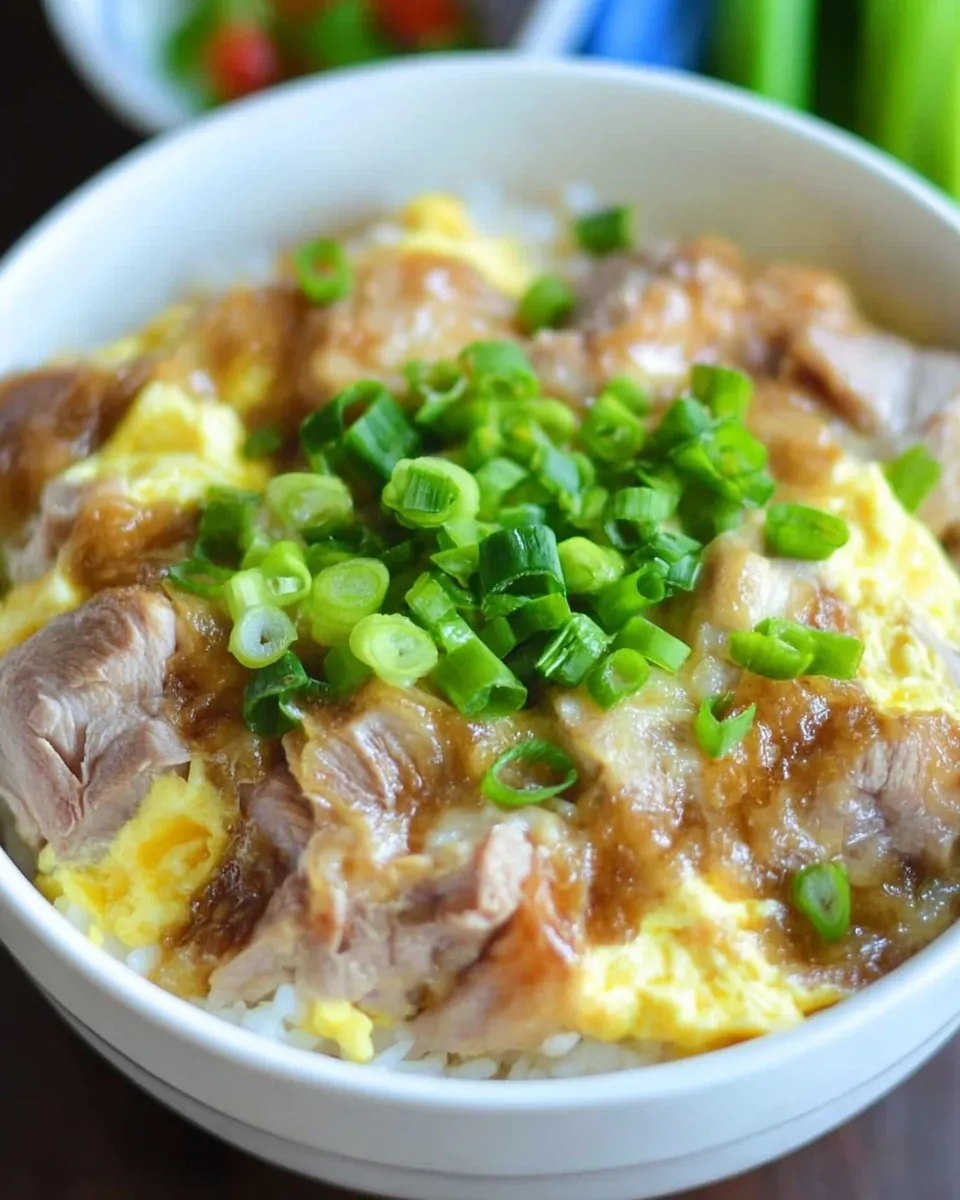
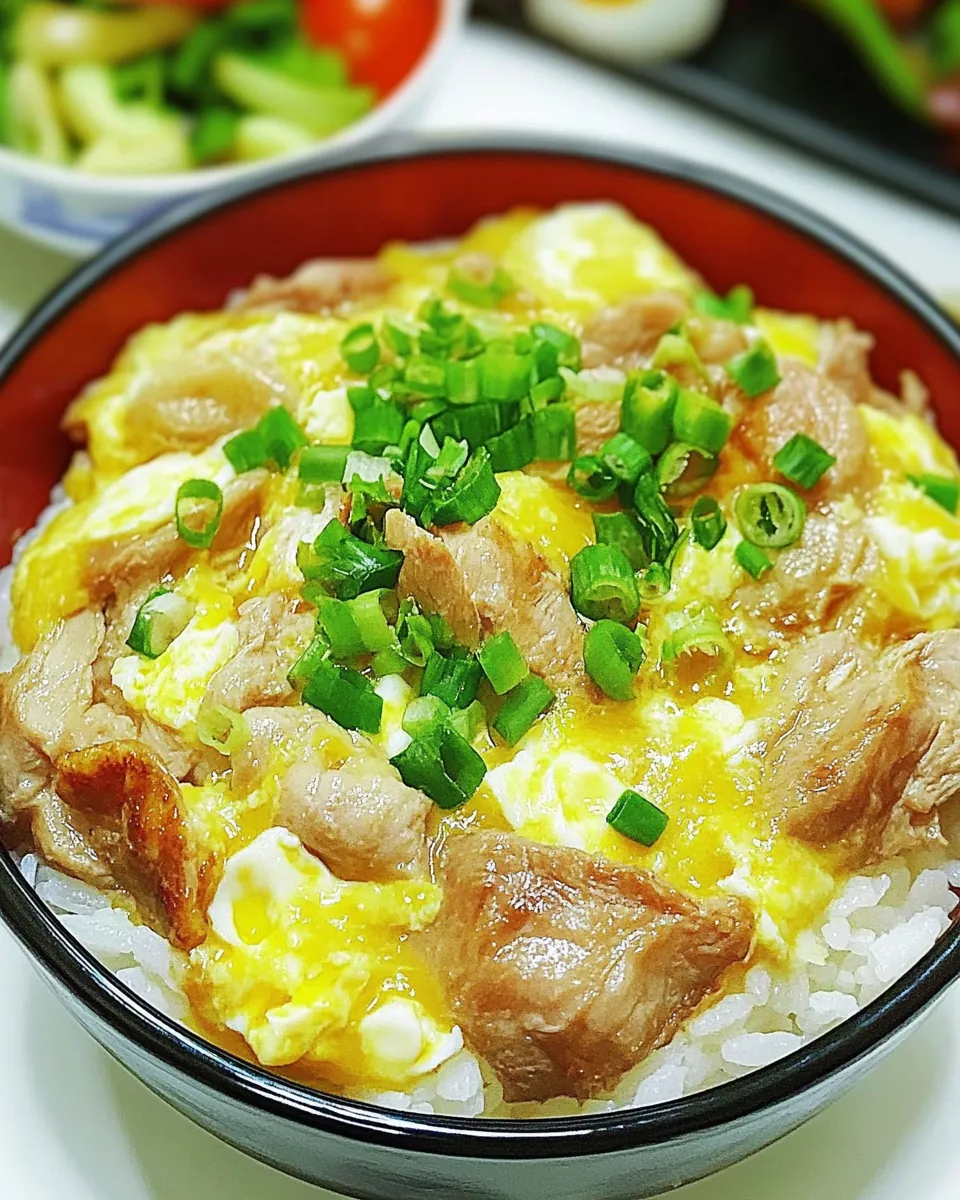
- Now, slowly pour the beaten eggs into the saucepan in a circular motion, covering the chicken and onions. This technique helps create a fluffy texture as the eggs cook. Reduce the heat to a gentle simmer, and cover the saucepan with its lid.
- Let it cook for about 2 minutes. You’ll want to check occasionally to see if the eggs are set but still soft. You’re looking for that perfect creamy texture.
- Just before serving, add the diagonally cut scallions on top. This adds a lovely freshness and a pop of color.
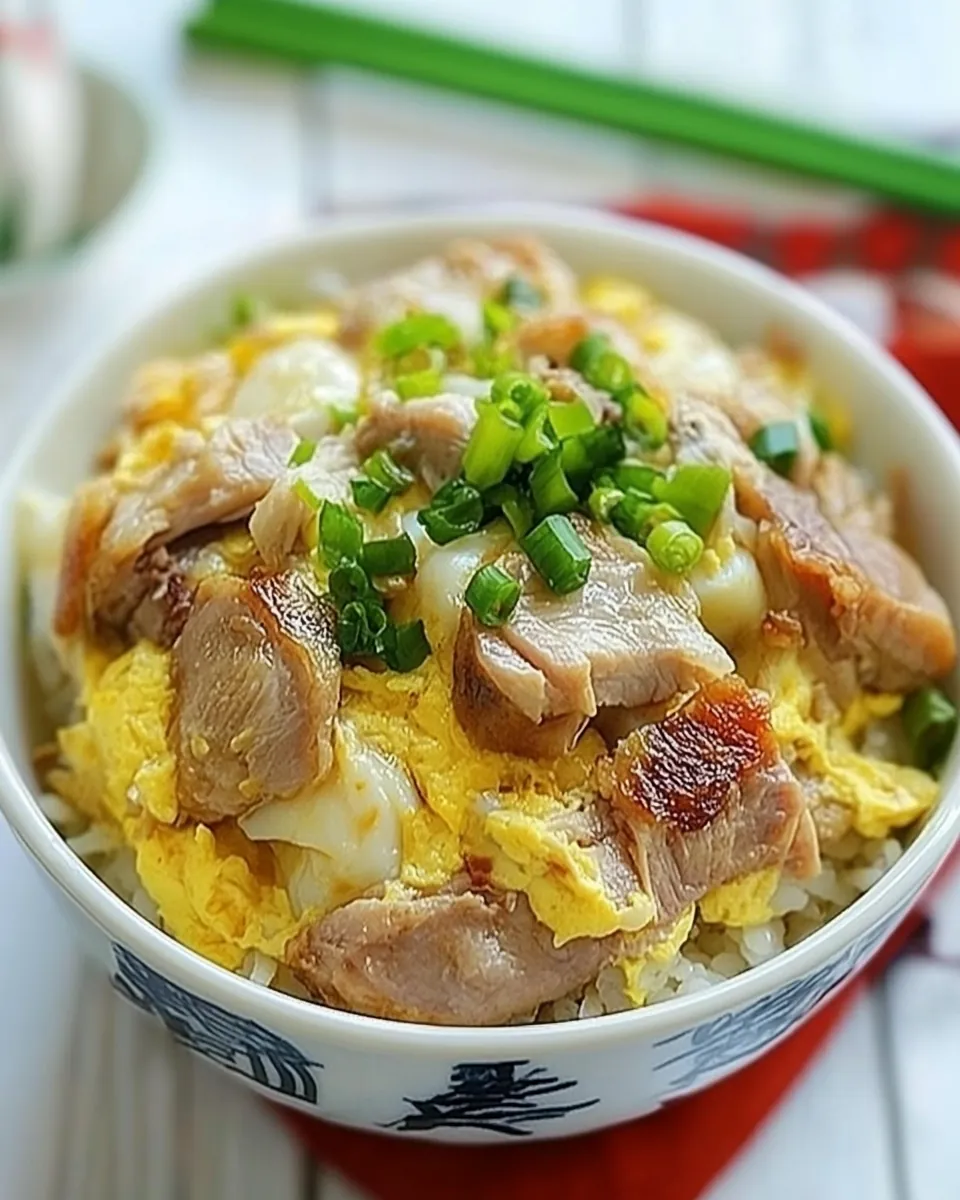
- To serve, prepare two bowls of steamed rice. Gently spoon the simmered chicken and egg mixture over the rice. The warm, comforting flavors of Oyakodon pair perfectly with the rice, making every bite a delightful experience.
- Enjoy your homemade Oyakodon immediately! It’s best served fresh, but if you have leftovers, they still taste fantastic the next day.
Things Worth Knowing
- Cooking the chicken: Make sure the chicken is cooked through to avoid any food safety issues.
- Egg texture: Aim for soft and creamy eggs in your Oyakodon. Don’t overcook them, as they can become rubbery.
- Flavor adjustment: You can always adjust the amount of soy sauce and sugar in the sauce to fit your taste preferences.
- Rice choice: While Japanese short grain rice is preferred, feel free to use any rice you have on hand.
Ways to Adapt This Recipe
If you’re looking to customize your Oyakodon, here are some great ideas to make this dish your own:
- Storage: Leftovers can be stored in an airtight container in the fridge for up to three days. Reheat gently in the microwave.
- Freezing: While it’s not ideal, you can freeze the cooked mixture without the rice. Thaw in the fridge and reheat when ready to serve.
- Pairing: Serve with pickled vegetables or miso soup for a complete Japanese meal.
- Add vegetables: Feel free to add mushrooms, carrots, or any other veggies you enjoy to the mix.
- Spicy kick: For those who love a bit of heat, add some chili paste or sriracha to the sauce.
- Herbs: Fresh herbs like cilantro or shiso can add a delightful twist to the traditional flavor profile.
What Goes Well With This Oyakodon
When serving Oyakodon, consider these wonderful pairings:
- Miso soup: A classic companion that complements the flavors of the Oyakodon.
- Pickled ginger: Adds a refreshing contrast and helps cleanse the palate.
- Steamed vegetables: A side of steamed broccoli or bok choy can add a healthy touch.
- Salad: A light green salad with sesame dressing is perfect for balancing the richness of the dish.
- Rice: Always serve with freshly steamed rice to soak up the delicious sauce.
- Occasions: This dish is perfect for a quick weekday dinner or a cozy weekend lunch. It’s also a wonderful option for gatherings or family meals.
FAQ
Conclusion
The Oyakodon is a beautiful melding of flavors and textures, showcasing the simplicity of Japanese cuisine. With its tender chicken and velvety eggs over rice, it’s a dish that warms the heart and fills the belly. I encourage you to try making Oyakodon at home; it’s not only delicious but also a wonderful way to bring a taste of Japan into your kitchen. You’ll find that this dish quickly becomes a favorite, perfect for any occasion.
Oyakodon
Ingredients
Equipment
Method
- Start by gathering all your ingredients. It’s always best to have everything prepped and ready to go. Chop the onion into rings, and cut your chicken into bite-sized pieces. Having everything ready will make the cooking process smooth.
- In a small bowl, combine the bonito flavored soup base, mirin, and sugar. Mix well until everything is combined. This is the flavorful sauce that will elevate your Oyakodon.
- Next, heat a small saucepan over high heat and add the water. Bring it to a boil, and then toss in the sliced onion and your prepared chicken pieces. Make sure to cook until the chicken is no longer pink and cooked through, which should take about 2 minutes. Keep an eye on the pot and skim off any scum that forms on the surface for a cleaner broth.
- Once the chicken is cooked, pour in the sauce mixture from the bowl. Allow it to simmer for a minute to meld those beautiful flavors together.
- Now, slowly pour the beaten eggs into the saucepan in a circular motion, covering the chicken and onions. This technique helps create a fluffy texture as the eggs cook. Reduce the heat to a gentle simmer, and cover the saucepan with its lid.
- Let it cook for about 2 minutes. You'll want to check occasionally to see if the eggs are set but still soft. You’re looking for that perfect creamy texture.
- Just before serving, add the diagonally cut scallions on top. This adds a lovely freshness and a pop of color.
- To serve, prepare two bowls of steamed rice. Gently spoon the simmered chicken and egg mixture over the rice. The warm, comforting flavors of Oyakodon pair perfectly with the rice, making every bite a delightful experience.
- Enjoy your homemade Oyakodon immediately! It’s best served fresh, but if you have leftovers, they still taste fantastic the next day.