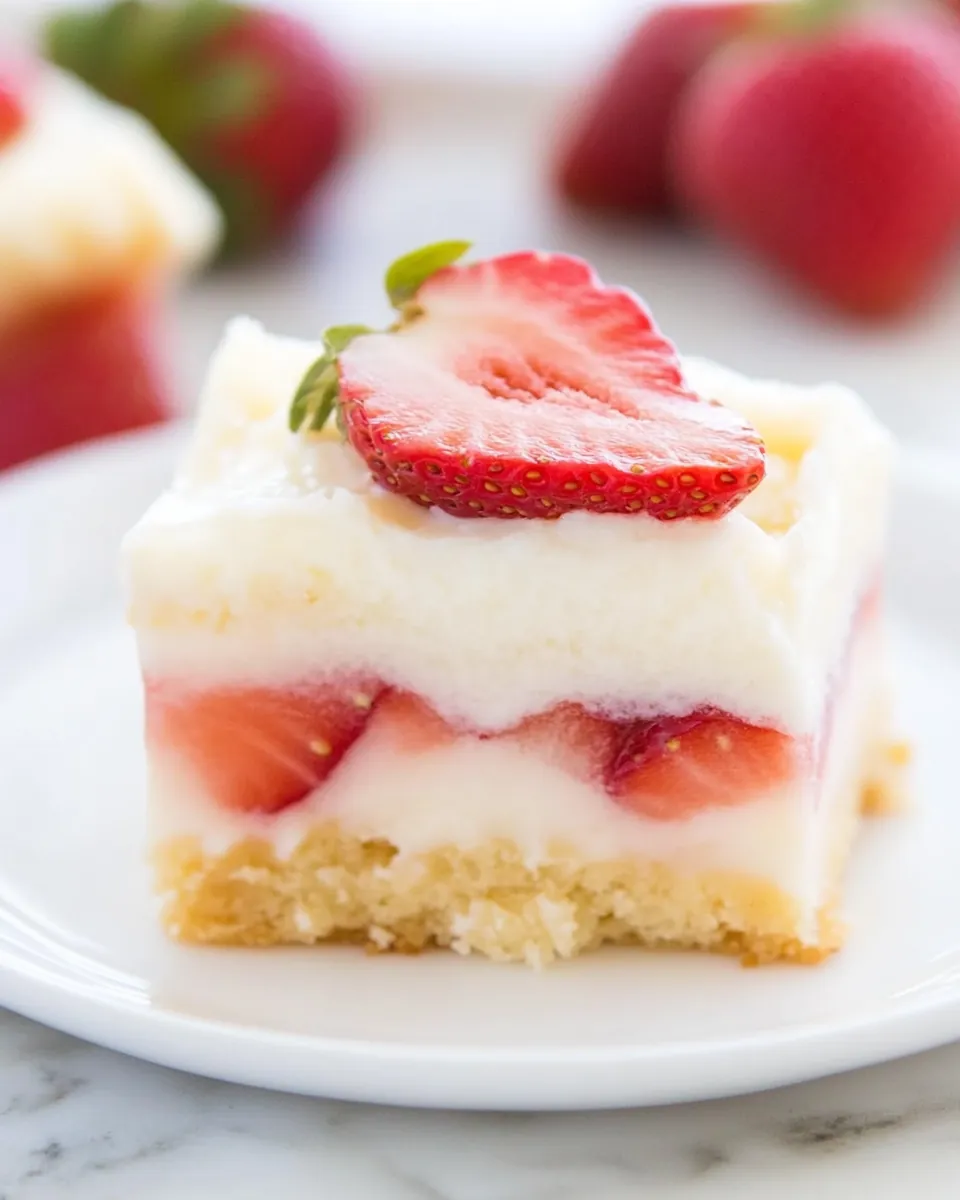
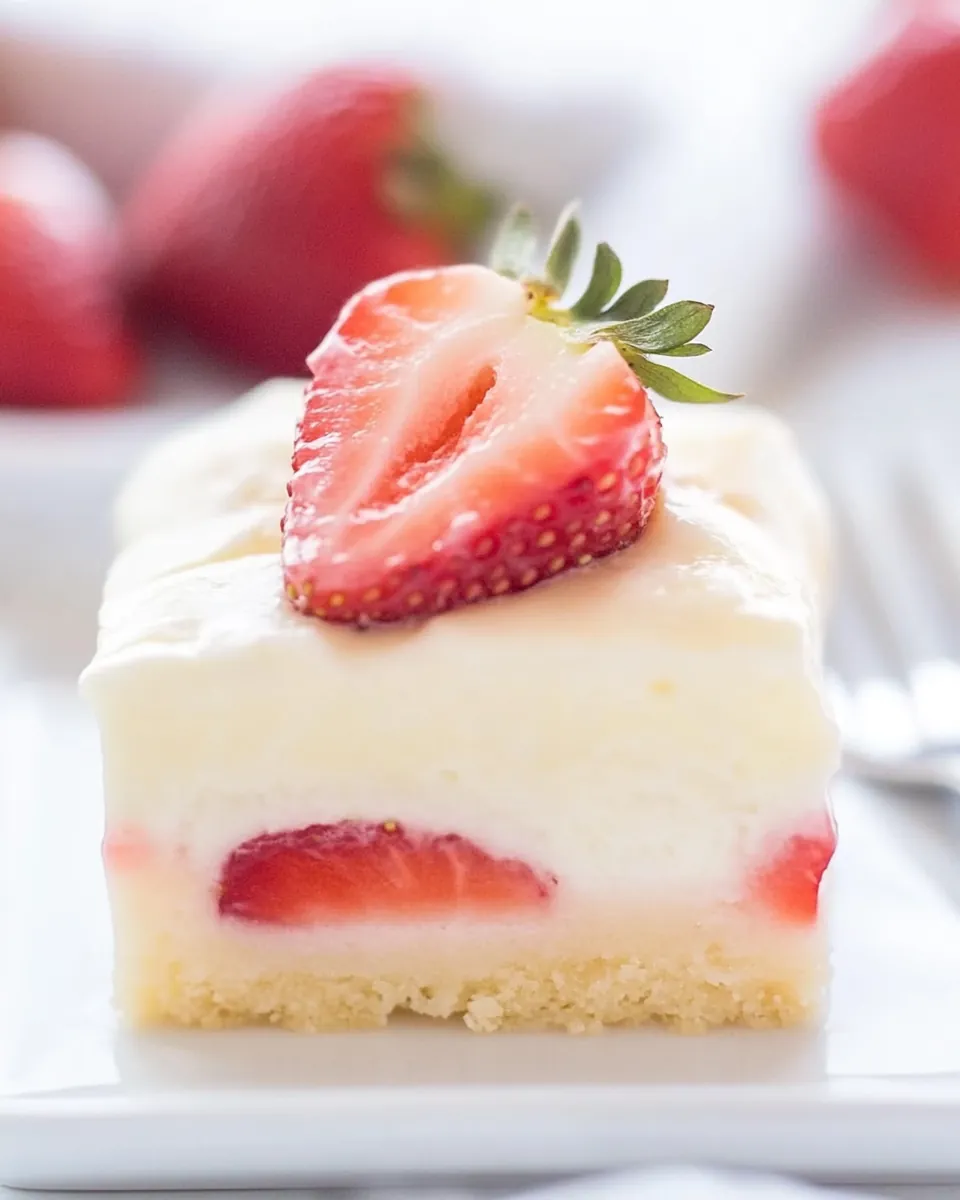
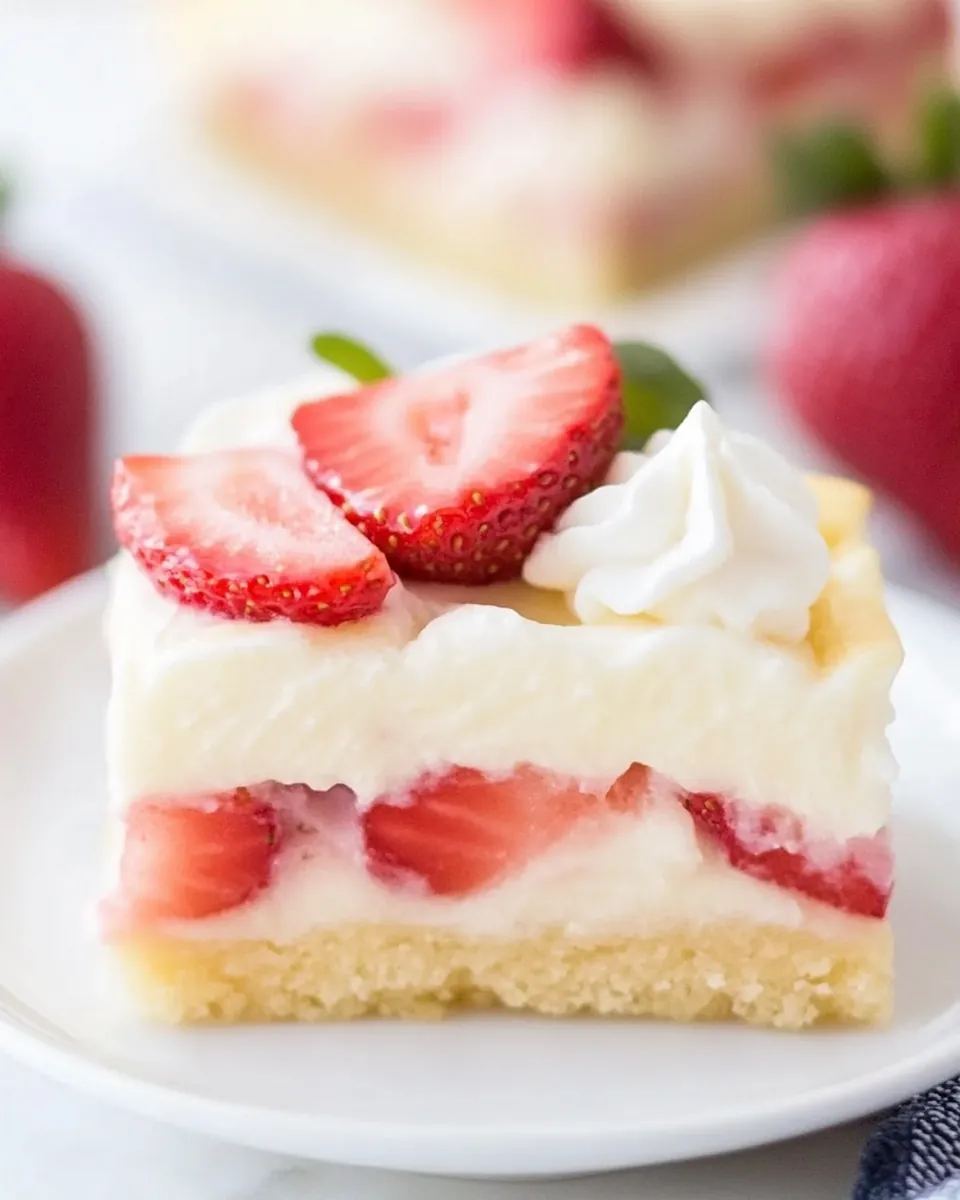
Strawberry Custard Bars
There’s something truly magical about the combination of strawberries and custard, and when you transform that into Strawberry Custard Bars, you create a delightful treat that’s perfect for any occasion. I remember the first time I made these bars; it was a sunny spring day, and the vibrant colors of the strawberries inspired me to create something special. As I gathered the ingredients, the sweet aroma of fresh strawberries filled my kitchen, instantly lifting my spirits. These bars not only look beautiful but are incredibly satisfying to make. The creamy custard layered over a buttery crust creates a texture that’s simply irresistible, and each bite is a burst of juicy flavor. Whether served at a family gathering or as a sweet snack during the day, these bars are sure to impress.
Recipe Snapshot
1 hr 5 mins
10 mins
55 mins
Medium
210 kcal
2 g
Gluten-Free, Low FODMAP
11 g
Oven, Baking Sheet, Frying Pan, Whisk, Mixing Bowl, Chef’s Knife, Cutting Board, Wooden Spoon
What You’ll Enjoy About This Strawberry Custard Bars
Why You’ll Love This Recipe
Perfect Balance of Flavors
The combination of tart and sweet is perfectly balanced in each bite of Strawberry Custard Bars. The freshness of the strawberries pairs beautifully with the sweet, creamy filling.Easy to Make
You don’t need to be a master chef to whip these bars up! With simple ingredients and straightforward steps, anyone can achieve delicious results.Great for Any Occasion
Whether it’s a picnic, birthday party, or just a cozy evening at home, these bars are always a hit. They can be dressed up or served casually, making them versatile.Make Ahead and Chill
These bars are the perfect make-ahead dessert. Prepare them a day in advance, refrigerate, and they’re ready to serve. The longer they chill, the better they taste!Stunning Presentation
With their vibrant colors and creamy topping, Strawberry Custard Bars look as good as they taste. They’re sure to steal the show at any dessert table.
Essential Ingredients for Strawberry Custard Bars
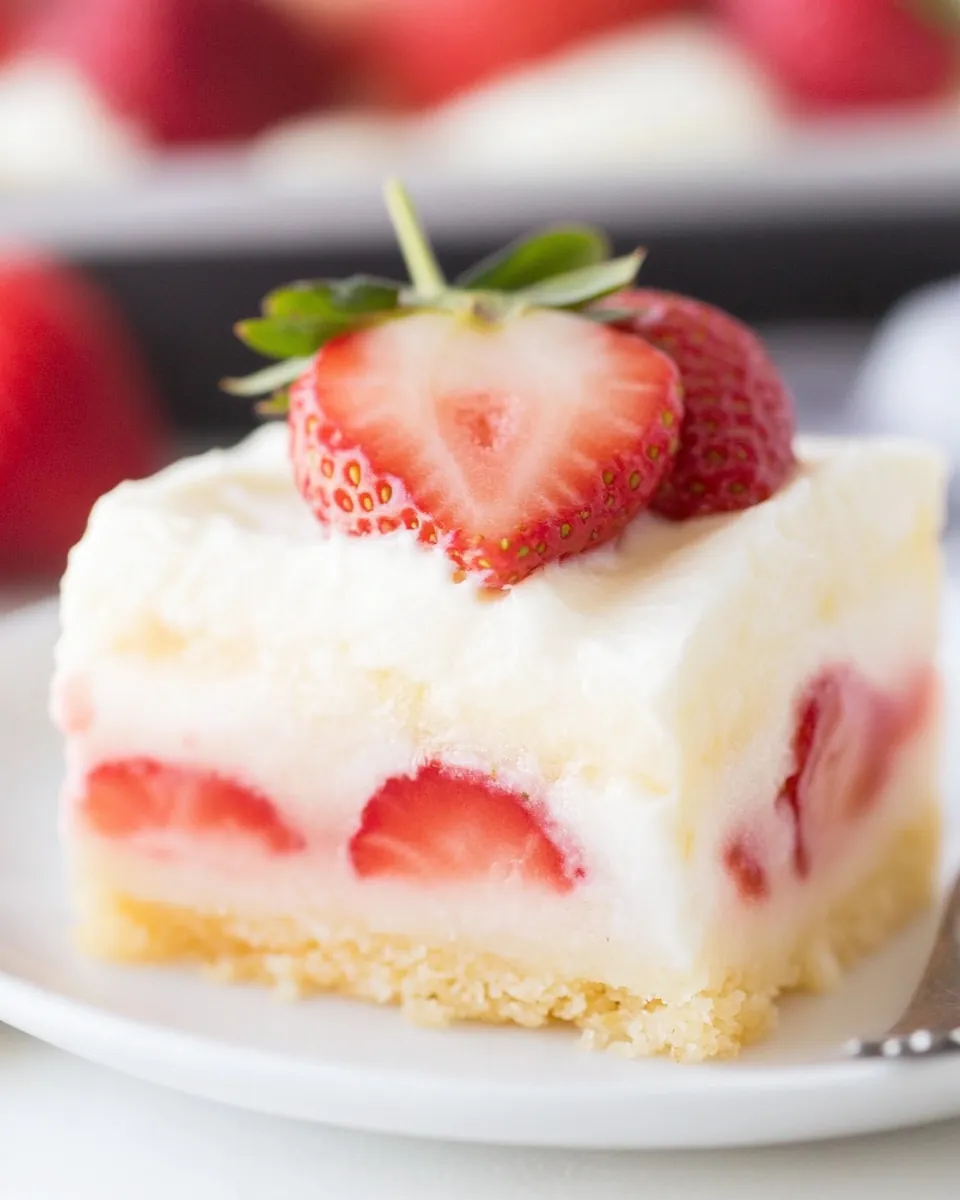
The magic of Strawberry Custard Bars lies in the harmony of its ingredients. Each component plays a crucial role, bringing flavor and texture to the final product. The buttery flour crust serves as a perfect base, while the rich custard filling, made with eggs, sugar, and heavy cream, creates a luscious layer that complements the sweetness of the fresh strawberries. Let’s dive into the key players that make this recipe a standout.
- All-purpose flour: 1 cup – This forms the base of the crust, providing structure and a delightful buttery flavor that pairs wonderfully with the custard.
- Cold unsalted butter: ½ cup – Chilled butter is essential for creating a flaky crust. It adds richness and helps achieve the perfect texture.
- Granulated sugar: 2 tablespoons + 1 cup – The first amount sweetens the crust, while the second enhances the custard filling, balancing the tartness of the strawberries.
- Salt: ½ teaspoon – A touch of salt elevates all the flavors, making them more pronounced without being overly sweet.
- Fresh strawberries: 1 pound – The star of the show! Use ripe, juicy strawberries for the best flavor. Dice them into small pieces for even distribution in the bars.
- Large eggs: 2 – They provide structure and richness to the custard filling.
- Heavy whipping cream: ½ cup – This adds a luxurious creaminess to the filling, creating a smooth texture that’s hard to resist.
- Vanilla extract: 1 teaspoon – While vanilla extract enhances the overall flavor, it should be used sparingly to let the strawberries shine.
- Whipped topping: about 3/4 of an 8-ounce container – For lightening up the dessert and adding a fluffy texture on top. You can make your own or use store-bought.
- Strawberry slices: for garnishing – A simple yet effective way to add a finishing touch to your Strawberry Custard Bars.
Putting Together Strawberry Custard Bars
Creating your own Strawberry Custard Bars is an enjoyable process that requires just a few simple steps. Follow along as I guide you through making this delightful treat. You’ll find that once you start, it becomes easy to get lost in the deliciousness of it all. Let’s get started!
- Preheat your oven to 350F. This initial step is crucial as it sets the stage for your bars to bake evenly.
- Line an 8×8-inch baking pan with aluminum foil. This will make it easier to lift the bars out once they are cooled.
- In a large mixing bowl, combine the flour, butter, granulated sugar, and salt. Using two forks or a pastry cutter, cut the butter into the dry ingredients until the mixture resembles coarse crumbs. This texture is essential for achieving that perfect crust.
- Turn the mixture out into the prepared pan. Using a spatula, hard-pack the mixture evenly to form a smooth crust layer. You want it to be firm but not overly compact.
- Bake the crust in the preheated oven for about 10 minutes. This will give it a head start on cooking and prevent it from becoming soggy.
- Remove the pan from the oven and place it on a wire rack to cool for a few minutes. While the crust is cooling, dice the strawberries and set them aside.
- In the same mixing bowl (just give it a quick wipe), add the eggs, 1 cup of sugar, heavy cream, and vanilla. Whisk vigorously for about 1 minute until well combined.
- Add in the flour and stir gently to combine, being careful not to overmix. You want a smooth filling without lumps!
- Evenly pour the filling mixture over the cooled crust and the diced strawberries. This layering creates a beautiful outcome.
- Bake for about 40 to 45 minutes. The top should be lightly golden brown and the custard set. Keep an eye on it; if it starts browning too quickly, tent the pan with a sheet of foil.
- Once done, allow the bars to cool uncovered on a wire rack for about 1 hour. Afterward, cover them and refrigerate for at least 4 hours or overnight to chill thoroughly.
- Before serving, evenly spread the whipped topping over the top of the bars and garnish with fresh strawberry slices. Serve and enjoy!
Things Worth Knowing
- Texture Matters: Ensure that the crust is not overworked; you want a flaky texture, not a tough one.
- Cool Completely: Allowing the bars to cool completely before refrigerating helps them set properly, making it easier to cut.
- Use Fresh Ingredients: Opt for the freshest strawberries to enhance flavor. They should be ripe and sweet for the best results.
- Storage Tips: Store leftovers in an airtight container in the fridge to maintain freshness.
Expert Tips about Strawberry Custard Bars
Before you dive into making these delicious bars, here are some expert tips to ensure success. Each step is essential, and these insights will help you create a perfect batch every time.
- Storage: After cutting, store any leftovers in an airtight container in the fridge for up to 5 days. This ensures they stay fresh and delicious.
- Freezing: Yes, you can freeze these bars! Wrap them tightly in plastic wrap and then foil. They’ll keep for up to 2 months. Simply thaw in the fridge overnight before serving.
- Serving Temperature: These bars are delightful served chilled, but you could also enjoy them slightly warmer if you prefer.
- Variations: Feel free to experiment with different fruits! Raspberries or blueberries can be a wonderful substitute for strawberries.
- Garnishing: Besides strawberry slices, consider adding a sprinkle of powdered sugar or a drizzle of chocolate for an extra touch.
What Complements This Strawberry Custard Bars
When it comes to serving Strawberry Custard Bars, there are plenty of delightful pairings that enhance their flavor. Here’s how you can enjoy them:
- Coffee: These bars are fantastic with a cup of coffee or tea in the afternoon. The sweetness of the bars balances beautifully with the bitterness of your favorite brew.
- Picnics: Perfect for outdoor gatherings, they travel well and are easy to cut into portions.
- Barbecues: Serve them as a refreshing dessert option during summer barbecues.
- Holiday Gatherings: Their vibrant appearance makes them a striking addition to any holiday dessert table, especially in spring!
- Storage Tips: If you’re preparing these bars ahead of time, remember they taste even better after chilling for a few hours. Make them the day before!
FAQ
Conclusion
Strawberry Custard Bars are truly a delightful dessert that combines the best of fruity flavors with creamy custard. They’re perfect for any gathering, bringing a touch of spring to your table with every bite. I encourage you to try making these bars; they’re sure to become a favorite in your household. Enjoy the sweet moments they create!
Strawberry Custard Bars
Ingredients
Equipment
Method
- Preheat your oven to 350F. Line an 8×8-inch baking pan with aluminum foil. This will make it easier to lift the bars out once they are cooled.
- In a large mixing bowl, combine the flour, butter, granulated sugar, and salt. Using two forks or a pastry cutter, cut the butter into the dry ingredients until the mixture resembles coarse crumbs. This texture is essential for achieving that perfect crust.
- Turn the mixture out into the prepared pan. Using a spatula, hard-pack the mixture evenly to form a smooth crust layer. You want it to be firm but not overly compact.
- Bake the crust in the preheated oven for about 10 minutes. This will give it a head start on cooking and prevent it from becoming soggy.
- Remove the pan from the oven and place it on a wire rack to cool for a few minutes. While the crust is cooling, dice the strawberries and set them aside.
- In the same mixing bowl (just give it a quick wipe), add the eggs, 1 cup of sugar, heavy cream, and vanilla. Whisk vigorously for about 1 minute until well combined.
- Add in the flour and stir gently to combine, being careful not to overmix. You want a smooth filling without lumps!
- Evenly pour the filling mixture over the cooled crust and the diced strawberries. This layering creates a beautiful outcome.
- Bake for about 40 to 45 minutes. The top should be lightly golden brown and the custard set. Keep an eye on it; if it starts browning too quickly, tent the pan with a sheet of foil.
- Once done, allow the bars to cool uncovered on a wire rack for about 1 hour. Afterward, cover them and refrigerate for at least 4 hours or overnight to chill thoroughly.
- Before serving, evenly spread the whipped topping over the top of the bars and garnish with fresh strawberry slices. Serve and enjoy!
Notes
- Tip 1: If using homemade whipped cream, it will be prone to deflating after the first day. For that reason, I prefer using whipped topping.
- Tip 2: Bars will keep airtight in the fridge for up to 5 days.