Chocolate Caramel Tarts
Every holiday season, I find myself reminiscing about the warm and inviting kitchens filled with laughter and the sweet scent of baked goods wafting through the air. This is where my love for Chocolate Caramel Tarts blossomed. I remember the first time I tasted these delightful tarts at a family gathering. The rich chocolate contrasted beautifully with the gooey caramel, and it was a match made in dessert heaven. I knew I had to learn how to make them myself, to recreate those cherished moments. Every bite takes me back to those cozy nights spent with family, sharing stories and indulging in treats that warm the heart. The best part? They’re perfect for any occasion – whether it’s a festive dinner or a casual get-together, these Chocolate Caramel Tarts are sure to impress. As I prepare this dish, I can’t help but feel excited to share it with others, knowing it will create new memories around the table.
Recipe Snapshot
60 mins
0 mins
0 mins
Easy
320 kcal
3 g
Gluten-Free, Low FODMAP
15 g
Food Processor, Oven, Baking Sheet, Frying Pan, Large Pot, Whisk, Mixing Bowl, Chef’s Knife, Wooden Spoon
Why This Chocolate Caramel Tarts Hits Different
Decadent Layers of Flavor
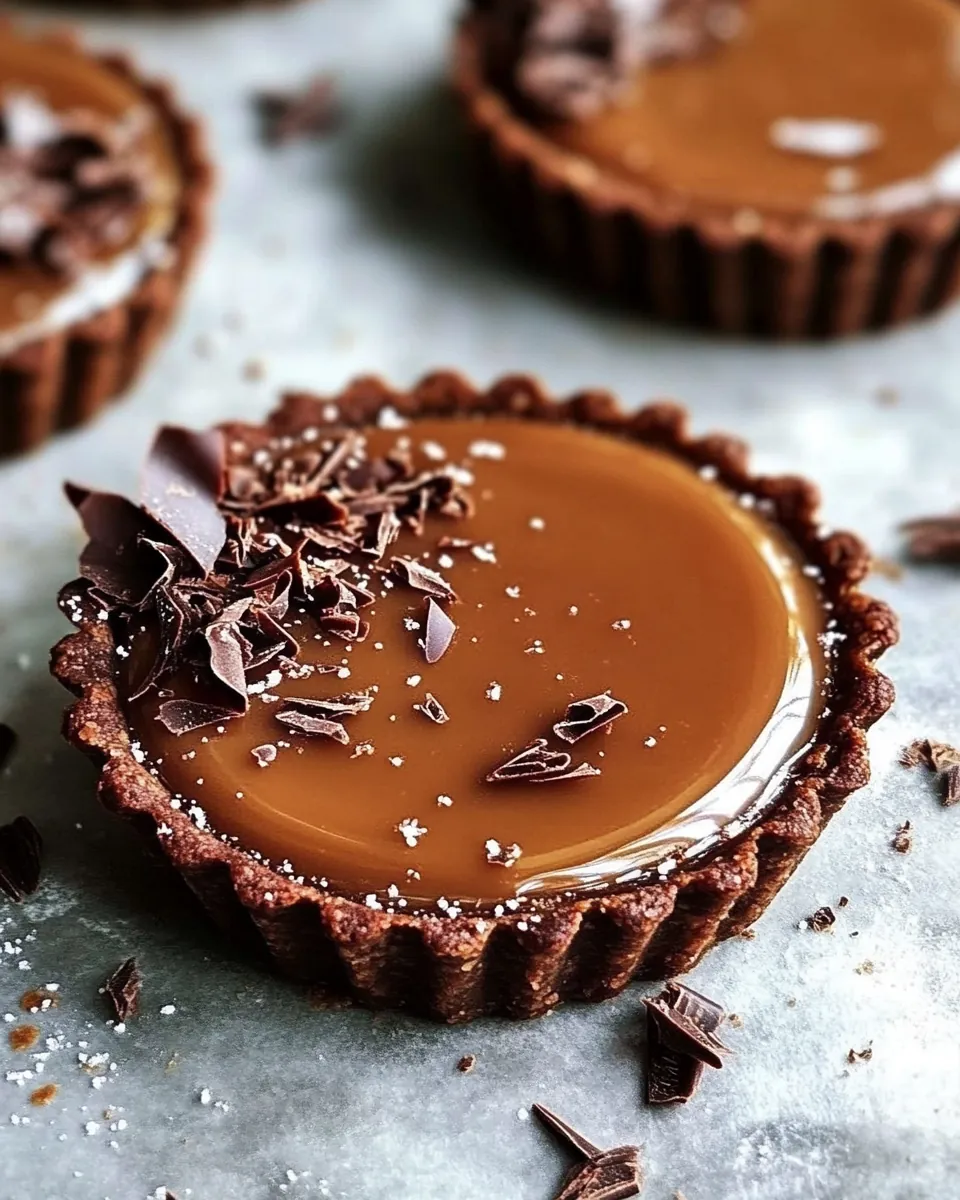
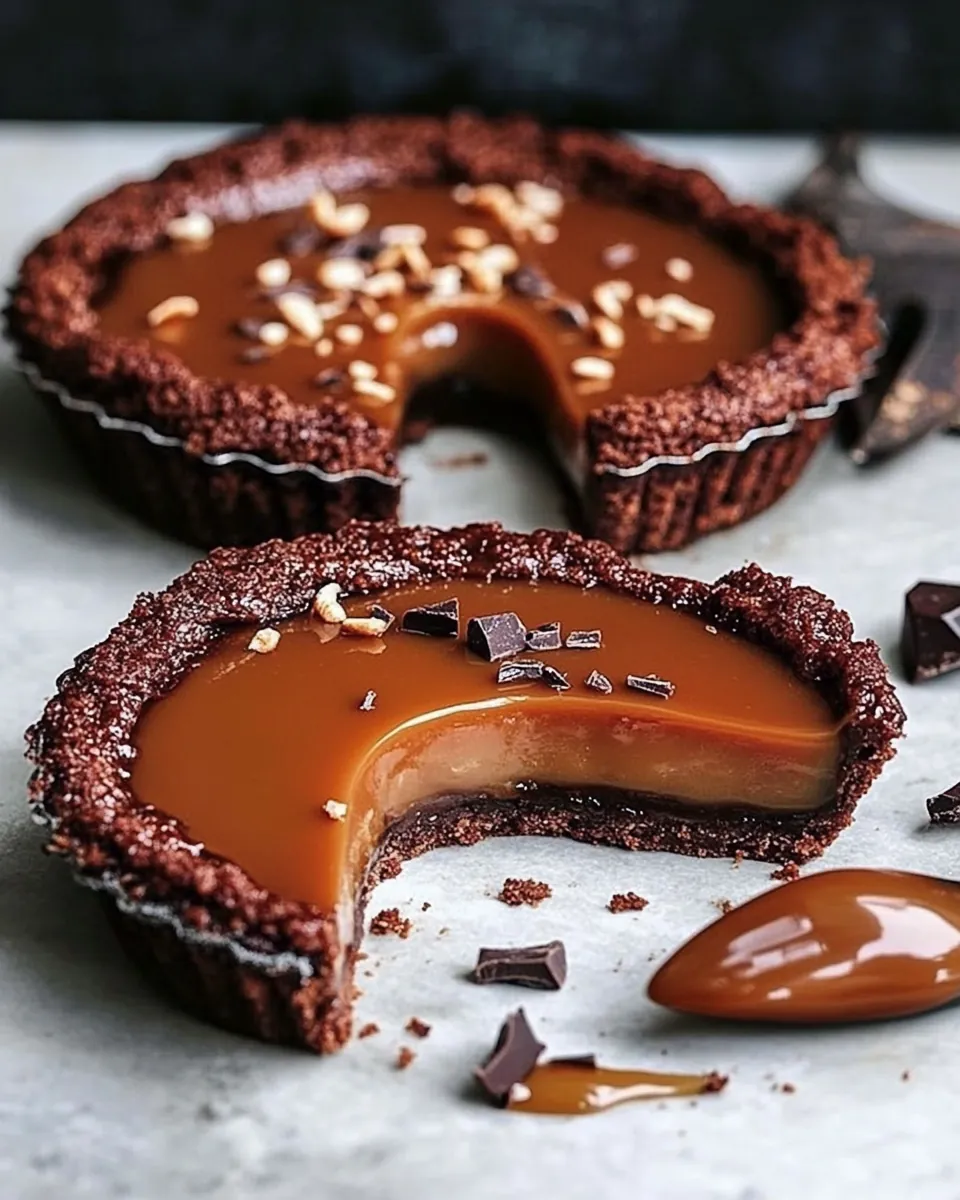
What sets Chocolate Caramel Tarts apart is the fantastic combination of flavors and textures. The buttery, flaky crust gives way to a luscious layer of caramel, which is then topped with a rich chocolate ganache. This balance creates a dessert that’s both satisfying and indulgent, perfect for satisfying any sweet tooth.
A Showstopper for Any Occasion
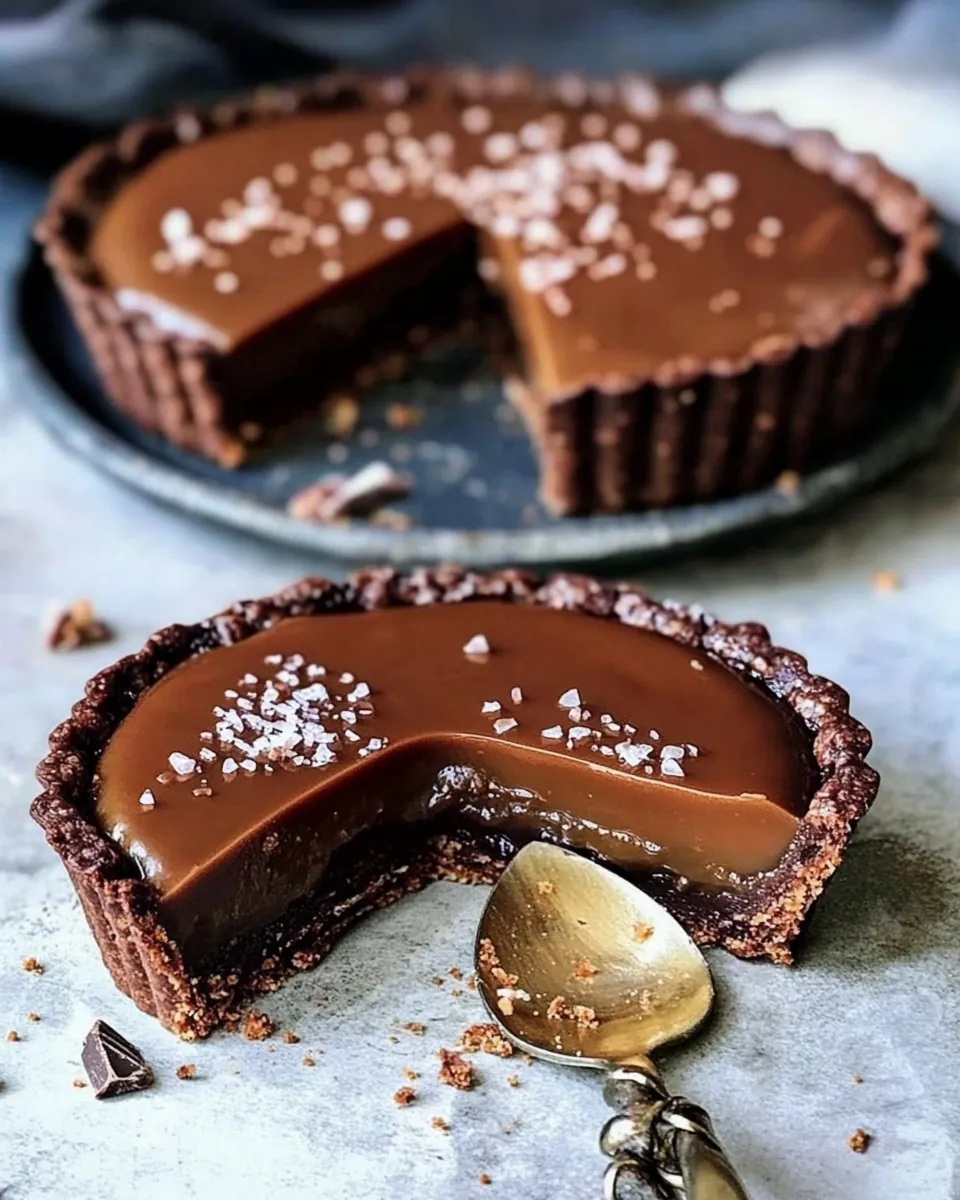
These tarts are more than just a treat; they’re a centerpiece. The glossy chocolate ganache and the sprinkle of fleur de sel on top create an eye-catching dessert that’s sure to wow your guests. Serving Chocolate Caramel Tarts at your next gathering will make you the star of the show!
Easy to Make, Hard to Resist
Many people may shy away from making desserts like tarts, thinking they’re complicated. However, my experience with Chocolate Caramel Tarts has shown me that they are much easier to prepare than they appear. With a bit of patience, you can whip these up without any fuss.
Perfect for Sharing
One of the joys of baking is sharing with loved ones. These Chocolate Caramel Tarts are perfect for potlucks, holiday parties, or simply as a lovely treat for your family. The recipe makes multiple tarts, so there’s plenty to go around!
A Versatile Recipe
This recipe can easily be adjusted to suit different preferences. You can experiment with different types of chocolate, add flavorings to the caramel, or even try different toppings. Your creativity can shine through in every batch of Chocolate Caramel Tarts, making it a delightful canvas for your culinary skills.
Essential Ingredients for Chocolate Caramel Tarts
When it comes to making Chocolate Caramel Tarts, the selection of ingredients plays a pivotal role in achieving that perfect balance of flavors. Each ingredient contributes to the overall taste, from the rich chocolate to the creamy caramel. Here’s a breakdown of what you’ll need:
- Flour: The foundation of our tart crust, providing the necessary structure.
- Cocoa Powder: Adds a deep chocolate flavor to the crust, enhancing the overall taste.
- Kosher Salt: Balances sweetness and enhances flavors.
- Unsalted Butter: Creates a rich, tender crust when creamed with sugar.
- Confectioners’ Sugar: Sweetens the crust while keeping it tender.
- Egg Yolks: Adds richness and helps bind the crust together.
- Sugar: The main ingredient in the caramel, providing sweetness and texture.
- Corn Syrup: Helps prevent crystallization in the caramel, giving it a smooth texture.
- Heavy Cream: Provides a rich, creamy texture to both the caramel and ganache.
- Scharffen Berger Bittersweet Chocolate: The star ingredient that brings the ganache to life.
- Sour Cream: Adds tanginess to the caramel, which complements the sweetness beautifully.
- Vanilla Fleur de Sel: A finishing touch that adds a burst of flavor to each bite (optional).
The Process for Making Chocolate Caramel Tarts
Making Chocolate Caramel Tarts can be an enjoyable and rewarding experience. Follow these steps for a delicious outcome:
- Prepare the Crust: Start by combining flour, cocoa powder, and salt in a medium bowl. This dry mix will be the base for your crust. In another bowl, cream together butter and confectioners’ sugar until light and fluffy. This process incorporates air into the mixture, which will help make the crust tender. Gradually mix in the egg yolks and vanilla. Once combined, add in the dry ingredients until just mixed. The dough should be soft yet manageable. Divide the dough into six equal portions and press each one into the bottoms and sides of six 3.5-inch tartlet pans with removable bottoms. This step is crucial, as it shapes the crust that will hold the delicious fillings. After you’ve pressed the dough into the pans, refrigerate the tartlet shells for thirty minutes to allow the dough to firm up.
- Preheat the Oven: While the crust is chilling, preheat your oven to 350 degrees Fahrenheit. Once the shells have chilled, prick them all over with a fork to prevent bubbling while baking. Place them in the preheated oven and bake for about thirteen to fifteen minutes until cooked through. You want a firm crust that’s lightly golden. Once baked, transfer the tartlet shells to a wire rack to cool completely.
- Prepare the Caramel: In a medium saucepan over medium heat, combine sugar, corn syrup, salt, and six tablespoons of water. Bring to a boil without stirring. Cooking at this temperature is important; you want to reach 340 degrees Fahrenheit, which is the hard crack stage. Use a candy thermometer for accuracy. As you cook, the mixture will change color, turning a lovely amber hue. Once it reaches the desired temperature, remove it from the heat and carefully whisk in butter, heavy cream, sour cream, and vanilla. Be cautious; the mixture will bubble up. Stir until smooth, then pour the caramel into the cooled tartlet shells. Refrigerate until firm, which takes about three to four hours.
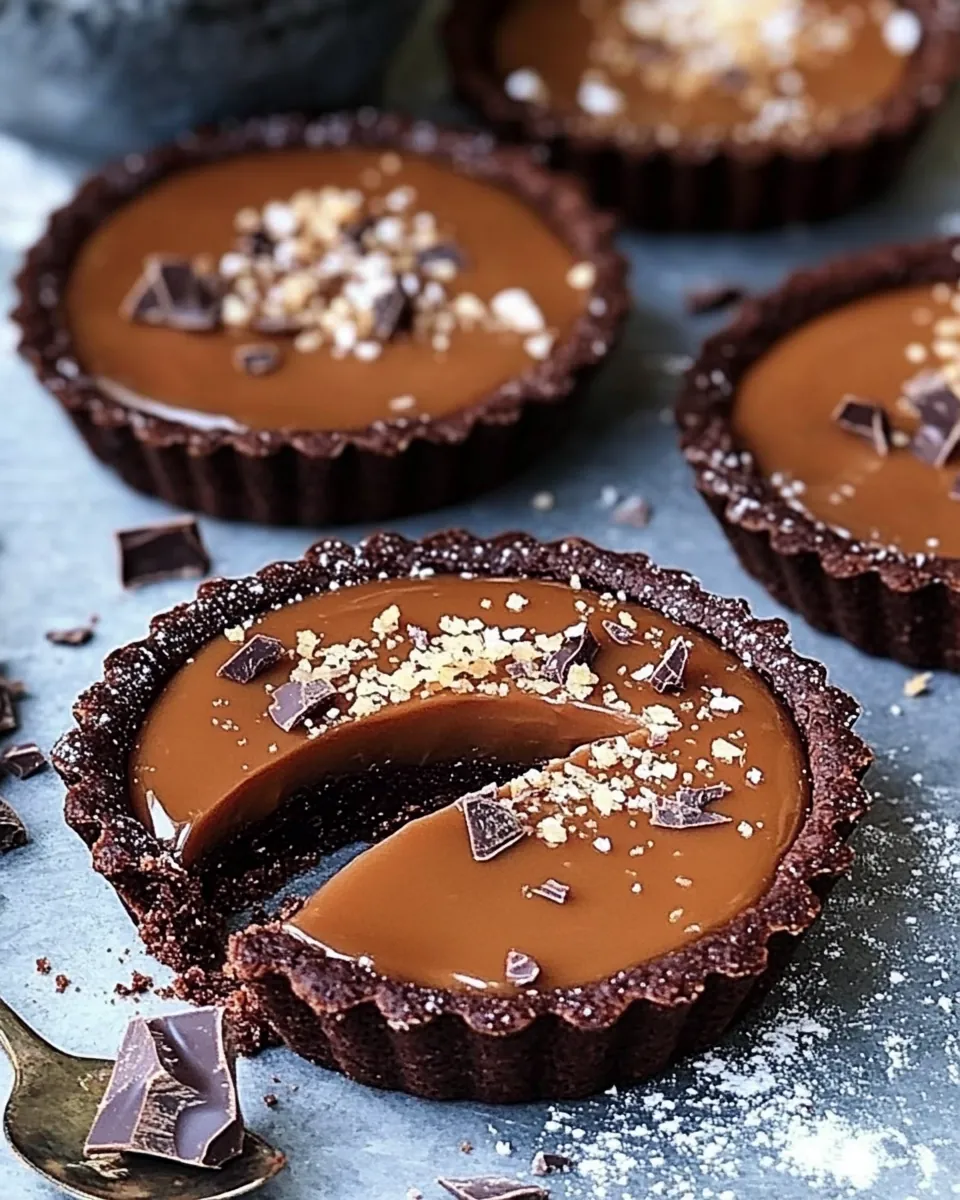
- Prepare the Ganache: For the ganache, bring heavy cream to a gentle boil in a medium saucepan. While it’s heating, chop your bittersweet chocolate and place it in a medium bowl. Once the cream is boiling, pour it over the chocolate and let it sit for one minute. This resting time allows the chocolate to soften. After a minute, stir gently with a rubber spatula until you achieve a smooth, glossy consistency. This is the magical moment where the flavors meld together. Spoon the ganache evenly over the caramel-filled tartlets, ensuring a smooth layer. Return the tartlets to the refrigerator and let them set for another three to four hours. If you love a bit of texture, sprinkle the tops with vanilla fleur de sel before serving.
- Serve Cold: Once set, the Chocolate Caramel Tarts are ready to be served. Slice them carefully and present on a beautiful platter. Enjoy the mixture of textures and flavors as you bite into the smooth chocolate, gooey caramel, and crisp tart shell.
Things Worth Knowing
- Mind the Temperature: When making caramel, it’s crucial to keep an eye on the temperature. Using a candy thermometer can help you achieve the perfect consistency without burning the sugar.
- Chill for Success: Allowing the tart shells to chill before baking ensures they’ll hold their shape and provides a tender crust.
- Cooling Times Matter: Be patient! The tarts need adequate time to cool and set in the refrigerator for the best texture.
- Ingredient Quality: Using high-quality chocolate and fresh ingredients can elevate your Chocolate Caramel Tarts to a whole new level.
Making Adjustments
Whether you’re looking to customize your Chocolate Caramel Tarts or just want to know how to store them, here are some tips:
- Storage: To store your tarts, keep them in an airtight container in the refrigerator. They are best enjoyed fresh but can last for up to three days in the fridge.
- Freezing: You can freeze the tarts after they are fully set. Wrap them tightly in plastic wrap and then in aluminum foil. They can be frozen for up to one month. Thaw in the refrigerator before serving.
- Pairing: Enjoy your Chocolate Caramel Tarts with a dollop of whipped cream or a scoop of vanilla ice cream for a delightful contrast.
- Flavor Variations: Feel free to experiment with flavored chocolates or add a hint of espresso to the ganache for a mocha twist.
- Presentation: Garnish with fresh berries or edible flowers for an elegant touch when serving.
Serve This Chocolate Caramel Tarts With
- Coffee or Tea: Pair these tarts with a rich cup of coffee or a delicate herbal tea for a delightful contrast.
- Seasonal Fruits: Serve alongside fresh berries or sliced fruit to balance the richness of the tarts.
- Cheese Platter: Consider pairing with a selection of cheeses for an interesting flavor combination.
- Holiday Gatherings: These tarts make an excellent dessert for holiday feasts, potlucks, and family gatherings, bringing warmth to the occasion.
- Birthdays: Perfect for special celebrations, these tarts can add a touch of elegance to birthday parties.
FAQ
Conclusion
In summary, Chocolate Caramel Tarts are a delightful fusion of flavors that create a memorable dessert experience. The rich chocolate combined with the gooey caramel and flaky crust is simply irresistible. I encourage you to roll up your sleeves and give this recipe a try; your taste buds will thank you! Plus, there’s nothing quite like sharing a homemade dessert with loved ones over good conversation and laughter.
Chocolate Caramel Tarts
Ingredients
Equipment
Method
- Prepare the Crust: In a medium bowl, combine flour, cocoa powder, and salt; set aside. Using a stand mixer fitted with the paddle attachment, or in a large bowl with an electric hand mixer, cream the butter and sugar until light and fluffy; mix in egg yolks and vanilla. Add in dry ingredients. Divide dough into 6 equal portions. Evenly press each portion into the bottoms and sides of 6 3.5-inch tartlet pans with removable bottoms. Refrigerate tartlet shells for 30 minutes.
- Preheat oven to 350 degrees F, prick the tart shells all over with a fork. Bake in preheated oven until cooked through, about 13-15 minutes. Transfer to a rack and let cool.
- Prepare the Caramel: In a medium saucepan over medium heat, whisk together sugar, corn syrup, salt, and 6 tbsp. water and bring to a boil. Cook, without stirring, until a candy thermometer inserted into the syrup reads 340°. Remove pan from heat and whisk in butter, heavy cream, sour cream, and vanilla (the mixture will bubble up) until smooth. Pour caramel into cooled tartlet shells and let cool slightly; refrigerate until firm, about 3-4 hours.
- Prepare the Ganache: In a medium saucepan over medium heat, bring heavy cream to a boil. Put chocolate into a medium bowl and pour in hot cream; let sit for 1 minute, then stir slowly with a rubber spatula until smooth. Spoon ganache evenly over tartlets and refrigerate until set, 3-4 hours. If desired, sprinkle tart with vanilla fleur de sel and slice. Serve cold.
Notes
- Storage: To store your tarts, keep them in an airtight container in the refrigerator. They are best enjoyed fresh but can last for up to three days in the fridge.
- Freezing: You can freeze the tarts after they are fully set. Wrap them tightly in plastic wrap and then in aluminum foil. They can be frozen for up to one month. Thaw in the refrigerator before serving.
- Pairing: Enjoy your Chocolate Caramel Tarts with a dollop of whipped cream or a scoop of vanilla ice cream for a delightful contrast.
- Flavor Variations: Feel free to experiment with flavored chocolates or add a hint of espresso to the ganache for a mocha twist.
- Presentation: Garnish with fresh berries or edible flowers for an elegant touch when serving.