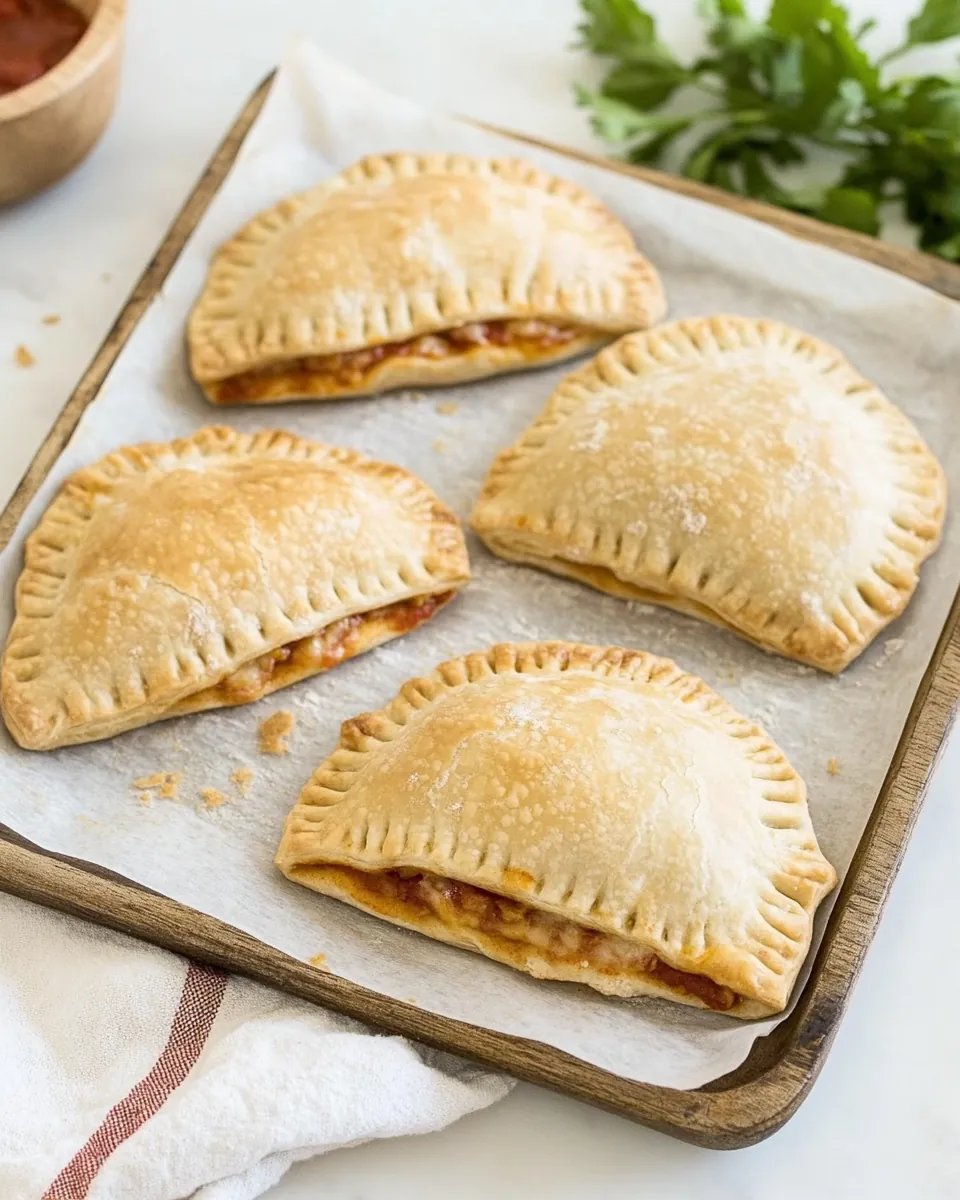
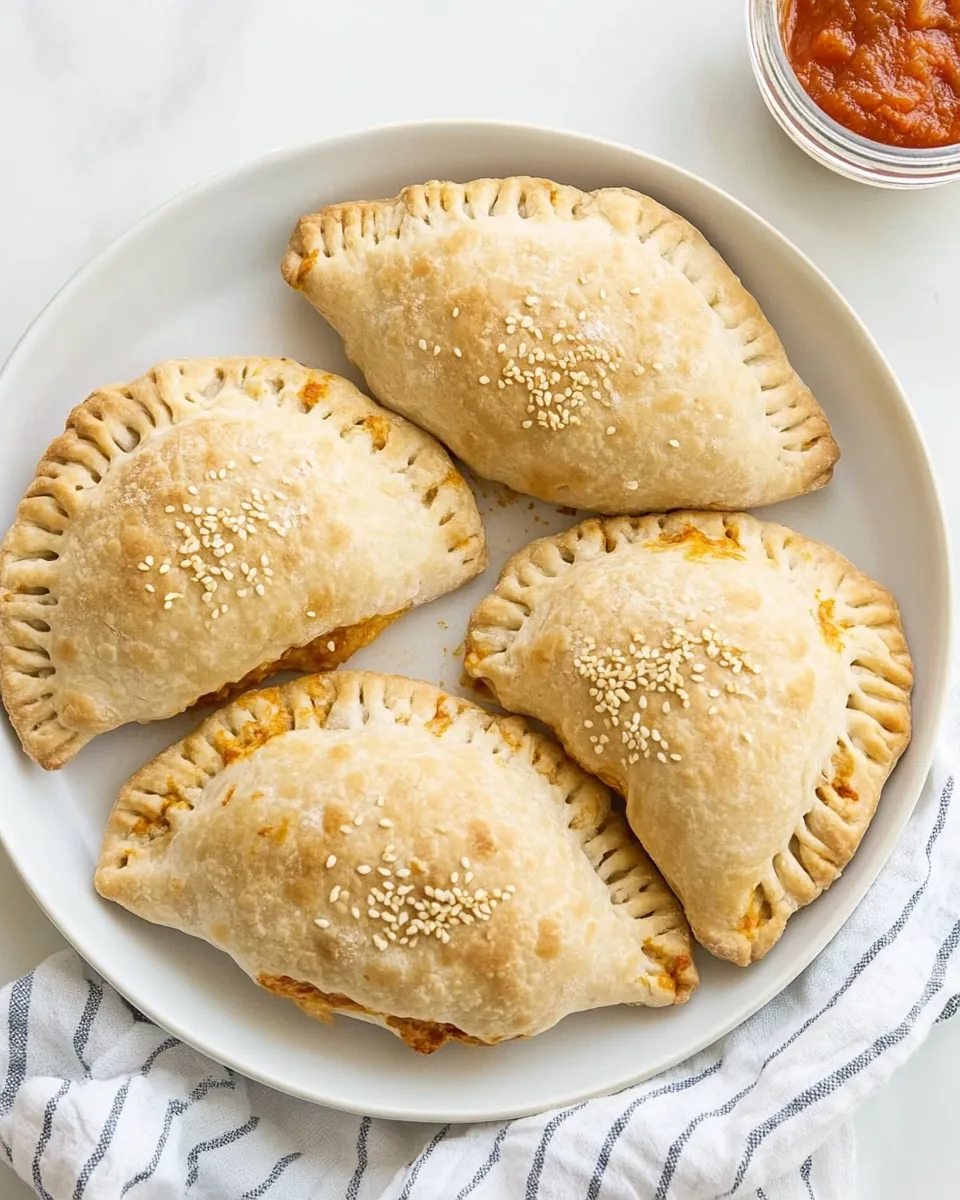
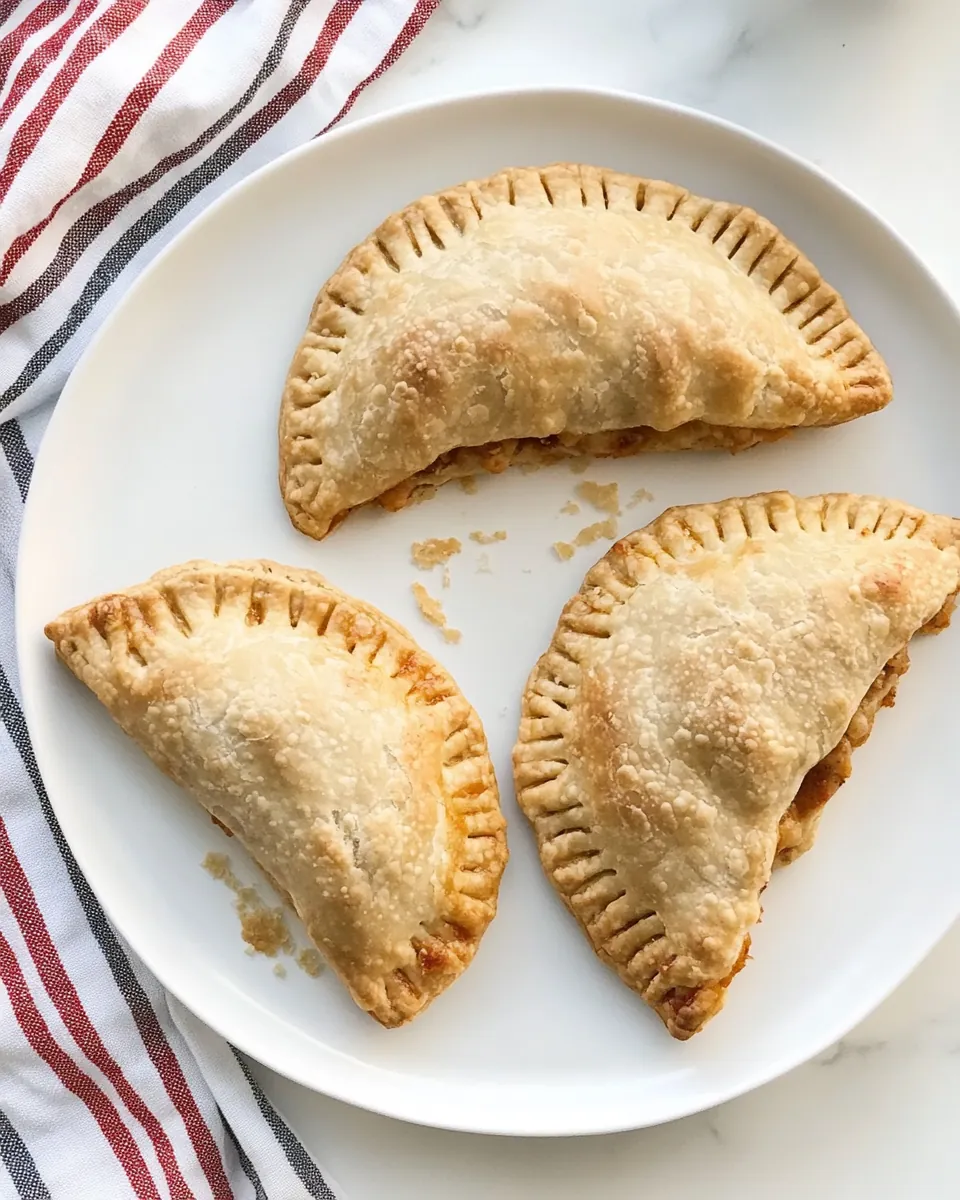
Homemade Pizza Pockets
The Homemade Pizza Pockets have a special place in my heart. Growing up, my family would gather around the kitchen on cozy evenings, creating these delicious little parcels of joy. They’re not just snacks; they’re memories wrapped in dough, filled with whatever toppings your heart desires. The smell of fresh dough rising and the anticipation of biting into a warm pocket filled with gooey cheese and vibrant veggies is simply unmatched. These pizza pockets are perfect for a quick lunch, a casual dinner, or even a fun party snack. Plus, the joy of customizing each pocket means everyone can get their favorite fillings. Whether it’s a burst of fresh broccoli, a sprinkle of cheese, or a dab of rich pizza sauce, each bite brings a smile. I promise you, once you take your first bite, you’ll understand why they hold such a special place in my culinary world.
Recipe Snapshot
35 mins
15 mins
20 mins
Medium
257 kcal
10 g
Standard
10 g
Oven, Baking Sheet, Mixing Bowl, Grater, Wooden Spoon
When it comes to food, I believe every ingredient tells a story. The magic behind Homemade Pizza Pockets lies in the simplicity and versatility of the ingredients we use. It’s a beautiful symphony of textures and flavors that come together effortlessly. First, we have the base dough, made with a combination of strong flour and whole wheat, creating a fantastic balance of lightness and hearty goodness. Then, we introduce our vibrant fillings—imagine the crunch of fresh broccoli and the creaminess of melted cheese, all enveloped in that perfect crust. Each ingredient plays a pivotal role, with the yeast bringing life to our dough, while a hint of olive oil adds richness and flavor. I love that you can throw in whatever toppings you have on hand, making it a dish that’s both economical and exciting! Let’s dive into why you’ll adore making these delightful pockets.
What You’ll Enjoy About This Homemade Pizza Pockets
Versatile Fillings
One of the best things about Homemade Pizza Pockets is the endless variety of fillings you can choose from. Whether you prefer classic pepperoni and cheese or want to experiment with veggies like mushrooms, spinach, or bell peppers, the options are limitless. This allows you to cater to your family’s tastes or even your dietary preferences, making it a truly customizable meal. The whole family can personalize their pockets, ensuring everyone’s happy.
Easy to Make
Don’t be intimidated by making the dough. It’s surprisingly easy and requires minimal ingredients! Just a bit of patience while letting the dough rise, and soon you’ll have a beautiful, pliable dough ready to be filled. Once you get the hang of it, making Homemade Pizza Pockets becomes a fun kitchen activity that you can involve the kids in, making it a perfect family project.
Perfect for Meal Prep
These pizza pockets are excellent for meal prepping. You can make a large batch ahead of time, freeze them, and then bake them straight from the freezer whenever you need a quick meal. They reheat beautifully, making them ideal for busy weeknights or unexpected guests. Having these on hand saves time and ensures you always have something delicious ready to go.
A Fun Cooking Experience
Involving kids in the kitchen can be a challenge, but Homemade Pizza Pockets transform cooking into a fun experience! Kids love rolling the dough, choosing their fillings, and sealing their pockets. It’s a hands-on activity that teaches them about food while sparking their creativity. Plus, there’s nothing like seeing the joy on their faces when they take their first bite.
Great for Any Occasion
Whether you’re hosting a casual gathering, preparing a family dinner, or just craving a late-night snack, Homemade Pizza Pockets fit the bill. They’re perfect for lunchboxes, parties, or a leisurely weekend treat. With their bite-sized nature, they’re easy to serve and even easier to enjoy!
Essential Ingredients for Homemade Pizza Pockets
When it comes to creating the perfect Homemade Pizza Pockets, the ingredients you choose are crucial. Each component plays a significant role in achieving that ideal balance of flavor and texture. The beauty of these ingredients lies in their simplicity and how they work harmoniously together. From the dough to the fillings, let’s explore the key players in this delightful recipe that will make every bite a delicious experience.
- 2 teaspoons yeast – This little powerhouse is essential for giving our dough its lift and airy texture.
- 1 teaspoon sugar – A touch of sweetness helps activate the yeast, ensuring our dough rises beautifully.
- 2 cups all-purpose flour – The backbone of our dough, providing structure and chewiness.
- 1 cup whole wheat flour – Adds a nutty flavor and extra nutrition to our pizza pockets.
- 1 teaspoon salt – Balances the flavors and strengthens the dough’s structure.
- 2 tablespoons olive oil – Imparts a rich flavor and a tender texture to the dough.
- ¼ cup pizza sauce – The flavorful foundation that makes these pockets taste like your favorite pizza.
- 1½ cups frozen broccoli florets, minced – A nutritious filling option that’s vibrant and delicious.
- 1 cup shredded mozzarella cheese – This melty favorite binds everything together, making each bite ooey-gooey.
- 2 tablespoons grated Parmesan cheese – A sprinkle of this adds a touch of savory depth to the filling.
How to Assemble Homemade Pizza Pockets
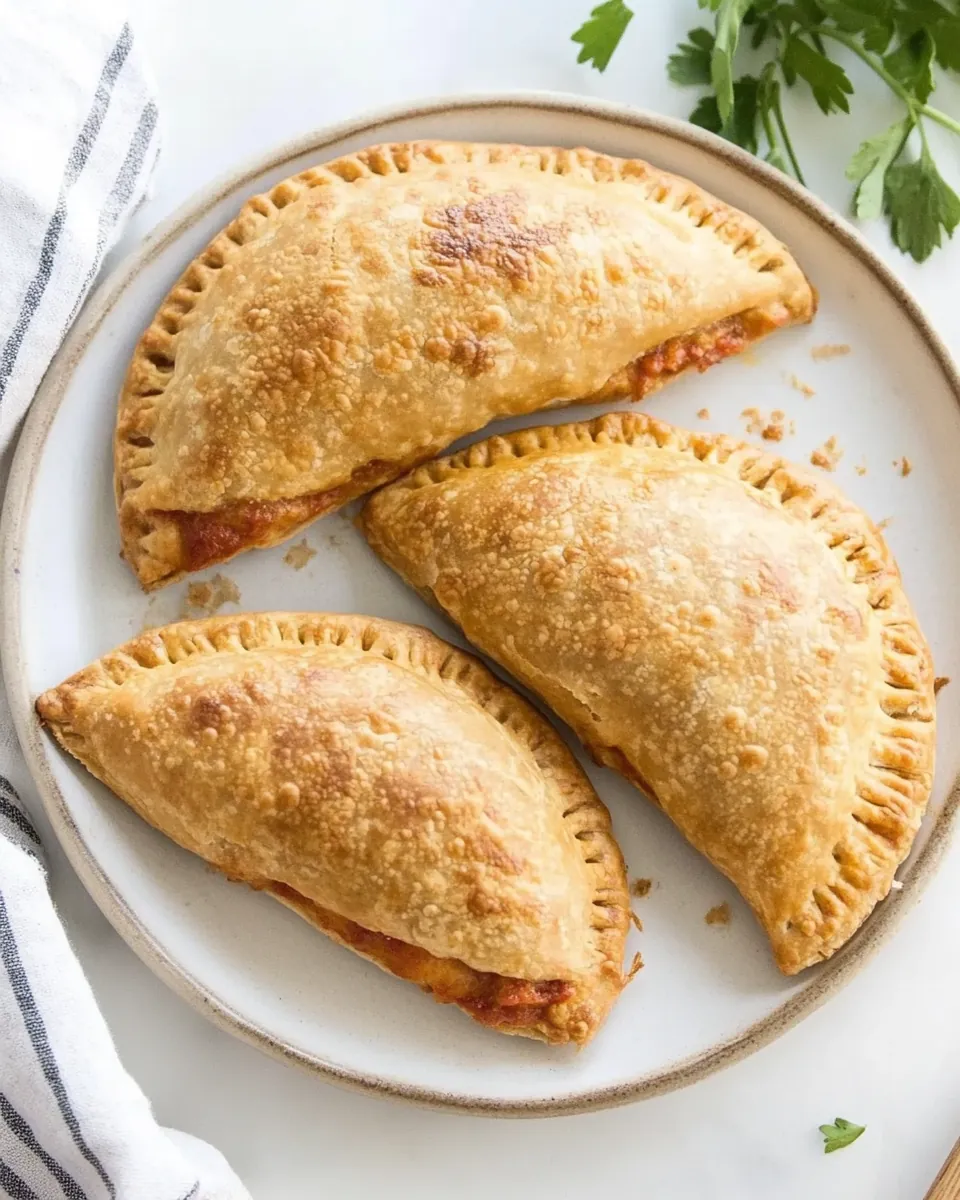
Assembling Homemade Pizza Pockets is a delightful process that combines creativity and technique. You’ll find that it’s not only simple but also fun! Follow these steps closely, and soon you’ll be enjoying your golden, crispy pockets filled with delicious goodness.
- Start by stirring yeast and sugar into 1 cup of warm water in a mixing bowl. Let it sit for about five minutes, or until it becomes puffy and frothy. This step is crucial as it shows that your yeast is active and ready to make the dough rise.
- Once the yeast mixture is puffy, add in all-purpose flour, whole wheat flour, salt, and olive oil. Stir everything together using a wooden spoon until a dough begins to form. It should be slightly sticky but manageable.
- Turn the dough out onto a floured surface. Knead it gently for about five minutes until it’s smooth and elastic. If the dough feels too dry, add a little water; if it’s too sticky, sprinkle a bit more flour.
- Place the kneaded dough into a lightly greased bowl, cover it with a clean towel, and let it rise for one to two hours. It should double in size, becoming puffy and airy.
- Once risen, punch down the dough to release the air. Divide it into eight equal sections. I like to cut it in half and then keep halving until I get eight even pieces.
- Take one piece of dough and flatten it into a disc about six inches wide on a floured surface. Don’t worry about making it perfect; the beauty of Homemade Pizza Pockets is in their rustic charm!
- In the center of each disc, place one teaspoon of pizza sauce, followed by two heaping tablespoons of minced broccoli and shredded mozzarella cheese. Sprinkle with a bit of Parmesan cheese for that extra flavor kick.
- Carefully fold the dough over the filling to create a pocket. Press the edges together firmly to seal. If needed, you can use a little water to help the seams stick together. Make sure it’s well-sealed to prevent any filling from escaping while baking.
- Transfer the filled pocket onto a lined baking sheet. Use a fork to poke a few holes in the top, allowing steam to escape during baking. For added flavor, feel free to brush the tops with olive oil and sprinkle with oregano.
- Repeat the process with the remaining dough and filling until you have all eight pockets ready. Once done, cover them with a towel while you preheat the oven to 400 degrees Fahrenheit.
- After preheating, bake the pizza pockets for 20 to 22 minutes, or until they’re golden brown and firm to the touch. Let them cool slightly before serving warm.
Things Worth Knowing
- Not all doughs are the same. If your dough feels too sticky or dry during kneading, adjust with a bit of flour or water to achieve a smooth consistency.
- For an extra crispy crust, consider preheating your baking sheet in the oven before placing the filled pockets on it. This helps create a golden, crunchy bottom.
- Experiment with different fillings, such as sautéed mushrooms or bell peppers, to find your favorite combinations.
- Don’t skip the step of poking holes in the pockets! This prevents them from bursting while they bake, keeping all that cheesy goodness inside.
Recipe Notes about Homemade Pizza Pockets
Every recipe comes with its own set of tips to ensure success. Here are some insights to help you master Homemade Pizza Pockets:
- Storage: After baking, let the pockets cool completely. Store in an airtight container in the fridge for up to five days. Reheat them in the microwave for about thirty to forty-five seconds or in the oven at 375 degrees Fahrenheit for around six minutes.
- Freezing: To freeze, make sure the pizza pockets are fully cooled. Place them in a zip-top freezer bag and store them for up to three months. When ready to eat, reheat directly from frozen in a 375 degrees Fahrenheit oven for eight to ten minutes.
- Sealing Tips: To prevent any filling from leaking out, be sure to secure the seams tightly. If you find the edges aren’t sticking well, a small amount of water can help seal them.
- Vent It: Use a fork to poke holes in the tops of each pocket. This helps steam escape and reduces the chances of cheese leakage.
- Using Fresh Broccoli: If you want to use fresh broccoli, simply chop the florets and add them directly to the filling. They’ll cook perfectly in the oven without the need for pre-cooking.
What Complements This Homemade Pizza Pockets
When it comes to serving Homemade Pizza Pockets, the possibilities are endless. Here’s a list of ideas to enhance your meal experience:
- Salad Pairing: Serve these pockets alongside a crisp garden salad for a refreshing contrast. A light vinaigrette complements the richness of the cheese nicely.
- Dipping Sauce: Consider offering a side of marinara sauce for dipping. This adds an extra layer of flavor and is a fun way to enjoy each bite.
- Casual Gatherings: They make for a great appetizer at parties. Serve them on a platter for guests to grab as they mingle.
- Lunchbox Treats: Pack them in lunchboxes for a delicious, filling meal that kids will love. They’re easy to hold and eat on the go.
- Game Day Snacks: Perfect for watching the game, these pockets are a crowd-pleaser that everyone will enjoy.
- Seasonal Variations: Experiment with seasonal vegetables to keep things fresh and exciting. Spinach in the spring or roasted peppers in the summer can enhance the flavor profile.
FAQ
Conclusion
In conclusion, Homemade Pizza Pockets stand out as a delightful and versatile dish that can be easily tailored to suit any palate. Their warm, cheesy filling encased in a golden crust creates a comforting meal that brings joy to every bite. I encourage you to try making them at home—you’ll find that they not only satisfy your cravings but also offer a fun cooking experience for the whole family. So roll up your sleeves, get creative with your fillings, and enjoy these tasty pockets of goodness!
Homemade Pizza Pockets
Ingredients
Equipment
Method
- Stir the yeast and sugar into 1 cup warm water. Let sit for 5 minutes or until puffy.
- Add the flours, salt, olive oil, and the water-yeast mixture to a medium bowl. Stir with a wooden spoon to bring the dough together, then use clean hands to knead slightly to incorporate all of the flour. (Add a little extra water if needed if the dough is dry.) Cover with a clean towel and let rise for 1 to 2 hours or until about doubled in size. It should look puffy.
- Divide the dough into 8 even sections. (I use a paring knife to cut it in half, then in half again and again, etc to make a pinwheel shape with 8 even triangles.)
- Working with one piece of dough at a time, coating with flour as needed if sticky, flatten into a disc that’s about 6 inches wide. (It doesn’t need to be precise!)
- Place 1 teaspoon pizza sauce and 2 heaping tablespoons each minced broccoli and cheese into the center. Sprinkle with a little Parmesan.
- Fold in the dough to enclose the fillings. The seams should press and hold together with a little gentle pressing. Use a little water if needed to help secure the dough.
- Place pocket onto a lined baking sheet and use a fork to poke a few holes in the top of each to allow steam to escape. Optional: Brush with olive oil and sprinkle with oregano.
- Repeat to make all 8 pizza pockets. Set aside and cover with a towel while the oven preheats.
- Preheat the oven to 400 degrees F. Bake the pizza pockets for 20 to 22 minutes or until firm to the touch. Let cool slightly and serve warm.
Notes
- Tip 1: After baking, let the pockets cool completely. Store in an airtight container in the fridge for up to five days. Reheat them in the microwave for about thirty to forty-five seconds or in the oven at 375 degrees Fahrenheit for around six minutes.
- Tip 2: To freeze, make sure the pizza pockets are fully cooled. Place them in a zip-top freezer bag and store them for up to three months. When ready to eat, reheat directly from frozen in a 375 degrees Fahrenheit oven for eight to ten minutes.
- Tip 3: To prevent any filling from leaking out, be sure to secure the seams tightly. If you find the edges aren’t sticking well, a small amount of water can help seal them.
- Tip 4: Use a fork to poke holes in the tops of each pocket. This helps steam escape and reduces the chances of cheese leakage.
- Tip 5: If you want to use fresh broccoli, simply chop the florets and add them directly to the filling. They’ll cook perfectly in the oven without the need for pre-cooking.