Gluten Free Yeasted Buttermilk Waffles
There’s something magical about a Saturday morning when the aroma of freshly made waffles fills the air, and those crispy edges beckon you to indulge. That’s exactly what you get with these Gluten Free Yeasted Buttermilk Waffles. The idea was born one rainy weekend when I craved a comforting breakfast but wanted to keep it gluten-free without sacrificing flavor. With a little experimentation, I combined fluffy buttermilk with yeast for a light, airy texture that’s perfect for any occasion. The addition of lemon-honey ricotta elevates these waffles to something truly special, and I couldn’t wait to share this delicious discovery.
Recipe Snapshot
20 mins
10 mins
10 mins
Easy
220 kcal
6 g
Gluten-Free
9 g
Wooden Spoon, Mixing Bowl
Why You’ll Love This Gluten Free Yeasted Buttermilk Waffles
Why These Waffles Stand Out
They’re gluten-free yet fluffy! Unlike many gluten-free recipes, these waffles retain a delightful texture that satisfies. The yeast fermentation process creates a light and airy batter that rivals traditional waffles.
Unique Flavor Combination
Imagine the zing of lemon paired with the natural sweetness of honey ricotta. This unique blend not only complements the waffles but also adds a refreshing twist that will keep you coming back for more. Each bite is a burst of flavor that dances on your taste buds.
Perfect for Any Meal
These waffles are not just for breakfast; they can easily transition into brunch or even a light dinner option when served with fruit and yogurt. They’re versatile and can be dressed up or down depending on your mood.
Easy Preparation
With straightforward steps, making these waffles is a breeze. You can prepare the batter the night before, letting it rise overnight for a hassle-free morning. Just heat the waffle iron, and you’re ready to go!
Kid-Friendly and Fun
Kids love waffles! Involving your little ones in the cooking process can turn a simple meal into a fun family activity. Let them help sprinkle the toppings—this makes breakfast more enjoyable for everyone!
What to Buy for Gluten Free Yeasted Buttermilk Waffles
When creating these Gluten Free Yeasted Buttermilk Waffles, the choice of ingredients plays a crucial role in achieving the perfect texture and flavor. Each component works in harmony to produce a delicious result. The star players include buttermilk, which adds richness, and the yeast, which provides that desired fluffiness.
- 1/2 cup warm water: Activates the yeast, providing the necessary hydration for the batter.
- 1.75-ounce packet Red Star Platinum or Active Dry Yeast: Essential for leavening, making the waffles fluffy and light.
- 2 cups buttermilk: Adds tanginess and moisture, crucial for soft and tender waffles.
- 1 tablespoon pure maple syrup: A touch of sweetness that enhances the flavor profile.
- 1/2 cup melted butter: Contributes to richness and flavor, ensuring a delightful taste.
- 2 cups gluten-free all-purpose flour: The base of the waffles, providing structure without gluten.
- 1/2 teaspoon sea salt: Balances the sweetness and enhances other flavors.
- 2 eggs slightly beaten: Binds the ingredients together, adding moisture and richness.
- 1/4 teaspoon baking soda: Provides additional leavening for a light texture.
- 15 ounces ricotta: Creamy base for the lemon-honey topping, adding richness.
- Zest of one lemon: Infuses a bright flavor into the ricotta.
- 2-1/2 tablespoons lemon juice: Brightens the ricotta, enhancing its flavor.
- 2 tablespoons honey to taste: Sweetens the ricotta, balancing the tartness of lemon.
- 1 pinch sea salt: Enhances flavors in the ricotta.
- Fresh blueberries: A delightful topping to add freshness and color.
- Honey: Additional drizzle for serving, sweetening the overall dish.
Cooking Instructions for Gluten Free Yeasted Buttermilk Waffles
Creating these waffles is a delightful process, and soon you’ll have a stack to enjoy. Follow these simple steps carefully, and you’ll be rewarded with delicious Gluten Free Yeasted Buttermilk Waffles that everyone will love.
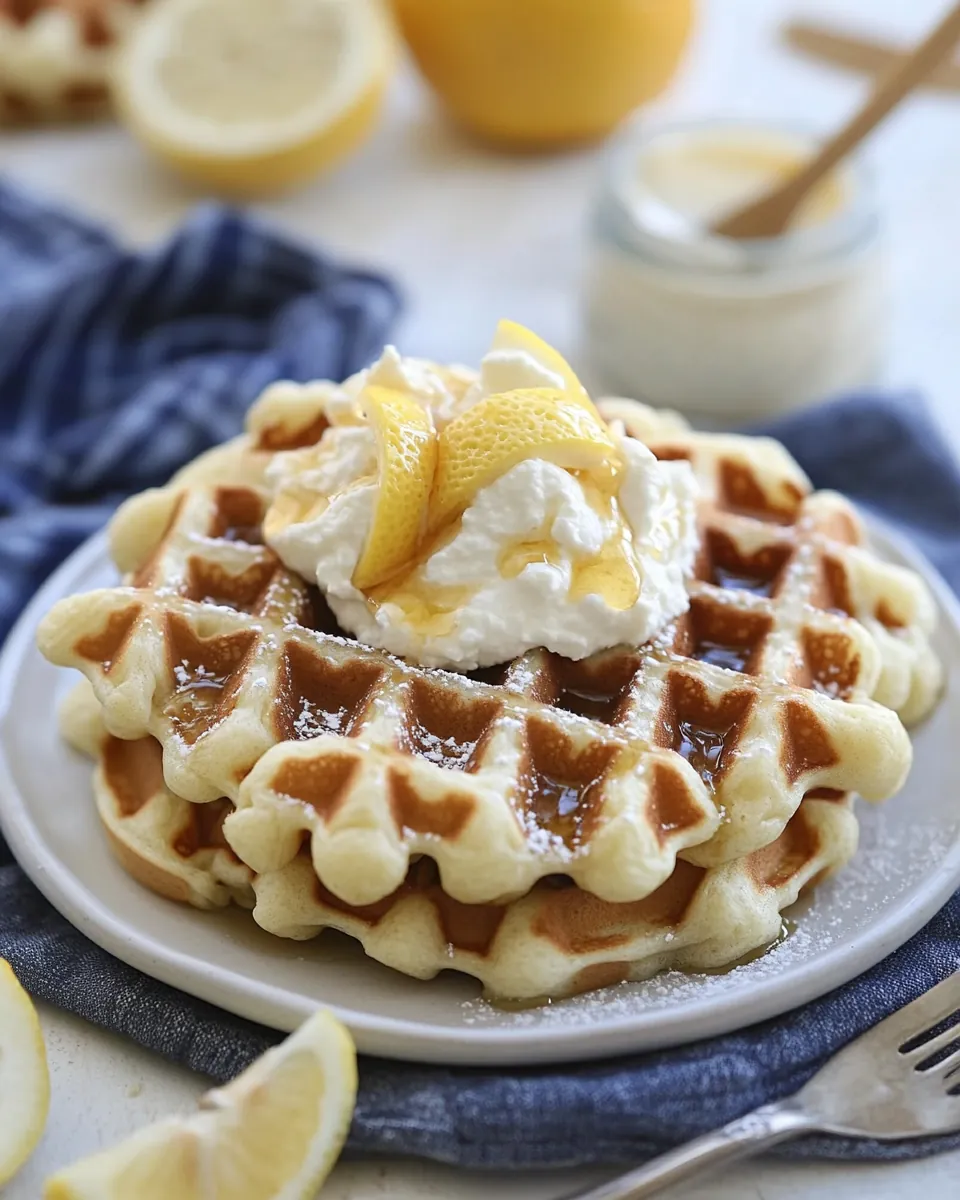
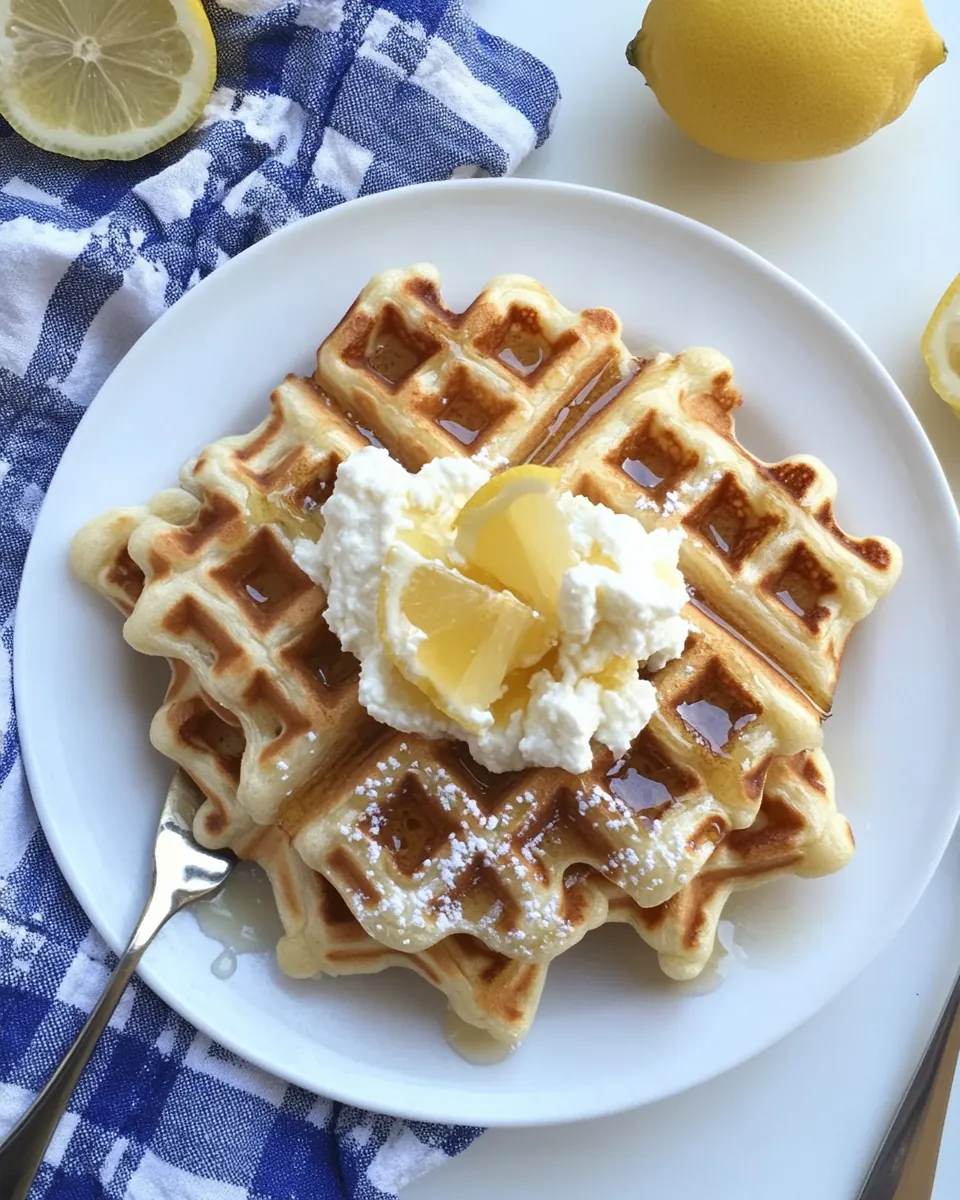
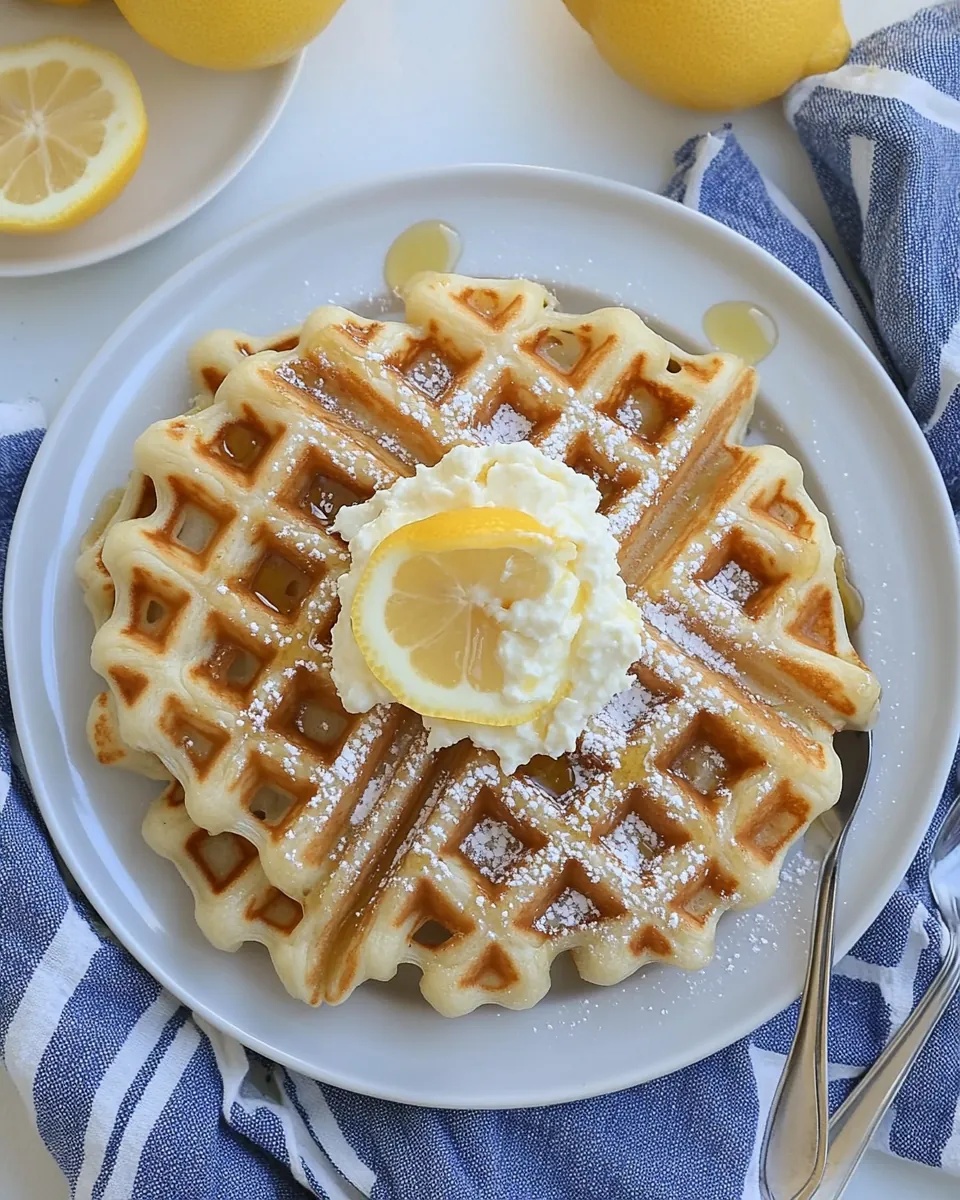
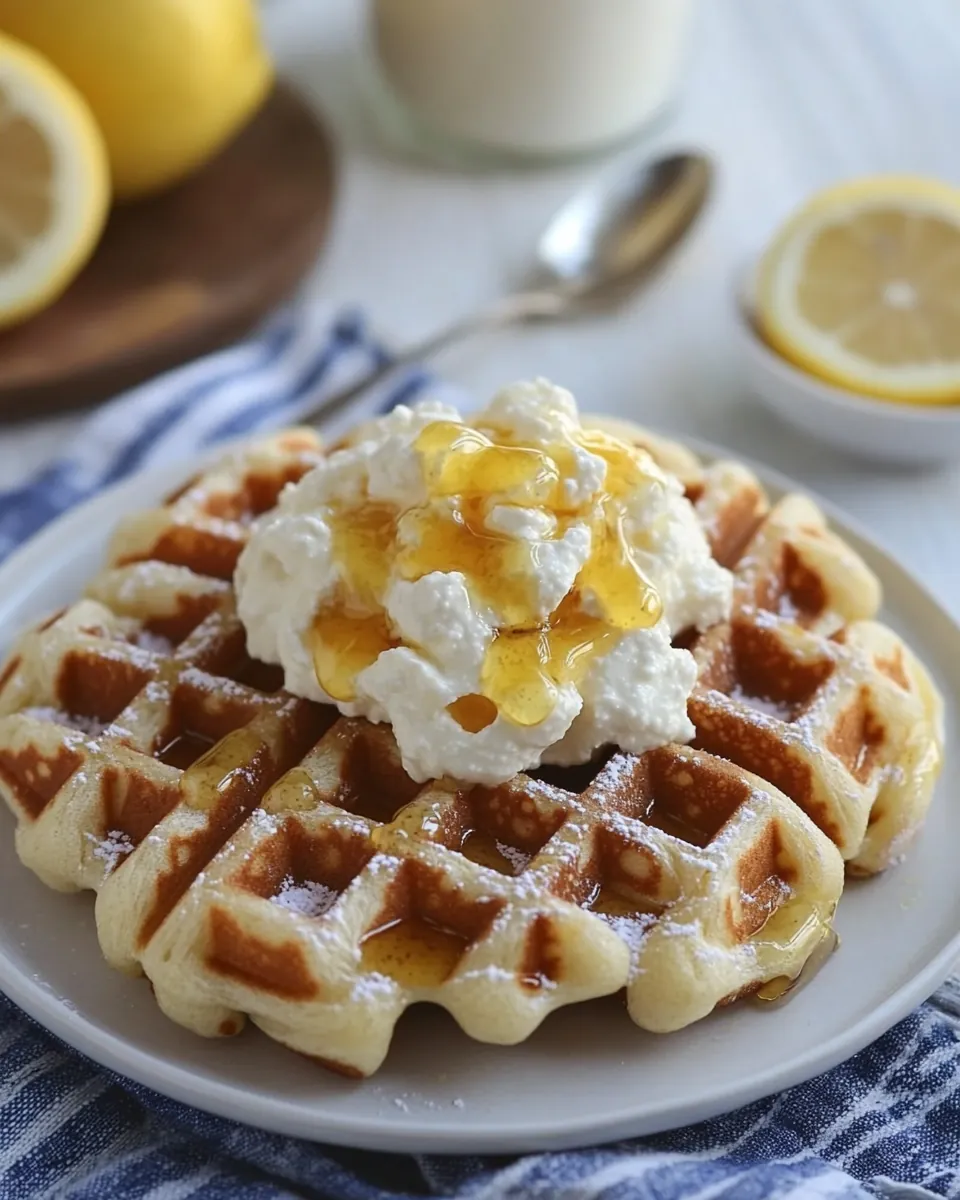
- Start by preparing the lemon-honey ricotta. Stir together all ingredients for the lemon-honey ricotta in a small bowl. Be sure to include the ricotta, lemon zest, lemon juice, and honey. Refrigerate until ready to use. If your honey is hard or crystallized, heat it for about 8 to 10 seconds in the microwave until liquid, then allow it to cool before adding it to the ricotta.
- In a large mixing bowl, combine the warm water and yeast. Stir together and allow the mixture to sit for 5 to 10 minutes, until it’s foamy. This confirms that your yeast is active.
- Add the buttermilk, melted butter, and maple syrup to the yeast mixture. Stir until combined. This wet mixture is critical for a flavorful batter.
- In a separate bowl, combine the gluten-free flour and sea salt. Mix well to evenly distribute the salt.
- Pour the flour mixture into the bowl with the wet mixture. Mix gently until no clumps remain, being careful not to overmix.
- Cover the bowl with plastic wrap and allow it to sit at room temperature for at least 3 hours or overnight. This resting period allows the flavors to meld and the batter to rise.
- Once rested, add the slightly beaten eggs and baking soda to the batter. Mix until fully combined.
- Preheat your waffle iron and spray it with cooking oil. This prevents sticking and ensures a nice golden color.
- Measure out about 1/2 cup of batter and pour it onto the hot waffle iron. Close the lid and let the waffle cook until golden brown, about 1 to 2 minutes. Watch for steam to slow down—this is a sign they’re close to done!
- Repeat for the remaining batter, ensuring each waffle is perfectly cooked.
- Serve the waffles hot with a generous dollop of the honey-lemon ricotta, a drizzle of honey, and fresh blueberries. Enjoy the deliciousness!
Things Worth Knowing
- Yeast Activation: Ensuring your yeast is fresh is key. If it doesn’t bubble during the activation step, it might be stale and won’t work.
- Mixing Techniques: Combine wet and dry ingredients gently to avoid overdeveloping the batter, which can lead to tough waffles.
- Resting Time: Allowing the batter to rest is crucial for the best texture. The yeast needs time to work its magic.
- Cooking Temperature: Make sure your waffle iron is properly heated before adding the batter. This guarantees a crispy exterior.
Customization Ideas
There’s always room for creativity in the kitchen! Here are some fun ideas to customize your Gluten Free Yeasted Buttermilk Waffles:
- Swap the Flour: Experiment with different gluten-free flours, like almond or coconut flour, for unique textures and flavors.
- Add Chocolate Chips: For a more indulgent breakfast, mix in some gluten-free chocolate chips into the batter.
- Fruit Variations: Use mashed bananas or applesauce for added moisture and flavor in the batter.
- Nutty Crunch: Stir in chopped nuts for a delightful crunch.
- Serving Ideas: Top with sliced strawberries, raspberries, or a scatter of nuts for added texture and flavor.
- Spices: A pinch of cinnamon or nutmeg can add a lovely warmth to the batter.
- Different Dairy Options: Try using yogurt instead of buttermilk for a tangy flavor.
What Complements This Gluten Free Yeasted Buttermilk Waffles
These Gluten Free Yeasted Buttermilk Waffles are perfect for various occasions and pair wonderfully with different accompaniments. Here are some ideas:
- Fresh Fruit: Serve with seasonal fruits like strawberries, blueberries, or even grilled peaches for a refreshing touch.
- Maple Syrup: A classic addition; the natural sweetness pairs beautifully with the waffles.
- Yogurt: A dollop of Greek yogurt adds creaminess and a tangy flavor that complements the waffles.
- Nut Butter: Drizzle with almond or peanut butter for a protein boost.
- Breakfast for Dinner: These waffles can be a fun dinner option when topped with savory ingredients like smoked salmon or avocado.
- Brunch Occasions: Perfect for brunch gatherings, serving these waffles alongside fresh salads or savory quiches can elevate your meal.
- Storage: Leftovers can be refrigerated for up to three days and reheated in a toaster for a quick breakfast.
FAQ
Conclusion
These Gluten Free Yeasted Buttermilk Waffles are a delightful twist on a breakfast classic. Their light and fluffy texture, combined with the refreshing lemon-honey ricotta, makes them a unique treat worth trying. Don’t hesitate to whip up a batch for your next breakfast or brunch gathering. You’ll impress everyone at the table and leave them asking for seconds!
Gluten Free Yeasted Buttermilk Waffles
Ingredients
Equipment
Method
- Stir together all ingredients for the lemon-honey ricotta in a small bowl. Refrigerate until ready to use. Note: if your honey is hard or crystallized, heat it for about 8 to 10 seconds in the microwave, until liquid, then allow it to cool before adding it to the ricotta.
- In a large mixing bowl, combine the warm water and yeast. Stir together and allow the mixture to sit for 5 to 10 minutes. Add the buttermilk, melted butter, and maple syrup and stir to combine.
- In a separate bowl, combine the flour and sea salt. Pour the flour mixture into the bowl with the wet mixture and mix until all clumps are out. Cover bowl with plastic wrap and allow it to sit at room temperature for at least 3 hours or overnight.
- Add the beaten eggs and baking soda to the waffle batter and mix until combined.
- Heat your waffle iron and spray it with cooking oil. Measure out about 1/2 cup of batter and pour onto the hot waffle iron. Replace the lid and allow the waffle to cook until golden brown, about 1 to 2 minutes. Repeat for the remaining batter.
- Serve waffles with honey-lemon ricotta, a drizzle of honey, and fresh blueberries.
Notes
- If you eat a gluten-free diet: Use Red Star's Active Dry Yeast instead of the Platinum, as Platinum yeast is not gluten-free.