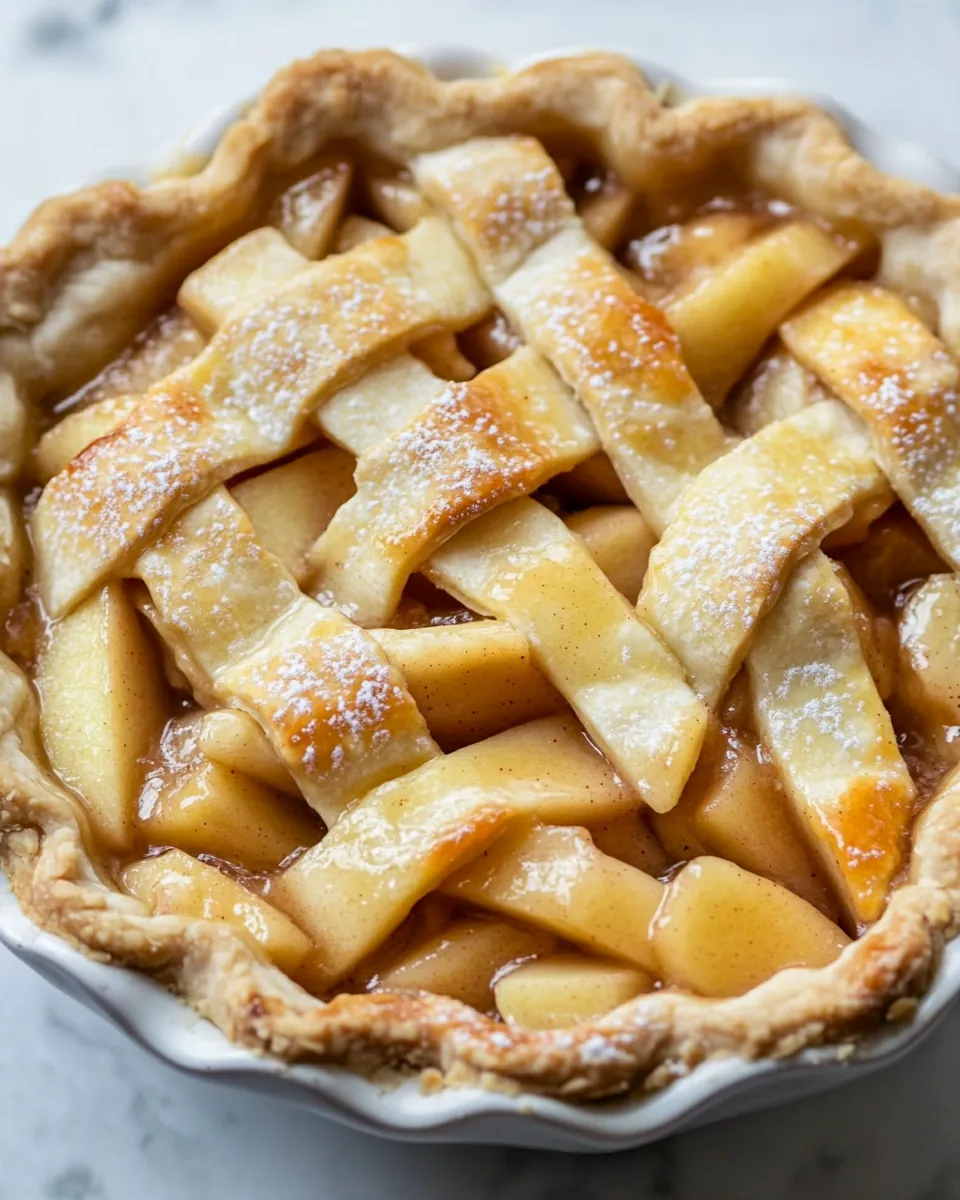
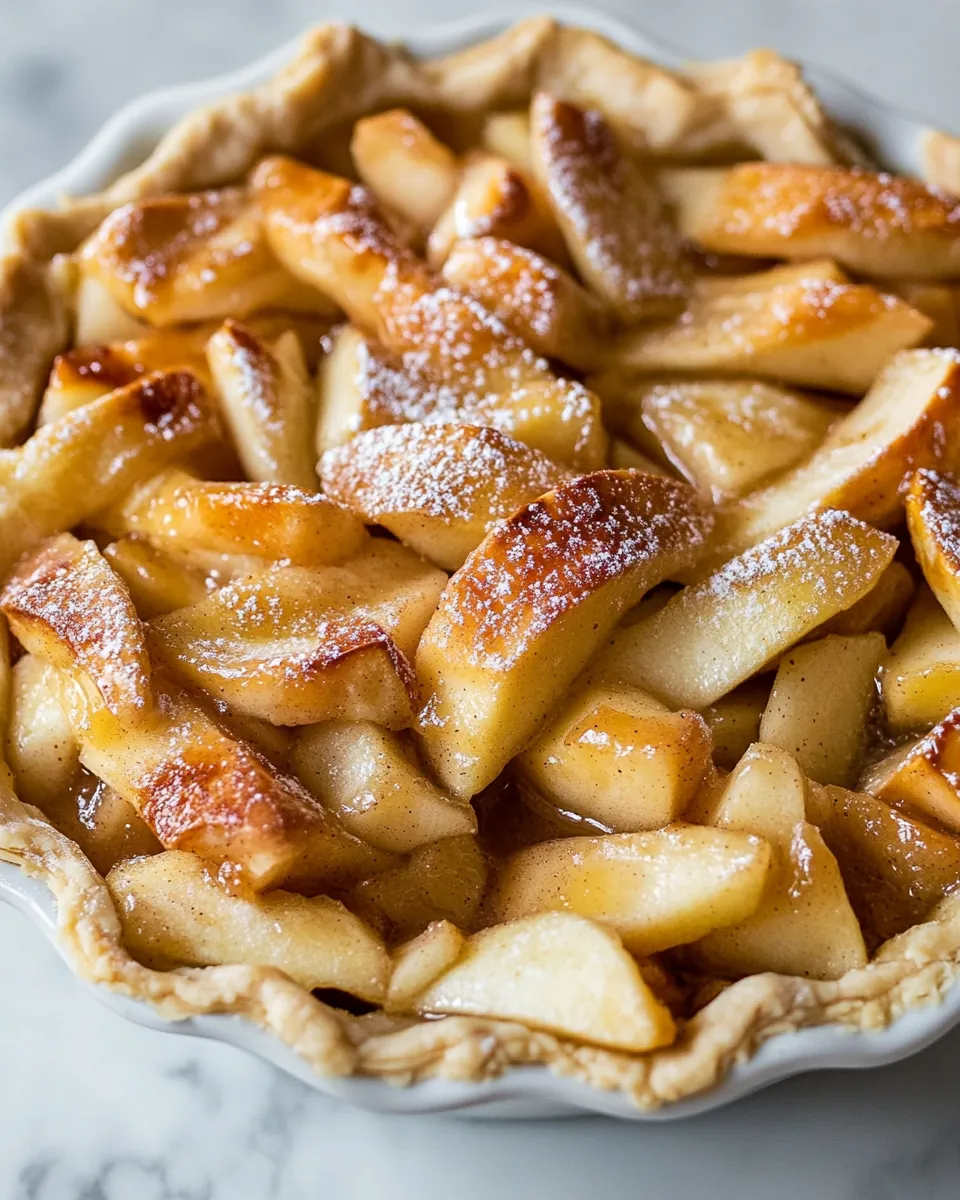
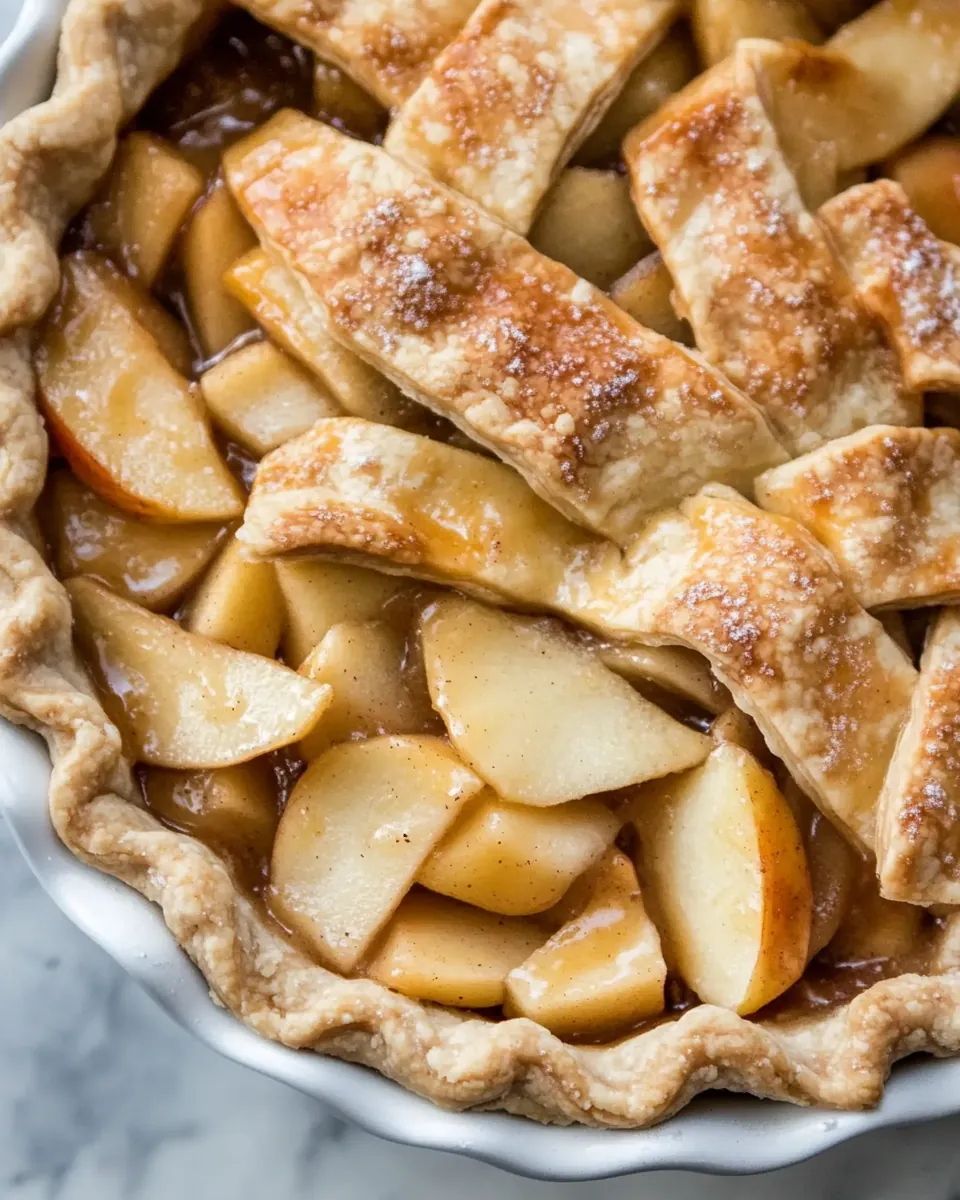
Homemade Apple Pie Filling
There’s something truly special about making your own pie fillings, and for me, it all begins with Homemade Apple Pie Filling. Every fall, as the leaves turn and the air gets crisp, I find myself drawn to the local apple orchards. The sweet and tart aroma of freshly picked apples fills the air, and I can’t help but imagine the warm pies that will soon emerge from my kitchen. Memories of family gatherings, laughter, and the golden crust of a pie bubbling with delicious apple filling flash before my eyes.
One of my fondest memories is baking with my grandmother. She had a knack for choosing the perfect apples, blending just the right spices, and teaching me how to make the filling from scratch. This tradition has been passed down through the generations, and I love sharing it with my own family now. There’s just something about the blend of sweet and tart apples that brings warmth to any occasion, especially during Thanksgiving or cozy family dinners.
As I make Homemade Apple Pie Filling, I feel a sense of accomplishment. It’s not just about the ingredients, but about creating something that will bring joy to others. The bubbling mixture of apples, sugar, and spices takes me back to those cherished moments. With each bite of pie, I hope to evoke the same feelings in my loved ones that I experienced when I first learned to make this delicious filling.
So, get your aprons ready! It’s time to embrace the joy of making your own Homemade Apple Pie Filling. Whether it’s for a special occasion or simply to enjoy on a quiet evening, this recipe will definitely bring a smile to your face.
Recipe Snapshot
25 mins
15 mins
10 mins
Medium
150 kcal
1 g
Vegan, Gluten-Free, AIP
0 g
Oven, Mixing Bowl, Grater, Peeler, Chef’s Knife, Wooden Spoon
Why This Homemade Apple Pie Filling Stands Out
Freshness of Ingredients
Using fresh, locally sourced apples makes a world of difference. The flavor profile of your Homemade Apple Pie Filling is enhanced with each bite of crisp, sweet apple. It’s truly rewarding to support local farmers while indulging in such a delicious treat.
Versatility
This filling is not only perfect for pies but can also be used in tarts, crumbles, or even as a topping for pancakes or ice cream. Its adaptability allows you to enjoy the flavors in various forms, making it a versatile addition to your dessert repertoire.
Customizable Flavors
One of the things I love about making my own filling is that you can adjust the sweetness, spice levels, or even the type of apples used. Feel free to experiment with different varieties to achieve the perfect balance that suits your taste.
Easy Freezing
The ability to freeze the filling means that you can enjoy the taste of apples even when they are out of season. Make a large batch and store it away for those last-minute pie cravings or unexpected guests!
Family Tradition
Creating Homemade Apple Pie Filling is not just cooking; it’s about creating memories. Involving family in the process, sharing stories, and passing down techniques can foster a sense of belonging and tradition that lasts for generations.
Healthier Choice
When you make your own filling, you control the ingredients. You can reduce the sugar or add more spices to enhance the flavor without compromising on taste. This makes for a healthier dessert option that everyone can enjoy.
Homemade Apple Pie Filling Ingredients
When it comes to the ingredients for Homemade Apple Pie Filling, each one plays a vital role in achieving that perfect balance of flavor and texture. The combination of apples, sugar, and spices creates a symphony of taste that’s simply irresistible. Let’s dive into the key players that make this filling so special.
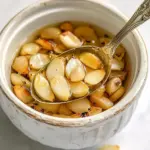
- 4 pounds mixed sweet/crisp and tart apples (about 8 large or 10 medium): The star of the show! A blend of both sweet and tart apples gives depth to the filling. My favorites are Honeycrisp for sweetness and Granny Smith for tartness.
- ½ cup granulated sugar: This adds just the right amount of sweetness to balance the tart apples.
- ½ teaspoon kosher salt: A pinch of salt enhances all the flavors, bringing the filling together beautifully.
- 1 teaspoon ground cinnamon: This spice adds warmth and a comforting aroma that’s synonymous with pie season.
- ⅛ teaspoon ground allspice: A touch of allspice brings a unique flavor that complements the apples perfectly.
- ⅛ teaspoon ground nutmeg (freshly grated if possible): Nutmeg adds a fragrant warmth and richness to the filling.
- ½ cup all-purpose flour: This helps to thicken the filling and give it a nice consistency.
- 2 teaspoons freshly squeezed lemon juice: The lemon juice brightens the flavor and helps to prevent the apples from browning.
Directions for Homemade Apple Pie Filling
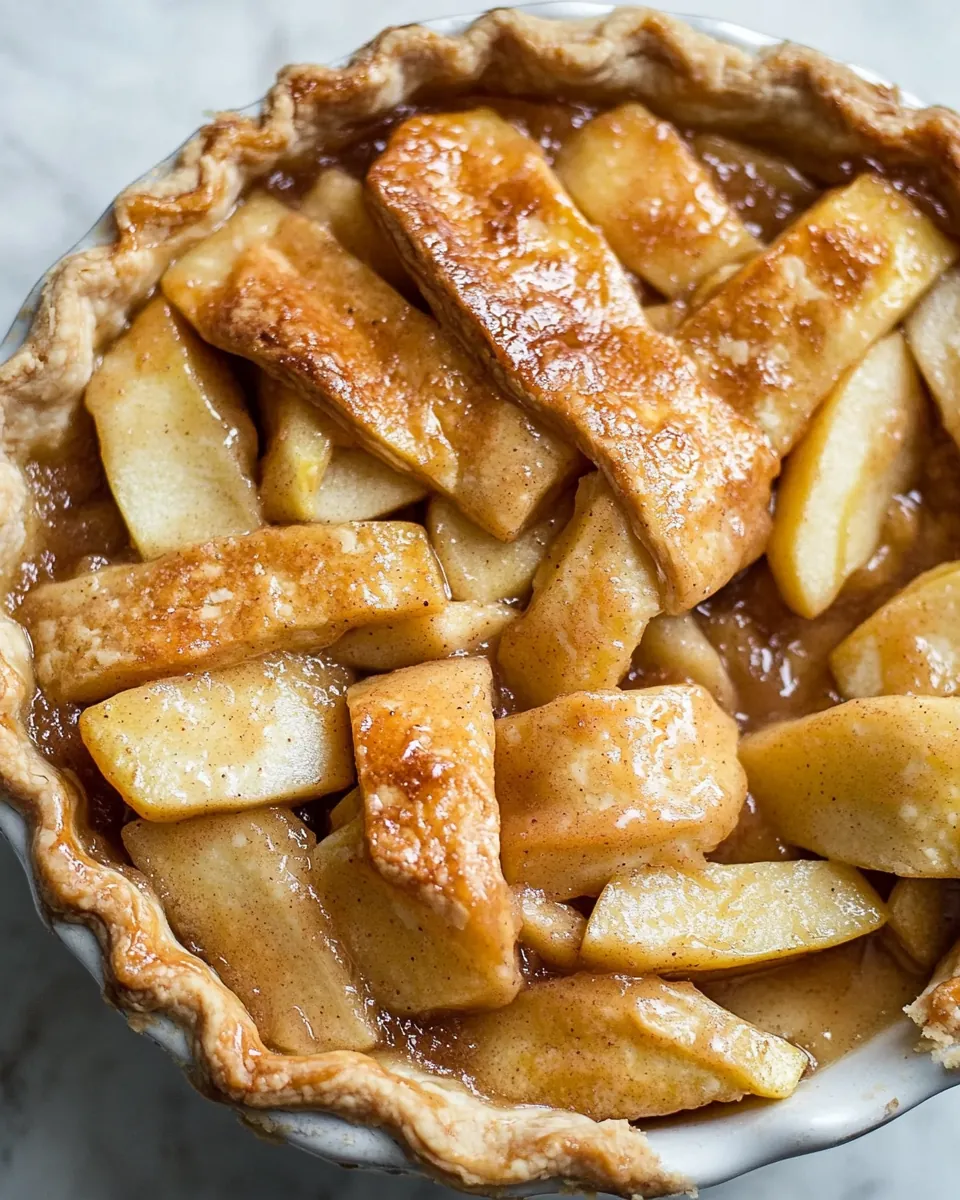
Making Homemade Apple Pie Filling is a straightforward process that yields delicious results. Follow these simple steps, and you’ll have a delectable filling ready to use in your favorite pie.
- Start by peeling the apples. Use a good peeler to remove the skins. The apples should feel firm and fresh as you work with them.
- Once peeled, core the apples and cut them into 1/4-inch slices. Aim for uniform pieces for even cooking. The aroma of the fresh apples will fill your kitchen, making it hard to resist!
- Place the sliced apples in a Dutch oven, large soup pot, or braiser. Ensure the pot is sturdy enough to handle the heat.
- To the pot, add the sugar, salt, cinnamon, allspice, nutmeg, and flour. Toss everything together gently to evenly coat all the slices with the mixture.
- Now, heat the pot over medium-low heat. As the mixture warms, stir it periodically. This will help the flavors meld together while the apples begin to soften.
- Cook until the apples just start to give up their juices, which should take around 10 minutes. You want to keep an eye on the texture; they should be soft but not mushy.
- Once the apples are ready, stir in the lemon juice. This will add a lovely brightness to the filling.
- Let the mixture cool completely to room temperature. This is key if you plan to use it later or freeze it!
- If you want to freeze the filling, spoon the apples and any juices into a sturdy zip-top freezer bag. Make sure to remove as much air as possible, seal it well, and freeze flat for up to 3 months.
- When you’re ready to use the filling, let it stand at room temperature for 20 to 30 minutes. This will allow it to loosen enough to spread into the pie crust without needing to thaw completely.
Things Worth Knowing
- Choosing Apples: Mixing sweet and tart apples ensures a balanced flavor. Try a combination like Honeycrisp and Granny Smith for the best results.
- Adjusting Sweetness: Feel free to modify the amount of sugar based on the sweetness of your apples. Taste as you go!
- Thickening Agent: The flour not only thickens but also absorbs excess juices. If you prefer a thicker filling, you can add a bit more.
- Freshness Matters: Always use fresh apples. The quality of your filling depends greatly on the freshness of your ingredients.
Tips and Variations
Creating the perfect Homemade Apple Pie Filling can be enhanced with a few additional tips and variations. Here are some ideas to consider!
- Storage: To store leftovers, place them in an airtight container in the refrigerator. They will keep for up to one week.
- Freezing: This filling can be frozen for up to 3 months. To use, simply thaw in the refrigerator before reheating.
- Flavor Variations: Experiment with different spices like cardamom or ginger for a unique twist on the traditional flavor.
- Serving Ideas: Besides pie, use this filling as a topping for yogurt, pancakes, or even ice cream for a delightful dessert.
- Batch Making: Make a large batch during apple season and freeze in individual portions for quick use later on.
- Texture Tips: If you prefer a chunky filling, avoid overcooking the apples. You want them to retain some structure.
What Complements This Homemade Apple Pie Filling
Serving Homemade Apple Pie Filling can be a delightful experience, especially when paired with the right accompaniments. Here are some wonderful options:
- Vanilla Ice Cream: A scoop of creamy vanilla ice cream on top of warm apple pie is a classic combination that never disappoints.
- Whipped Cream: A dollop of freshly whipped cream adds a rich and fluffy texture to the pie.
- Sharp Cheddar: Some people enjoy a slice of cheddar cheese with their apple pie, creating a perfect sweet and savory balance.
- Seasonal Sides: Serve alongside a simple green salad or roasted vegetables for a well-rounded meal.
- Perfect for Holidays: This is an ideal dessert for gatherings like Thanksgiving or Christmas, where it can be the star of the table.
- Storing Leftovers: To keep your pie fresh, store it covered in the refrigerator for several days. Reheat in the oven for the best texture.
FAQ
Conclusion
The joy of making **Homemade Apple Pie Filling** comes from the blend of flavors and the memories created along the way. It’s a recipe that not only satisfies your cravings but also warms your heart. I encourage you to try making it for your next gathering or cozy night in. The delicious aroma and delightful taste will surely bring smiles to everyone at the table. So, roll up your sleeves and start creating your own cherished tradition!
Homemade Apple Pie Filling
Ingredients
Equipment
Method
- Start by peeling the apples. Use a good peeler to remove the skins. The apples should feel firm and fresh as you work with them.
- Once peeled, core the apples and cut them into 1/4-inch slices. Aim for uniform pieces for even cooking. The aroma of the fresh apples will fill your kitchen, making it hard to resist!
- Place the sliced apples in a Dutch oven, large soup pot, or braiser. Ensure the pot is sturdy enough to handle the heat.
- To the pot, add the sugar, salt, cinnamon, allspice, nutmeg, and flour. Toss everything together gently to evenly coat all the slices with the mixture.
- Now, heat the pot over medium-low heat. As the mixture warms, stir it periodically. This will help the flavors meld together while the apples begin to soften.
- Cook until the apples just start to give up their juices, which should take around 10 minutes. You want to keep an eye on the texture; they should be soft but not mushy.
- Once the apples are ready, stir in the lemon juice. This will add a lovely brightness to the filling.
- Let the mixture cool completely to room temperature. This is key if you plan to use it later or freeze it!
- If you want to freeze the filling, spoon the apples and any juices into a sturdy zip-top freezer bag. Make sure to remove as much air as possible, seal it well, and freeze flat for up to 3 months.
- When you’re ready to use the filling, let it stand at room temperature for 20 to 30 minutes. This will allow it to loosen enough to spread into the pie crust without needing to thaw completely.
Notes
- For tart: Use a variety such as Granny Smith; for sweet/crisp, I love Honeycrisp. Varieties like Jazz, Braeburn, Fuji, Gala, and Pink Lady are good too.
- Yield: About 8 cups filling, enough for one 9-inch pie (deep dish or regular).
- To store: Apple pie filling will keep in the refrigerator for up to one week.
- To freeze: Transfer the apples and their juices to a sturdy zip-top freezer bag. Press out any air, then seal and freeze flat for up to 3 months.
- To reheat: Let the apple pie filling thaw in the refrigerator, then warm it up in the microwave or on the stovetop to use it as a topping.