Easy Homemade Labneh Recipe
There’s something magical about making your own cheese, and with this Easy Homemade Labneh Recipe, you can experience that joy right in your own kitchen! When I first stumbled upon the concept of labneh, I was immediately intrigued by how simple yet elegant it seemed. Just think about it: creamy, tangy, and oh-so-versatile, this yogurt cheese can elevate any dish. I remember the first time I made it; I was hosting a small gathering and wanted to impress my friends with something unique. As I drizzled the labneh with olive oil and sprinkled fresh mint on top, I watched their eyes light up in surprise. Who knew something so straightforward could be so delightful?
The best part about Easy Homemade Labneh Recipe is its adaptability. You can enjoy it as a dip with pita, spread it on sandwiches, or even use it in salads. It’s a fantastic way to incorporate more probiotics into your diet, and trust me, once you taste it, you’ll never want to go back to store-bought versions. It’s also a great activity to do with kids or friends; they’ll love watching the transformation of simple ingredients into something delicious. So, whether you’re prepping for a casual dinner or a festive occasion, this labneh will surely steal the spotlight!
Recipe Snapshot
10 mins
10 mins
0 mins
Medium
120 kcal
8 g
Keto, Gluten-Free, AIP
10 g
Mixing Bowl
Why This Easy Homemade Labneh Recipe Works
Rich in Flavor and Texture
One of the key reasons I absolutely adore this Easy Homemade Labneh Recipe is its rich, creamy texture. When you make labneh, you’re not just creating a cheese; you’re concocting a creamy dip that’s bursting with flavor. Its tanginess comes from the fermentation process, making it a wonderful addition to any meal.
Versatile Uses
Labneh is incredibly versatile. You can serve it as a dip with fresh vegetables or pita bread, or use it as a spread for sandwiches. I often find myself slathering it on toast with a drizzle of honey for a delicious breakfast treat. The possibilities are endless, and it’s a sure way to impress your guests!
Health Benefits
Not to mention, labneh is a healthier alternative to many cream-based products. It’s lower in fat while being packed with protein and probiotics. This means you can enjoy a guilt-free indulgence that not only tastes good but is good for you. I love knowing that I’m feeding my body something wholesome while satisfying my cravings.
Perfect for Meal Prep
If you’re someone who loves meal prepping, this recipe is a game changer. You can easily make a batch of labneh at the beginning of the week and use it in various meals. I often pair it with grilled veggies or use it as a topping for soups. It saves time and adds a nutritious twist to my meals!
Impressive but Easy
Finally, the best thing about this recipe is how impressive it is for something so easy. When you serve homemade labneh, it looks and tastes gourmet, but it requires minimal effort. I love how it elevates a simple gathering into something special, making you feel like a culinary star.
Easy Homemade Labneh Recipe Shopping List
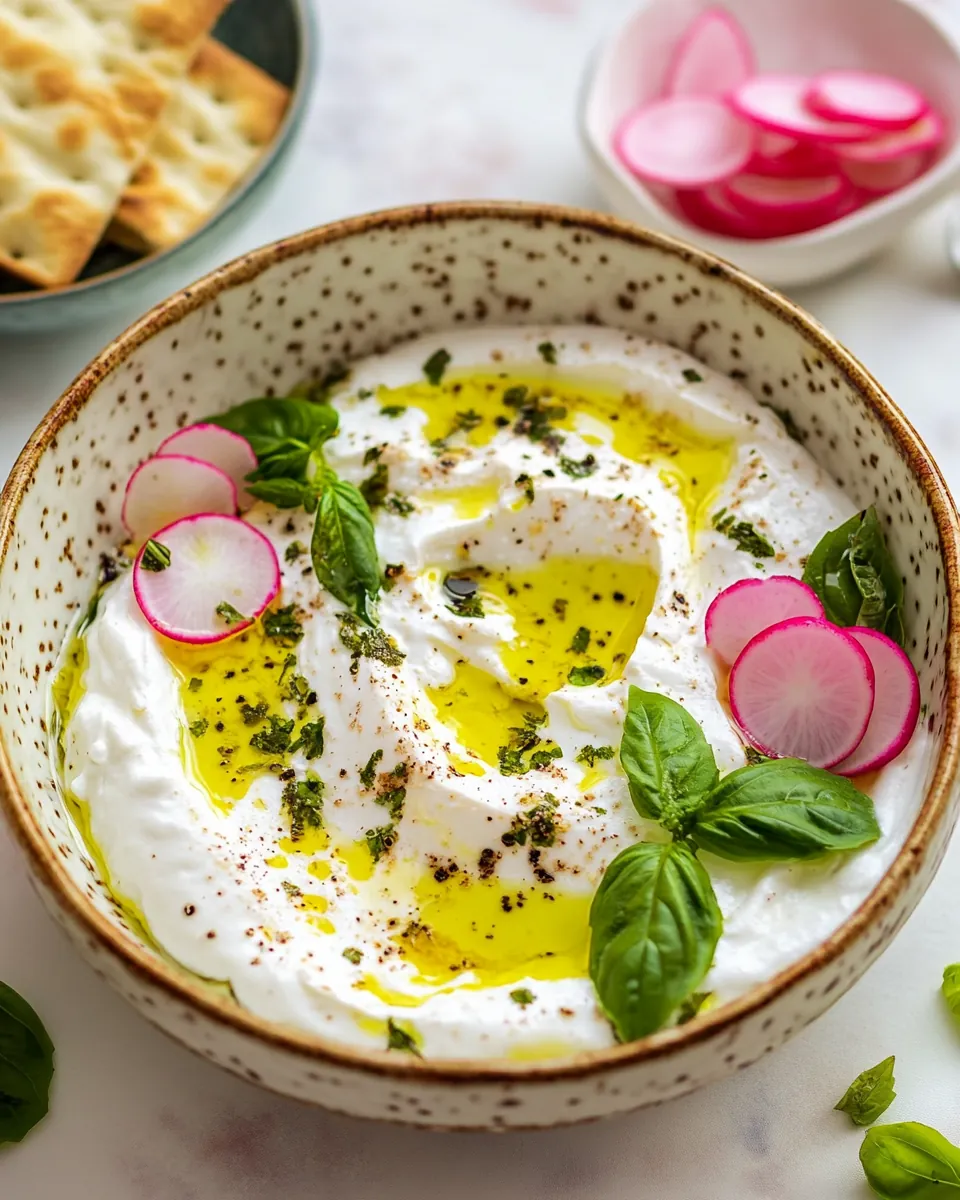
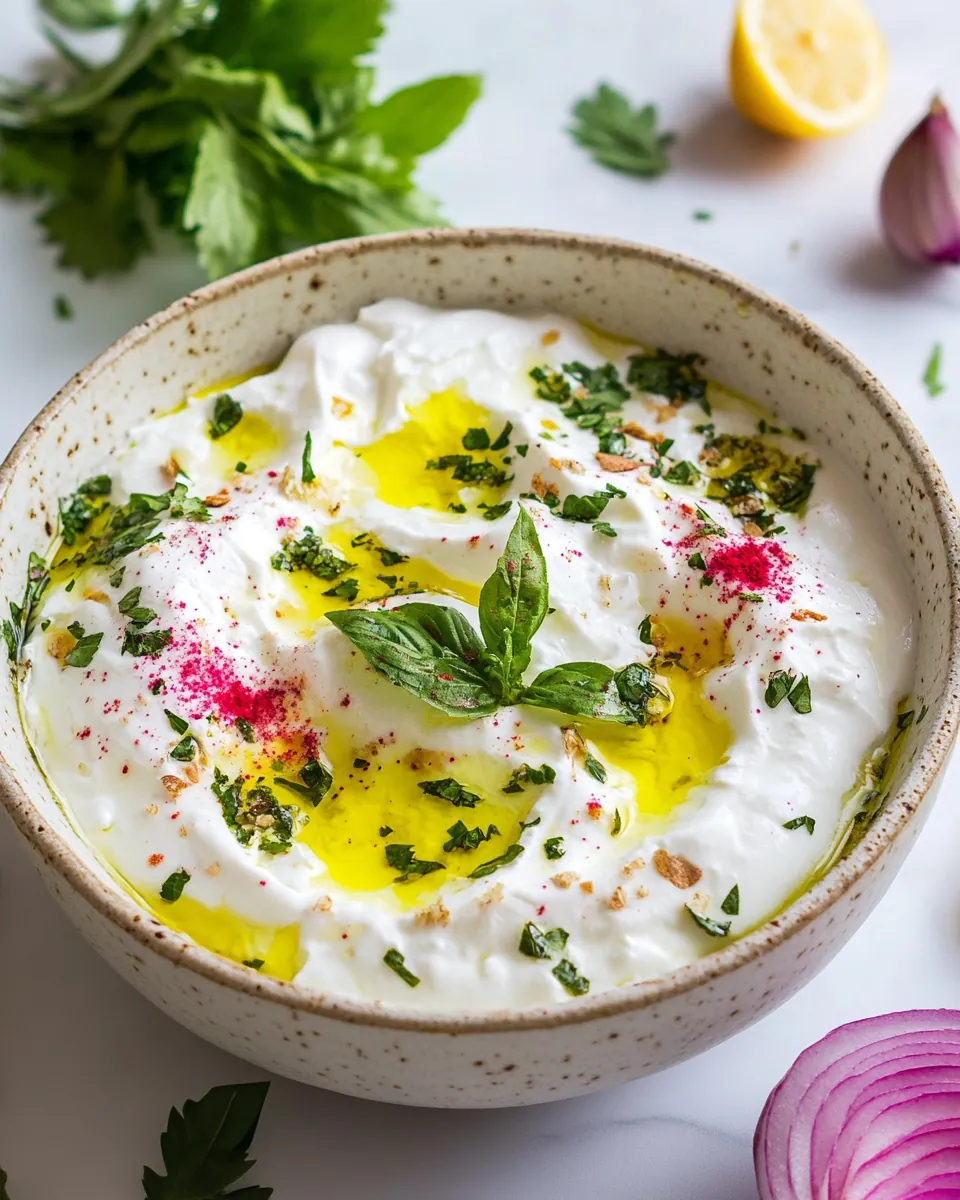
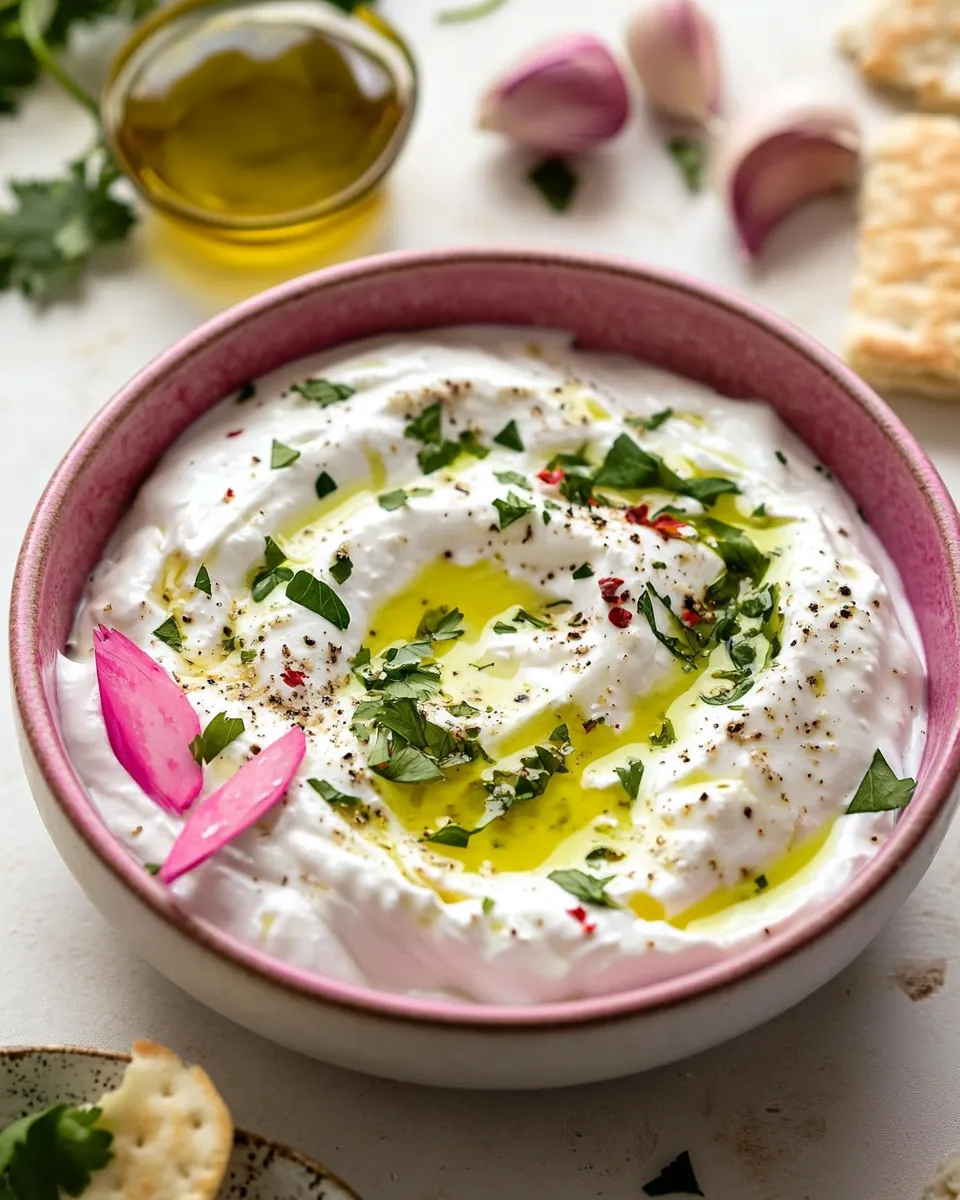
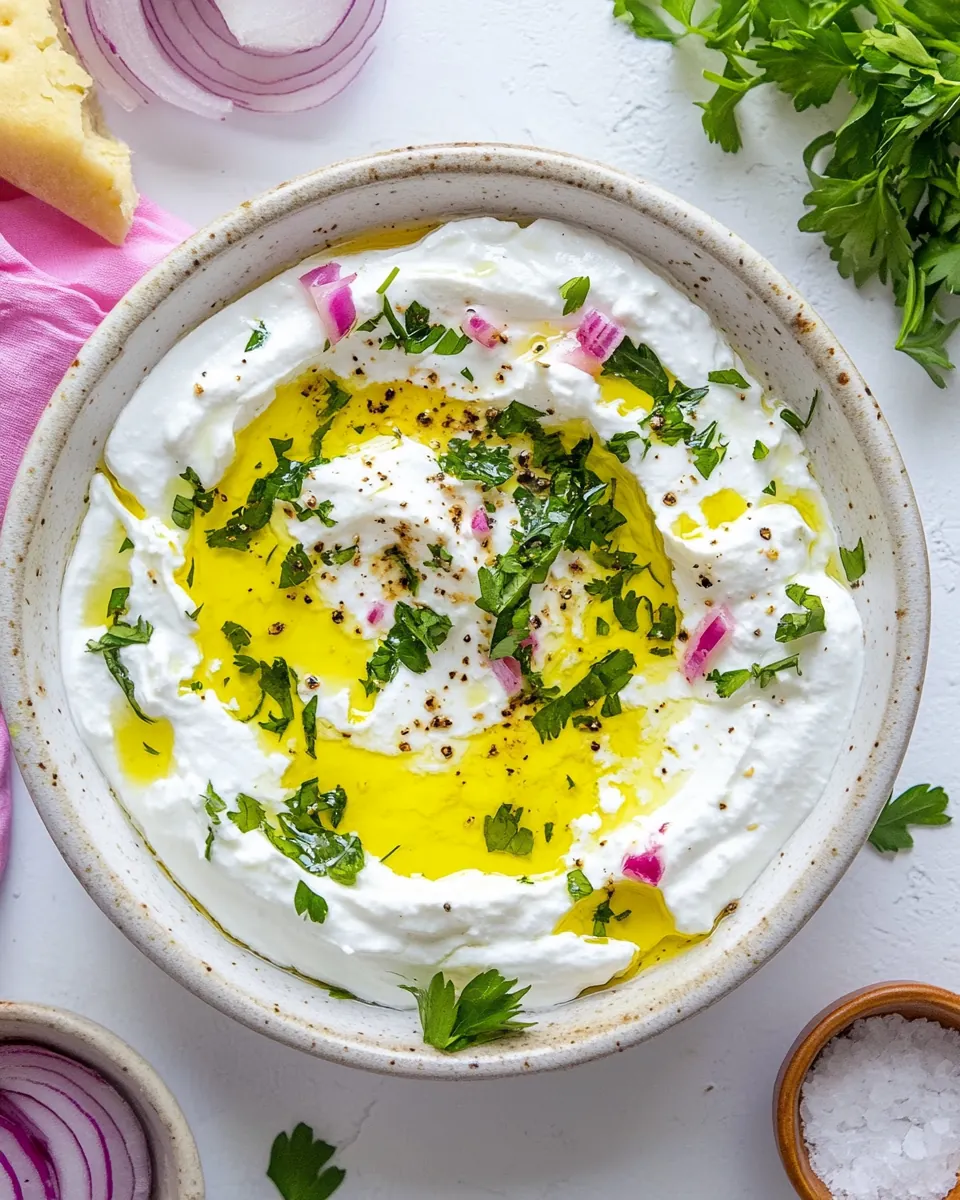
When it comes to making labneh, the ingredients are not only simple but also work harmoniously to create something extraordinary. The key players in this Easy Homemade Labneh Recipe are going to be fresh, quality ingredients. Using full-fat Greek yogurt ensures that the labneh comes out creamy and luxurious, while a touch of sea salt enhances the flavor beautifully. Let’s not forget the accompaniments like extra virgin olive oil, mint leaves, pita, and red radishes—all of which play vital roles in elevating the dish.
- 1 cup full-fat Greek yogurt: The base of your labneh, providing creaminess and richness.
- 1/4 teaspoon sea salt: Enhances flavor and balances the tanginess of the yogurt.
- Extra virgin olive oil: For drizzling on top, adding depth and richness.
- Mint leaves: Fresh and fragrant, perfect for garnishing and adding a vibrant touch.
- Pita: Ideal for dipping, it complements the labneh perfectly.
- Red radishes: Crunchy and peppery, they add a refreshing contrast.
Step by Step Instructions for Easy Homemade Labneh Recipe
Making labneh is not just straightforward; it’s an enjoyable process! Get ready to channel your inner chef as we dive into these easy steps. You’ll find that once you get the hang of it, labneh will become a staple in your kitchen.
Begin by placing a strainer or fine-mesh sieve over a medium bowl. Line it with a clean cheesecloth. Prepare string or rubber bands to use later, as you’ll be tying up the cheesecloth.
In a small bowl, mix together the Greek yogurt and sea salt until well combined. You’ll want to ensure the salt is evenly distributed for the best flavor.
Scoop the mixture of Greek yogurt onto the cheesecloth, then carefully pull the edges together tightly, ensuring no openings are left for the yogurt to seep out. Trust me, the tighter the better!
Once secured, tie the cheesecloth at the top with your string or rubber band. Place it in the center of the strainer or sieve. This step is crucial as it allows the whey to drain out, leading to that thick, creamy consistency.
Chill your labneh in the refrigerator overnight. If you prefer it thicker, you can let it sit for up to 24 hours. This is where the magic happens as it transforms into creamy goodness.
After the chilling period, remove the labneh from the cheesecloth and transfer it to a small bowl for serving. Don’t worry if it looks a bit messy; that rustic charm is part of its appeal!
To serve, drizzle with extra virgin olive oil and garnish with fresh mint leaves. Add any additional toppings you desire, such as spices or vegetables.
Finally, enjoy your labneh as a dip for pita or alongside fresh veggies. You can also use it as a spread in sandwiches or wraps.
Things Worth Knowing
- Cheesecloth matters: Make sure to use a clean cheesecloth to avoid any flavors transferring to the labneh.
- Patience is key: The longer you let it drain, the thicker your labneh will be. So if you want a super thick texture, give it that extra time.
- Flavoring options: You can infuse different flavors into your labneh by adding herbs or spices to the yogurt mixture before draining.
- Storage tips: Store any leftover labneh in an airtight container in the refrigerator. It can last up to a week!
Pro Tips and Tweaks
Making labneh is a delightful experience, and there are a few tips that can enhance your results. Here are some fantastic pointers to keep in mind!
- Storage: Keep your labneh in an airtight container in the fridge for up to one week. Just drizzle some olive oil on top to keep it fresh.
- Freezing: While labneh is best fresh, you can freeze it in an airtight container for up to three months. Just remember to thaw it in the fridge before using.
- Pairing: Labneh pairs beautifully with fresh vegetables, spiced meats, or even in salads. Get creative with your pairings!
- Flavor twists: Consider adding garlic, herbs, or spices to the yogurt before draining for a different flavor profile.
- Serving suggestions: Serve labneh topped with za’atar or fresh herbs for an added flavor boost.
- Texture tips: Adjust the draining time based on your personal preference for thickness. Experiment to find your ideal consistency!
Serving This Easy Homemade Labneh Recipe
When it comes to serving labneh, the options are truly endless! Here are some delightful ways to present this Easy Homemade Labneh Recipe at your next gathering or meal.
- As a Dip: Serve labneh as a creamy dip alongside fresh pita, crispy vegetables, or crackers. It’s always a hit at parties!
- Sandwich Spread: Use labneh instead of mayonnaise for a healthier and creamier sandwich filling. It adds a refreshing twist!
- Salad Topping: Dollop labneh on salads for a rich and creamy addition. It pairs wonderfully with leafy greens and grilled vegetables.
- Brunch Staple: Include labneh as part of your brunch spread alongside smoked salmon, bagels, and fresh herbs.
- Seasonal Pairing: In the summer, serve labneh with fresh tomatoes and cucumbers for a light, refreshing dish. During winter, pair it with roasted vegetables.
- Flavor Variations: Experiment with different seasonings on top of the labneh, such as smoked paprika or fresh herbs, to add your personal touch.
FAQ
Conclusion
This Easy Homemade Labneh Recipe is truly special because it combines simplicity with a delightful flavor that can elevate any meal. Making your own labneh allows you to enjoy the freshest ingredients while impressing your guests with your culinary skills. I encourage you to give it a try; you might just find it becomes a staple in your home!
Easy Homemade Labneh Recipe
Ingredients
Equipment
Method
- Begin by placing a strainer or fine-mesh sieve over a medium bowl. Line it with a clean cheesecloth. Prepare string or rubber bands to use later, as you'll be tying up the cheesecloth.
- In a small bowl, mix together the Greek yogurt and sea salt until well combined. You’ll want to ensure the salt is evenly distributed for the best flavor.
- Scoop the mixture of Greek yogurt onto the cheesecloth, then carefully pull the edges together tightly, ensuring no openings are left for the yogurt to seep out. Trust me, the tighter the better!
- Once secured, tie the cheesecloth at the top with your string or rubber band. Place it in the center of the strainer or sieve. This step is crucial as it allows the whey to drain out, leading to that thick, creamy consistency.
- Chill your labneh in the refrigerator overnight. If you prefer it thicker, you can let it sit for up to 24 hours. This is where the magic happens as it transforms into creamy goodness.
- After the chilling period, remove the labneh from the cheesecloth and transfer it to a small bowl for serving. Don’t worry if it looks a bit messy; that rustic charm is part of its appeal!
- To serve, drizzle with extra virgin olive oil and garnish with fresh mint leaves. Add any additional toppings you desire, such as spices or vegetables.
- Finally, enjoy your labneh as a dip for pita or alongside fresh veggies. You can also use it as a spread in sandwiches or wraps.