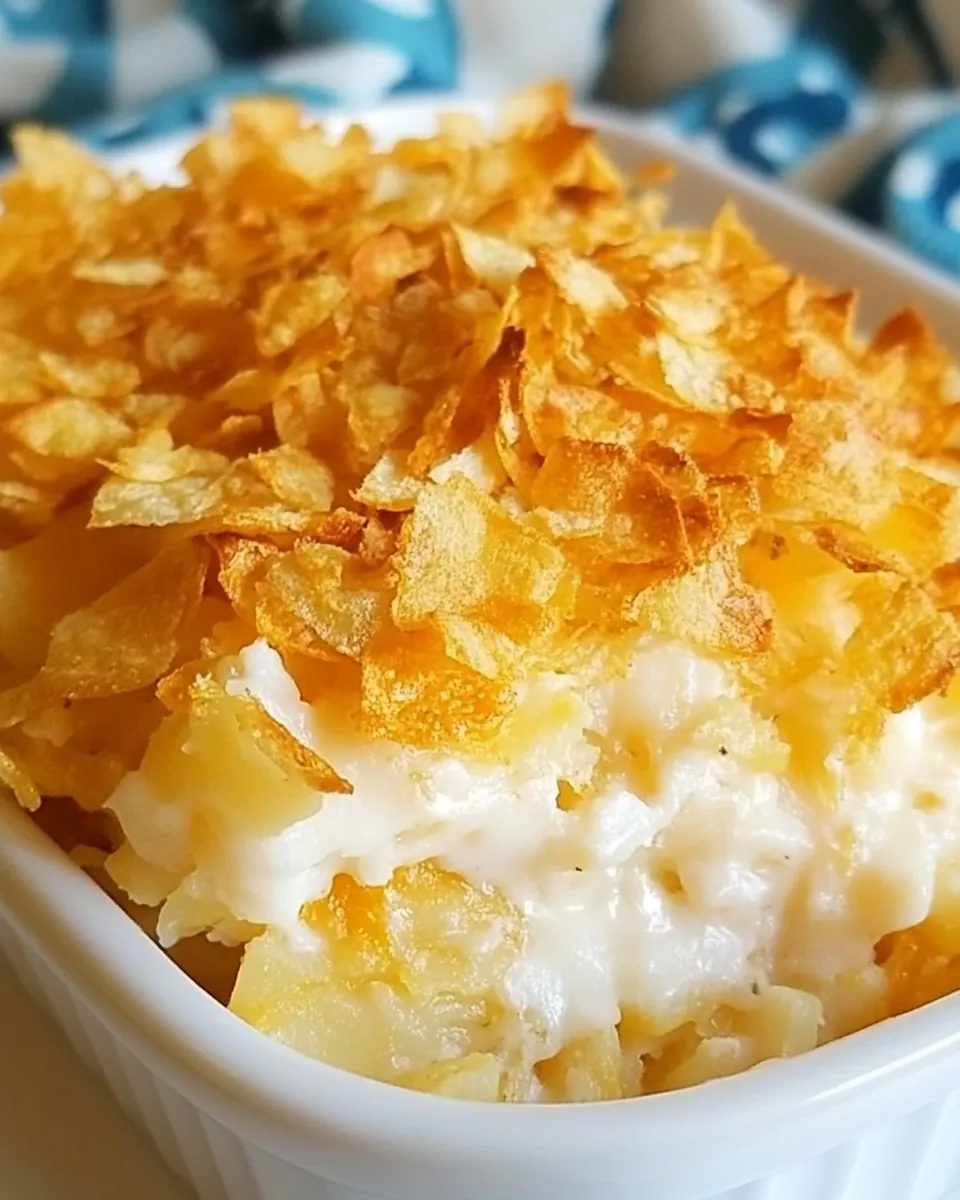
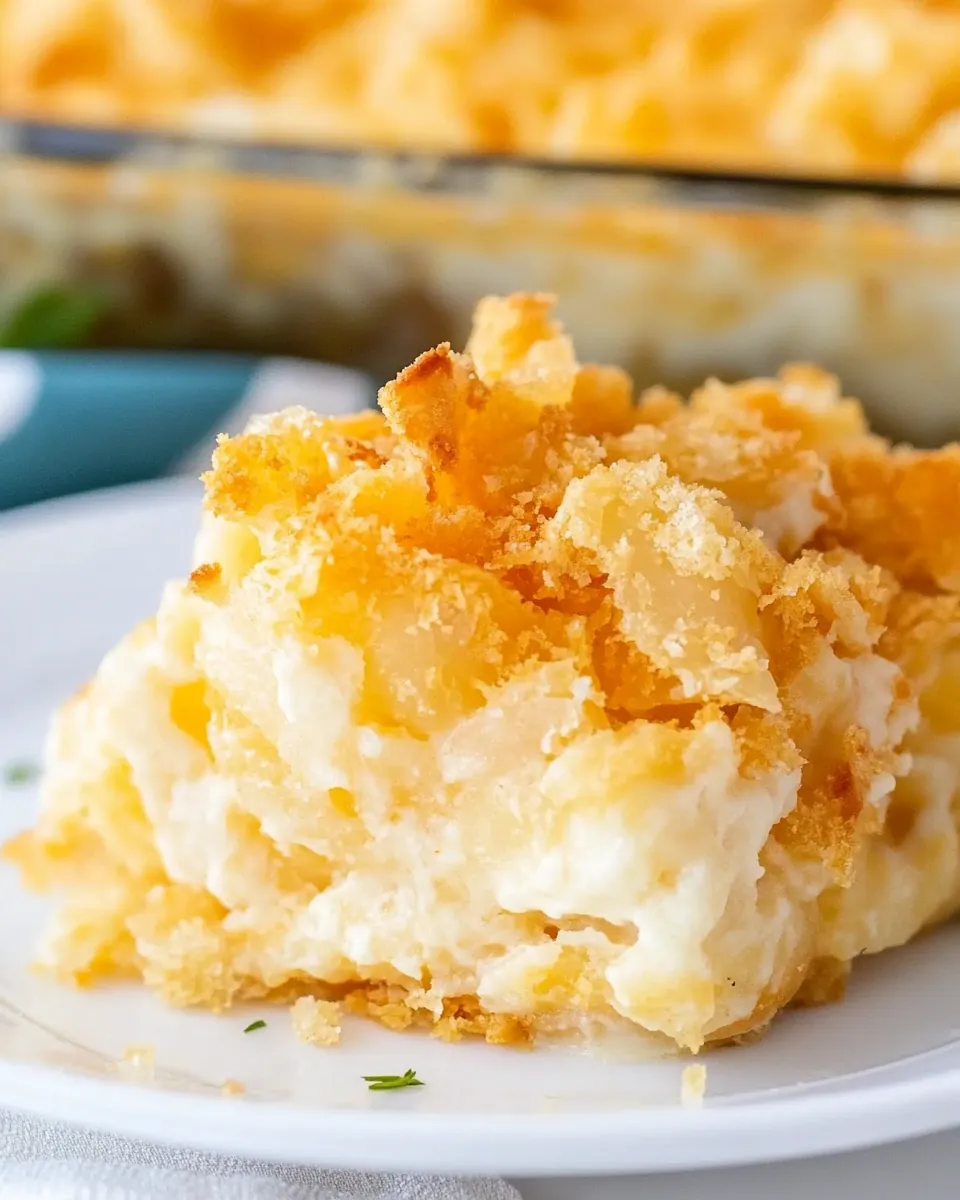
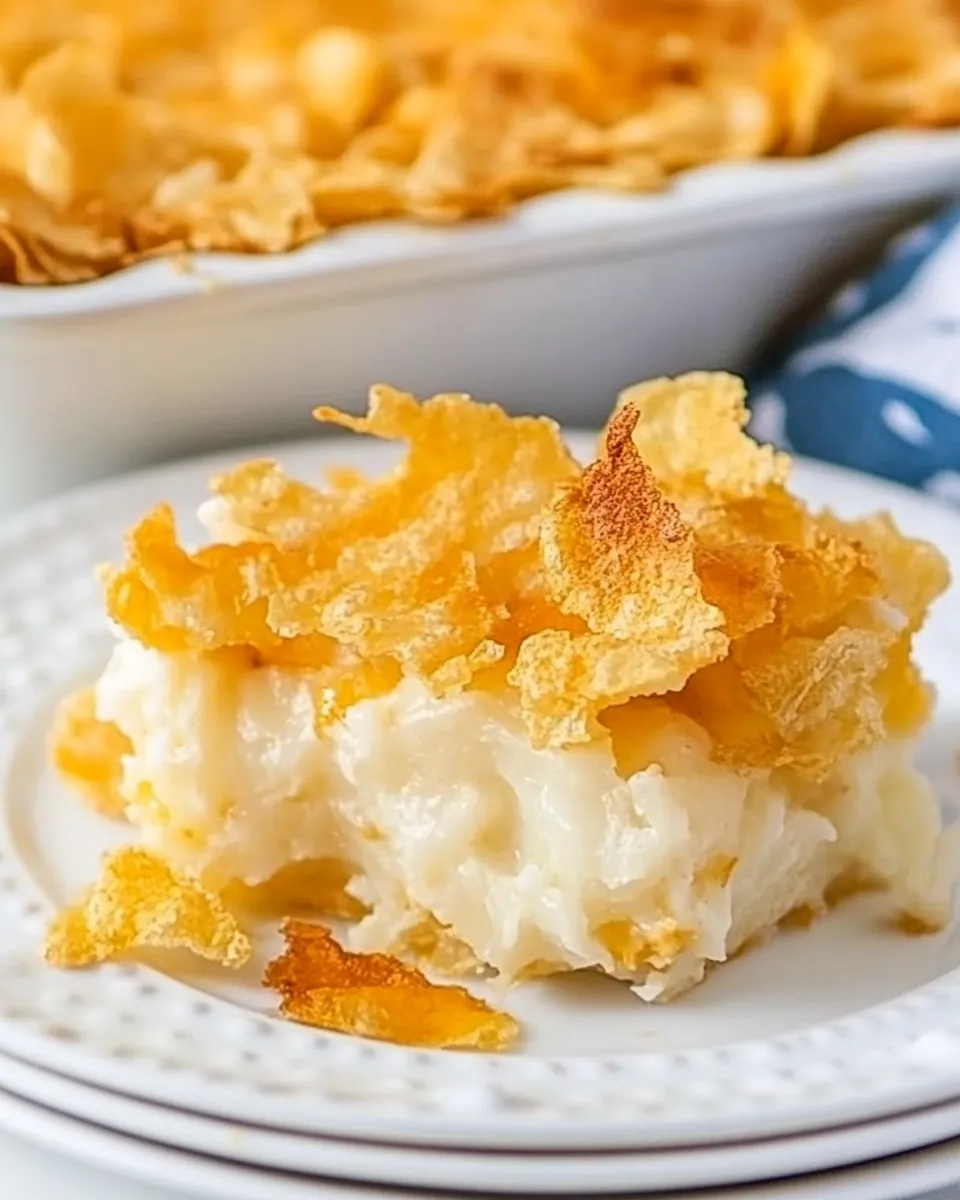
Cheesy Potatoes
In my family, no gathering is complete without a dish of Cheesy Potatoes on the table. It’s that one dish that brings everyone together, filling the air with a mouthwatering aroma that instantly ignites nostalgia. I remember my grandmother making this during the chilly fall evenings when we would gather around the fireplace, sharing stories and laughter. The gooey, cheesy goodness is enough to make anyone’s heart warm, and every bite is like a comforting hug. Whether it’s a holiday feast or just a cozy dinner, this dish never fails to impress. Simple yet indulgent, Cheesy Potatoes is the epitome of comfort food that leaves you craving more.
Recipe Snapshot
55 mins
20 mins
35 mins
Hard
350 kcal
9 g
Gluten-Free, Low FODMAP
20 g
Oven, Baking Sheet, Skillet, Whisk, Saucepan, Mixing Bowl, Grater, Wooden Spoon, Cutting Board
The Magic of This Cheesy Potatoes
Unforgettable Comfort
The first reason I love Cheesy Potatoes is that it’s the ultimate comfort food. Every bite is a creamy, cheesy delight that warms the soul.
Versatility at Its Best
This dish is incredibly versatile. It pairs perfectly with any main course, making it a fabulous side for family dinners or holiday feasts.
Perfect for Gatherings
Whenever I make Cheesy Potatoes, it’s always a hit at gatherings. Friends and family rave about it, and there’s rarely any leftovers!
Simple Ingredients
What’s amazing about this recipe is the simplicity of the ingredients. You probably have most of them in your pantry already!
Easy to Make
Even if you’re not an experienced cook, this dish is straightforward to prepare. It’s such a forgiving recipe that even beginners can feel like pros.
Memories Attached
Finally, Cheesy Potatoes come with a wealth of memories. Each bite reminds me of family gatherings and the joy we share over good food.
Recipe Ingredients for Cheesy Potatoes
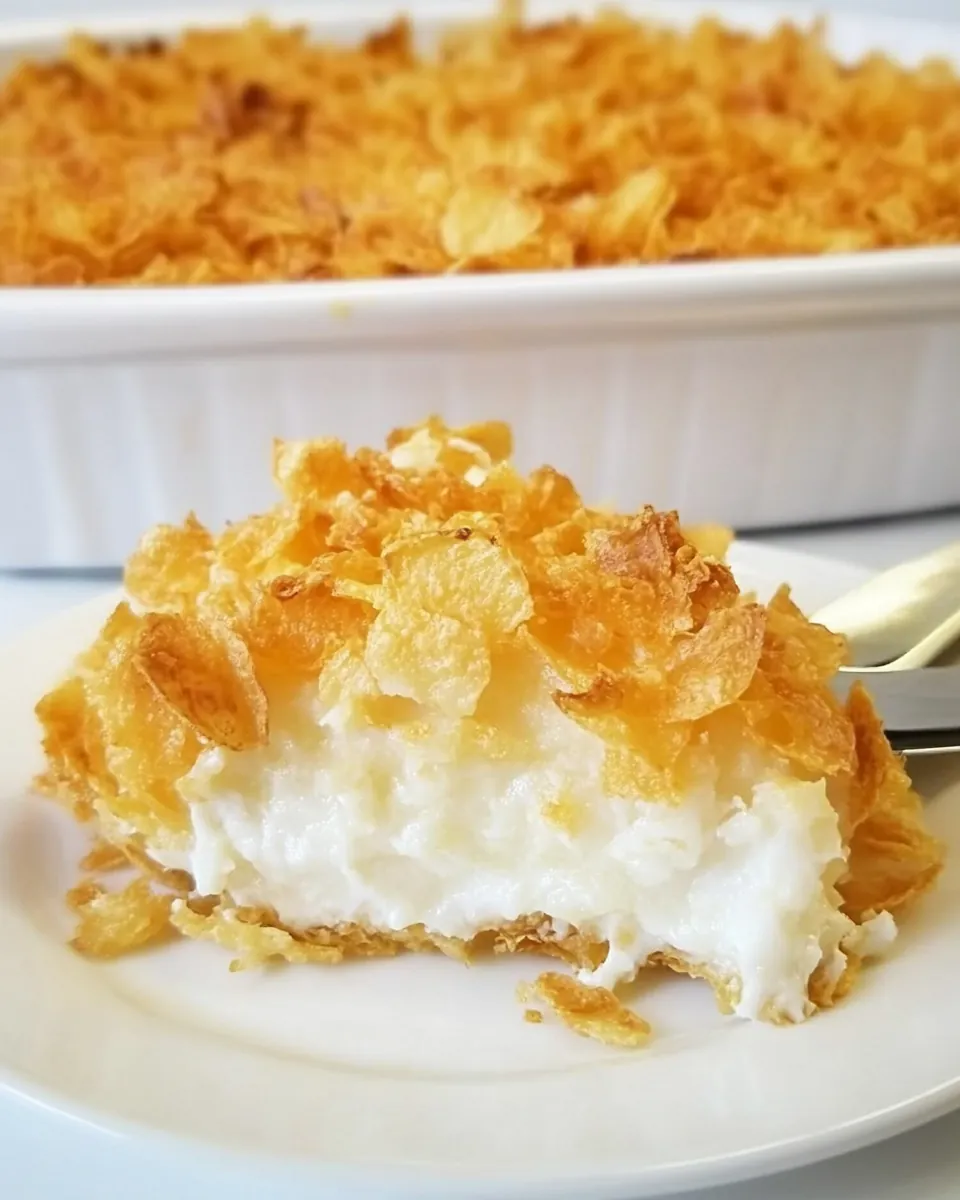
The beauty of Cheesy Potatoes lies in its hearty ingredients. Each component plays a significant role in creating that rich, creamy flavor we love. The hash brown potatoes form the base, while the combination of cheddar and Monterey Jack cheese provides a gooey richness that melts in your mouth. Onions and garlic give it depth, and the cornflakes topping adds a delightful crunch. Together, these ingredients create a dish that is not just filling but also bursting with flavor.
- 32 ounces diced hash brown potatoes or shredded hash brown potatoes, defrosted – These are the star of the dish, providing the perfect base and texture.
- 4 tablespoons unsalted butter, melted – Adds richness and helps meld the flavors together.
- ½ teaspoon salt – A must to enhance the natural flavors of the ingredients.
- ½ teaspoon freshly ground black pepper – Adds a hint of spice to the dish.
- 1 ½ cups sour cream – Contributes to the creamy texture and tangy flavor.
- 2 cups sharp cheddar cheese, grated – The classic cheesy flavor that everyone loves.
- 1 cup Monterey Jack cheese, grated – Melts beautifully and adds creaminess.
- ½ medium onion, diced – Brings a subtle sweetness and depth in flavor.
- 2 to 3 garlic cloves, minced – Infuses the dish with aromatic goodness.
- ¼ cup all-purpose flour – Helps to thicken the creamy sauce.
- 1 cup low sodium chicken broth or stock – Adds moisture and flavor to the creamy mixture.
- 1 ½ cups milk – For extra creaminess and to balance the flavors.
- 2 cups crushed cornflakes – Provides a delightful crunch on top.
- 4 tablespoons butter, melted – Used to enhance the topping’s flavor.
How to Assemble Cheesy Potatoes
Assembling Cheesy Potatoes is as easy as pie! The steps are simple, and I love how each component contributes to the final dish. Let’s dive into the process so you can enjoy this comforting dish soon!
Preheat your oven to 350°F. This ensures that the dish cooks evenly and is hot throughout. You want that cheesy goodness bubbling!
Lightly grease or butter a 9×13 baking dish and set it aside. This step prevents the potatoes from sticking and makes cleanup easier.
In a small bowl, combine the shredded cheeses (both cheddar and Monterey Jack) and toss to combine. Setting this aside helps it stay blended when adding to the potato mixture.
Next, place the defrosted potatoes in a very large bowl. Toss them with 4 tablespoons of melted butter, salt, and pepper. This is the base that will soak up all the flavors!
Stir in the sour cream and 2 cups of the combined cheese. The sour cream adds a creamy tang that you’ll absolutely love.
In a large skillet over medium heat, melt 4 tablespoons of butter. Once melted, add the onions and cook until translucent, about 4 to 5 minutes. This step is crucial for developing flavor.
Add the garlic and continue cooking, stirring frequently for 1 minute. You want the garlic fragrant but not burnt!
Sprinkle with flour and continue cooking for another minute, stirring to combine. This will help thicken your sauce.
Slowly whisk in the chicken stock until completely combined and smooth. Then gradually whisk in the milk until everything is smooth. Bring the mixture to a simmer.
Season with salt and pepper, then continue cooking for three to four minutes until thickened. Remove from heat; this creates that wonderful creamy sauce.
Pour the cream sauce over the potato mixture and gently fold to combine. This is where all the magic happens!
Transfer this to your prepared baking dish and top with the remaining cheese. Every bit should be covered for maximum cheesiness!
In a medium bowl, combine the remaining 4 tablespoons of melted butter with the cornflakes and toss to combine. This topping will add a delightful crunch.
Spread the topping evenly over the layer of cheese. Cover with foil and bake for 20 minutes.
Remove the foil and bake for another 15 to 20 minutes, or until the edges are bubbling and the cornflakes are golden brown. The beautiful golden color means it’s done!
Let it rest for 10 minutes before serving. This patience will pay off with perfect portions!
Things Worth Knowing
- Ingredient Quality: Use the best-quality cheese you can find for richer flavor.
- Potato Texture: Make sure your potatoes are defrosted properly so they cook evenly.
- Heat Control: Keep an eye on the sauce; whisk continuously to prevent lumps.
- Resting Time: Allow the dish to rest after baking; it helps to set the layers.
Making Adjustments
When it comes to Cheesy Potatoes, there are always ways to make it your own! Here are some tips to help you adjust the recipe to your liking:
- Storage: Store leftovers in an airtight container in the fridge for up to five days.
- Freezing: You can freeze this dish. Just be sure to wrap it tightly.
- Pairing: Serve with grilled chicken or a fresh salad for a balanced meal.
- Spice It Up: Add jalapeños for a kick or mix in some greens for extra nutrients.
- Cheese Varieties: Experiment with different cheeses like Gouda or Pepper Jack for unique flavors.
What to Serve With Cheesy Potatoes
When it comes to serving Cheesy Potatoes, the options are delightfully endless. Here are some ideas to make your meal even better:
- Grilled Chicken: A nice, juicy chicken breast complements the creaminess perfectly.
- Fresh Salad: Pairing it with a crisp salad brings balance to the richness of the potatoes.
- Beef Dishes: The heartiness of beef stew or roast beef makes an excellent companion.
- Holiday Feasts: This dish is a hit during Thanksgiving and Christmas gatherings.
- Casual Dinners: Serve it alongside burgers or hot dogs for a casual cookout.
- Leftover Makeovers: Use leftovers in a breakfast casserole for a wonderful next-day treat.
FAQ
Conclusion
In conclusion, Cheesy Potatoes is a dish that embodies warmth and togetherness. Its creamy texture, rich flavors, and delightful crunch are sure to bring a smile to everyone at the table. I encourage you to try making this dish for your next gathering or cozy night in. It’s not just a recipe; it’s a way to create cherished memories with loved ones.
Cheesy Potatoes
Ingredients
Equipment
Method
- Preheat your oven to 350°F. This ensures that the dish cooks evenly and is hot throughout. You want that cheesy goodness bubbling!
- Lightly grease or butter a 9×13 baking dish and set it aside. This step prevents the potatoes from sticking and makes cleanup easier.
- In a small bowl, combine the shredded cheeses (both cheddar and Monterey Jack) and toss to combine. Setting this aside helps it stay blended when adding to the potato mixture.
- Next, place the defrosted potatoes in a very large bowl. Toss them with 4 tablespoons of melted butter, salt, and pepper. This is the base that will soak up all the flavors!
- Stir in the sour cream and 2 cups of the combined cheese. The sour cream adds a creamy tang that you’ll absolutely love.
- In a large skillet over medium heat, melt 4 tablespoons of butter. Once melted, add the onions and cook until translucent, about 4 to 5 minutes. This step is crucial for developing flavor.
- Add the garlic and continue cooking, stirring frequently for 1 minute. You want the garlic fragrant but not burnt!
- Sprinkle with flour and continue cooking for another minute, stirring to combine. This will help thicken your sauce.
- Slowly whisk in the chicken stock until completely combined and smooth. Then gradually whisk in the milk until everything is smooth. Bring the mixture to a simmer.
- Season with salt and pepper, then continue cooking for three to four minutes until thickened. Remove from heat; this creates that wonderful creamy sauce.
- Pour the cream sauce over the potato mixture and gently fold to combine. This is where all the magic happens!
- Transfer this to your prepared baking dish and top with the remaining cheese. Every bit should be covered for maximum cheesiness!
- In a medium bowl, combine the remaining 4 tablespoons of melted butter with the cornflakes and toss to combine. This topping will add a delightful crunch.
- Spread the topping evenly over the layer of cheese. Cover with foil and bake for 20 minutes.
- Remove the foil and bake for another 15 to 20 minutes, or until the edges are bubbling and the cornflakes are golden brown. The beautiful golden color means it's done!
- Let it rest for 10 minutes before serving. This patience will pay off with perfect portions!